Saturday, December 25, 2021

25 Days of Christmas Decorations - Day #25 A Nativity Triptych

A Nativity Triptych

As an advent gift to the readers of my blog, I have posted Christmas decorations every day for 25 days.  I hope these Christmas decorations have brightened your day and brought joy to your home.  It has been a pleasure to make them and share them with you all.  I wish each and everyone a very Merry Christmas Day.

The final decoration is a triptych which is a picture with three panels which are hinged together and typically used as an altarpiece. I think this final decoration is an appropriate finale to my 25 day journey of creating holiday decorations.

Here is the PDF file. I used Neenah brand 65 lb metallic cardstock from Office Depot.

Here is the .Studio file.

Here is the SVG.

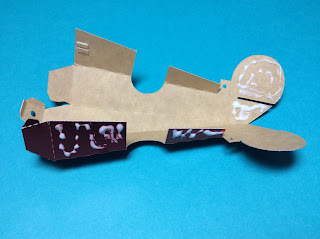
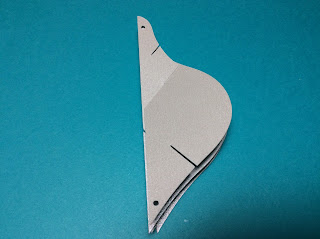
The panels are easy to assemble as there are tabs on the first and third panels which get glued to the second panel.  Each panel has a frame that is glued to both sides on this panel.  This was done to give the triptych support to prevent buckling. I recommend using a fairly new blade and mat for cutting this design.

First Panel

Second Panel - the angels have 3D wings that are glued on.  Two gold stars are glued to both sides of the panel.

Third Panel

Top View to show3D angel wings.

Merry Christmas and a have a Blessed Day.

Friday, December 24, 2021

25 Days of Christmas Decorations - Day #24 A World War I Airplane Christmas Ornament


A World War I Airplane Christmas Ornament

As an advent gift to the readers of my blog, I will be posting Christmas decorations every day for the next 25 days.  I hope these Christmas decorations will brighten your day and bring joy to your home.

Today's decoration is a World War I airplane Christmas Ornament.  I have named the airplane, North Pole Express and I placed Snoopy in the cockpit. My granddaughter loves Snoopy and I thought she would enjoy seeing him flying the airplane like the Red Baron.

Here is the PDF file. I  used 65 lb foil cardstock. Four mini fasteners or brads are needed to make the snowman's arms and boots move.

Here is the .Studio file.

Here is the SVG.

Bend the hanger in half, insert it into the hole near the engine(center of photo), splay the tabs and glue to the underside of the fuselage.

Splay the tabs of the tail upward and glue the undersides (nonmetallic side) together. Set this piece aside

Splay the crossbeams of the top wing upward at a right angle. Insert the outer crossbeams into the bottom wings slots. Make sure the wing is facing the correct direction before gluing down the tabs of the crossbeam.  The two center crossbeams will be attached to the fuselage later.
I like to use tweezers to make sure that the glued tabs adhere correctly.

Splay the wheel beams on the bottom wing at a right angle. Glue the tires together.

Glue all four tires to the wheels. 

Apply glue to the bottom wing and attach the wing with the wheels.

Glue the name of the airplane on the top of the wing.

Glue the wing on top of the wing assembly.

Glue the propeller together.

Crease the fuselage as shown.

Apply glue as shown and adhere to make the airplane shape.

I used two tweezer to adhere the glue.

Slide the tail onto the back of the plane.  Apply glue to the tabs and adhere with tweezers.

Bend the center engine piece backwards and glue the four sides of the engine compartment, one at a time. Use tweezers and let the glue dry before continuing with the next engine tab.

Assemble the Snoopy dog as shown above. Both side are identical.

Cut the prongs of a mini brad.The one on the left is the original size.  The one on the right is the correct size which will fit in the engine compartment.

Attach the mini brad to the engine compartment by threading it through the propeller and engine compartment.


Apply glue to the bottom of the splayed tabs on Snoopy.

Apply glue to the bottom of the fuselage and glue it to the wing

Attach the wings by sliding it over the fuselage and gluing it underneath the fuselage as shown.

Attach the crossbeam inside of the wing. I used a Glue Dot because glue did not adhere properly.

Thread a string through the two holes on the top of the airplane so that Snoopy can be hung from your Christmas tree.

Snoopy is now ready to fly to the North Pole.

Merry Christmas!


Thursday, December 23, 2021

25 Days of Christmas Decorations - Day #23 A Jointed Snowman Christmas Ornament

A Jointed Snowman Christmas Ornament 

As an advent gift to the readers of my blog, I will be posting Christmas decorations every day for the next 25 days.  I hope these Christmas decorations will brighten your day and bring joy to your home.

Today's decoration is a jointed snowman Christmas ornament.

Here is the PDF file. I  used 65 lb cardstock. Four mini fasteners or brads are needed to make the snowman's arms and boots move.

Here is the .Studio file.

Here is the SVG.


Glue the scarf, and hat pieces on the snowman.

Glue the holly on the hat.

Glue the cuff on the boot.  Add the rest of the embellishments. Attach the arms and the boots with a mini fastener. I taped on a hanger to the back of the snowman so that it could be hung on the tree.

I glued on a candy cane to his hand to add some interest.

Wednesday, December 22, 2021

25 Days of Christmas Decorations - Day #22 Slide Together Christmas Ornament


Slide Together Christmas Ornament 

As an advent gift to the readers of my blog, I will be posting Christmas decorations every day for the next 25 days.  I hope these Christmas decorations will brighten your day and bring joy to your home.

Today's decoration is a  slide together Christmas ornament. This is a challenging but rewarding ornament to make.

Here is the PDF file. I  used Neenah brand 65 lb metallic cardstock from Office Depot. 

Here is the .Studio file.

Here is the SVG.

To make the ornament. I will designate the two types of slices according to the placement of the slits.  One has two slits on the straight edge and the other has two slits on the curved edge. 

Take an inner edge piece and slide it into an outer edge piece.  The two top slits together to make an X. The pointy edge is the bottom of the ornament. Lay the piece flat on a table.  The inner edge piece is on top.

Take an outer edge piece and slide the second slit together to the top slice of the stack.

*1.Take an inner edge piece and slide the first slit together on the top slice of the stack. 
 ***These steps repeat.***

2.Take an outer edge piece and slide it into the second slit on the top slice of the stack.

3. Pick up the top slice. This slice is moved to get it out of the way.

4.The bottom two slices are then slide into one another.

This makes the first X at the bottom of the ornament. 
 ***Go back  to the "*" and repeat the above four steps until the stack is completed.***
The last piece slid together is an inner piece.

Thread a 12 inch piece of thread through the the top.

Thread another 12 inch piece of thread through the the top.

Remove the thread from two slices on both sides. Do the same for the other thread.

There are two top slices that need to be slid into one another.  This is the tricky part.  Do it slowly.

There are two bottom slices that need to be slid into one another.  Do it slowly.

Rethread the holes that were unthread.  Tie and knot the thread to close the gap. Repeat for the other side.

Make a hanger out of the top thread and cut the bottom thread so that it is not visible.