A Christmas Present: A Train That Revolves Around a Christmas Tree With a Gear
Video of the Train Revolving Around the Christmas Tree
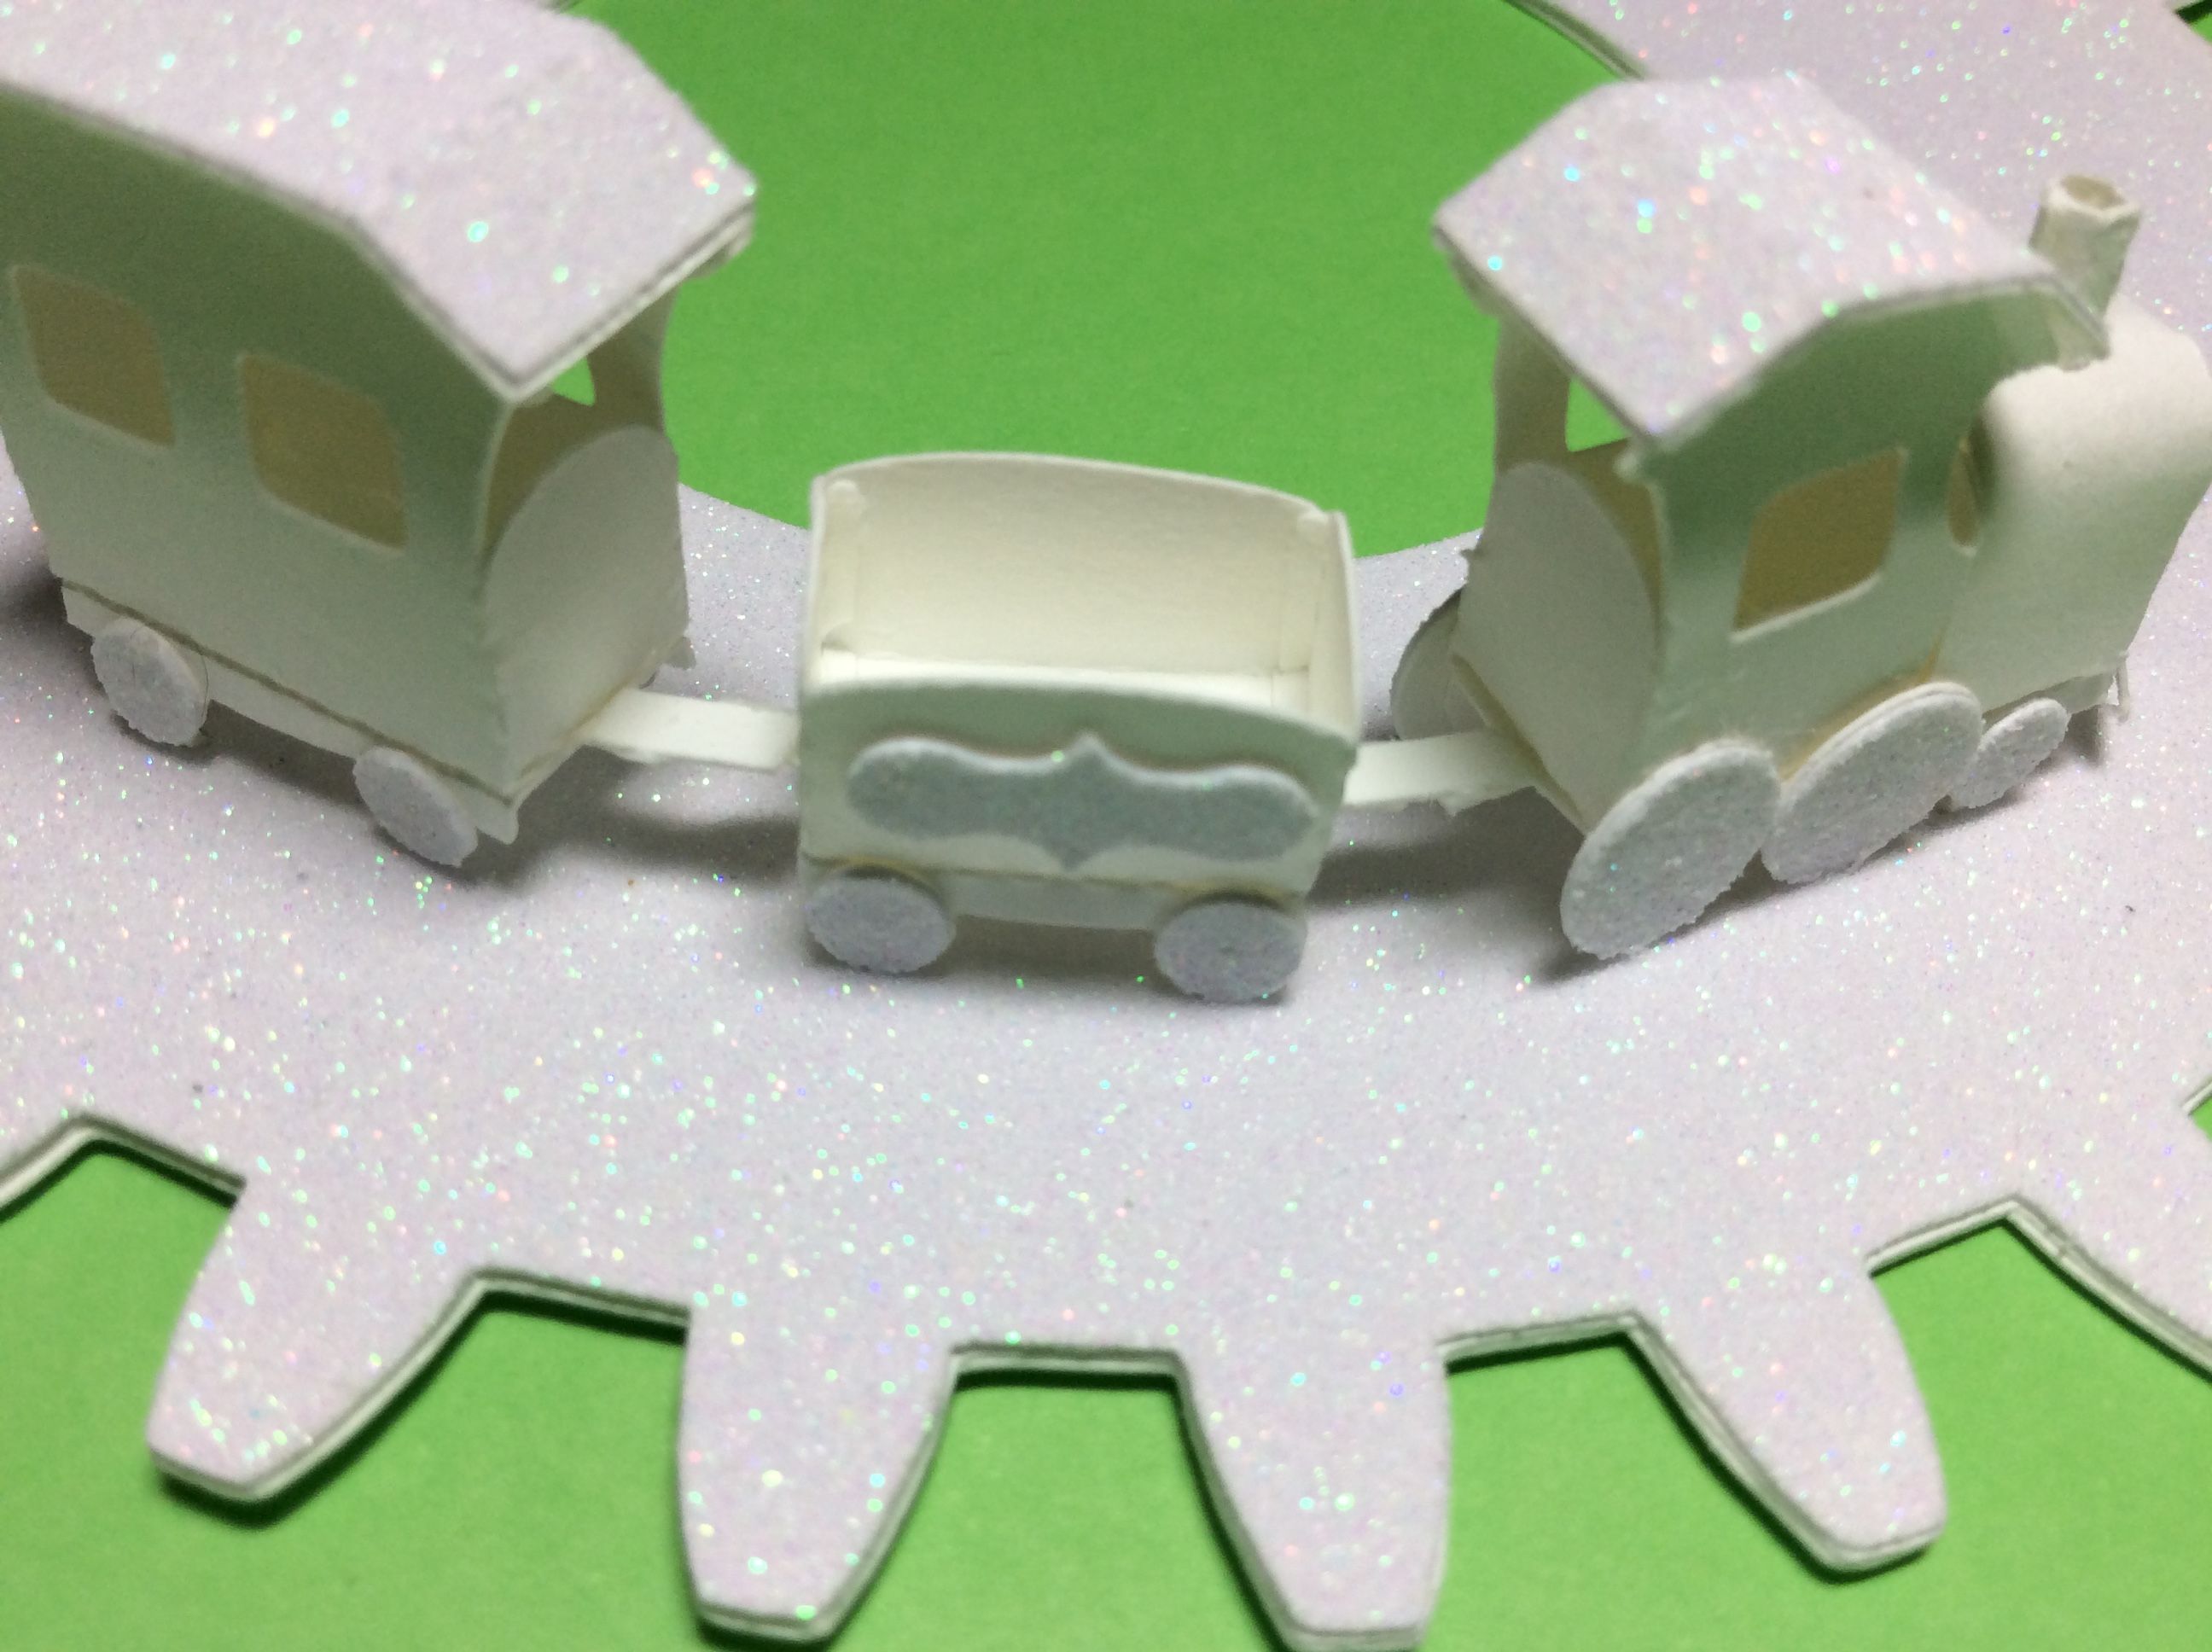
I made this Christmas present for myself. I have been wanting a train that revolves around a Christmas tree with a gear for a while. Here it is the day before Christmas and the elf (me) has finally fulfilled the wish. I took a previous blog entry and modified the pieces. I added tabs to the bottom of the wheel platform so that the trains could be attached to the base and I simplified the engine grill. The engine grill is now attached on both sides. The sides are bent and glued to the inside of the engine compartment. The tab at the bottom of the engine is glued underneath the wheel platform as before.
Glue the five holes (one of the holes is the center of the template when cut) together. Precision gluing is necessary for the gear to operate properly.
Align the template with the outer gear casing. Glue the stack of holes which is the axle to the center of the outer gear casing.
Remove the template and throw it away as it is no longer needed.
Glue the two gears together.
Insert the two gears onto the axle. Make sure that the gear turns correctly. Set this aside.
Insert the tabs of the trains into the glitter gear and glue the tabs down on the underside of the gear.
Glue the glitter gear to the other two previous gears that were glued together.
Glue the two connectors to the hitches between the trains.
Make the Christmas tree by gluing three of the tree sides together as shown above. Repeat for the other side.
Glue the Snowflake tree topper together and the tree base pieces together but leave the bottom tabs unglued.
Glue the Snowflake tree topper to the Christmas tree and the tree base as shown above.
Insert the tree base tabs into the glitter axle and apply glue the tabs. Adhere to the bottom of the glitter axle. Please note that this glitter axle piece is a little bit larger than the other axle pieces.
Apply glue to the center axle. Align the glitter axle to the center axle. There is a slight difference in size in the circle.
The axle difference is to prevent the gear from slipping out of the groove when the axle is turned.
Fold the tabs on the outer gear casing with the center hole as shown above.
Slide the outer gear casing with the hole over the Christmas tree and and encase the tabs around the bottom of the outer gear casing. Apply glue to each of the tabs and adhere to the underside of the piece.
The gear portion is now completed and the gear should move freely when turned. Set this aside.
Make the bottom of the box by gluing the sides together into an octagon.
Apply glue to the tabs inside the box and adhere the bottom octagon. Turn the piece over and apply glue to the tabs on the bottom of the piece. Adhere the other bottom octagon. The box has a two sided bottom for to provide extra support for objects placed in the box.
Make the top of the box by gluing the sides together into an octagon. The Snowflake cut outs from the sides are used to embellish the top of the gear casing.
Apply glue to the tabs inside the box and adhere the top octagon. Turn the piece over.
Apply glue to the tabs on the top of the box. Using a tape runner, apply tape to the top octagon. I did this two step gluing procedure together because it would be hard to apply the tape runner glue once the top octagon was glued on top. Center the top octagon with the tape runner glue on top.
Glue on the Snowflakes to the edges of the gear casing.
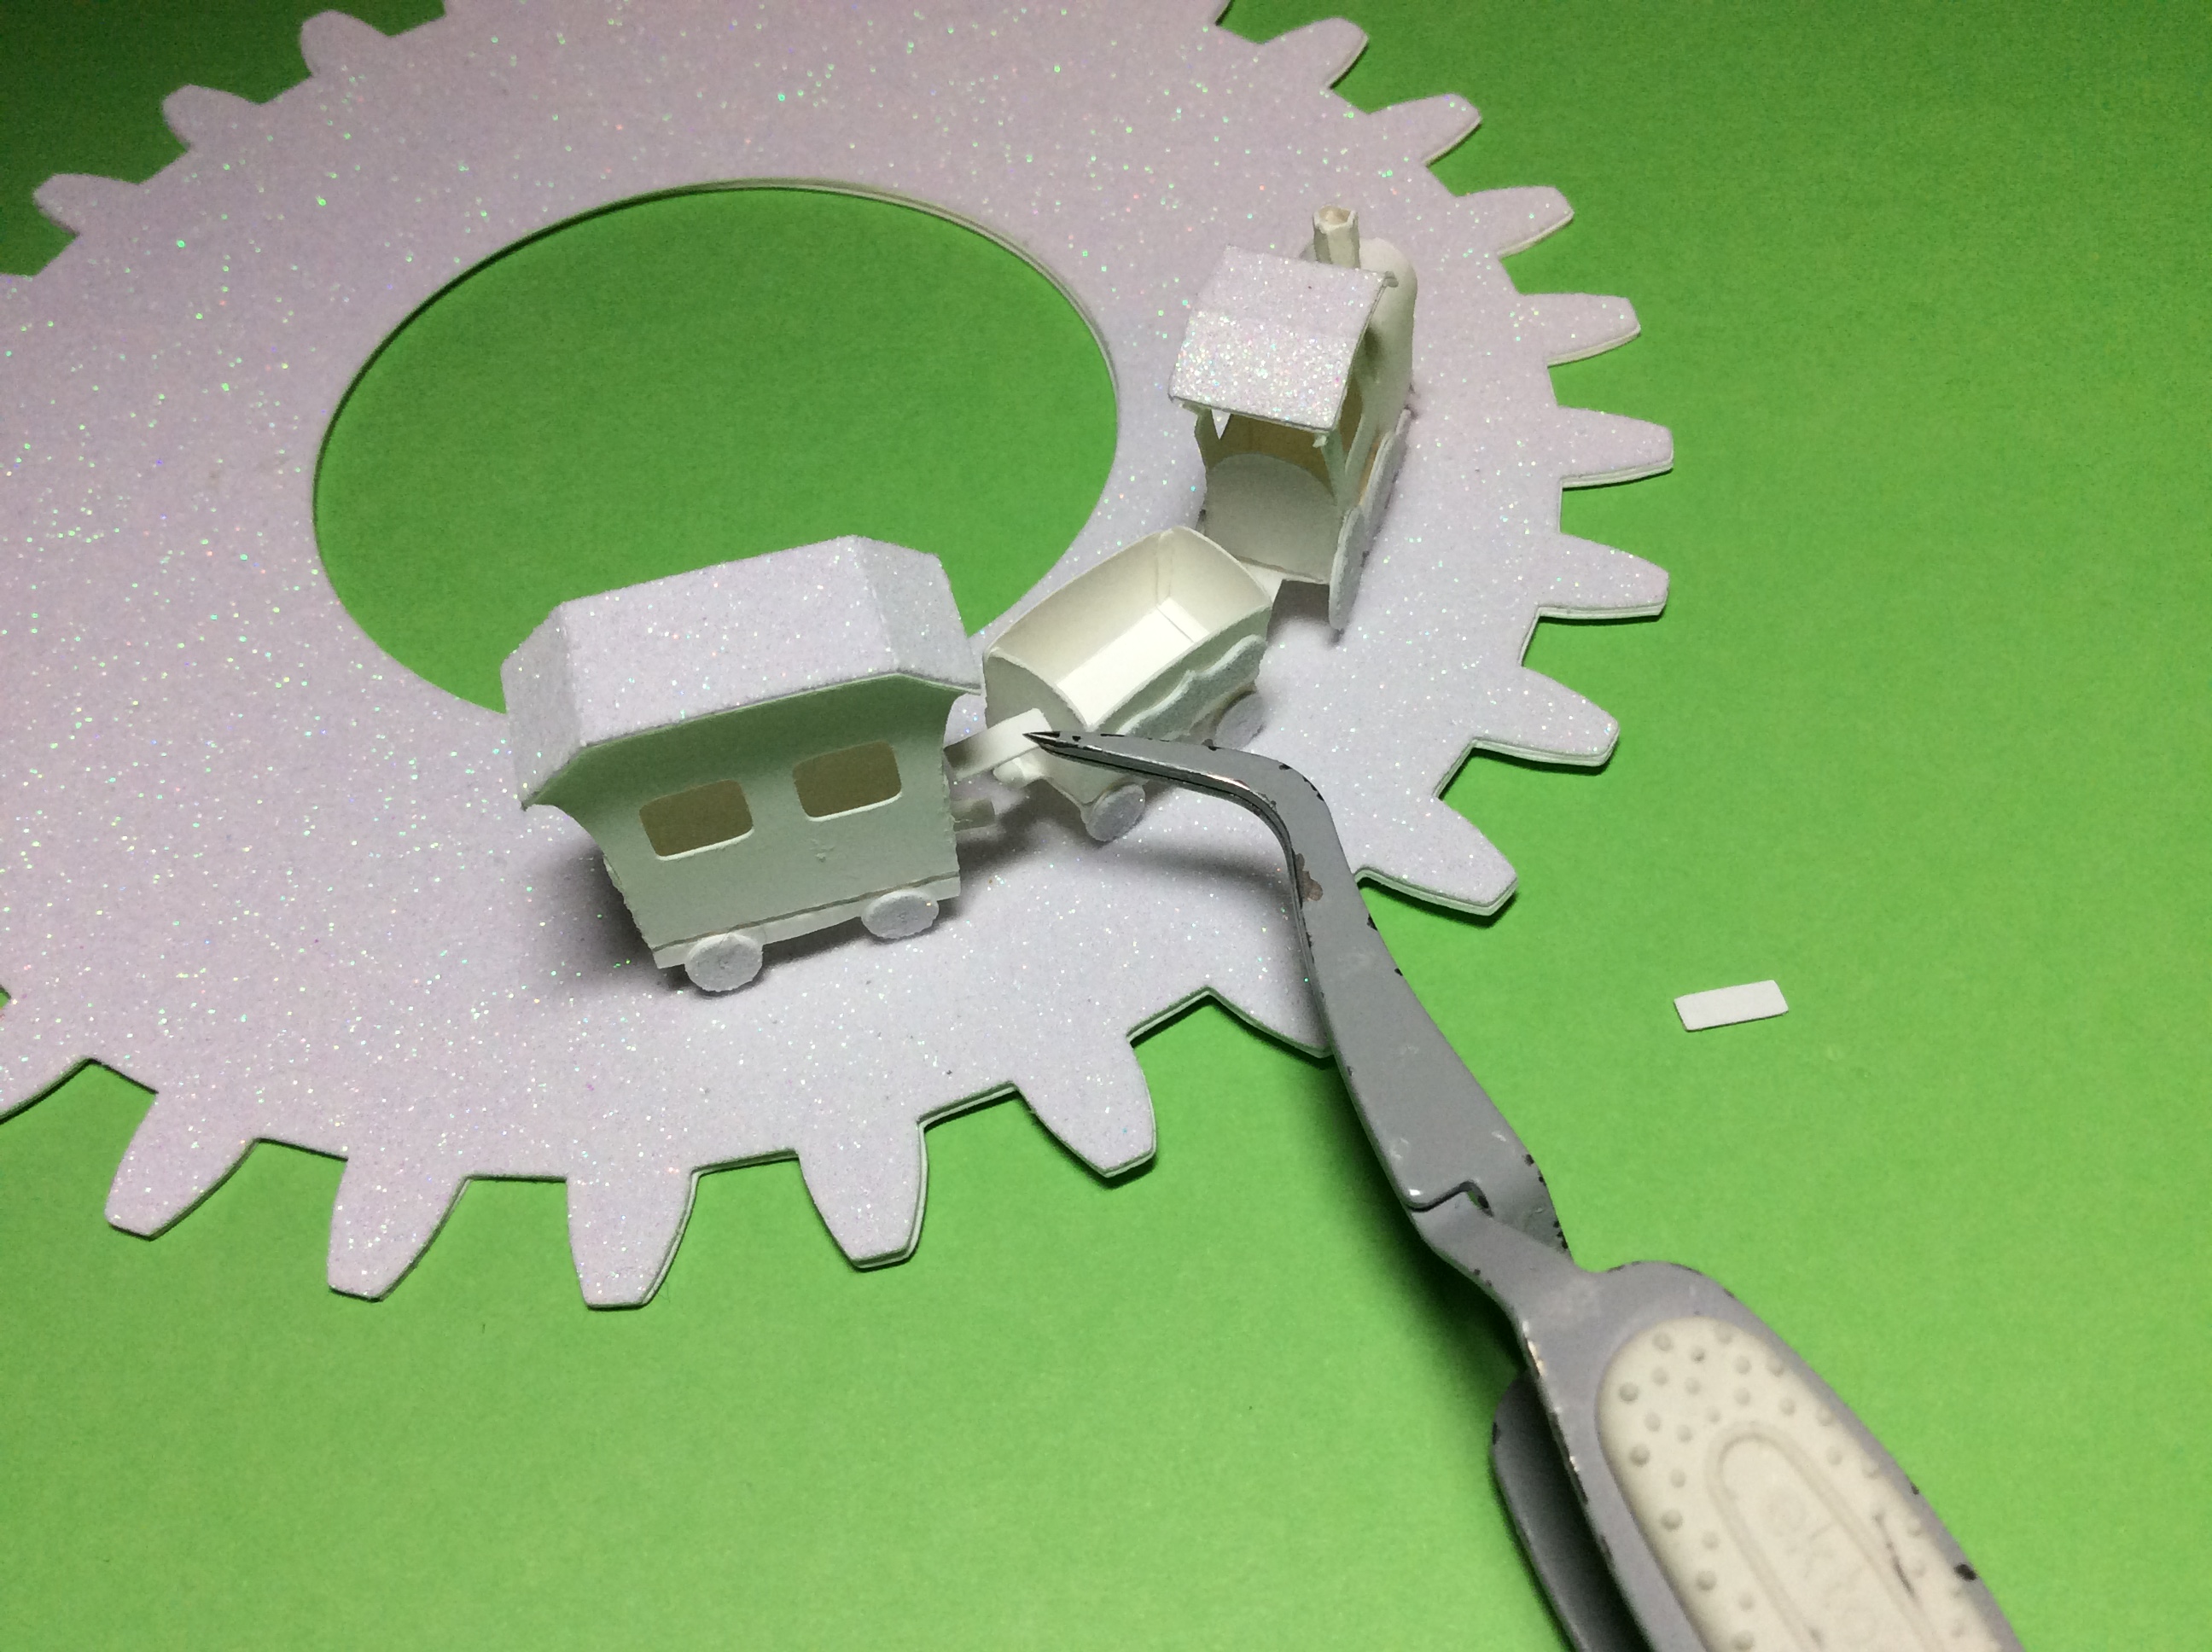
I added a small box to the train car. The tiny box is in the files. It is very small and requires patience to glue the tabs on each part of the box together with tweezers.
💕Merry Christmas from the Papercraft Christmas Elf!💕
A Rubber Band Pop-Up Penguin With a Pretty Snowflake Envelope and Notecard
Video of the Penguin Popping Out of the Snowflake Envelope
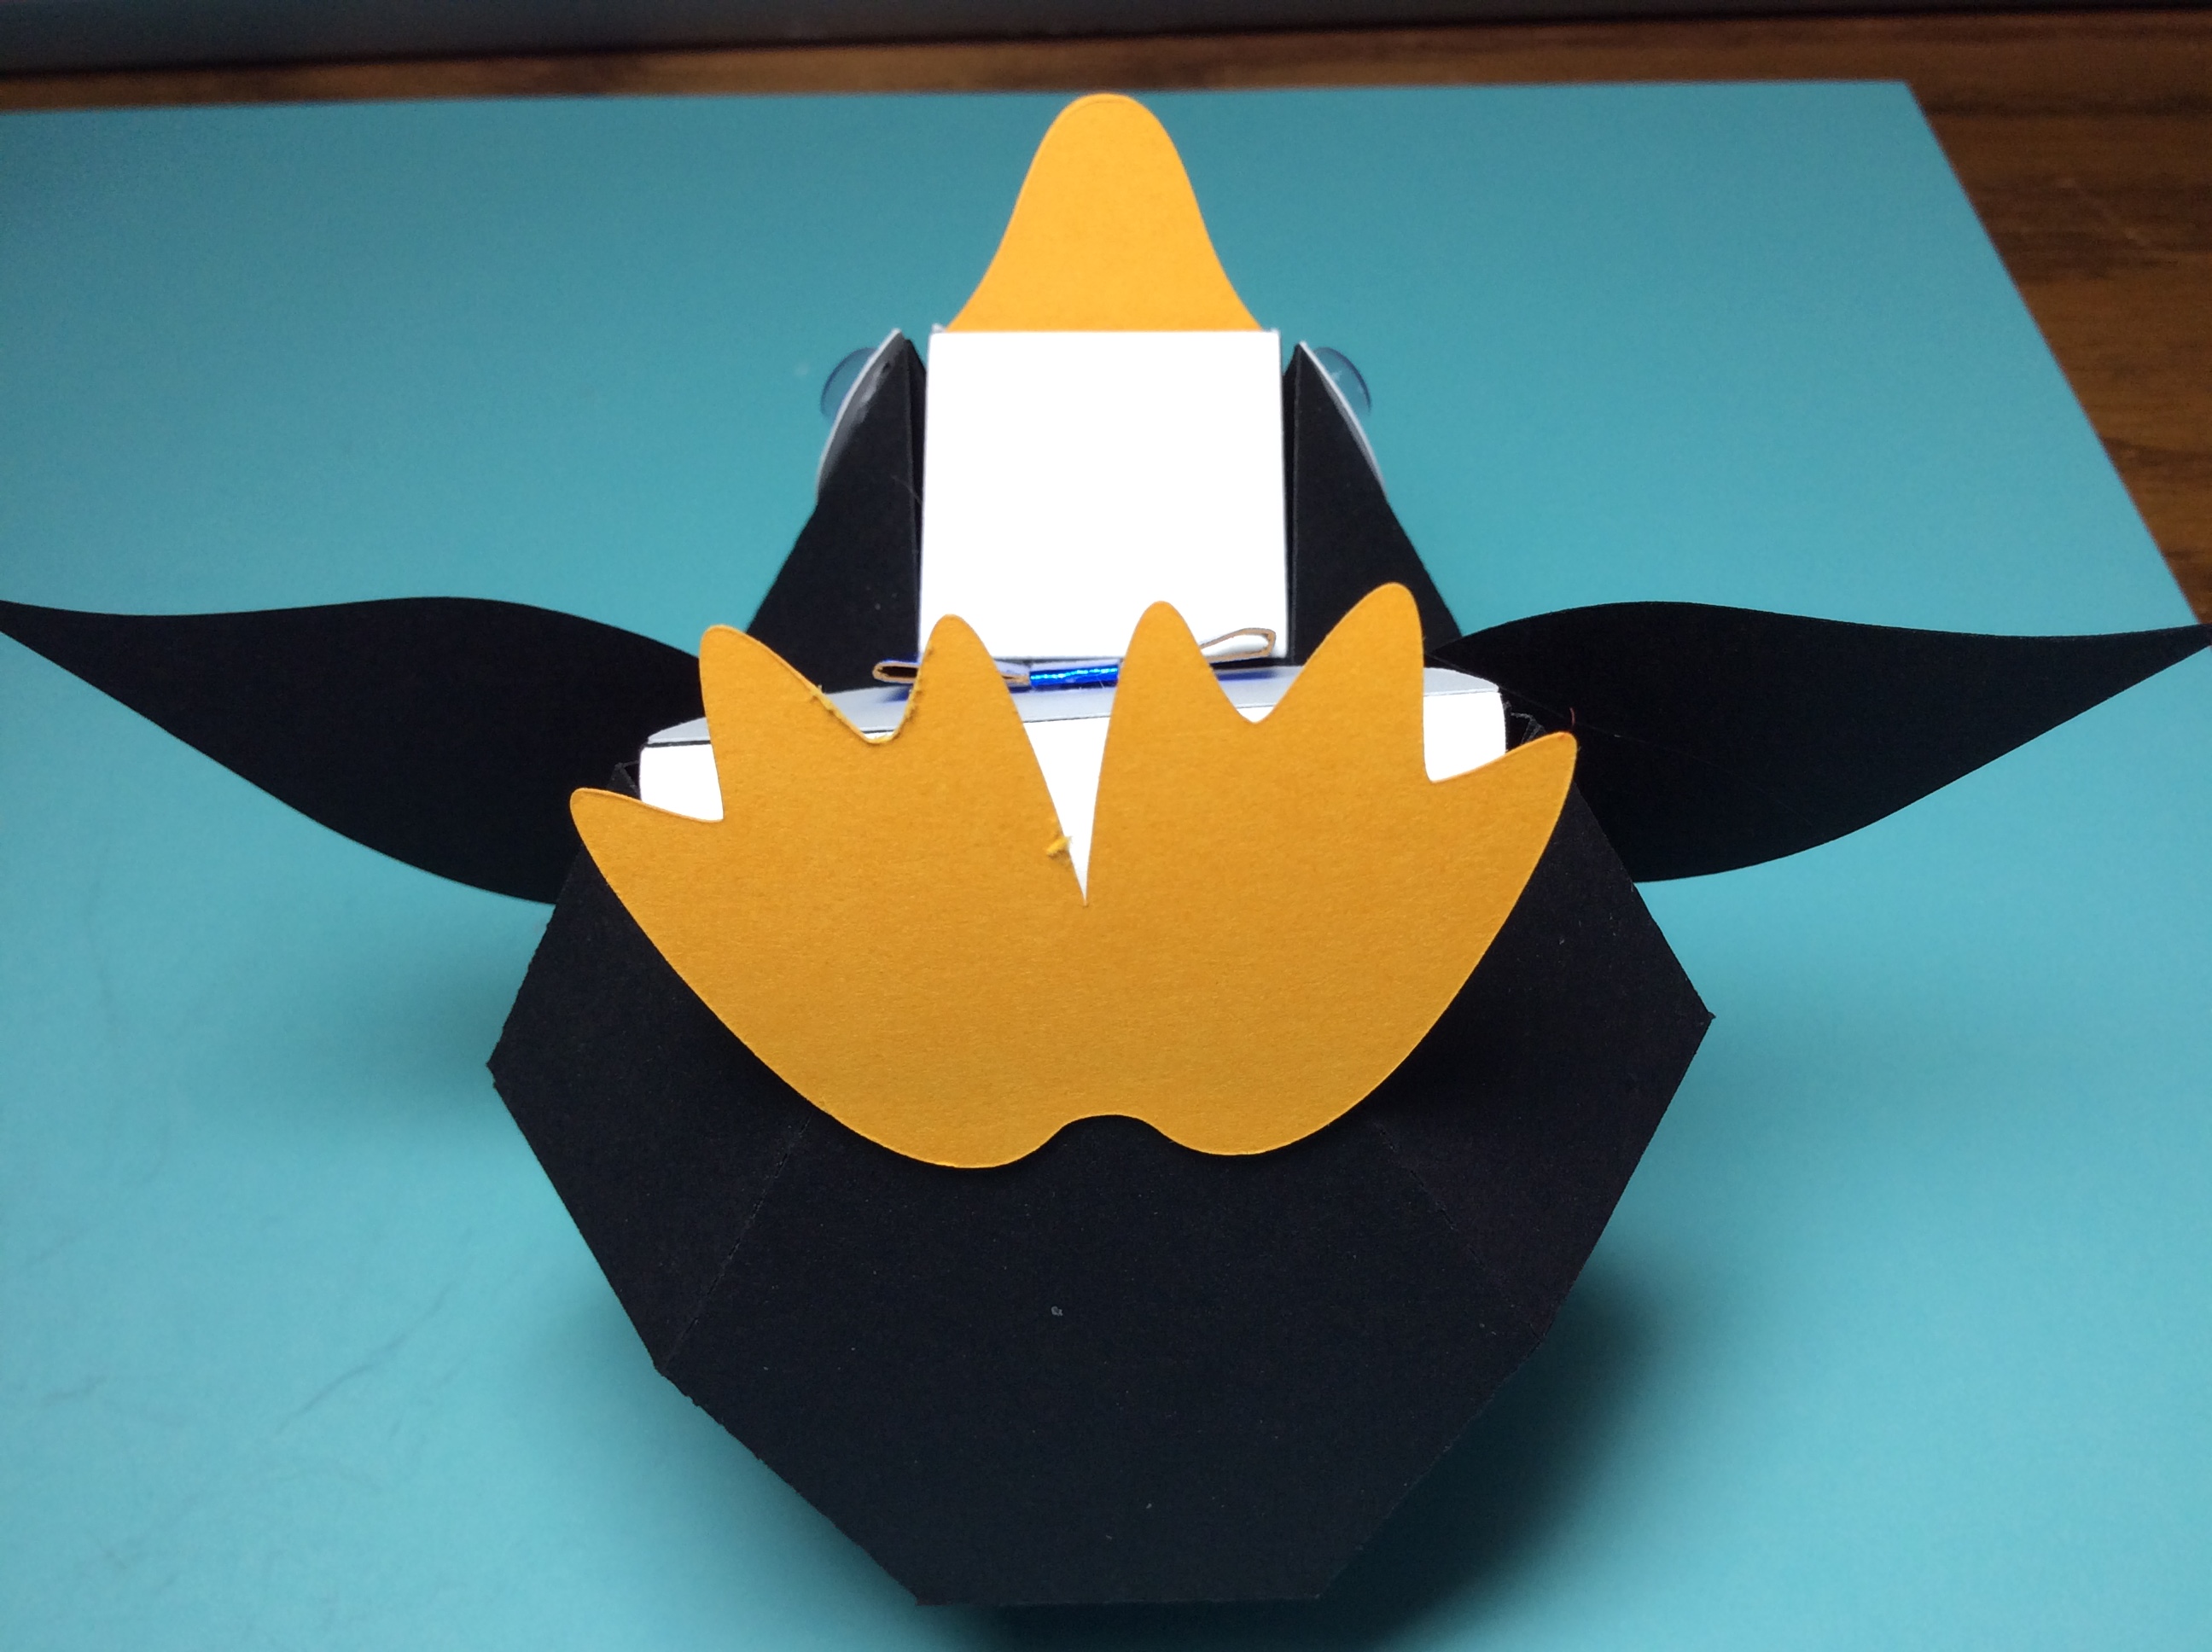
This Rubber Band Pop-Up Penguin makes a fun surprise for the recipient as the penguin pops up out of the Snowflake envelope when it is removed. There is stored energy in the rubber band that was incorporated into the design. The rubber band was stretched and placed into the Snowflake envelope. The rubber band wants to return to its natural state and it does so when it is removed from the envelope. It is 3 1/2 inches tall.
The base design is a triamond triangular bicupola from my blog post https://papercraftetc.blogspot.com/2020/02/a-stem-project-rubber-band-polyhedron.htmlThe triamond triangular bicupola is made up of squares and trapezoids with a hexagon center. I used this design to my advantage when I placed a square and a hexagon together to form the penguin. The top half has the squares of the triamond triangular bicupola facing forward. The bottom half has the trapezoids facing forward. The reason why this design works is because the smaller base of the trapezoid and the square are the same length. By combining the two, the proportions look different.
Side View of the Penguin - the head appears larger.
Both halves appear to be the same size facing forward.
Here is the PDF. I used assorted 65 lb cardstock and foil cardstock from Michaels. I used a pair of wiggly eyes. I have included two round black dots if these wiggly eyes are not available. This
Penguin Pop-Up plus the Snowflake envelope/notecard can fit into an A4 envelope for mailing.
I cut and knotted the rubber band as shown above. The length between the knots is approximately 1 3/4 inches.
Layout the penguin body and glue on the white pieces as show above. The direction of the slits does matter. See below for a close-up of the head half and then the second photo is the body half.
Notice that both slits are oriented in the same direction for the head.
And the same direction for the body. Glue these two body tabs together. Set aside to allow the glue to dry.
Fold and apply glue to the inside of the beak.
Apply glue to the tab shown above.
Adhere the beak. Notice the circle and slit for the rubber band are visible. This is needed so that the rubber band can be slid into place here. Glue the two head tabs together. Set this aside for the glue to dry.
When the glue has dried for the body of the penguin, Slide the rubber band into place. Make sure to align the rubber band into the middle of the semicircle. Apply glue to the two tabs shown above.
Bring the two halves together and adhere the corresponding tabs. Apply glue and adhere the semicircle tab. Wait for the glue to dry before trying to slide the rubber band into place. Make sure to align it in the middle of the semicircle.
Repeat the above procedure for the head of the penguin.
Bring the two halves together and adhere the corresponding tabs. Apply glue and adhere the semicircle tab. Wait for the glue to dry before trying to slide the rubber band into place. Make sure to align it in the middle of the semicircle.
Press the body half down to glue and adhere the last two tabs.
Glue on the Penguin's wings.
Glue on the Bow Tie
Press the head half down to glue and adhere the last two tabs.
Glue the head and body halves together. Adhere the feet to the bottom of the penguin. Glue on the wiggly eyes.
Fold envelope part #1 as shown above.
Fold envelope part #2 as shown above.
Glue and adhere the tab of part #2 to envelope part #1.
Side view of the envelope.
Apply glue to the two sides of part #1 and adhere to part #2.
Completed envelope with the two snowflake sides inserted into the slot in the top flap.