Wednesday, June 30, 2021

A STEM Project: Yoshimoto's Cube #2 - Two Rings of Twelve Triangular Pyramids Can Be Flexed to Create a Cube

Two rings of twelve triangular pyramids can be flexed to create a cube. I made a box to contain them as they are very flexible and will not stay in the cube shape.

Two halves make up the cube.

Twelve triangular pyramids make up a ring for a total of twenty four triangular pyramids to create a cube.

In this series of four blog entries, I will be recreating, in the style of, Naoki Yoshimoto's "Shinsei Mystery Puzzles". The word "shinsei" means application in Japanese. This blog entry will explore the puzzle entitled Yoshimoto's Cube #2. In 1971, Naoki Yoshimoto discovered a way to divide a cube into equal parts in three-dimensional space. The result was a series of three puzzles by Yoshimoto.  

This design is twelve flexible triangular pyramids that are glued together to create a ring.  The two rings of twelve triangular pyramids are interlocked to form a cube. 

Here is the PDF.   I used 65 lb. cardstock. 

Here is the .Studio file. 

Here is the SVG.

To Make Yoshimoto's Cube #2


Make a box to contain the cube.

Cut four of the above pieces. Orient the piece as shown with the large tab on the right. Valley and mountain fold the dotted lines like an accordion. This piece creates six triangular pyramids. I recommend making all four sections together as an assembly line as the instructions are the same.

Mountain fold all the remaining dotted lines except the large tab on the right.

Turn the piece over with the large tab on the right.

1. Apply glue to the two tabs as shown above.

2. Adhere the bottom tab to the center of the diamond.

3. Adhere the top tab to the inside of the triangular pyramid.

4. Apply glue to the two tabs as shown above.

5. Adhere the bottom triangle to create another triangular pyramid. 

Repeat the above five steps until you get to the last triangular pyramid where the last tab is should not be glued. 

Fold the small tab inward and adhere the other two sides of the triangle. There is an opening at the base of one triangle for the large tab to be inserted later to create the ring.

Completed segment.

Glue both sides of the large tab and insert into the opening of the other segment.

Apply glue to both sides of the large tab and insert into the other side of the segment to complete the ring.

Repeat gluing the other ring together.

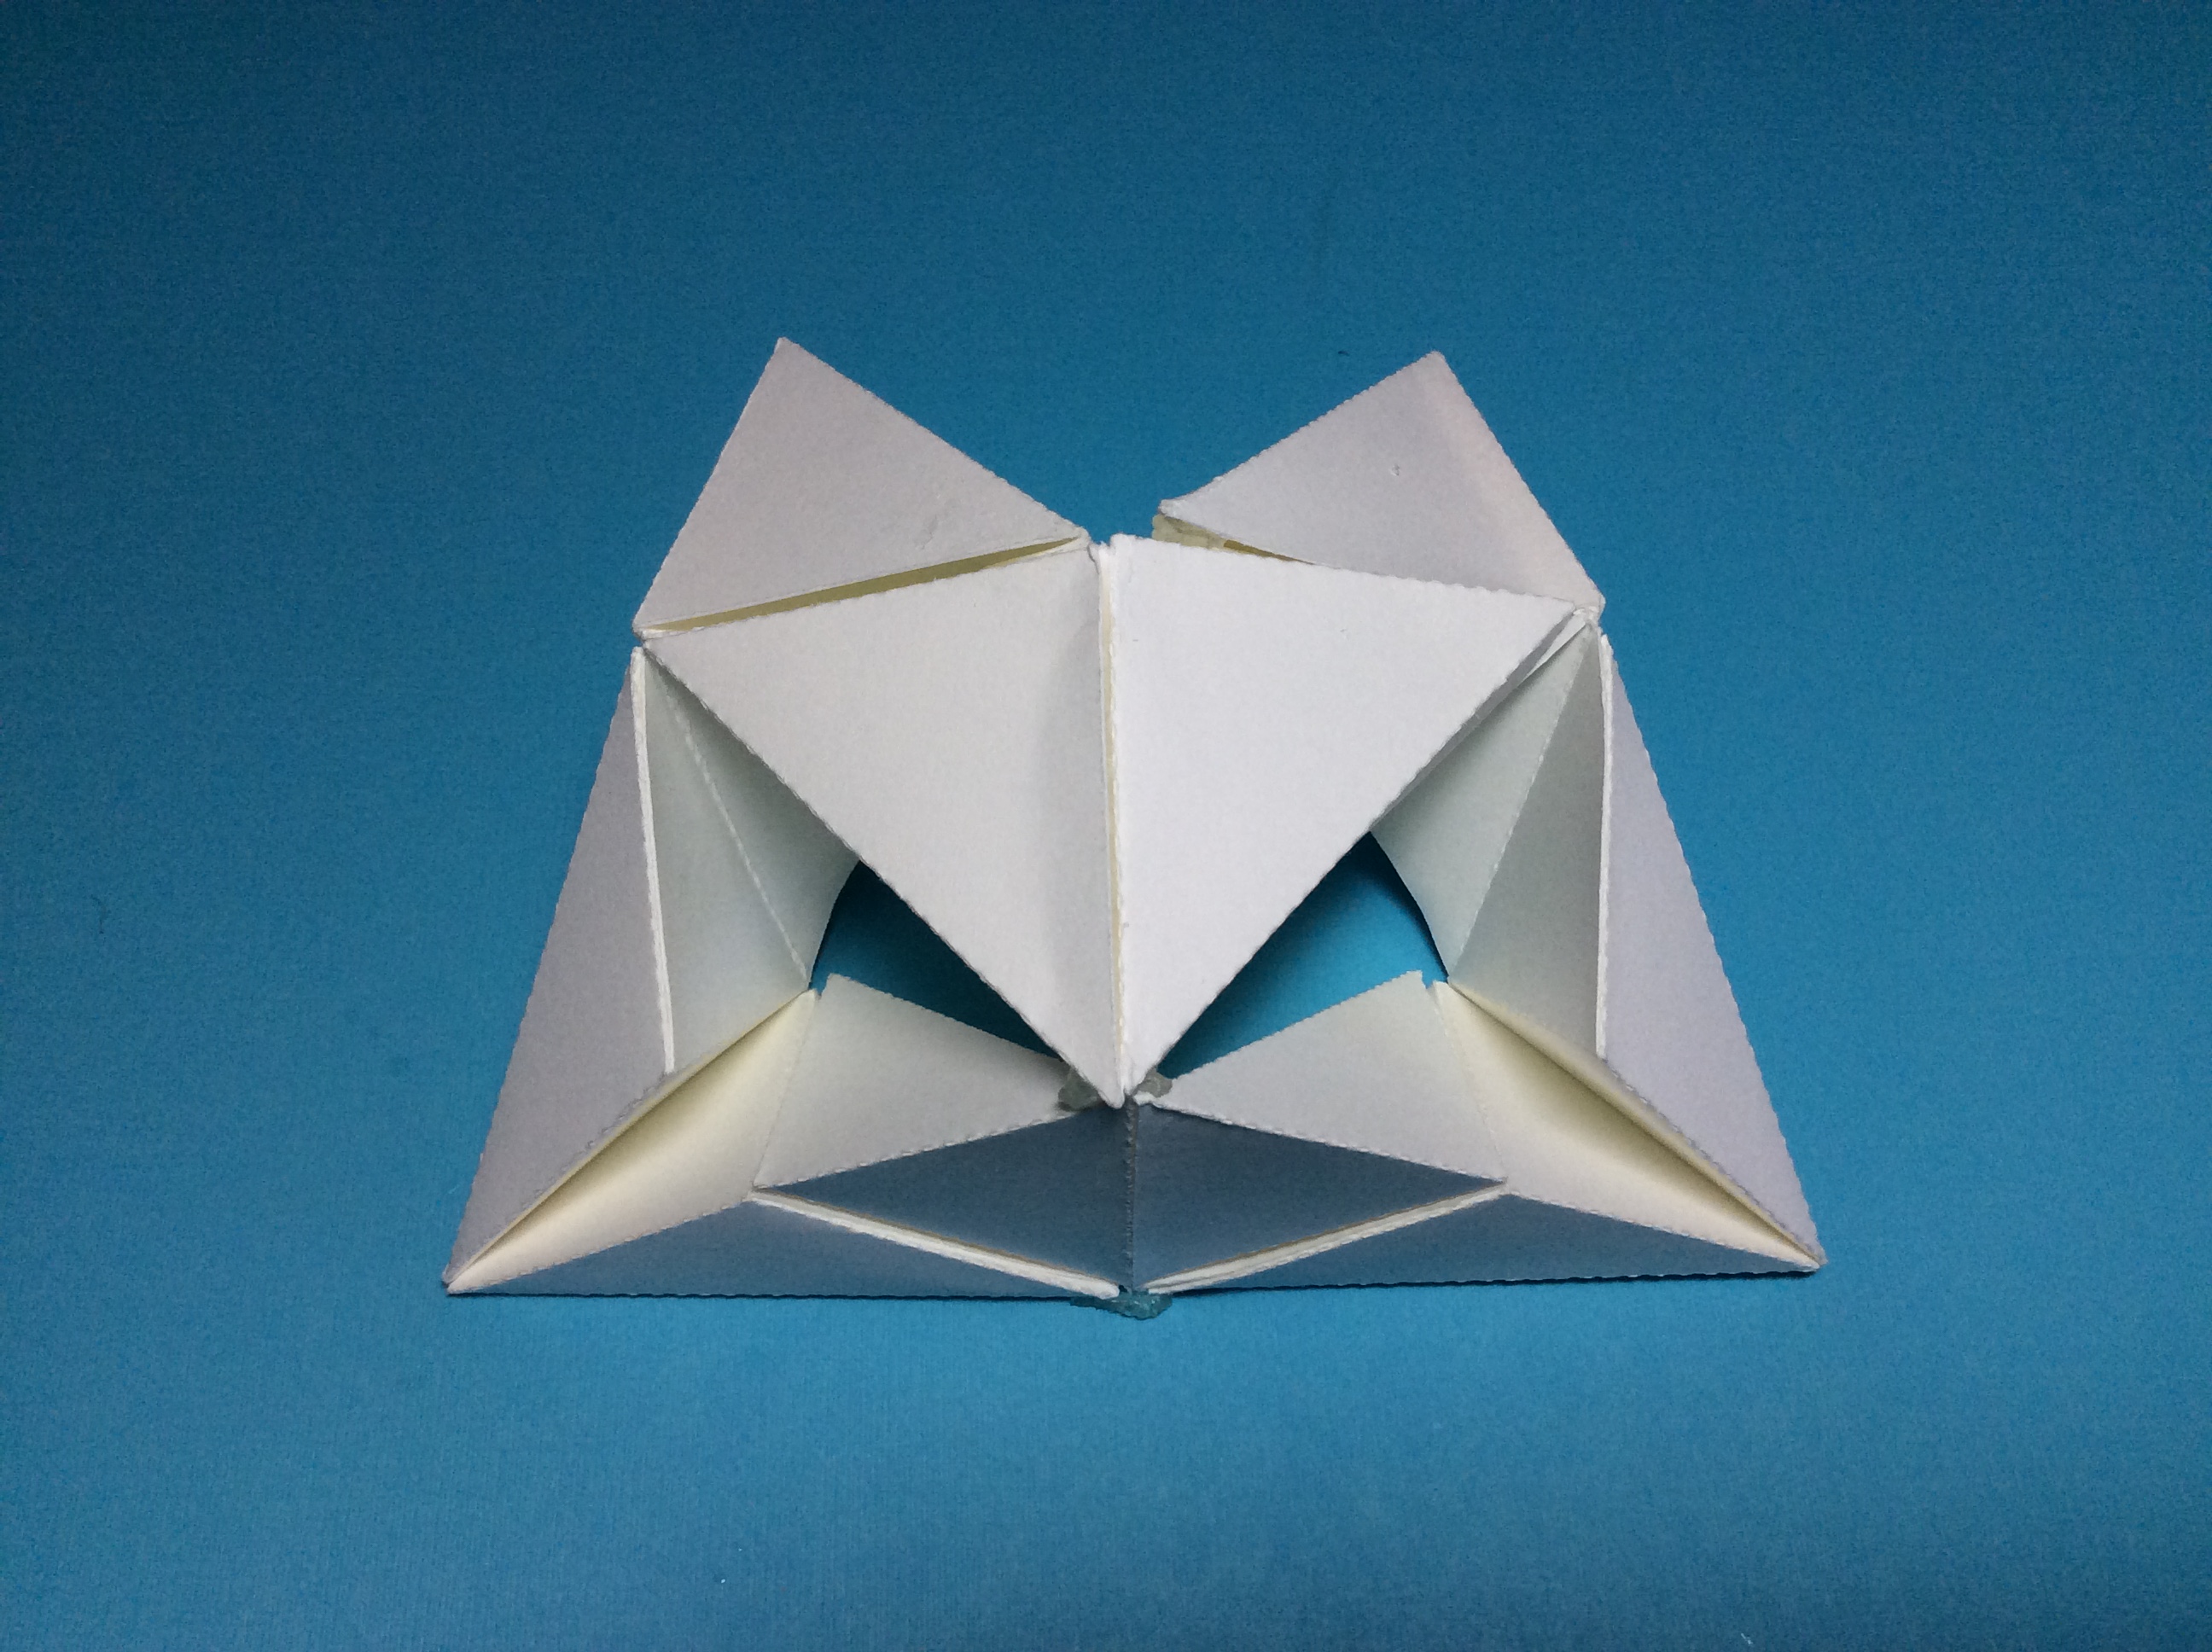
Push the lower six triangular pyramids together.

Flex the top and bottom triangles upward to create a square base. Place in a box.

Repeat for the other ring to make two parts of the cube.

Interlock them to create the cube.

A STEM Project: Yoshimoto's Cube #3 - A Ring of Twelve Triangular Pyramids Can Be Flexed to Create a Cube

A ring of twelve triangular pyramids can be flexed to create this cube.

Ring of twelve triangular pyramids

In this series of four blog entries, I will be recreating, in the style of, Naoki Yoshimoto's "Shinsei Mystery Puzzles". The word "shinsei" means application in Japanese. This blog entry will explore the puzzle entitled Yoshimoto's Cube #3. In 1971, Naoki Yoshimoto discovered a way to divide a cube into equal parts in three-dimensional space. The result was a series of three puzzles by Yoshimoto.  

This design is twelve flexible triangular pyramids that are glued together to create a cube. When the triangular pyramids are flexed, many different configurations are created.  Here are some of the unique configurations that are produced.

This shape is a rhombic dodecahedron which is essentially a stellated cube.

More fun shapes.


Frontside

Backside of above shape.
Try to make some of these interesting shapes.  There are more shapes to explore beyond what I have shown here.

I have included a box to contain the flexible cube.


Here is the PDF.   I used 65 lb. cardstock. 

Here is the .Studio file. 

Here is the SVG.


To Make Yoshimoto's Cube #3

Cut three of the above pieces. Orient the piece as shown above. This piece creates four triangular pyramids, two on each side of the halves. I recommend making all three sections together as an assembly line as the instructions are the same.

Fold the center dotted line as a mountain and then a valley fold. Fold the two dotted lines on each side of the center dotted line as a valley fold. Valley fold the two top tabs.

Mountain fold the tab (where the glue bottle is pointing)and apply glue to the tab. Valley fold the next dotted line on the right. Adhere the tab to the center dotted line.

Apply glue to the top of the tab that you just adhered. The location is where the glue bottle is pointing. Valley fold the next dotted line on the left. Adhere the tab to the center dotted line.

Mountain fold the tab on the right side and apply glue to the two tabs in this triangular region. Mountain fold the dotted line and adhere the tabs to create a triangular pyramid.

Repeat for the other side. Valley fold the dotted lines on either side of this triangle and adhere the glue on both sides.

Valley fold the top dotted line of the triangular pyramid

Mountain fold the remaining dotted lines. Please note that the large tab is the connector tab.

Apply glue to the small tabs and adhere to create a triangular prism. The larger tab remains unglued at this time. Repeat for the other side.

Completed section.

Apply glue to both sides of the big tab and insert into the hole in the adjacent section. Repeat until a ring is formed.

Completed ring of 12 triangular pyramids. Make sure the glue is dry before trying to flex the shape.  The shape flexes easily into a rhombic dodecahedron.

This rhombic dodecahedron can form a cube by flexing the triangular pyramids inward. (Essentially you will be turning the entire figure inside out.) If you continue to flex the shape inward, the result will bring you back to the original rhombic dodecahedron.

Make the box to contain the flexible triangular pyramids.


Tuesday, June 29, 2021

A STEM Project: A Flexible Cube Which Can be Turned Inside Out

Eight flexible cubes are connected so that they create one larger cube.

In this blog entry, I will be revisiting a design that I made previously because I want this design to be included in this series of four blog entries where I will be recreating, in the style of, Naoki Yoshimoto's "Shinsei Mystery" puzzles.

This design is a large flexible cube where eight small cubes are taped together to create a larger cube. When the cubes are flexed, it creates different configurations.  It takes eight flexes to get back to the original large cube.  

The cube can be flexed to create different configurations.

 I made the eight cubes and glued colored cardstock on all of the 24 outer squares.  This allows for the  transformations of the cube to be easily seen.  It takes four flexes to turn the cube inside out and eight flexes to get the cube back to the original configuration.


The Cube has been turned inside out in four flexes.

Here is the PDF of the cube.   I used 65 lb. cardstock. 

Here is the SVG.


Make eight cubes. Tape the eight cubes together with 4 strips of tape as shown. 

 Place the bottom cubes with the tape facing outward as shown. The opposite side of the cube should look exactly the same as the photo.  Place the top cubes with the tape facing the ceiling.

Next using 4 strips of tape, place the tape on the sides going upward as shown. There will be 2 strips of tape on one side going upward and 2 strips of tape on the other side going upward. There is a total of 8 strips of tape used in this model. The opposite side of the cube will have the same tape placement.