
A Halloween Haunted House Box

Side view
Back view
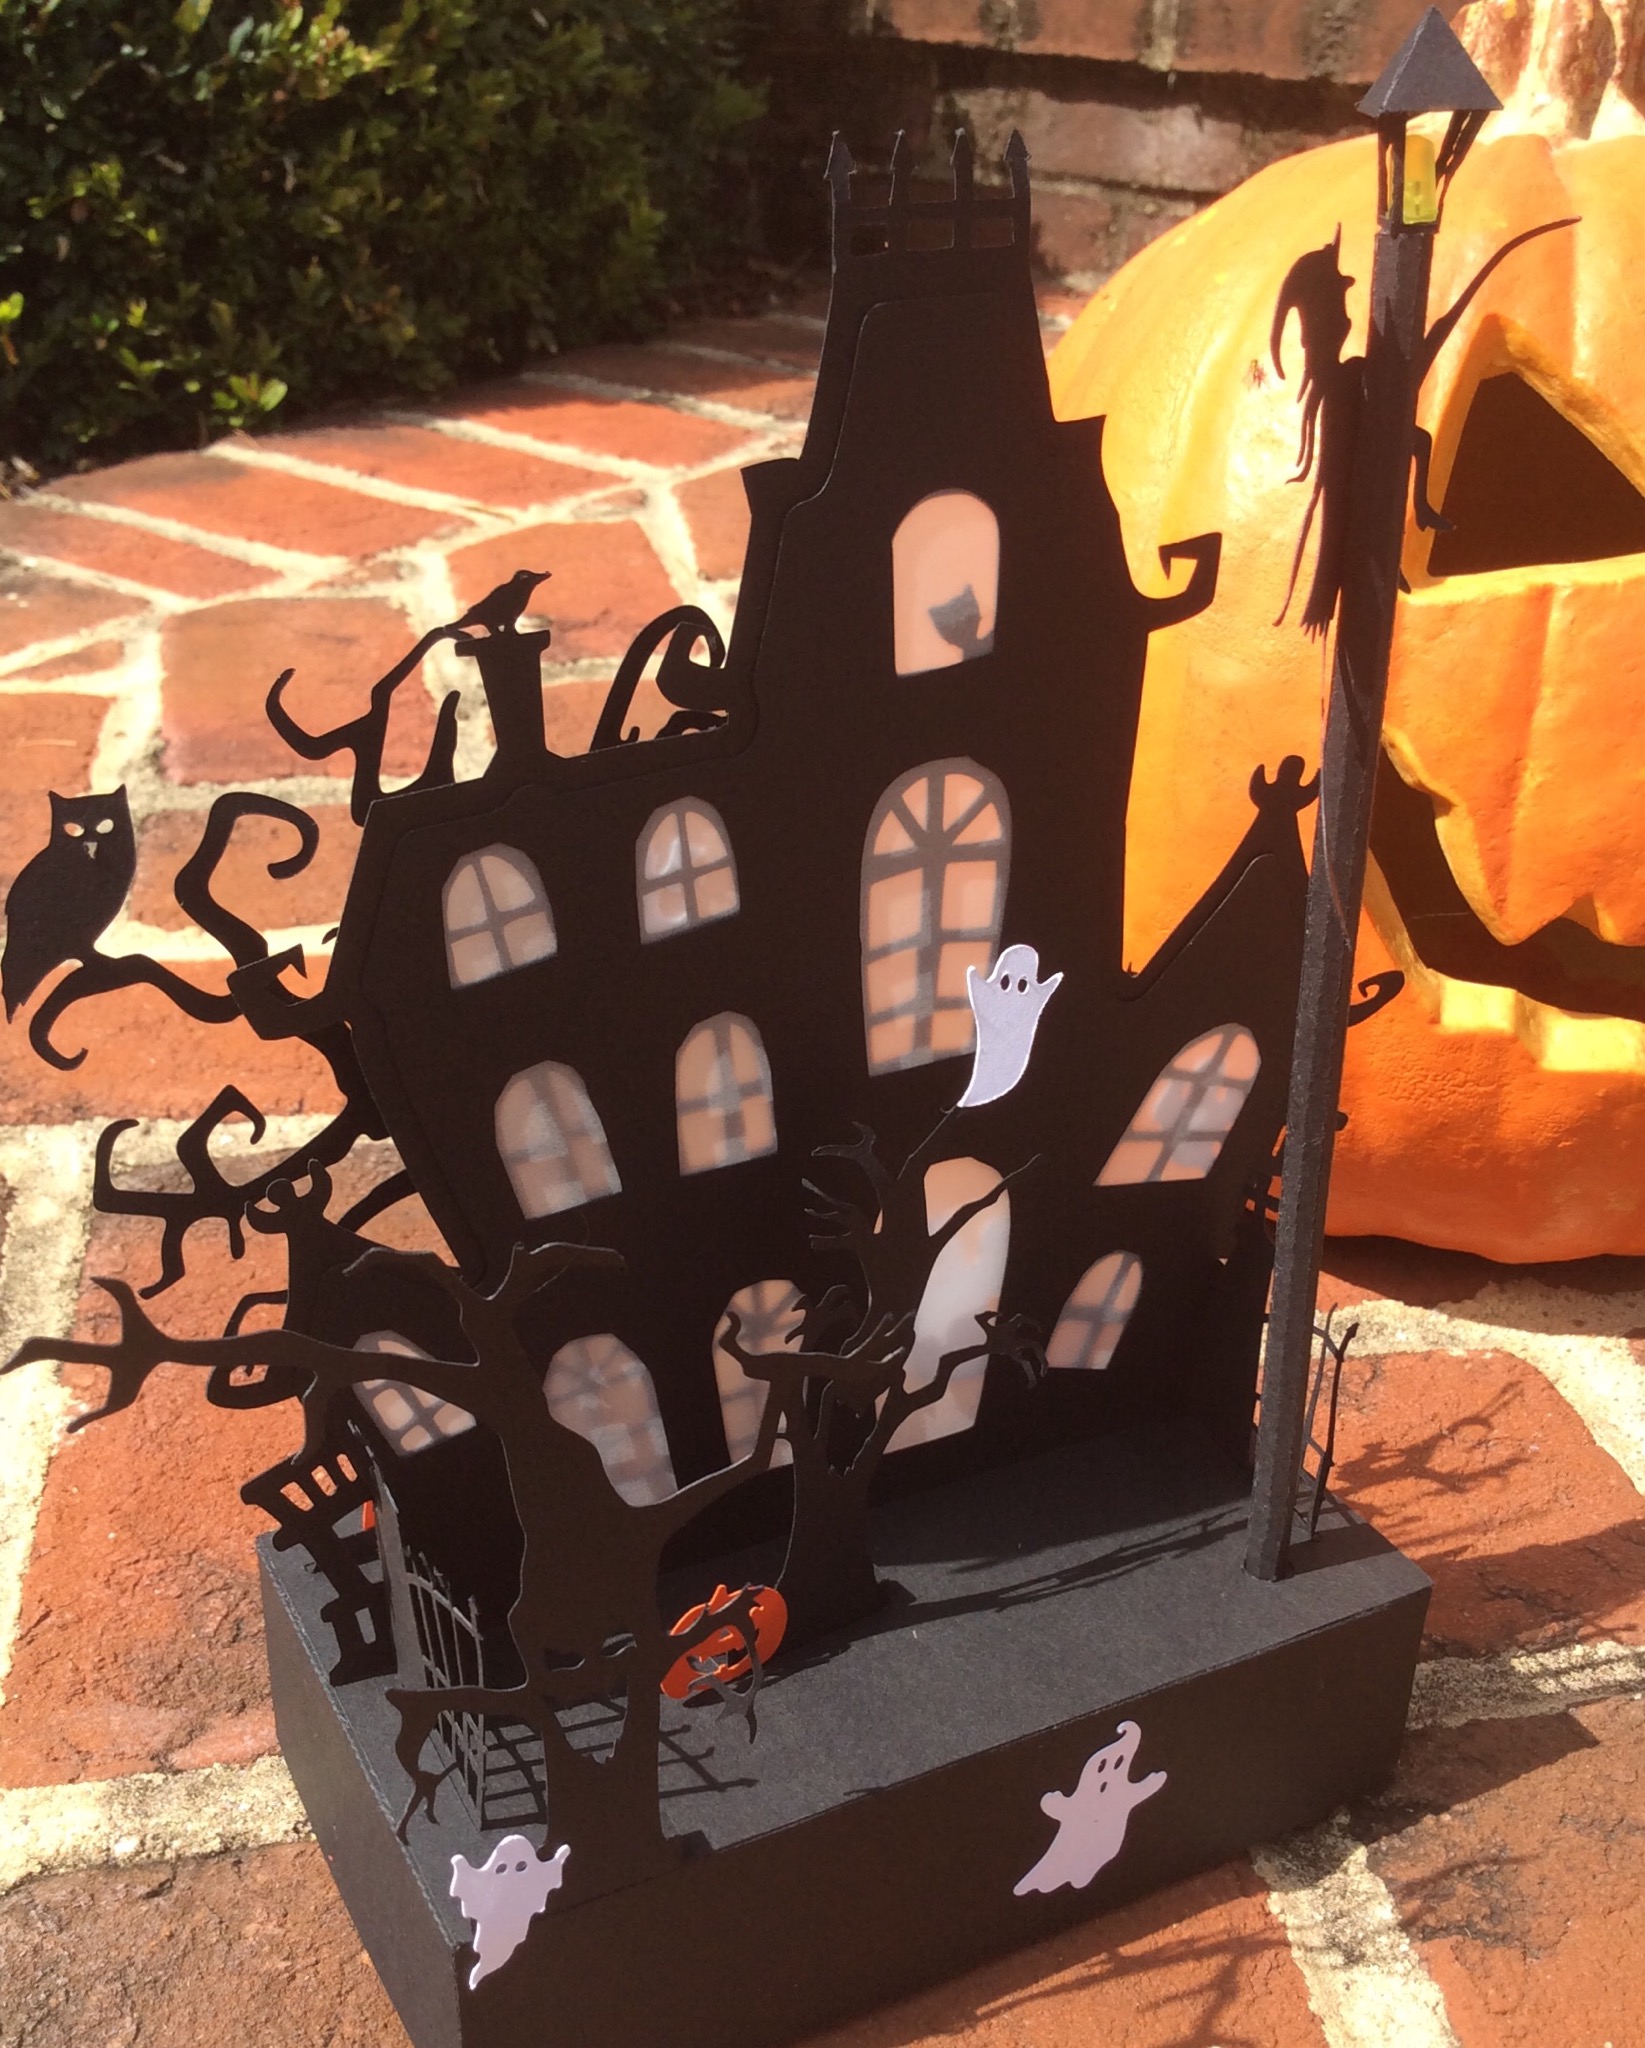
This Halloween haunted house box has a witch which is wrapped around a lamp post that can twirl when rotated. The silly witch has lost her bearings when she hits a lamp post and breaks her broomstick. Four happy Jack-O-Lanterns sit in front of a gnarly tree. Cats, haunted trees and ghosts are hovering around to add their holiday spirit to this Halloween haunted mansion scene.

The box is six inches long and about 3 1/4 inches wide so it can hold a lot of Halloween candy.
Here is the PDF. I used 65 lb. cardstock.
Here is the .Studio file.
Here is the SVG. The SVG file goes beyond the viewable area. To see the entire file, zoom out.
Make the box

Crease the box edges as shown. Glue the two corners together to make a rectangle. Repeat for the other box edges.

Apply glue to the inside of the top of the box.

Adhere the solid top piece. Make the bottom of the box by gluing the two bottom rectangles together and gluing this to the bottom sides of the box. Set the this aside
Make the Haunted House

Glue three ghosts to the haunted house

Align the rectangular base as shown above.

Apply glue to the tab of the haunted house so that the tab will face the front edge when it is inserted into the slit of the rectangular base.


Align the vellum to the back of the haunted house. It will be glued later.

Bend and insert the tab of the haunted house back so that the tab is facing the back edge. Apply glue to this tab and adhere to the base.

Apply a few drops of glue to the vellum after the back and vellum have been aligned to the front of the house. Make sure the windows are centered correctly.

Crease the gate tabs as shown above.

Glue and adhere the gate tab towards the outer edge.

Repeat for the other gate.

Insert the side tab of the gate sandwiched into the backside of the haunted house.

Repeat for the other gate.

View of the gates.

Apply glue to the tab of the back of the haunted house. Adhere the tab towards the back edge.

View of the tabs that have been glued.

Apply glue to the backside of the haunted house. Adhere to the vellum and the front of the haunted house.

I noticed some buckling so I applied additional glue to some areas.

Make the square beam support for the tree.

Make a beam at the bottom of the tree with the cat.

Insert and glue the beam to make a 'T' on the backside of the tree.

Glue on the pumpkins.

Insert the two tabs of the tree, apply glue and adhere the tabs towards the front.

Apply glue to the bottom beam of the tree.

Crease the ghost with dotted lines and glue in back of the tree.

Make the lamp post by creasing the pole. The lamp post can be folded flat for gluing and adhering. Once the glue adheres, make the lamp post into a tube. Make the top of the lantern into a pyramid and glue the other portion of the lamp together.

Insert the lamp post into the center of the circle. Apply glue to the tabs.

Adhere the tabs.

Slide the lamp post into the hole in the base.

I used a diode to simulate a light.

Insert the diode into the lamp post. Glue the light together. Glue the witch to the lamp post. The witch can be slightly creased around the post to make it seem like she has hit the post.

Apply glue to the top of the box and adhere the base of the haunted house.

Make support beams on the bottom of the three trees. Glue the trees where desired.
Add additional ghosts as desired.

Happy Halloween!


