Thursday, January 16, 2020

A Heart Valentine Box

Heart Valentine Box

This Valentine box reminds me of the fancy Valentine boxes that I used to see at Loft's Candies around Valentine's Day.  I remember gawking at all of the beautiful heart boxes in the window with their luscious candy displayed.

About six Hershey Kisses can fit inside.

Here is the PDF. I used 65 lb. cardstock.
https://drive.google.com/file/d/15n0EkNb0BFTQl__SEZ7jXWhhvyX3BKXt/view?usp=sharing

Here is the .Studio file.
https://drive.google.com/file/d/1rmkx5zkCMkKMem18Dfu_aIp7jQ-VxowX/view?usp=sharing


Glue the top side pieces together.  

Glue the opposite side together to form a loop. The tab is glued inward.

Bend the tabs down.

Apply glue to the inside tabs and insert the top heart. I recommend adhering the bottom point of the heart first and then bend the side inward at the top of the heart.  Make sure you align the seam to the top of the heart. 

 Turn the piece over and make sure all of the tabs are adhered correctly.

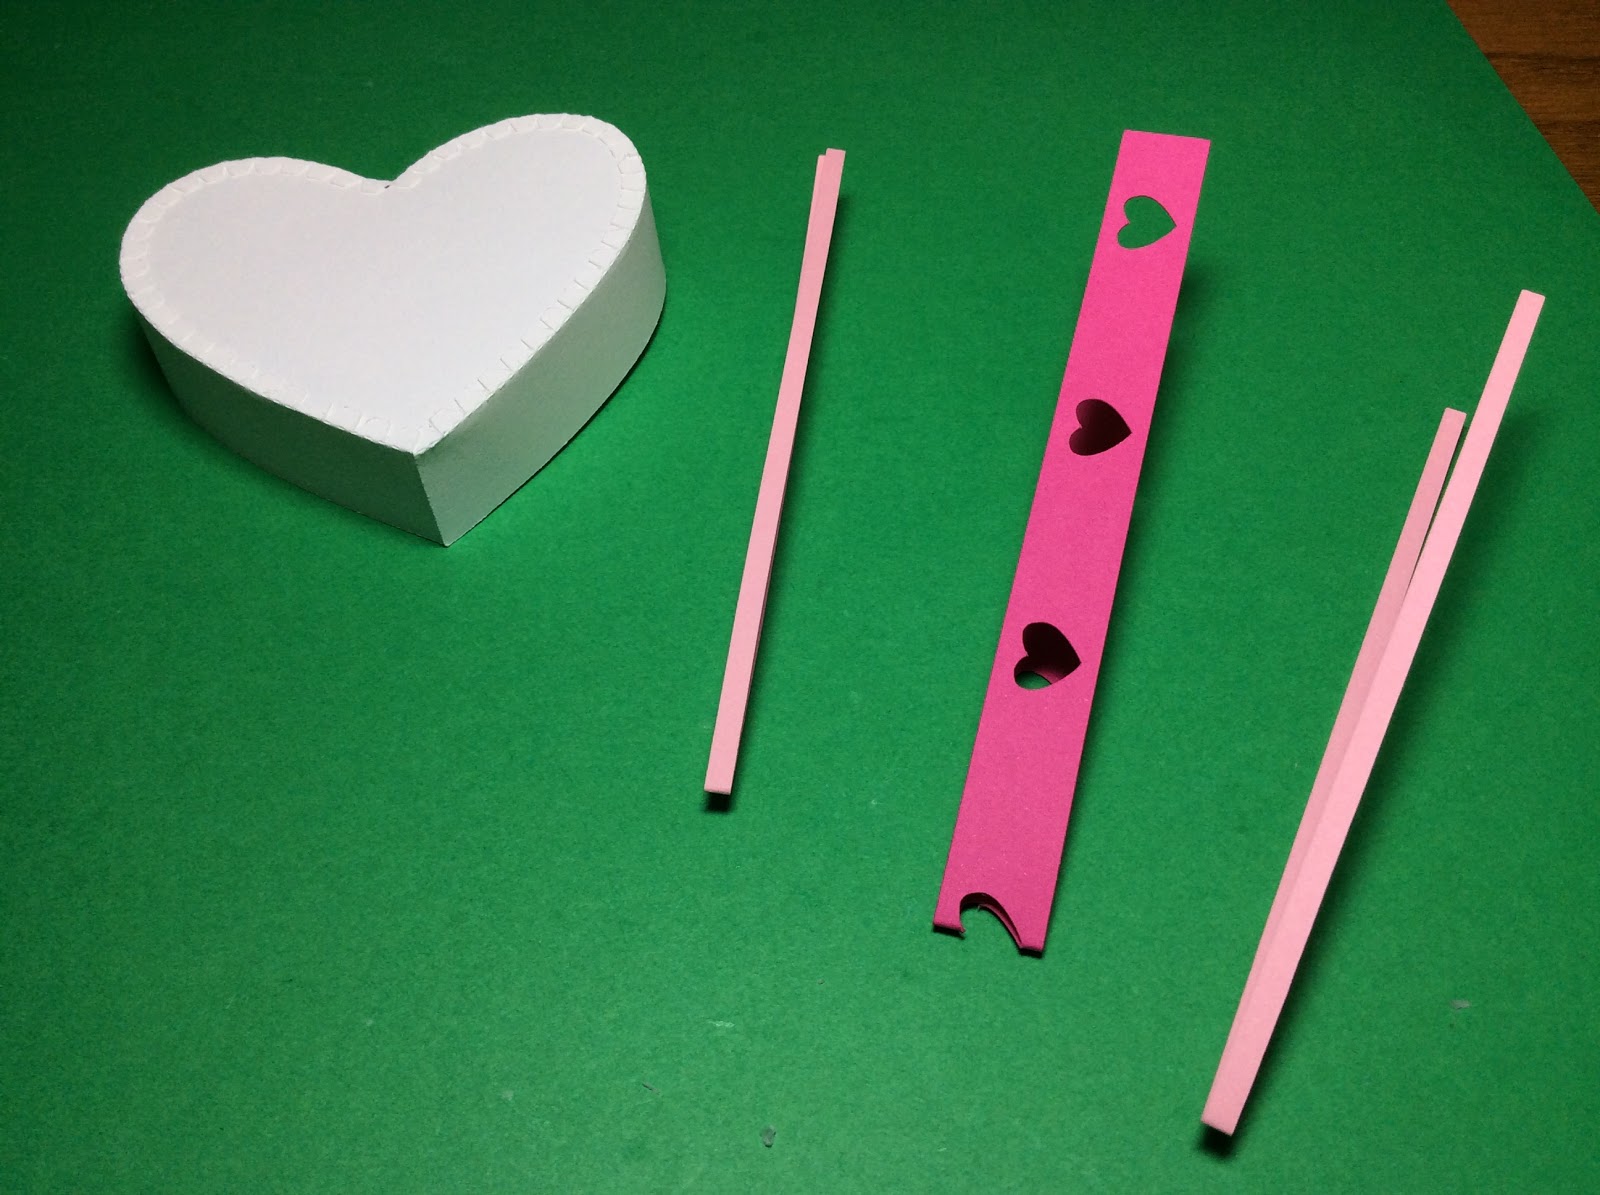
Bend the embellishments in half.  Please note that there is a tab on the wider piece with the hearts,...the one heart will be folded in half...see above photo.

Apply glue to the narrow strip of paper using a glue stick.

Adhere the narrow strip to the edge of the top.

Apply glue to the heart embellishment piece.

Notice that the tab is adhered to one side.

Adhere the rest of the heart embellishment to the side.

Apply glue to the dark pink heart.

Adhere the dark pink heart to the light pink heart.  Apply glue to the the white heart as shown and adhere it to the other two hearts.

Apply glue to the top of the heart. Adhere the heart embellishment.

The top of the heart box is now complete.

Make the bottom of the box by gluing the one tab together.

Glue the other tab together and bend the tabs inward.  Apply glue to the inside tabs.

Insert the heart bottom and adhere the tabs. Turn the bottom over to see that all of the tabs are adhered correctly.

Glue the two pink hearts together and apply glue to the bottom of the box. Adhere the pink hearts.

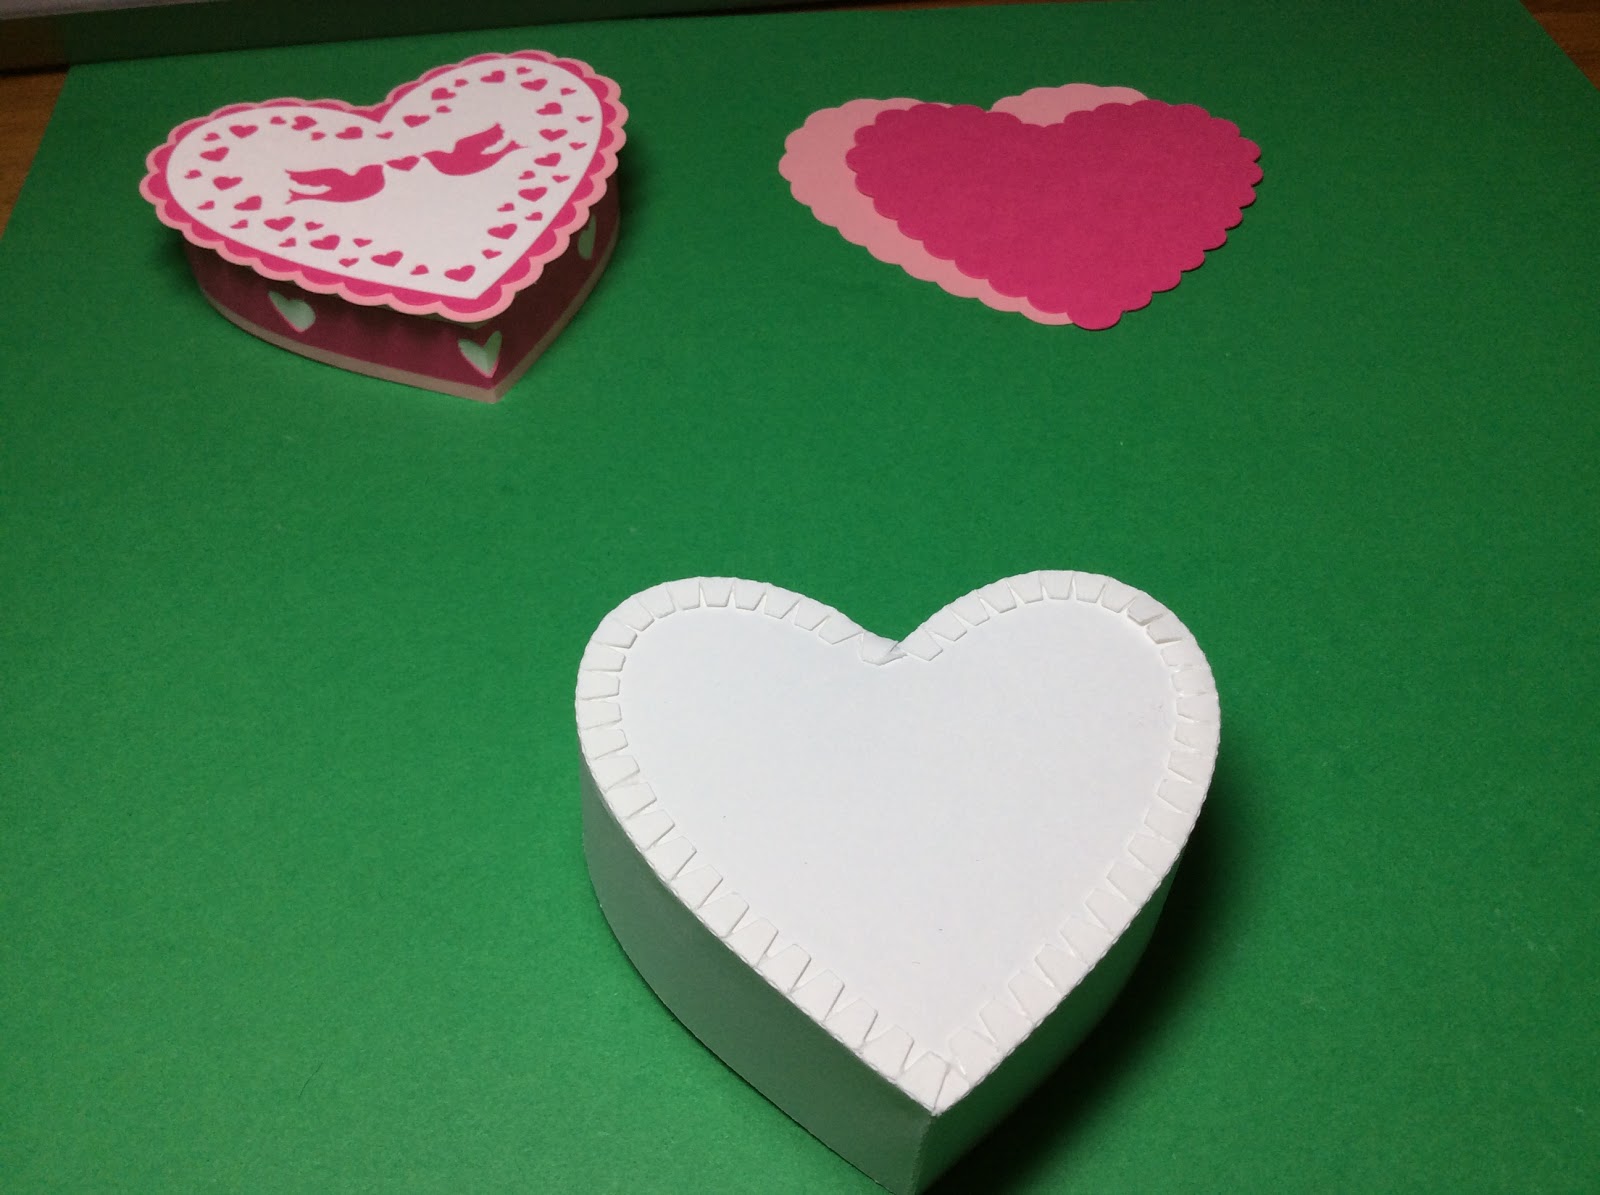
Top and Bottom of the Valentine Box

Side view

Completed Valentine Box

Happy Valentine's Day!

Monday, January 13, 2020

A STEM Project: How To Design Geometric Earrings With The Silhouette Cameo Software

Geometric Earrings 

Designing geometric earrings is an interesting way to have fun with math.  How many different shapes can you design using the Flexishape tool in the Silhouette software? There are quite a few shapes that can be used to create unique earring designs. Once you make the shape, add a .05 inch circle for the earring back.   Offset this circle by .04 and weld the two circles to the top of your design.

The Flexishapes are on the left side in the above screen shot.

I have included a few designs in my file that I created with the flexishapes.  I especially like the graduated designs with different colors of leather combined on a jump ring and attached to an earring back. The jump ring and earring back are called findings. Findings are materials that are needed to make jewelry not including gemstones, beads or stringing materials.  They can be purchased at a craft store like Michaels or Joanns.  I got my findings at Walmart.

The faux leather that I used was purchased at Michaels.  It was the Cricut brand faux leather in five colors. It was daunting to think about how many color combinations there were to make with my design with three layers of leather. I didn't want to make too many tests of the material because it would be expensive and I didn't want to waste the material. I decided to virtually design the earrings where I could test out all of the color combinations.  It is easy to do with the Designer Edition software.  

Take a photo of the material that you are planning to use for your design. 

Copy the photo into your Silhouette software. Pick the colors of the photo using the eyedropper tool and make a custom palette for the Faux Leather.  Here is a video that explains how to do this. https://www.youtube.com/watch?v=wGePh520sac
Move the photo of the leather off of the page (it's nice for reference if you look at your palette another day).

For the next step, you can use the file that I created for my design. (If you want, you can create something similar for your design.) Here is my .Studio file for the custom color designs
https://drive.google.com/file/d/1CbETU1IacsQ292h9oxm-Kwh4Wz0jW2j4/view?usp=sharing

I decided that the five color palette was too many choices for my three tiered earrings. It would be three to the fifth power, 3= 3 x 3 x 3 x 3 x 3 = 243 choices for five colors. With a more limited palette of just three colors, it would be three to the third power, 33 =  3 x 3 x 3 = 27 choices. 


I also added a two tiered version of my design to my custom color file. The number of combinations would be three to the second power, 3= 3 x 3 = 9  There are four versions of this two tiered design.

In the Select By Color Menu, select By Fill.

If you select the Red color, the bounding box for all red filled objects will be included.

In the top left of the screen, select the red and a pull down menu of colors will appear. Select the tan color.

This is the result once the tan color is selected. Repeat for the other two colors.

A virtual look of the earring designs with three colors.


Here is the PDF.
https://drive.google.com/file/d/1Hca3cKk3fnEq928-E-ECnVQSPVmAZOS3/view?usp=sharing

Here is the .Studio file.
https://drive.google.com/file/d/17rnwQFvYeNfn27Qgu_856ElNZ8IQ1NOj/view?usp=sharing

I used the faux leather setting when cutting the leather with my Silhouette.  It was cut with a ratchet blade set at 7, Force 33, Speed 3 and Passes 1.

Here is a tip when cutting expensive material.  Write a note on the back of the material and give it a name.  This name will become the file name for this material.  Load your material as evenly as possible. Cut out your design.  Once the design has been cut, go to line style and make the cut design another color that you do not use. Do not delete the design.  Save the file to your library. The next time you need to use the material, open the file and then you will know approximately where to cut the next design. Repeat this procedure each time you use this material. When the material is used up, delete the file from your library.

Once the earring design is cut with your Silhouette, use a jump ring to attach it to the leather. The jump ring is a circular piece of wire.  Open the wire and thread the jump ring through the leather. Above is a photo of the earrings with their jump rings attached.

Attach the earring back to the jump ring by hooking the jump ring through the circular piece of wire at the the bottom of the earring back. Close the jump ring into a circle.  A drop of glue can added to the point where the jump ring is closed.  This will prevent the jump ring from opening up inadvertently. 


Saturday, January 4, 2020

A Star Valentine Box

Star Valentine Box


These star Valentine boxes are so cute.  I love the saying that is printed on the vellum. "I thank my lucky stars for a teacher/friend like you". The red heart has the name of the gift giver Foil Quilled on the heart. The bottom of the box has a glittered bottom.  The star box is very small.  A Musketeers Mini fits perfectly inside.  The design can be resized if you want to put a larger candy inside.  It takes about an hour to make six of them.

Here is the PDF.
https://drive.google.com/file/d/1xV4WfQ57-Il1Yxxlvc2e_0vnjLpxs_IX/view?usp=sharing

I used 65 lb. cardstock for the box, ink jet printed vellum for the saying and glittered vinyl for the outer star. The red heart is 65 lb. cardstock that has been Foil Quilled with gold foil.

Here is the .Studio file.
https://drive.google.com/file/d/1tTthEPEf5W0a8WW_eeRJdQqPB2Sty6R7/view?usp=sharing


The box sides have two sizes. The larger one is for the top of the box and the smaller one is for the bottom of the box.  Make sure that you keep them separated.  The size difference is slight but it makes a difference in construction.

Make the smaller side first for the bottom of the box.  Make into a star and glue the side tab. Bend the star point tabs inward as shown in the photo above on the right.

Apply glue to the star point tabs inside the star. Adhere the star to the glued tabs.

Turn the star over and apply glue to the outside edge as shown above.  I applied the glue with a quilling bottle filled with Aleene's Tacky glue. This method allows for a fine application of glue and no warping of the cardstock.

Adhere the star to the glue.  The bottom of the box is now completed.

The vellum stars were made by printing the saying on an inkjet printer with registration marks on the vellum.  After the vellum was printed, it was then cut with the Silhouette.  Apply glue to the edge of the star. Notice that the saying is face down.  The star piece is glued to the underside.

Apply glue to the star tabs.  Adhere the vellum star.

Turn the star over.

Peel the backing off of the vinyl and adhere the star.

The bottom of the box has the inner piece of the vinyl star.  (I didn't want the vinyl to go to waste.)

Completed Star Valentine Box

The Foil Quilled Heart fits perfectly inside.

A Musketeer Mini inserted in the box. 

The Star Valentine Box ready to be given to a friend.

Happy Valentines Day!