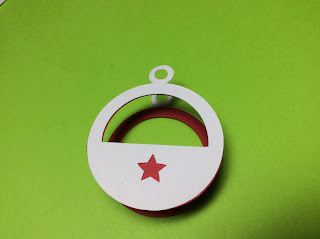
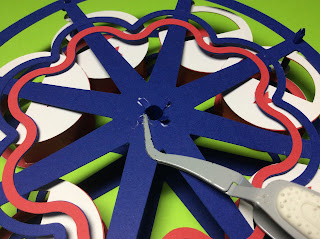
This Ferris wheel uses a Hyperduino with a yellow motor and LED lights to rotate and illuminate the Ferris wheel.
Disclaimer:
- Adult supervision is recommended when using the Hyperduino.
- This project involves a motor which could cause a fire. Do not operate unattended.
I used 65 lb cardstock. I used Aleene's tacky glue in a glue bottle. An adhesive foam sheet to mount the Hyperduino.
Here is the PDF.
Here is the .Studio file.
Here is the SVG.
Make the Ferris wheel
Make the Ferris wheels seats by applying glue to the inside slotted piece and adhere to the star outside piece.
Repeat for the other side. Fold the seat into a U shape. Apply glue to the white slotted area and adhere the seat. Repeat for the other side.
Completed Ferris wheel seat. Repeat for the other seven seats.
Make the seat axle by rolling the sides over a tooth pick. Apply glue to the small end tab and adhere into a tube.
Thread this axle through the whole on the seat and slide a spacer over the axle. This spacer will prevent the seat from moving around. Repeat for the other seven axles.
Roll the large center axle into a tube and apply glue to the tab at the edge. This piece does lie flat if you need to adhere the glue. Immediately make this piece into a tube with a sewer.
Slide the tab onto the Ferris wheel and glue it down.
This is what it looks like on the other side.
Make the center axle to attach to the motor. Shown on the right. Set this piece aside.
Glue on the embellishments to both sides of the Ferris wheel.
Embellishments attached.
Thread the seat axle onto the side with the main axle attached.
Apply four dots of glue and adhere the four tabs.
Glue a star on top of the previously glued area. Repeat for the other seven seat axles.
Turn the Ferris wheel over.
Thread all of the axles onto the other side of the Ferris wheel.
Repeat threading and gluing each axle onto the Ferris whee. Completed Ferris wheel shown above.
Thread and glue a gear piece onto the axle for the yellow motor.
Apply glue to the star and white circle. Adhere to complete the center motor axle.
Thread the center motor axle through the Ferris wheel axle. This center motor axle will be removed later.
Opposite side shown. Set this piece aside,
Make the Hyperduino Presentation Box.
Apply a Glue Dot to the yellow motor as shown above.
Attach the yellow motor with the axle exposed. Thread the motor strap through the hole and apply glue to it. Adhere the strap down and repeat for the other side.
Motor strap attached.
Thread the wires through the hole in the bottom of the box side. Glue the four sides to make a box. Set this piece aside.
Create a three sided box by folding the dotted areas as shown above
Apply glue and adhere the tab as shown above to create a triangular prism. These triangular prisms create a sturdy support structure for the box.
Apply and adhere the bottom tab. This side will now be at a right angle to the bottom. Repeat this instruction and the one above for the other side of the box.
Side view of three sided box. Set this aside to make the square sides.
Fold the dotted areas and apply glue as shown above. Notice there is no glue on each side (triangular area) of the tab. This area needs to be be free of glue as this will be where the sides slide into one another. Adhere to create another triangular prism.
Apply glue to the three outer flat edges and the bottom tab as shown above.
Align the bottom flat edge of the square side to the three sided box and then slide the two side tabs of the three sided box into the square piece. Align the top edge to create a mitered corner. Adhere the bottom tab to create a triangular prism.
Completed side. Repeat for the other square side piece.
Completed presentation box.
Glue the crossbeam support together. Do not glue the bottom tabs.
Bend up the bottom tabs.
Glue the chipboard to the Ferris wheel platform.
Apply glue to the top of the tab on the crossbeam. Slide this edge into the side of the presentation box. The other tab will be glued on top next.
Apply glue to the bottom of the other tab and adhere it to the top of the box.
The crossbeam should look as the above photo.
Apply glue to the top fours sides of the presentation box.
Adhere the Ferris wheel platform. I added an extra bead of glue to the edge between the cross beam and the presentation box for support.
The crossbeam is now at a right angle to the presentation box.
Apply Glue Dots to the bottom of the Hyperduino.
Adhere the squares into the presentation box and then place the Hyperduino on top of the squares with the power supply facing the the crossbeam side.
Apply a Glue Dot around the sides of the LED light.
Thread the LED light through the hole on the top of the Ferris wheel platform.
Repeat for the other five lights.
Thread the yellow motor wires through the hole in the top of the Ferris wheel platform. Apply glue to the bottom of the yellow motor box and adhere to the Ferris wheel platform while aligning the hole in the box.
Attach the black and white wires to the Hyperduino,.
Backside of the yellow motor assembly.
Remove the center motor axle from the Ferris wheel and thread it through the cross beam.
Thread the Ferris wheel onto the center motor axle and attach the end of the center motor axle to the yellow motor.
I used the following code in Snap4Arduino to operate the Hyperduino with motion and lights.
Completed Hyperduino Ferris wheel


