Wednesday, October 21, 2020

A Thanksgiving Slice Form Sphere That Rotates with a Gear

Thanksgiving Slice Form Sphere That Rotates with a Gear

This Thanksgiving Slice Form Sphere with a Gear that Rotates is a companion piece to the Zig-Zag Thanksgiving card from the previous posting. https://papercraftetc.blogspot.com/2020/10/a-zig-zag-first-thanksgiving-card.html I think it would make a beautiful centerpiece for your Thanksgiving table as it is a great conversation piece.

This card depicts a scene from the First Thanksgiving.  An Indian boy is giving a Pilgrim girl some wampum.  A Pilgrim boy is sharing a wishbone with an Indian girl.  The dog is looking out into the distance at a wild turkey near their home by a pond.  The Mayflower ship is in the background. 

Here is a video of the Thanksgiving Slice Form Sphere Rotating

 It has the same gear mechanism as the Birthday Slice Form sphere and it rotates in the same manner.  https://papercraftetc.blogspot.com/2020/10/a-birthday-slice-form-sphere-that.html

To make this slice form, follow the directions from the Birthday Slice Form sphere as it is the same construction.

I used 65 lb cardstock to make this card. The beige metallic paper is Neenah brand Champagne Pearl 65 lb. card stock from Office Depot.  


Here is the .Studio file.

Here is the SVG.


My kitty likes the slice form Thanksgiving scene too!

I recommend reading this fascinating history of Thanksgiving.  "Little known facts about Thanksgiving and Lincoln's Proclamation." https://archive.org/stream/littleknownfacts00warr?ref=ol#mode/2up

Sunday, October 18, 2020

A Zig-Zag First Thanksgiving Card

In this time of the Coronavirus pandemic, families will not be sharing a Thanksgiving meal because of the virus.  I thought it would be nice to create a Thanksgiving card to send to the people you love.

This card depicts a scene from the First Thanksgiving.  An Indian boy is giving a Pilgrim girl some wampum.  A Pilgrim boy is sharing a wishbone with an Indian girl.  The dog is looking out into the distance at a wild turkey near their home by a pond.  The Mayflower ship is in the background.  The card is 5 inches x 5 1/2 inches.

Card laying flat.

The scenes are glued together to create the First Thanksgiving card.

The scenes are connected in a zig zag design.

The back of the card looks just as good as the front of the card. The back scene has the tab glued first and then the metallic paper is glued on top of it. The oval is centered in the back of the this scene.

I used 65 lb cardstock to make this card. The beige metallic paper is Neenah brand Champagne Pearl 65 lb. card stock from Office Depot.    

Here is the PDF.

Here is the .Studio file.

Here is the SVG.


Wishing all a Happy Thanksgiving!


Thursday, October 15, 2020

A Zig-Zag Zoo Scene Birthday Card


This Birthday card is similar to the scenes from my previous Birthday Slice Form Sphere. This card would make a nice accompaniment with the slice form. The card is 5 inches x 5 1/2 inches.

Card laying flat.

The scenes are glued together to create the Birthday card.

The scenes are connected in a zig zag design.

The back of the card looks just as good as the front of the card. The back scene has the tab glued first and then the metallic paper is glued on top of it. The oval is centered in the back of the this scene.

I used 65 lb cardstock to make this card. The white metallic paper is Neenah brand 65 lb. card stock from Office Depot.  The foil card stock for the "Happy Birthday" words is Recollections brand from Michaels.  The background is a 12 x 12 sheet of Peebles by American Crafts, Happy Hooray, Party animal.

Here is the PDF.

Here is the .Studio file.

Here is the SVG.


Tuesday, October 13, 2020

A Birthday Slice Form Sphere That Rotates with a Gear

A Birthday Slice Form Sphere that Rotates 

This Birthday Slice Form Sphere would make a beautiful birthday gift for a small child with it's zoo animal scenery inside. The gear mechanism in it's base allows the sphere to rotate.

Here is a video of the slice form sphere rotating.


I used 65 lb. Neenah metallic paper from Office Depot.  The shiny metallic paper is Recollections brand foil cardstock from Michaels.

Here is the PDF.

Here is the .Studio file.

Here is the SVG.

Glue the Happy Birthday greeting onto the corresponding slice form circle.

I like how the metallic paper sparkles and gives the sphere a pop of color.

Arrange the outer slice form circles.

Arrange the inner slice form circles.

Slide the inner and outer corresponding center slice form pieces together. Bottom is shown.

This is what the top looks like.

Add the next largest outer slice form circle.  The circles with scenery will be attached first at the top  of the circle. (When I say attached, I mean the two corresponding pieces are slid into one another.)

The bottom is then attached.

The smaller slice is attached at the top.

The small slice is attached on the bottom.  Repeat until all of the scenes are attached.

Attach the opposite direction pieces. Do not be afraid to bend the paper a little.  The slices might come out of their slits but realign them gently.

Slide the top of the slice form first and then the bottom.

If you have any difficulty, make the slice form flat.  This will align the slits.  Push it down gently.

All of the slices have been attached.

Glue the foil base into a round and set aside.

Turn the slice form upside down and slide the center notched piece onto the slice form as shown.

Slide the other center notched piece onto the slice form as shown.

Slide the other two similar squares onto the base.

Another view of the base.

Fold the foil round tabs inward and apply glue to the tabs.

Adhere the round onto the foil circle.

Slide the foil round base onto the base of the slice form.

Bend the tabs of the gear casing upwards.

Slide this gear casing on top of the foil round.

Slide the Foil gear with the X over the slice form base tabs as shown above.

Bend and glue down each of the tabs.

All the tabs have been glued down.

Glue on the center circle.

Glue the three gears together.  

Make sure that the foil is showing.

Apply glue to the gear on the slice form.

Adhere the sandwiched gears to the slice form gear.

Apply glue to each of the gear casing tabs and adhere to the other side of the gear cashing as shown above.

Completed gear case base.

The gear casing base might inhibit the movement of the gear. I inserted tweezers to enlarge the area once the glue had dried.

Completed Birthday Slice Form Sphere

Monday, October 12, 2020

A STEM Project: Adding Scenery to a Slice Form Sphere

A Slice Form Birthday Themed Sphere with a Base that Folds for Mailing

A Slice Form Birthday Themed Sphere with a Base that does not Fold

In the previous blog post https://papercraftetc.blogspot.com/2020/10/a-stem-project-how-to-make-slice-form.html, I described how to make a slice form sphere.  In this post, I will explain how to add scenery to this sphere and how to display the sphere.

Here is the .Studio file which reflects the 4 inch snow globe that was made in the previous posting.

I used 65 lb. Neenah metallic card stock from Office Depot to make this slice form.

https://drive.google.com/file/d/1l6ekHJjy63DM-Bpe_JUEY1HtRslktYE1/view?usp=sharing

Making a Birthday Themed Slice Form Sphere


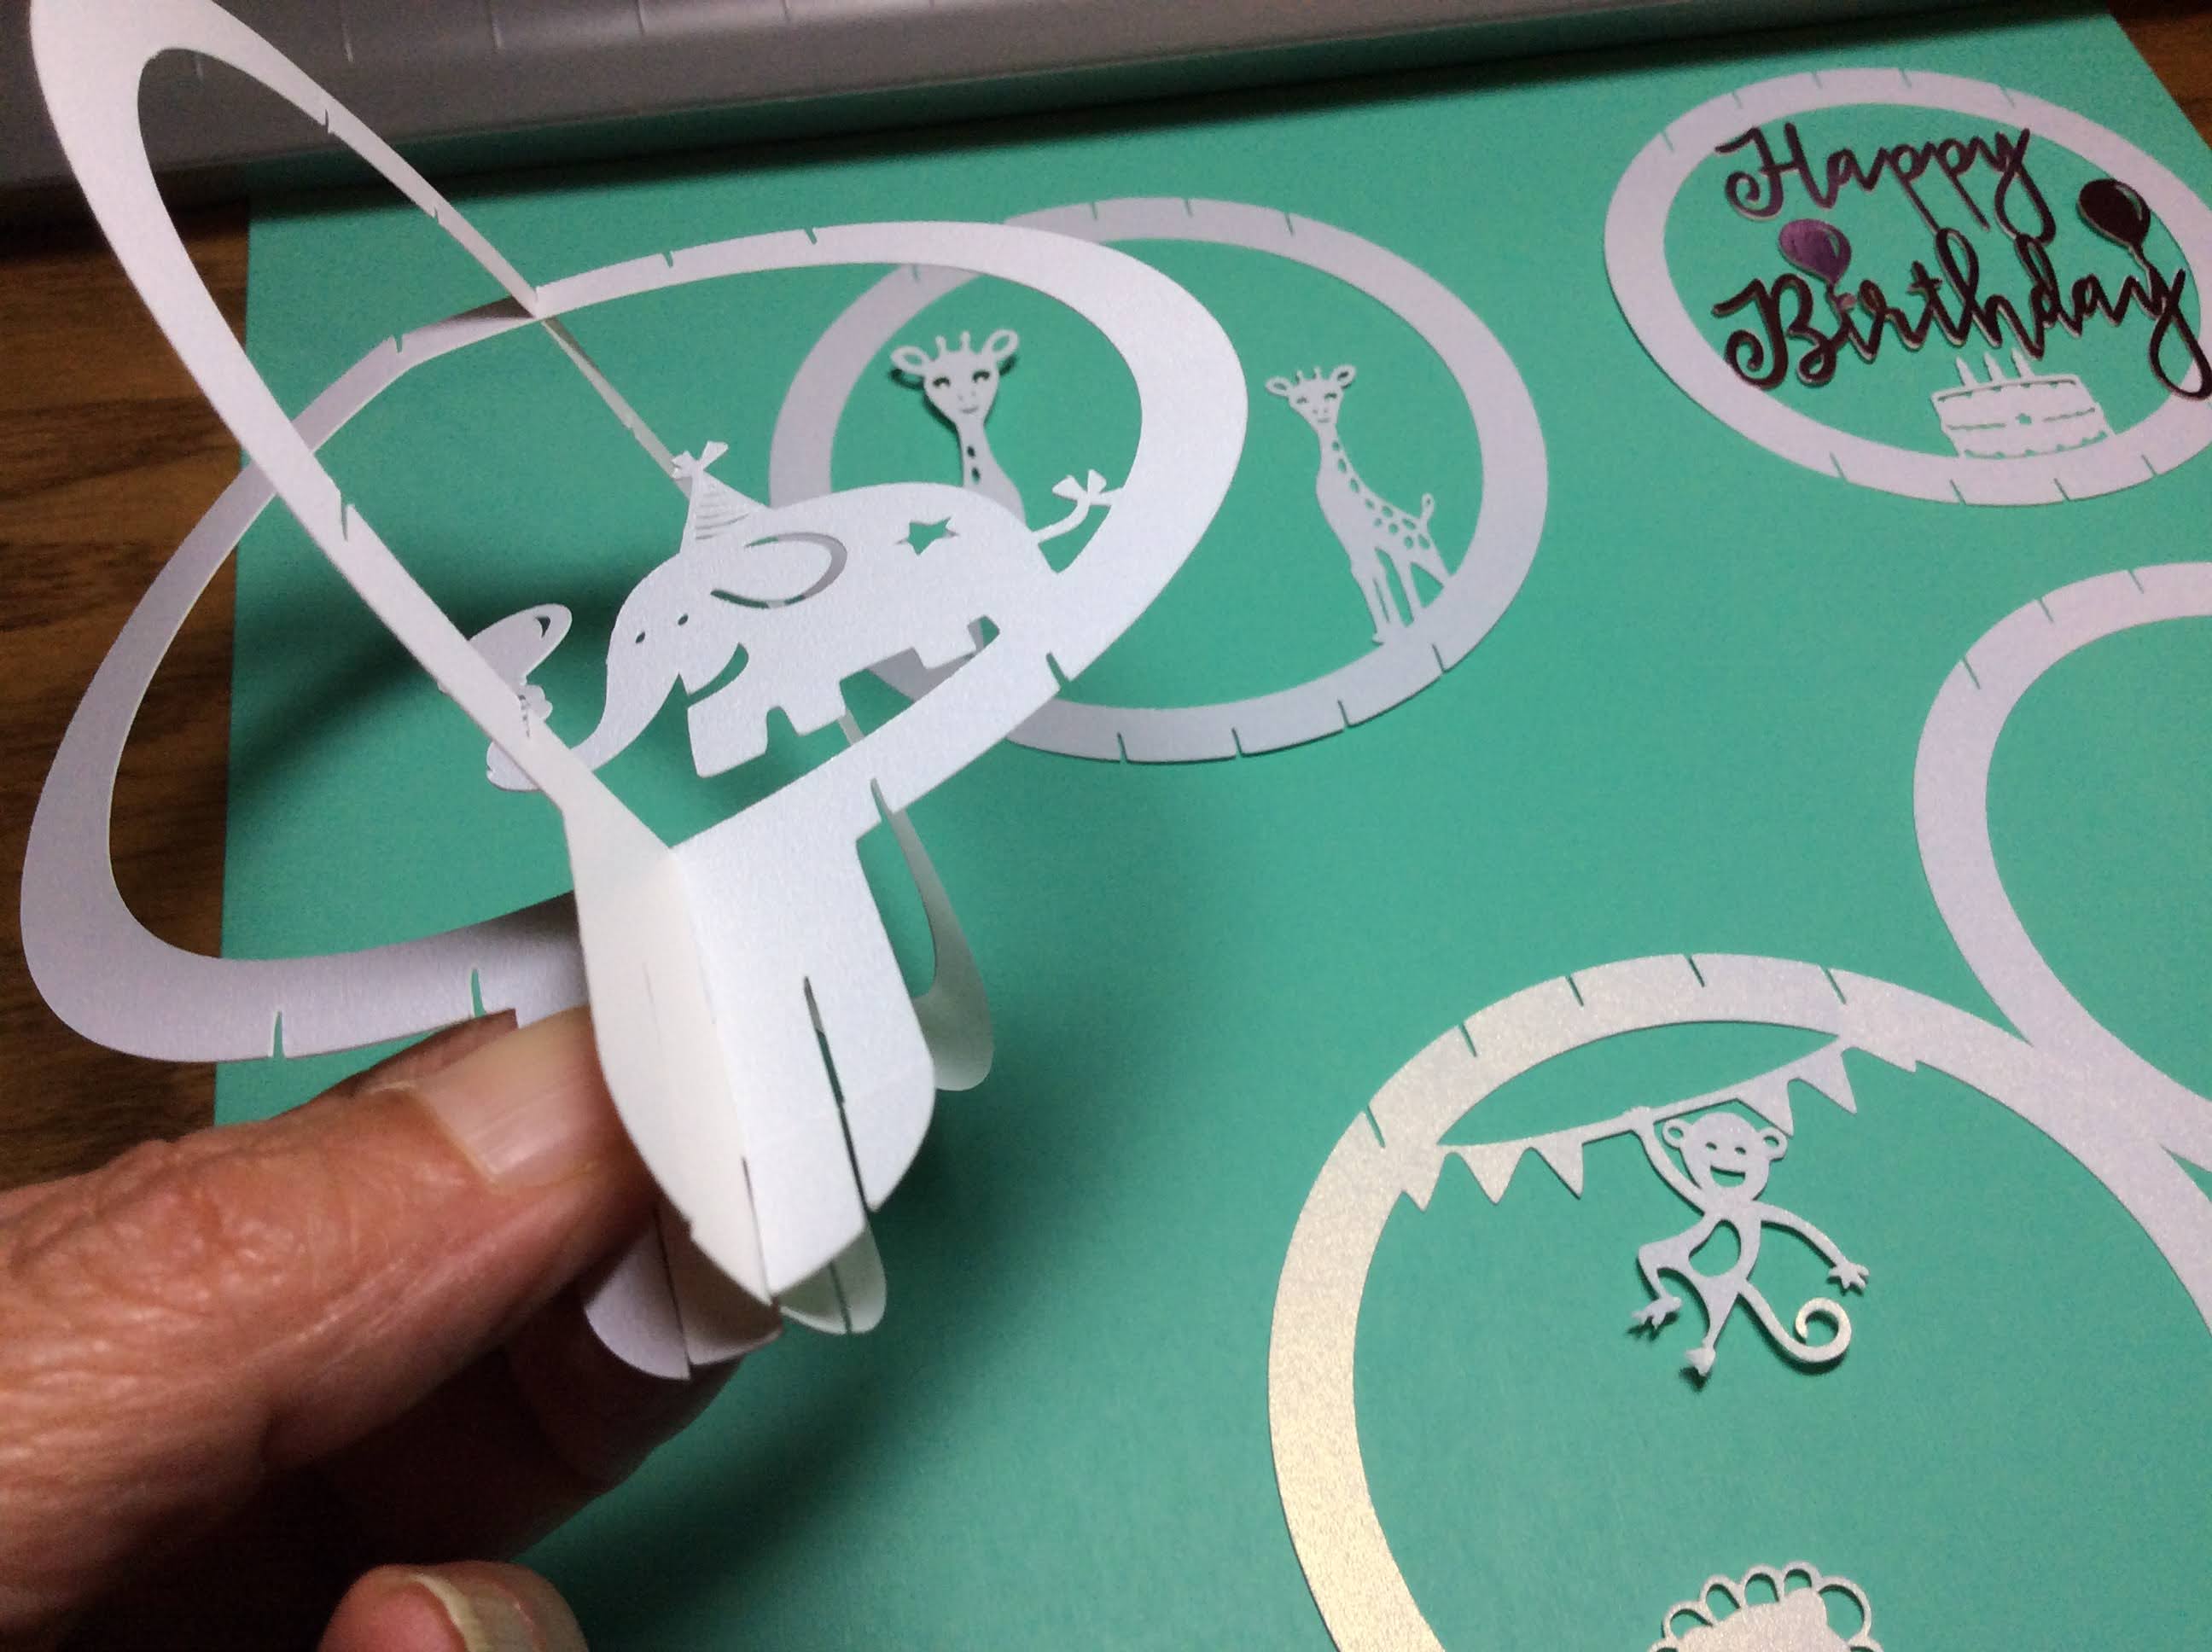
The outer slice of the slice form sphere has a plain circle in the middle.  This area will be used to display the diorama with five scenes, one on each inner circle.  Notice that there are only three outer slices above. The 3.872 inch and 3.464 inch slice will be duplicated on either side of the center slice.


Choose some images to put in your diorama.  Make sure the images do not have any broken paths.  You can determine this by double clicking the image and looking for any red dots.  If there are any red dots, make sure to close them by moving the one red dot to the other red dot.


Arrange the circles, one 4 inch outer circle, two 3.872 inch outer circle and two 3.464 inch outer circle. Move the image that you would like to see on each circle. Group the image to the circle  

Move the circle to the center of the page and imagine what the slice form sphere will look like. The  circle with the banner will not center correctly.  Center the circle first and  then move the banner to the circle. If you are happy with the positioning. Attach the shape to the circle with the following instructions. 

The Sophia name was made with the Silhouette software using the font Lucida Grande, 25.72 pt - character spacing - 135 %.  The Silhouette text to path grab handle put the letters on the edge of the circle.
The letters were attached using the Modify function. The Modify function is dependent on images being in the foreground and background. To determine the location of the image you can use a fill pattern and move the one image to the other image to determine if you need to move it forward or backward.

Notice that the red balloons are in front of the circle.  In order to use the Subtract function in the Modify window, the image that you are subtracting must be in the front.  The procedure to attach an image to the circle is as follows:

1. Center the outer slice form circle to the Center of the Page

2.  Ungroup the circle.

3. Move the circle with the slits off to the side, while keeping the inner circle untouched.

4.  Move the image that you want onto the circle.  Make sure that the edge of the image overlaps the circle.

5.  Select both the circle and the image to highlight them. In the Modify window, Subtract the image.

6. Select the circle with the slits and center it on the page.

7. Select the entire image and Object Group it.
Completed image.  Repeat for all of the other slice form circles.

Making a Foldable Base Suitable for Mailing

Arrange the base pieces

Slid the two largest pieces into one another and place them face down.  It s easier to do the bottom first.

Add the next largest piece to either side.

Add the smallest piece to either side and flip the entire base over.

Add the largest piece on either side.  Repeat for the smallest piece.

Completed base that can fold flat.

Slice Form Sphere With Foldable Base


Making a Base That Does Not Fold

Cut out the base pieces

Glue the Strip together. Fold the tabs and apply glue to each triangular tab.

Insert the tabs into the circular base and adhere the tabs.

Slice Form Sphere With Non-Foldable Base