Monday, November 13, 2023

One Tough Puzzle Reimagined

One Tough Puzzle Reimagined 
The above placement of the pieces is the solution to the puzzle

My latest obsession is jigsaw puzzles.  I learned that there are people who can put a 500 piece puzzle together in about 30 minutes. I wondered how long it would take for me to do this task. I purchased a Ravensberger puzzle called Circle of Colors: Donuts.  It took me three hours to complete this puzzle. Here is a link to the puzzle https://www.ravensburger.us/products/jigsaw-puzzles/adult-puzzles/circle-of-colors-donuts-17346/index.html

While it was a lot of fun to put the puzzle together, I don't think I am close to becoming a puzzle champion. However, I can make a puzzle easily using my Silhouette software.  In this blog posting, I have reimagined a puzzle called "One Tough Puzzle".  The puzzle is no longer produced but you can find a copy on Ebay. The puzzle is just nine pieces that can be assembled together but there is only one way that the puzzle will fit together correctly. There are over 300,000 wrong ways to put this puzzle together but just one right way! My puzzle has the same results.

Here is the PDF.  I used 65 lb. cardstock which has a different color on its opposite side.  This is necessary to solve the puzzle.

Here is the .Studio file.

Here is the SVG. 

I have also printed this puzzle with my 3D printer.  Here is its link. https://www.tinkercad.com/things/lHqL7chFYNp-tough-puzzle-2


Saturday, November 11, 2023

A STEM Project: Converting a Silhouette Studio File Into a 3D Print File In Tinkercad and Making a Puzzle to Learn About 3D Printing Tolerances of the Ender 3 V3 SE


I was amazed at how easy it was to convert any Silhouette Studio file into a file to be printed with my Ender 3 V3 SE, 3D printer in Tinkercad. TinkerCad is a free 3D modeling program, http://tinkercad.com.

 Using the Silhouette Studio Business Edition (you need to have this upgrade), save your file as an SVG.  The project designed in the Silhouette software should not be bigger than your 3D printer space. For my Ender 3 printer, the size is 8.6 x 8.6 x 9.8 inches. While you can resize it later, it is easier to stay within your limitations of the size of your 3D printer. As an aside, if it is a large project, don't cram the entire project onto one Silhouette workspace with little space between pieces.  Break up the project into different Silhouette Studio files. Also, do not save any work outside of the viewable area in Silhouette as everything is copied to the SVG file. 

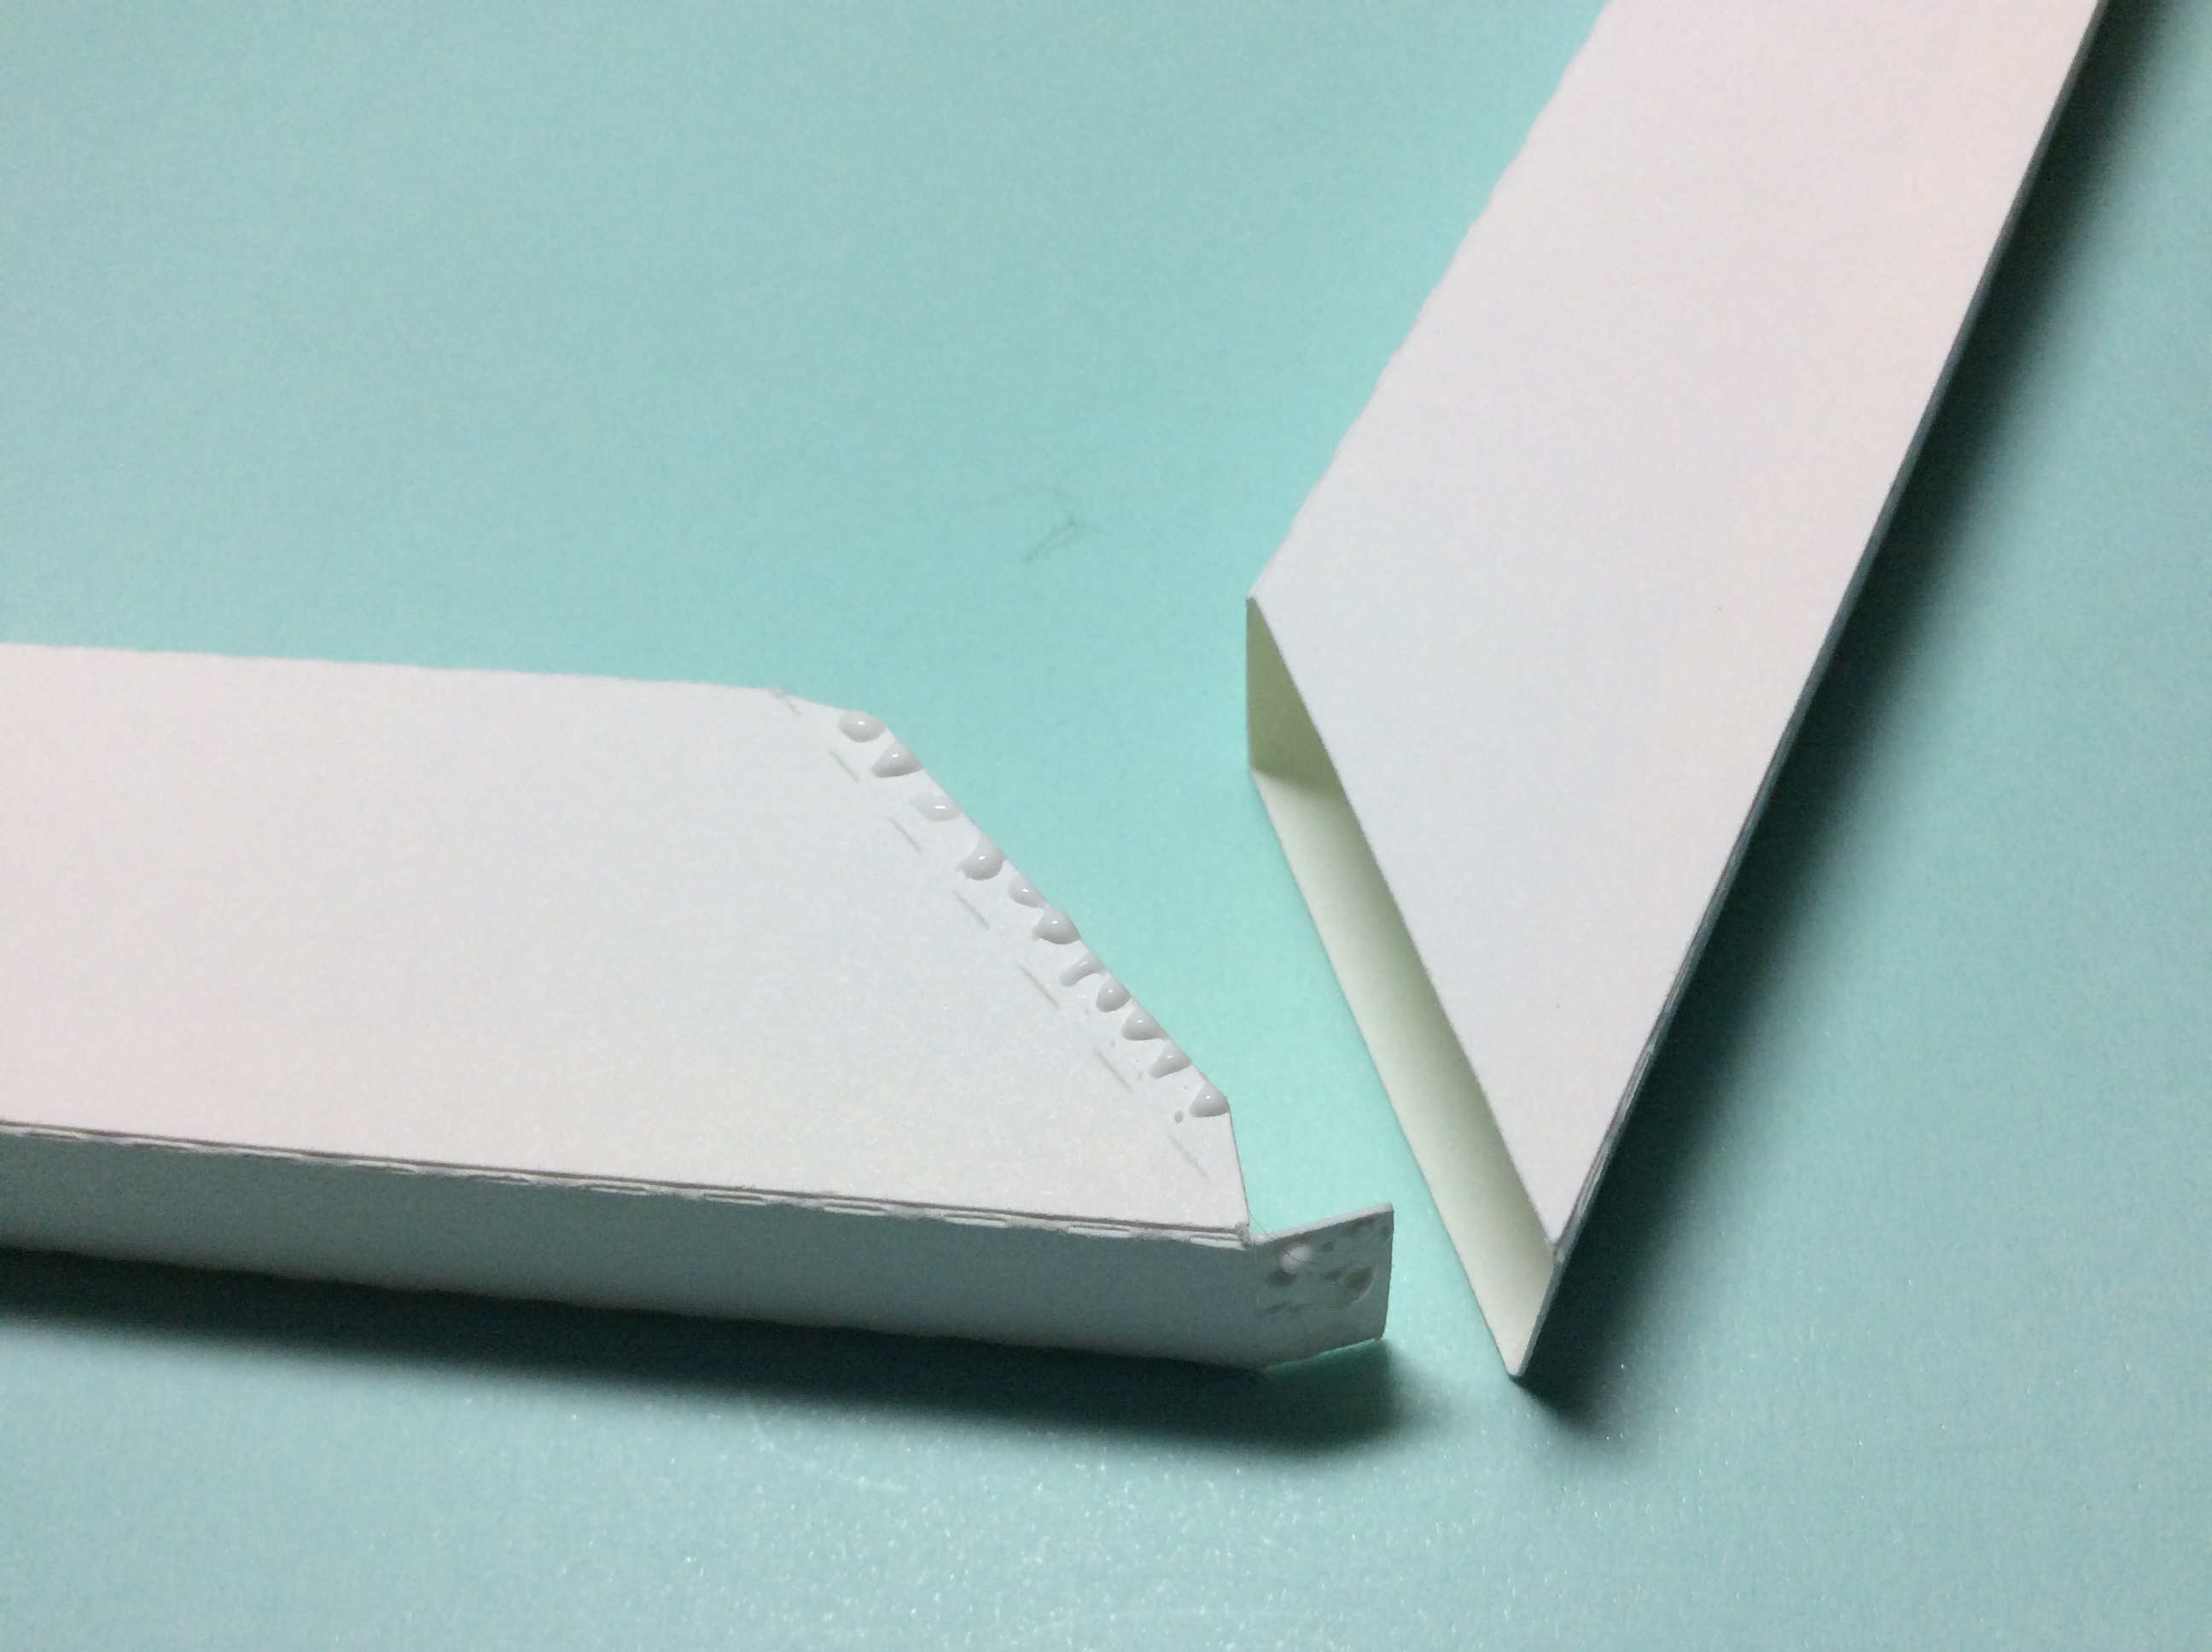
At the end of this tutorial about Tinkercad, I will explain how I created the print tolerance puzzle using the Silhouette software because I wanted to know how close puzzle pieces had to be in order to slide into one another easily after being 3D printed. As a conclusion, I determined that I like .014 inch tolerance for my Ender 3 printer.

In TinkerCad, create an account and then Create a 3D Design

In the upper left portion of the screen, is the file name "Daring Krunk".  A unique file name is automatically created each time a new project is created. Type over the file name and change it to your file name.  In the upper right portion of the screen, there is an import command. Click the import command.

Choose your Silhouette SVG file.

Choose the Import command.

The SVG file is then placed on the workplane in Tinkercad.  Click on the image of the design.  The result is shown above.  There is a blue outline around the image.  To the right of this image is the height the SVG when imported, 10 mm.  The height can be changed by either using the slider or hovering over the  height of 10 and changing its value.

I chose 2.5 mm.  You will notice that the height of the design was recalculated in Tinkercad when the height was changed. The design can now be exported to your 3D printer by selecting Export in the upper right hand corner.

Click on .STL to save the file. The file is now ready to be used in your 3D printing software. 

 (In my Creality Print software for my Ender 3 printer, I had to Open the file and Slice it.  Once sliced, I exported the file and printed my design.)

Creating the print tolerance puzzle using the Silhouette software


Using the puzzle feature, I created a 2 row x 2 column puzzle.

I broke the path of each piece in point editing mode.

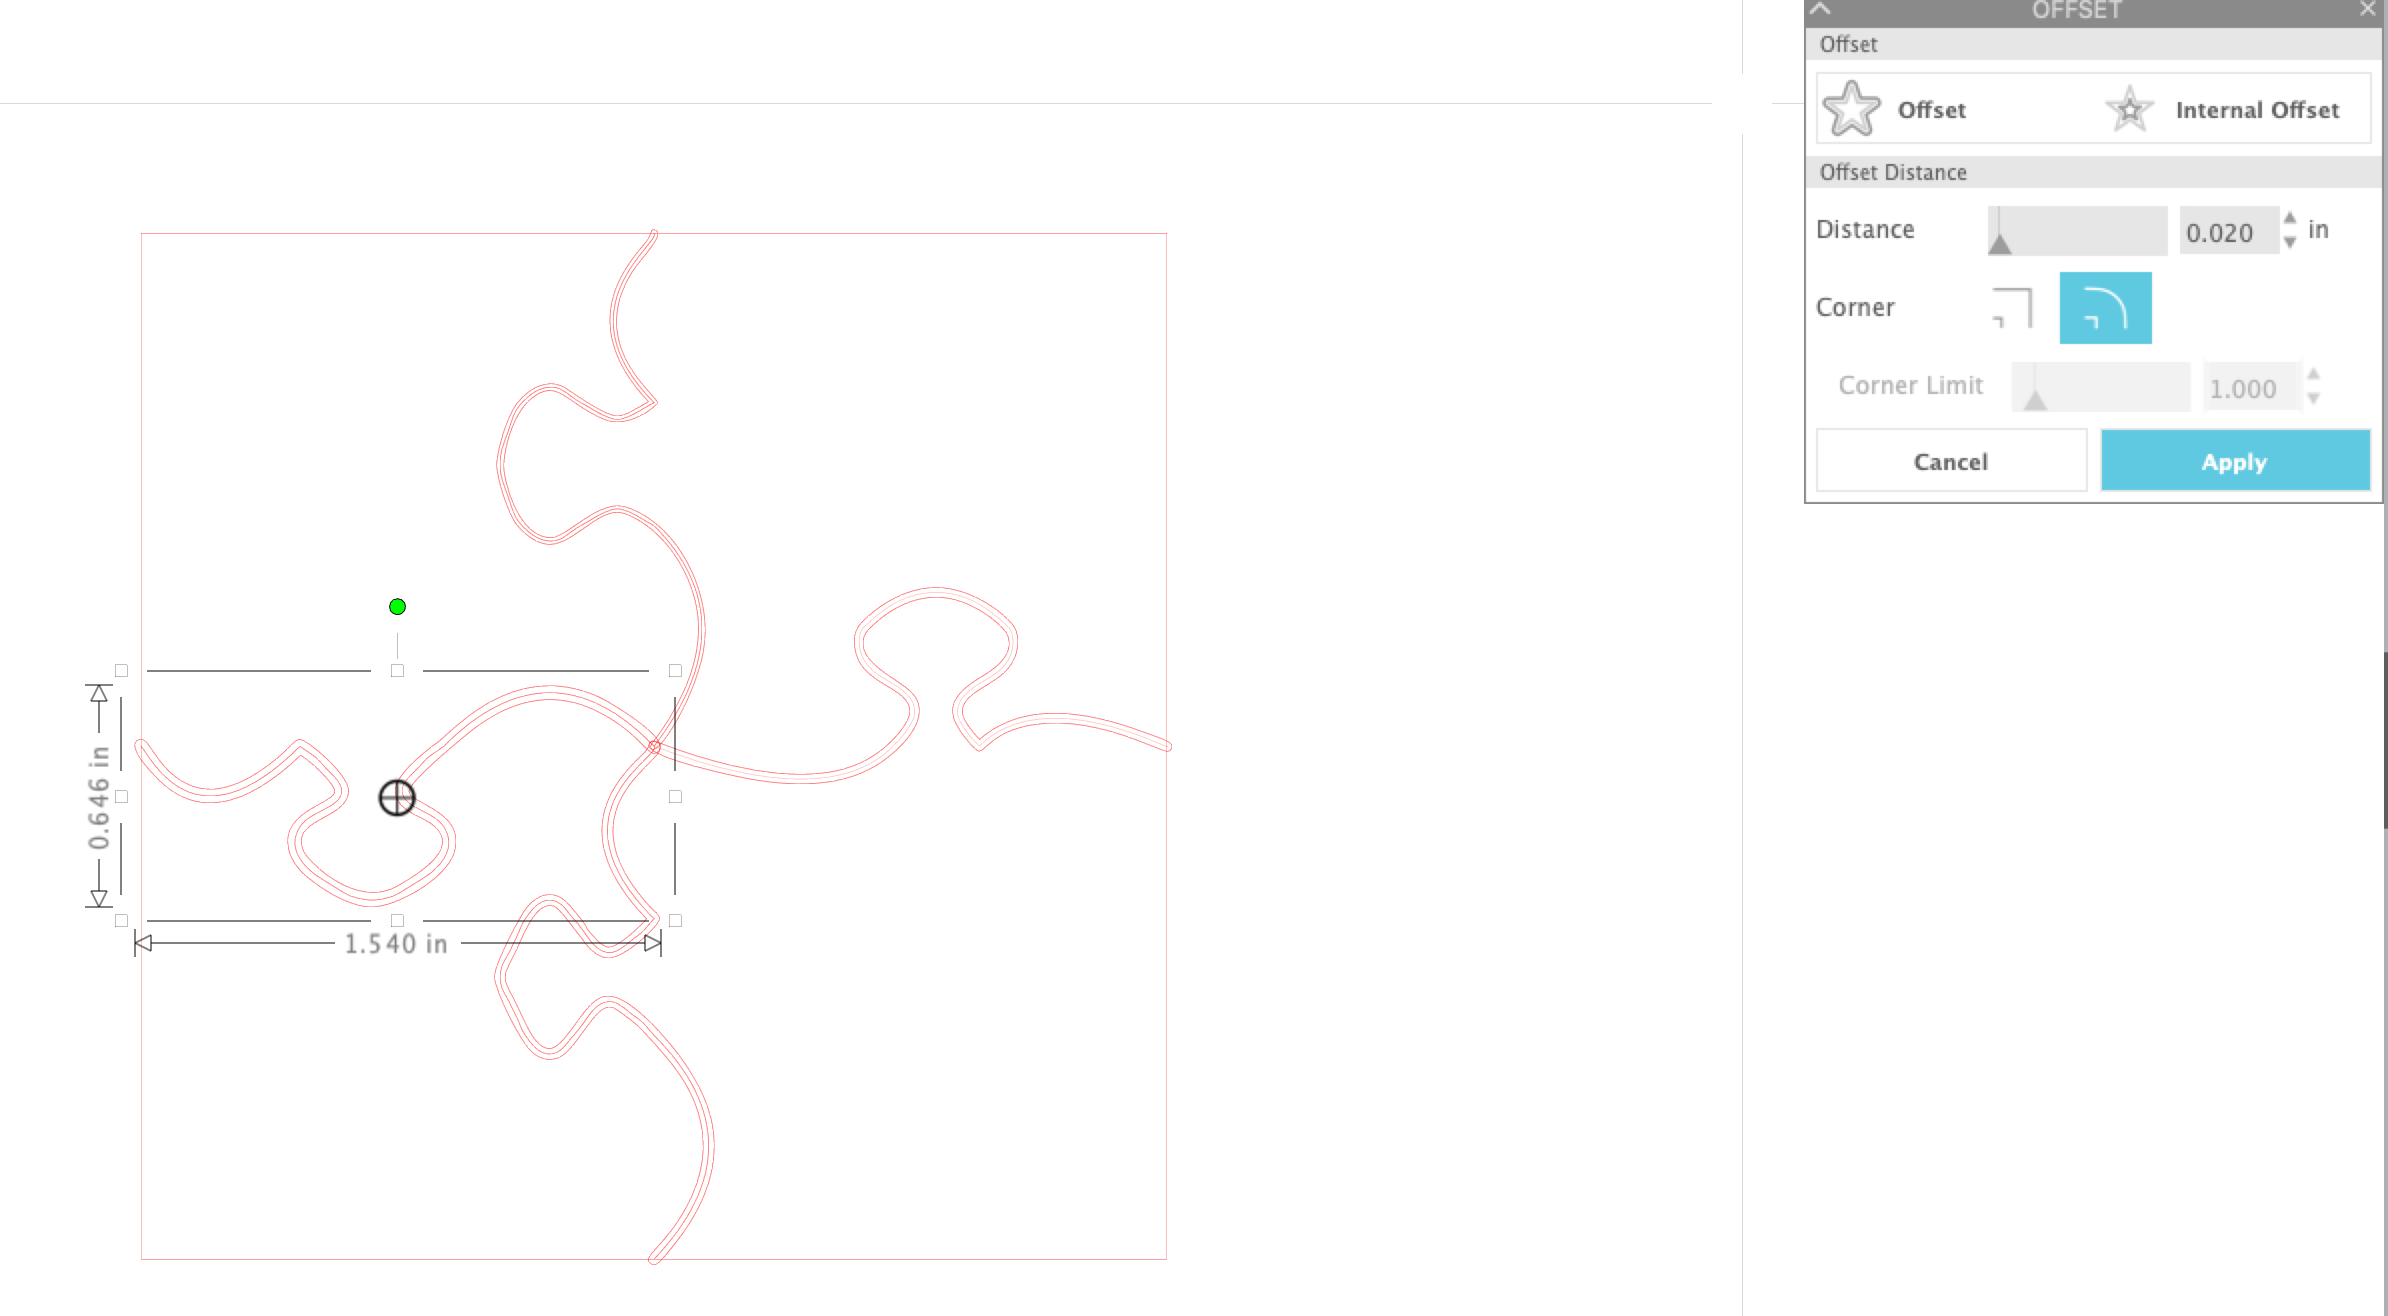
In the Offset window, I offset each internal wavy line with a different value, .01, .014, .016 and .02 inches. Delete the original curvy line as it is no longer needed.

Send the frame of the puzzle to the back ( highlighted in blue).


In the Modify window, subtract both images.
Please note, I changed the border to a curved corner box before I modified it (not shown).

The Silhouette created the above print tolerance puzzle. 


Saturday, November 4, 2023

A STEM Project: Proving the Pythagorean Theorem Using an Empirical Model


The sum of the areas of the two squares on the legs (and b) equals the area of the square on the hypotenuse (c).

The Pythagorean Theorem explains the relationship between the three sides of a right angle triangle. It states, "the area of the square whose side is the hypotenuse is equal to the sum of the areas of the squares on the other two sides." The Pythagorean theorem can be written mathematically as an equation, a2 + b2 = c2 , where a and are the legs and is the length of the hypotenuse. 

Here is a video of the model.

In this blog posting, I prove the 
Pythagorean Theorem by filling the largest square with yellow split peas, (you can use rice or beans).  Moving the model to empty the large square into the two smaller squares proves that the quantity of the large square is equal to the quantity of the two smaller squares.  There are small gaps around the center triangle which allows the yellow peas to flow between the squares.

Here is the PDF.  I used 65 lb. cardstock and an acrylic sheet.

Here is the .Studio file.

Here is the SVG.  The file extends beyond the scope of the viewing field.  Zoom out to see the entire file.


Here are directions from a previous blog posting that show how to make the frame sides.


Crease and apply glue to the tab as shown above for the side piece with the wing tabs. Flatten the piece to adhere the glue. Form the piece into a block.  

Crease the sides of the piece without the wing tabs. Apply glue to the tab as before. Adhere the glue by pressing down on the side piece to flatten it.  Once the glue is adhered, form the piece into a block. 

Apply glue to the wing tabs.   Insert the tabs into the side without the winged tabs.

Make the Pythagorean Theorem Model


The frame sides are glued together in the following sequence from 1-9 as shown above.

Glue the squares and triangle onto the backing.  Make a 3 dimensional triangle and glue the sides down to the center of the base triangle.

Glue the sides of the model to its base

Glue the second triangle to the center of the 3D triangle. Attach the acetate to top and tape the sides. Remove the acetate.

Fill the large square with yellow split peas and reattach the acetate.

The yellow split peas can move from square to square with the gaps surrounding the triangle.