In my last blog posting, https://papercraftetc.blogspot.com/2022/10/coding-generalized-rubber-band-pop-up.html I created a generalized form with variable dimensions to create rubber band pop-ups. The rubber band expands when the base is pressed down at the seam that is opposite to the internal diagonal. When the side pressure is released, the expansion tension on the rubber band is released and the rubber band returns to its natural state This phenomenom allows the slice form to deploy and become three dimensional.
In this blog posting, I have created a house wrap to go around this rubber band pop-up mechanism. I coded the house form in TurtleStitch using a lot of math, trigonometry and geometry. For example, I used the Pythagorean theorem to code the peak of the house and the roof beam. I used Trigonometry and Geometry to code the arched windows.
I only recommend changing the Height of Peak for your first try at this code, if desired. Familiarize yourself with the workings of the code before modifying it. Run the code in TurtleStitch.
2). Three forms are created, a roof, a house and a roof beam. In the TurtleStitch drop down File menu, Export as DXF for a paper cutting machine. Export the three forms.
3). Using your paper cutting machine, cut out the three forms.
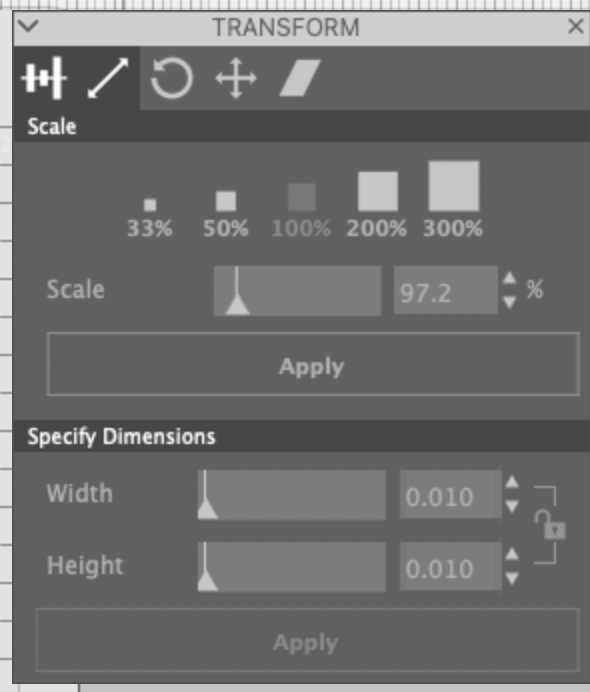
If a Silhouette cutting machine is being used, I have observed that the dimensions are not preserved. It must be resized in the Silhouette software before cutting. I have included a one inch square for reference. Once in the Silhouette software, release the compound path and observe the size of the one inch square. Divide 1.00 inch by this observed value and then multiply by 100 to get the percentage that the figures needs to be changed. In the Silhouette's Transform Panel, resize the entire image using the scale window.
The image selected will be transformed 97.2% when the Apply button is pressed.
Make the House Wrap For The Rubber Band Pop-Up Mechanism
There are three forms that make up the house wrap.
Crease the roof beam as shown above. Apply glue to one side of the rectangular area. Adhere the rectangles together.
Apply glue to both ends of the roof beam triangles.
Adhere the triangles to the peak of the house as shown above.
Apply glue to the top of the roof beam. Crease the roof and apply glue to the crease as shown above.
Adhere and center the roof to the roof beam.
Collapse the house by pressing down on the house seam that is across from the diagonal to ensure that the roof has adhered correctly.
Completed Rubber Band Pop-Up House
This rubber band pop-up is an engineering marvel. It can fit into an A4 envelope using the dimensions that I have used coding in TurtleStitch.. An A4 envelope is 4 1/4 in. x 6 1/4 in. The recipient of this house will be astonished when the flat house opens into this amazing three dimensional marvel.
A Generalized Rubber Band Pop-Up Mechanism Coded In TurtleStitch
Here is a video of the Rubber Band Pop-Up Mechanism in action.
In my last blog posting, https://papercraftetc.blogspot.com/2022/10/a-rubber-band-pop-up-haunted-house-for.html, I created a pop-up haunted house for Halloween. I belong to a group of educators who saw my pop-up and challenged me to recreate this pop-up mechanism in TurtleStitch. I knew it was an easy endeavor with just some basic math calculations using the Pythagorean theorem. In coding the mechanism, I decided to create a generalized form with variable dimensions so that I could use the code to design future rubber band pop-ups.
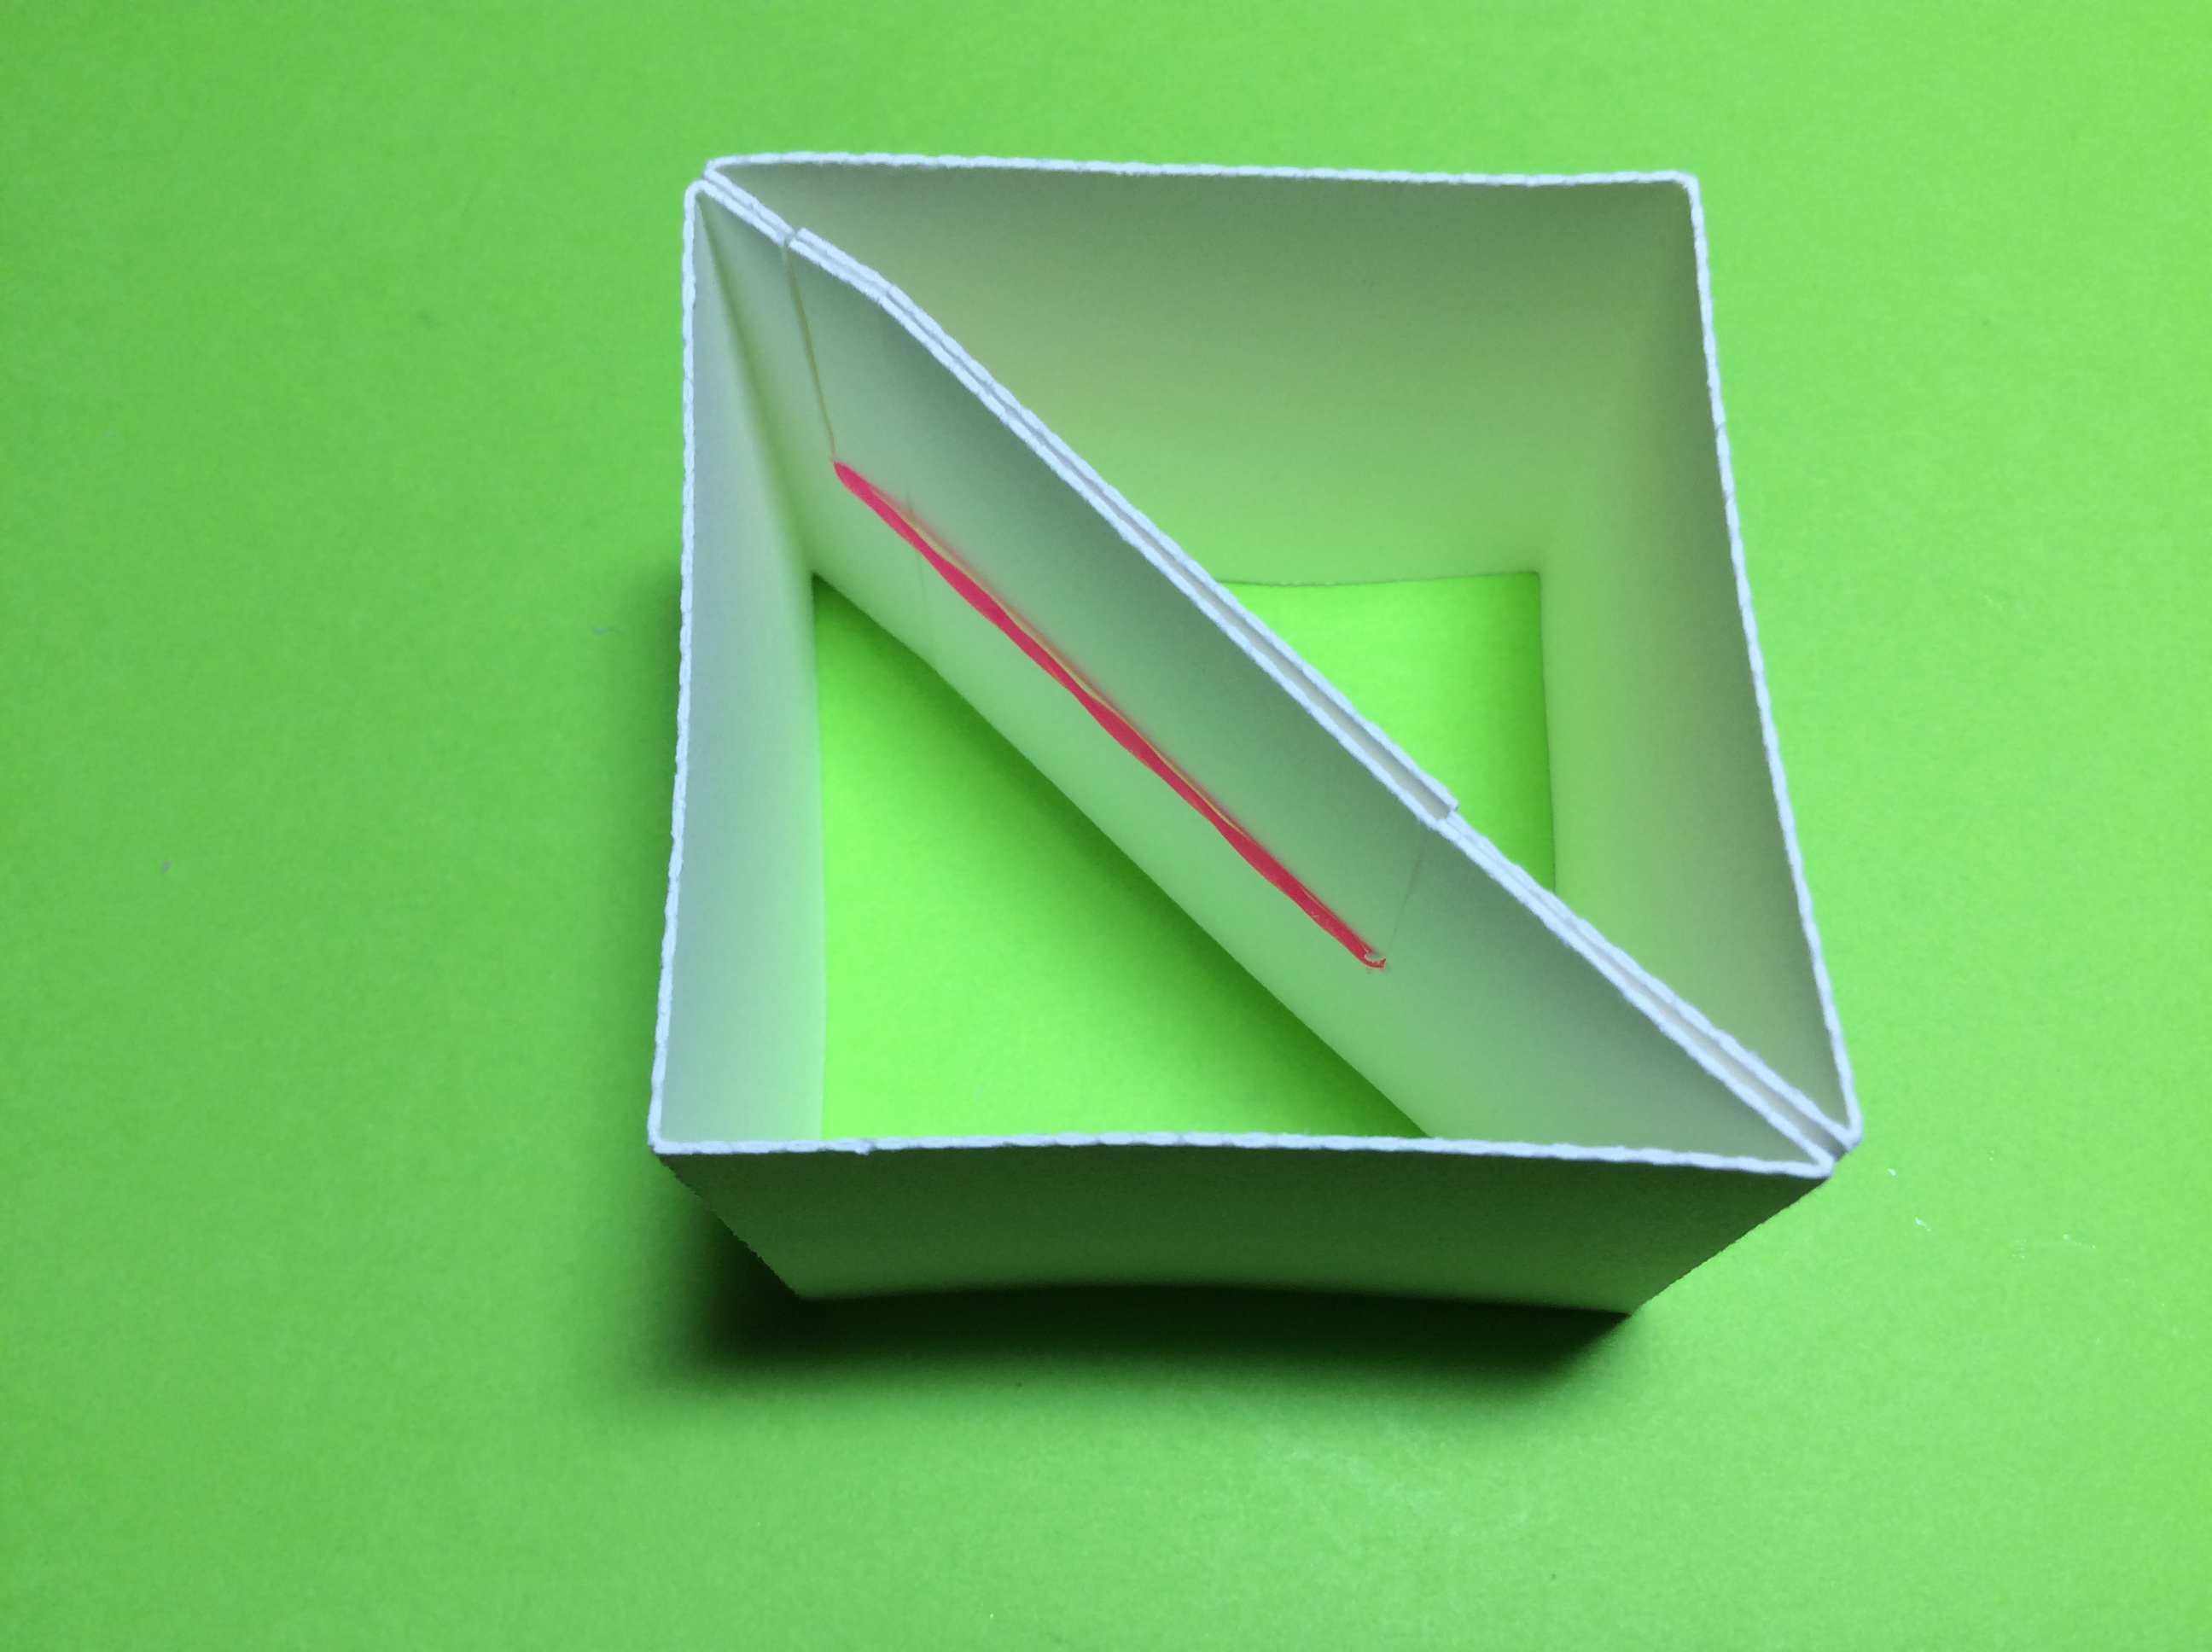
The rubber band pop-up mechanism is a cube with a diagonal in the middle. The diagonal is separated by a rubber band. When the base is pressed inward at the corners that are opposite to the internal diagonal, the mechanism becomes flat because a rubber band expands to fill the void in the diagonal. When the corner pressure is released, the expansion tension on the rubber band is released and the rubber band contracts to its natural state This phenomenon allows the form to deploy and become three dimensional.
The strip is divided into four sections. The first section represents the diagonal part #1, the second and third sections are the sides of the pop-up and the fourth section is diagonal part #2. The diagonal needs to divided into two parts for the rubber band to be expanded.The first part is generalized at 0.5 inches long. The second part is the remainder value of the diagonal.
Using the Pythagorean theorem, a^2 + b^2 = c^2 , the diagonal of the square is calculated. The variable "Length" in my code is the side of the cube.
To Create a Rubber Band Pop-up Mechanism In TurtleStitch:
2). A rectanglar strip is created. In the TurtleStitch drop down File menu, Export as DXF for a paper cutting machine. Export this rectanglar strip.
3). Using your paper cutting machine, cut out two copies of these rectangle strips from 65 lb. card stock. The dotted lines are fold lines. Please follow the directions on when to fold the lines because the paper tends to warp and create uneven sides if the sides are folded too early. The lines with the circles on either end are slits where the rubber band is inserted. The rubber band that I used is a common Rainbow Loom rubber band.
If a Silhouette cutting machine is being used, I have observed that the dimensions are not preserved. It must be resized in the Silhouette software before cutting. I have included a one inch square for reference. Once in the Silhouette software, release the compound path and observe the size of the one inch square. Divide 1.00 inch by this observed value and then multiply by 100 to get the percentage that the figures needs to be changed. In the Silhouette's Transform Panel, resize the entire image using the scale window.
The image selected will be transformed 97.2% when the Apply button is pressed. Look at the square's size. It should now measure one inch. The square is no longer needed and can be deleted.
Make the Pop-Up Rubber Band Base
Fold the rectangular strip in half lengthwise. Glue this lengthwise side together (I use Aleene's Tacky Glue) Repeat for the second rectangular strip.
Let the glue dry completely before proceeding because you want the sides to be rigid.
Crease the vertical lines of one of the strips so that a triangle is formed. (not shown as the triangle pulls apart when tension is released) The two sides with the slits come together to form the diagonal. Repeat for the second strip (it will be opposite of the first strip) so that a square is formed with a diagonal in the middle of the square. Make sure the slits run in the same direction.
Glue the diagonal part #1 (small side) together with the corresponding diagonal part #1. together. Make sure that the slits are going in the same direction.
Slide the one inch rubber band into the slit of diagonal #1 and align the rubber band with the round hole in the base of the slit. Fold the base so that a square is made with a diagonal in the middle. The gap in the diagonal will be closed by the rubber band.
Apply a Glue Dots to the diagonal part #2 as shown above. Make sure the slit is not covered by the Glue Dot. Bring the two diagonal #2's together. Glue can be used but it needs to be dried completely before inserting the rubber band into the second slit. I like Glue Dots because I do not feel like waiting for the glue to dry. Insert the rubber band into the second slit.
The Rubber Band Pop-Up Mechanism is now ready to be used.
This rubber band pop-up card is an engineering marvel. It combines a rubber band mechanism with a house which pops-up when removed from an A4 envelope. An A4 envelope is 4 1/4 in. x 6 1/4 in. The recipient of this card will be astonished when the flat card opens into this amazing three dimensional haunted house for Halloween.
The rubber band expands when the base is pressed down at the seam that is opposite to the internal diagonal. When the side pressure is released, the expansion tension on the rubber band is released and the rubber band returns to its natural state This phenomenon allows the form to deploy and become three dimensional.
Here is the PDF. I used 65 lb. cardstock. A one inch rubber band is required for the pop-up base. (The rubber band is similar to the rubber band used on a Rainbow Loom.)
There are two sides to the rubber band base. Each side is folded over to create a two-ply base. Crease the paper as shown above.
Glue the folded sides together.
Glue the tabs together. Make sure that the slits are going in the same direction.
Slide the one inch rubber band into the slit and align the rubber band with the round hole in the base of the slit.
Fold the base so that a square is made with a diagonal in the middle. Slide the rubber band into the slit and align the rubber band as before. There is a gap in the diagonal.
Apply a Glue Dot into this gap.
Rubber Band Base
The base can be flattened when the corners without the diagonal are pressed inward.
Make the Haunted House
Wrap and glue the velum to the pop-up base as shown above. Do not use a lot of glue. I glued just the base of the vellum.
Glue the ghost in the doorway. Wrap and glue the house around the vellum. Again, do not use a lot of glue. I applied glue on the bottom and top of the velum and then adhered to the house.
Apply glue on the roof beam and fold in half.
Apply glue to the outer triangle that were formed.
Attach the triangles to the peak of the roof line on both sides. Allow the glue to dry before proceeding to attach the roof.
Glue on the roof tiles to the roof.
Apply glue to the roof line in the two locations shown above. Attach the roof.
Make the trees by creasing the dotted lines into a beam. Glue on the embellishments to the house as desired.
Hope you enjoy making this Haunted House as much as I did!