Saturday, January 22, 2022

A STEM Project: A Slice Form Flower Vase With TurtleStitch(SNAP!) Coded Valentine Roses

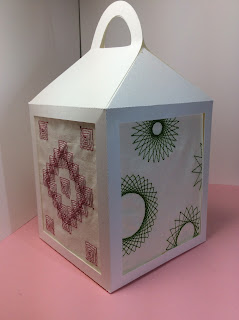
A Slice Form Flower Vase With Valentine Roses 

 (I have included all of the cut files. No coding is necessary.  I would like the users of my blog to be inspired by the Turtlestitch coding.)

The paper roses are spirals that are rolled with tweezers and then glued to a base. The roses and vase are about seven inch tall.

Here is the PDF.  I used 65 lb. cardstock.

Here is the .Studio file.

Here is the SVG.

The roses in this design were coded in TurtleStitch which is based on the SNAP! programming language. TurtleStitch is a program which can generate code for an embroidery machine. It can also create these same designs as a line drawing for the Silhouette. Here is my code on the TurtleStitch website. https://www.turtlestitch.org/run#cloud:Username=Elaine&ProjectName=Rolled%20Paper%20Flowers%20w%2fLeaves 

Transferring the TurtleStitch designs to the Silhouette Software

Export the file from TurtleStitch as an SVG and open it in the Silhouette Studio program.  "Ungroup" the images under the "Object" menu.

"Offset" each image separately. The "Offset" was .05 inches for the circular spiral.

"Ungroup" the image from the "Object" menu.

Pulling the images apart resulted in the above images. The image on the left of this photo is the rolled flower piece. The other two images are not needed and can be deleted.  Resize the circular spiral to your personal preference.

For the triangular spiral and the leaves, the Silhouette software seems to have too many points for these designs and the images gets distorted when it is "Offset". To rectify this problem, "Simplify" the image in "Point Editing" mode and then "Offset" the image. The triangular spiral is offset at .1 inches and the leaves by .09 inches.  


Making the Valentine Roses and Vase

Use tweezers to roll the rose.  

Start at the widest end and roll inward.

Remove the tweezer.  The rose will unroll slightly but this is ok.

Here are three roses that have been rolled and then released from the tweezers (not glued yet).  The two roses on the left are the circular spiral and the one on the right is the triangular spiral. I made three sizes of the sepal (green flower base) so that you can accommodate any size rose depending on how tightly the rose was wound.

Apply glue to the circular base. Notice that I used a lot of glue.  You can use a hot glue gun instead of glue.  If you use regular glue,  you will have to wait for the glue to dry.

Glue on the correct size sepal which is the starlike part underneath the flower. Repeat for all of the roses.  It is nice to make a variety of flower sizes for interest in your flower arrangement.

Score the center of each leaf to add a three dimensional effect to the leaves.   Glue on the leaves to the slice form vase piece.  There are two sizes of leaves for variety.

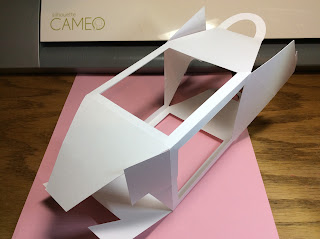
Two slice form vase pieces are glued together to provide a sturdier structure. Apply glue to the slice form vase piece with the leaves.  Do not glue the top half of the buds as this piece needs to be splayed apart.

Splay apart the buds. Glue on the heart embellishment on top of the heart design on either side of this slice.

Apply glue to the bud.

Attach the rose.  Repeat for the other rose.

The rose slice is then slid into the circle pieces. Repeat for all of the other rose slices.

The roses are a beautiful gift for Valentine's Day.

Thursday, January 20, 2022

A STEM Project: A Paper Lantern Box to Display Turtlestitch Designs

I made many interesting designs in Turtlestitch which I embroidered using my Brother PE 800 embroidery machine. I wanted to display these fabulous designs so I created this paper lantern. The designs can be illuminated using a Dollar Tree tea light.

For my paper crafting friends, TurtleStitch is based on Snap!, a block based programming language. Please check out TurtleStitch, https://www.turtlestitch.org. to learn to code using this powerful "drag and drop blocks" programming language to make designs for an embroidery machine or an electronic paper cutter like the Silhouette or Cricut machine as the designs can be exported as an SVG. After opening the designs in the Silhouette software (Designer Edition or above is required), the images can be sketched on Vellum paper using a Silhouette sketch pen or Foil Quilled.

A Paper Lantern Box to Display Turtlestitch Designs

The design on the left is an example of a spiral pattern. The code can be found on the Turtlestitch website at https://www.turtlestitch.org/users/Elaine/projects/Spiral%20Square%20Block
The design on the right is an example of a star pattern whereby the turtle is rotated in a circular fashion with varying degrees. It can be found on the Turtlestitch website at 


Here is the PDF file.  I used 65 lb. cardstock. This design can be resized if you need to make a smaller or larger lantern.

Here is the .Studio file.

Here is the SVG.

To assemble the lantern.  Glue the two side tabs together.

Make the bottom of the box by inserting the flaps as shown above. The C shaped flap is on the left in the photo above.

Complete the bottom by sliding the remaining flap into the side of the other flap.

Make the frames. Using the template as a guide, place the embroidery underneath the template.  Adjust the template so that the design is centered.   Trace along the outer edge of the template with a pencil and cut out the design using scissors.

 Glue a frame on both sides of this design. 

 Glue this frame to the interior of the lantern. Repeat for the other frames.

Slide the inner tabs together to close the interior box.  I used a Glue Dot to close the top flap.

Completed Lantern

The design on the left is an example of recursion whereby the same code is repeated numerous times.  It can be found on the Turtlestitch website at 
The design on the right is an example of Margaret Low's Fan Flower block code.  It can be found on the Turtlestitch website at 

Monday, January 17, 2022

A Valentine Heart Pop-Up Card

A Valentine Heart Pop-Up Card 
This card can fit into an A7 envelope for mailing.

The front of this Valentine card has three layers - a foil layer for color, a doily layer with paper cut-outs and a foil cut-out of the word "Love".

Another foil cut-out of the word "Love" is glued to the interior of the card.  The paper heart with the three tabs is glued to the interior of the folded card.  The bottom tab of this heart is placed in the center of the card on the edge of the fold and glued to the base as shown above.  

The two upper tabs are glued at a right angle to the card.  Placement is shown in the photo above on the top right. Open and close the card to make sure that the placement is correct before gluing.

Glue the red foil, heart doily and love bird embellishment to complete the card.


Saturday, January 15, 2022

A Pop-Up Valentine With a Cupid Angel Inside a Heart Sliceform

A Pop-Up Valentine With a Cupid Angel Inside a Heart Sliceform

This pop-up Valentine can fold flat and will fit into an A7 envelope.  Please note, the receiver of this Valentine will have to insert the tab into the slot in the hexagonal base. 

Glue the embellishments on Cupid and the heart. (The heart swirl is not shown.  I decided to add this embellishment after the photo was taken.)

Glue the reinforcement tab onto each side of the base.  Align all the edges.

Slide the two center slices into one another.

Attach all of the inner slices.  These are the slices with the tabs inside the heart.

Fold the slices flat to make sure that everything is aligned properly.

Attach all of the outer slices.

Make the base.
 The directions to make this hexagon base is in this blog posting. https://papercraftetc.blogspot.com/2020/12/a-peace-dove-pop-up.html