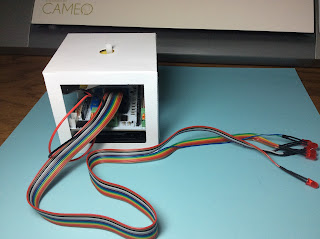
Hyperduino Presentation Box - Front view
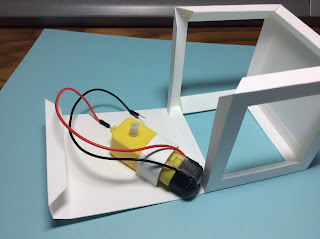
Hyperduino Presentation Box - Rear view
In this blog posting, I made a Hyperduino presentation box to include a yellow motor assembly and a ribbon cable with LED lights. This box will be used as a base for carousels.
It can be used in this blog posting. https://papercraftetc.blogspot.com/2020/11/a-stem-project-rotating-hyperdino.html and in the next blog posting of a WWI/WWII airplane carousel.
Here is the PDF. I used 65 lb cardstock to make the presentation box.
Here is the .Studio file.
Here is the SVG.
Making a Hyperduino Presentation Box
Apply glue to the two center tabs as shown above.
Adhere the two sides pieces at the dotted line. Crease all of the dotted lines to form a box.
Apply glue to the top window tab as shown. Adhere to form a triangle. These triangles form the support structure for the box.
Apply glue to the bottom window tab to form a triangle.
Notice this creates a right angle and makes a sturdy support column for the box.
Glue the other window tabs on the top and bottom.
Apply glue as shown to the side that does not have a hole in the middle. The triangular area on each side of this tab needs to remain free of glue. Apply glue to the two tabs to make the box.
Apply glue to the two side tabs as shown above.
Make the box by sliding the corners together so that the angled corner is visible. Adhere the glued tab. Repeat for the right side.
Completed side of box
.
Bend the motor strap as shown on the right.
Align the motor so that the shaft is in the middle of the hole. Slide the strap through the holes on both sides.
Glue the motor straps to the sides.
Top view
Apply glue to the square. Notice that I used a lot of small dots of glue. This piece needs to adhere correctly to the corresponding piece which is the top of the presentation box.
Adhere as shown above.
Make the final support triangle by applying glue as shown. The triangular corners of this tab need to be free of glue.
Apply glue to the two sides.
Make the box by sliding the corners together so that the angled corner is visible. Adhere the glued tab. Repeat for the other side.
Completed box
Attach the ribbon cable in pins 8 - 13.
I made a base with these Lego pieces
I attached the two rectangular Lego pieces to the side of the 2.5 in. x 2.5 in. Lego so that the Hyperduino would have a platform to sit upon. (If you do not have Legos this size, make a similar platform out of craft form). The height of the platform is needed for the power cable and computer connection to fit through the box window.
I applied Glue Dots to the base and placed it at the bottom of the box.
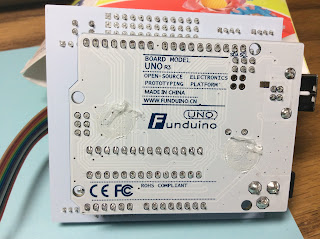
I applied two Glue Dots to the Hyperduino
I inserted the Hyperduino through the window of the box and affixed it to the Lego base.
Completed Hyperduino Presentation Box


No comments:
Post a Comment