
Here is the PDF. I used 65lb. cardstock and chipboard.
https://drive.google.com/file/d/18_B7L6XzUrgz9MHEGPKr-JXV1HLBpVUR/view?usp=sharing
Here is the .Studio file.
https://drive.google.com/file/d/1pADpm3qPv_6LGOH6E8EB18Gdwk3Iezsf/view?usp=sharing

Make the Scrambler seats. The star pieces are glued to the yellow base. The blue rectangular seat is folded in a W.

Put a line of glue in the hollow of the W on the yellow piece as shown above on both sides. Adhere the seat on both sides. Repeat for all of the seats.

Glue cover pieces on the chipboard on both sides. This gives the seat assembly a nice platform to rest on.

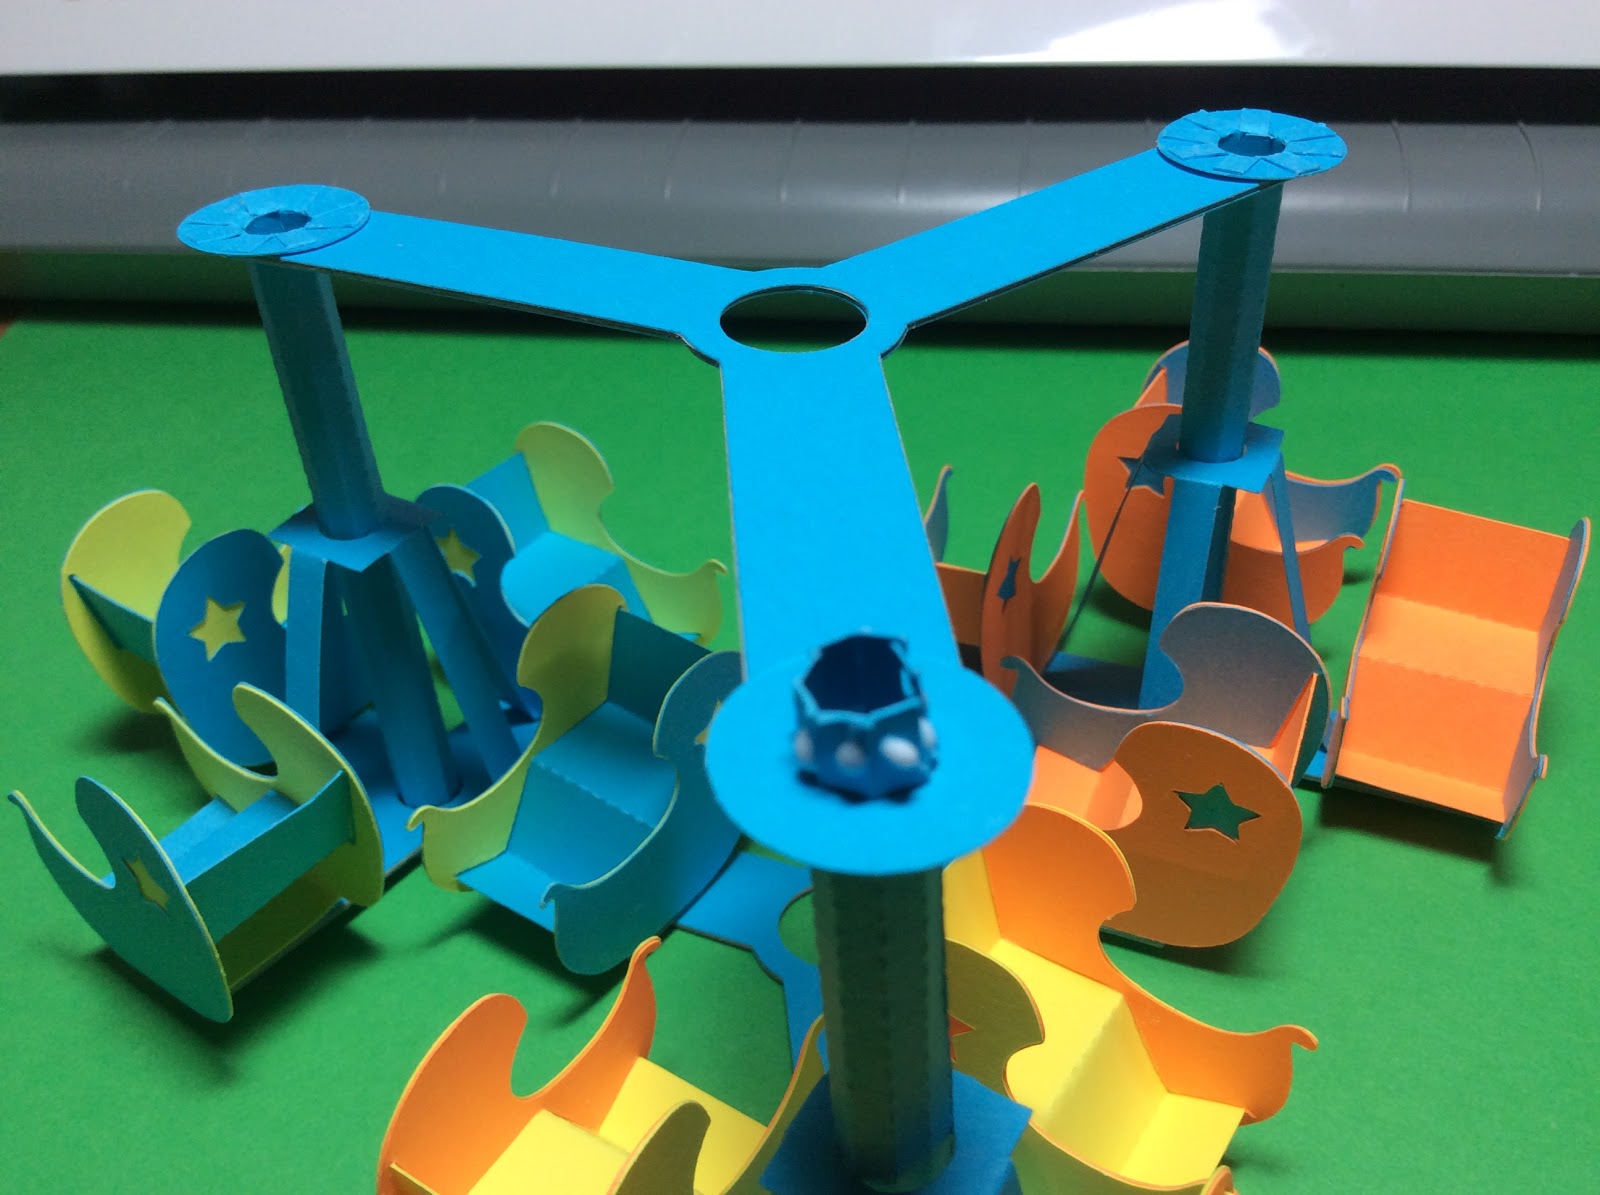
The cross beam is shown on the left. On the top right, the cross beam is bent. This cross beam is for decoration. It does not support anything. The piece on the bottom right is the seat platform. The seats will be glued to this piece.

Glue the seats to the cross beam at the dotted line. Make sure all of the seats are going in the going in the correct direction.

Turn the seats over. It should look like the above photo.

Turn the seats over. Glue the seat platform to the seats.

Notice where the glue was applied and the position of the seat on the seat platform.

Completed seat assembly. Repeat for the other two seat assemblies.

Seat assemblies completed.

Sandwich the chipboard in the middle of the blue pieces. Repeat for the other crossbeam. These two pieces are the main platforms for the seat assemblies. One will be on top and the other on the bottom of the seat assemblies.

Make the center axles by rolling them into a tube and gluing them together,

Slide on the circle.

Spread the tabs apart and glue to the circle.

Slide the axle onto the crossbeam

Crossbeam assembly

Slide the seat assemblies onto the crossbeam. Make sure that the seat assemblies move freely.

Slide the top crossbeam onto each of the seat assembly axles.

Slide on a circle washer.
Apply glue as shown and adhere the tabs to the circle washer.

Make the bottom of the box by creasing the pieces as shown above.

Glue together

Glue a base to the tabs and glue another corresponding base to the inside of the box. This will create a two-walled box bottom to give the box strenghth.

Take the scalloped top pieces and glue into a hexagon. Apply glue to the inside tabs as shown

Repeat for the other scalloped piece. Glue the scalloped pieces together.

Glue the top hexagon into the scalloped piece as shown on the right in the picture above. Glue the yellow yardstock with the hole in the middle to the chipboard.

Thread the center axle through the chipboard.

Glue the center axle to the chipboard and apply glue as shown. Attach this piece to the scalloped box top.

Slide the seat assembly onto the center axle. Glue the star embellishments onto the seat axles.

Glue the embellishments onto the main axle. The rectangular piece is folded in half and glue together and a star is glued on either side of this piece at the top.

Top View
Happy Summer!
No comments:
Post a Comment