Saturday, December 1, 2018

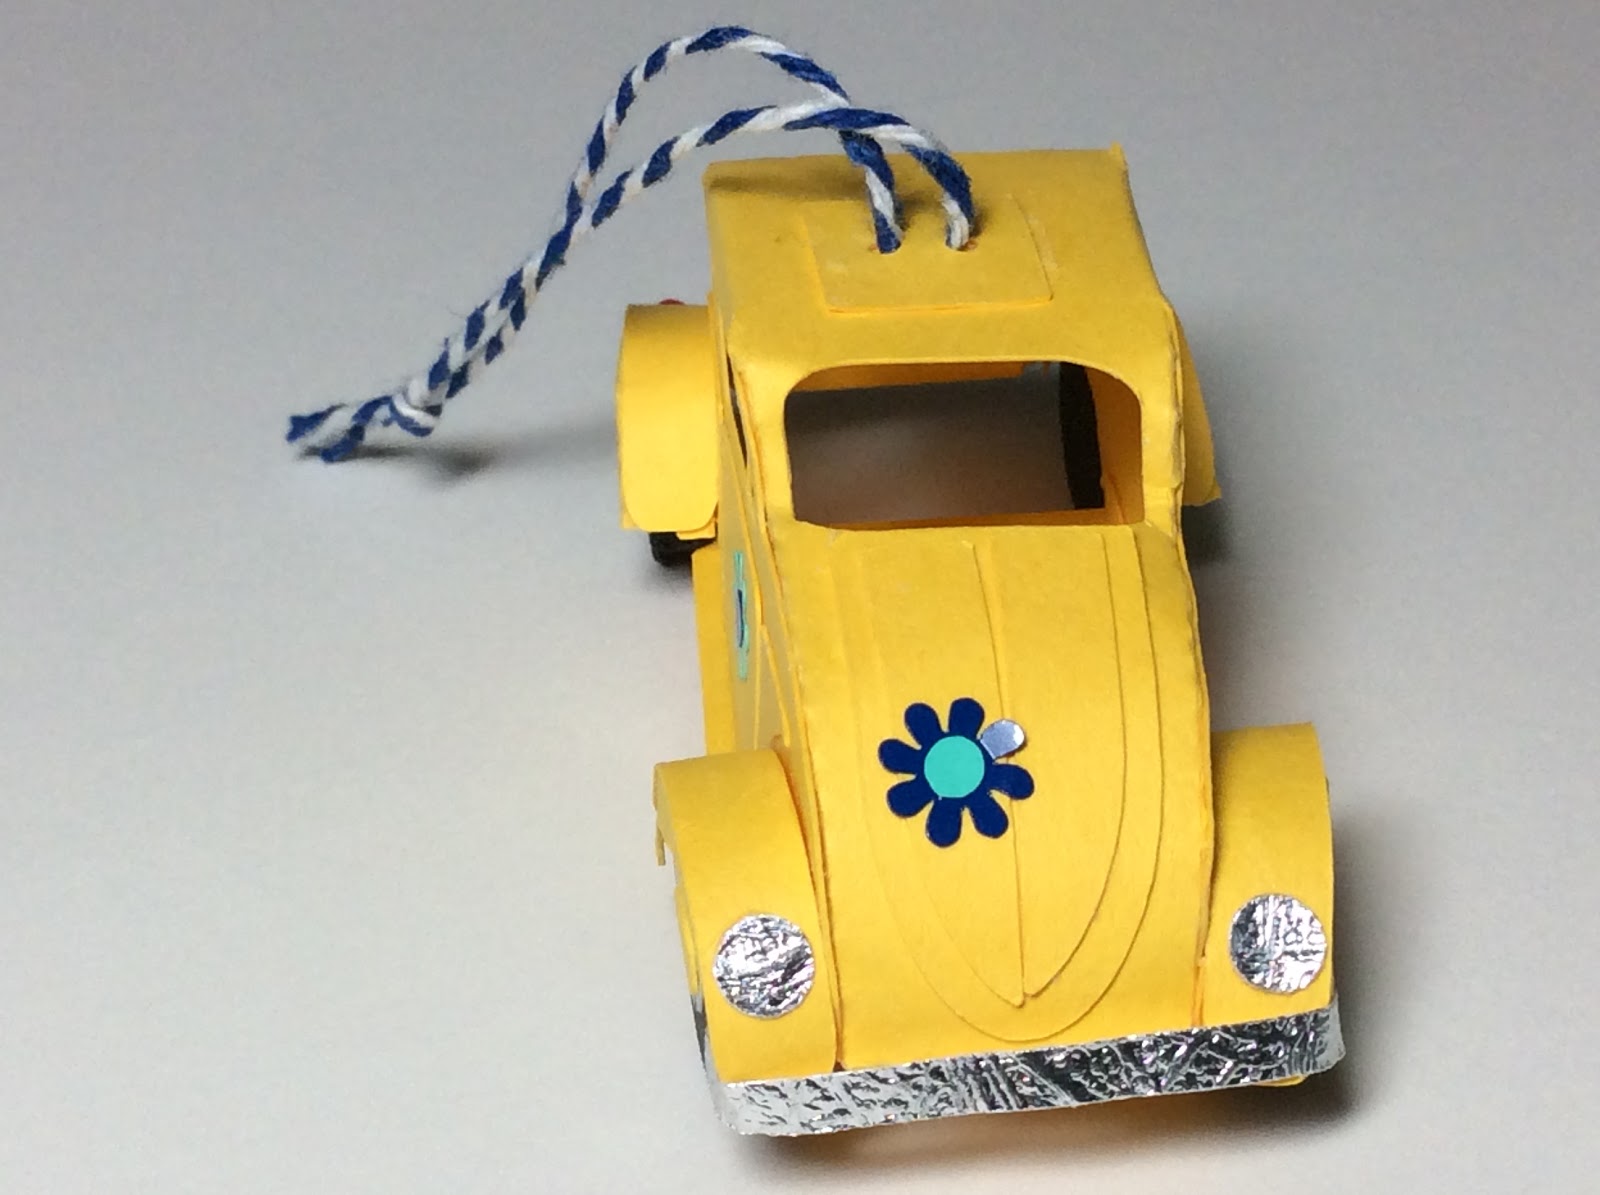
VW Love Bug Ornament for the Christmas Tree

VW Love Bug Christmas Ornament with a string hangar on top.

I made a VW Love Bug for my Christmas tree.  This three inch model reminds me of the time that a friend drove me in his VW Bug with a hole in the floor on the passenger side. The hole was so big that I could see the pavement speeding by at 50 mph. It was a wild ride!

The curved tire well pieces are a little hard to put together.  I recommend curving all the pieces to their final form and then gluing them tab by tab.  It is a little tedious but it works.

I used cardstock for the model and shiny vinyl for the peace flowers.

Here is the PDF.
https://drive.google.com/file/d/17lP_S01WW1vbDrCOHJBj3Wg-h5LRV2Ny/view?usp=sharing

Here is the .Studio file.
https://drive.google.com/file/d/1g-KRolmGfNzAuGPOX3w-8G6SFzdhdjC_/view?usp=sharing

Here is the SVG.
https://drive.google.com/file/d/17ZJq-nqMWRNfU22P5YREH_8gFiP5LOwV/view?usp=sharing

 The bumpers are glued on just the ends


 undercarriage 

Prototype without the string hangar


Monday, November 26, 2018

Peace Van with a Miniature Travel Trailer

The travel trailer and peace van are adorable.  They are decorated for Christmas with a tree and a wreath.  I am a busy elf for Christmas and I have lots of models to make. I have not given any instructions. I hope you do not have any problems constructing it. If you do, please leave a comment below and I will try to explain what needs to be done. I used cardstock for both models and silver wrapping paper for the headlights on the van.

A hangar piece is included if you want to hang it on the Christmas tree with a string.

Here is the PDF for the trailer.
https://drive.google.com/file/d/1AqavJ3rUyN0B-yVgt_Cg0MgCXaHWdSXQ/view?usp=sharing

Here is the .Studio file for the trailer.
https://drive.google.com/file/d/1HNBx7_IMLsC-o1SQQwaOtSeHKvxh56fL/view?usp=sharing

Here is the SVG for the trailer.

Tuesday, November 20, 2018

Thanksgiving Turkey Place Card or Centerpiece


I made these Thanksgiving turkeys to hand out to some residents in assisted living.  I made 30 of them. Each one has one Dove chocolate in it. The design can be enlarged to make a centerpiece if desired. I used card stock.  The beak is bent forward.  The eyes should be placed so that there are two colors in the eyes.  You can get this effect because of the two different colored card stocks.

Here is the PDF.
https://drive.google.com/file/d/1JPVosUJSKPjG1I-ib63-r0gtQ9iVlWnY/view?usp=sharing

Here is the .Studio file.
https://drive.google.com/file/d/1ERSbfn9a5eaadgB0-juQPb7toBkPgy3S/view?usp=sharing


 I love the design on the back of the turkey.  I recommend using a new blade if you are making place cards as the design is very intricate.
 Front and Back
One Dove chocolate

Pop Up Christmas Tree Card


I made two versions of this card.  One card says "Merry Christmas" and the other card says "Happy Holidays".  The slice form tree is a little difficult to put together.  If you are having trouble with it, I recommend cutting the easy tree without the additional slices. The center slices of the tree need to be bent in order to slide the two center pieces together. I designed it this way because it locks the tree top in place.

Two main pieces are slide together.

Slide the two small trees with the upward slits onto the main pieces.

 Next, slide the small tree downward.  This is the difficult part as the branches might get in the way of sliding it downward. Go slowly and it will work.   Again,if you get frustrated, just cut the easy tree and be happy. It does help to fold the tree flat and try to slide the small tree. Start with the center slit and slowly push downward.  Once all of the slits are attached.  Fold and unfold the tree a few times. This process will loosen the paper slits and make the tree easier to open and close in the card. 


The two slits above are where to place the Glue Dots.

Enlarged view of rolled up Glue Dots

Using Glue Dots, which are rolled up, you must use Glue Dots as tape will not work, attach the tree to the base of the card.  Open and close the card, putting pressure on the area where the Glue Dots are so that they adhere to the base card.  The Glue Dots do move a little, this is necessary so that the card and tree open properly.

Back of card with tabs inserted.

Glue the tree to the base card.  The greetings in the front of the card need to have the center of some of the letters inserted such as the e, h, s and a. I also used the scraps to embellish the card. 


Here is the .Studio file.

Here is the SVG.

Thursday, November 15, 2018

Snowy Winter Scene Card


What to do on a snowy November day, our first of the season? Make a snowy winter scene card that folds like a zig zag.  This card is similar to my previous nativity card.  I used metallic cardstock to make the card. The sections are glued together to form the zig zag.

 Top view of card

This card folds flat for mailing.


Here is the PDF.

Here is the .Studio file.

Saturday, November 10, 2018

Nativity Card for Christmas

This nativity card is like a diorama.  There are seven sections which when folded together create a three dimensional scene.  The seven sections are glued together by a tab.  Each section is numbered in the file to help with the placement.

Top view of the card. Notice the zigzag that is formed when the sections are glued together.

The nativity card 


Here is the PDF.  I used metallic cardstock to make the card.

Here is the .Studio file.

Here is the SVG file. Please zoom out of the SVG file as the entire file is outside of the viewing area.


Tuesday, November 6, 2018

Religious Card for a Girl or Boy and a Simple Cross Card


 Girl and Boy Baptismal card


Simple Cross card


Inside of simple cross card

Here are some cards that you can use for a baptismal or a christening. I used metallic cardstock to make the cards.

Here is the PDF.

Here is the .Studio file.

Thursday, October 25, 2018

Halloween Haunted House Cascade Card

 This haunted house is very cute as a cascade card. This card folds flat for mailing. It is 4 1/2 inches wide and 5 inches tall. I used black card stock to make this card.


The two shapes are folded as shown above.

The two pieces slide together to form two X's.

Side View

Here is the PDF.

Here is the .Studio file.

Here is the SVG.


Tuesday, September 25, 2018

Miniature House #25 - Castle


I did 25 houses in 25 days and I left the best for last.  I made a four level castle.  It is about 7 inches tall and 5 inches wide. It took me a few days to make this model but I think it turned out marvelously.

I used 65 lb. card stock.

Here is the PDF.
https://drive.google.com/file/d/1Bq5rmGyOM0V0SuMxxS0jyagpxyLMIpKX/view?usp=sharing

Here is the .Studio file.
https://drive.google.com/file/d/1UQpmz8PEdYN7vsLCtz4T28JlSEk80UZT/view?usp=sharing

Cut out all level 1 patterns first.  Make sure that you don't flip the pieces over as the tabs need to be in the same direction.

 The four sides are folded to create a box which forms the wall.

 The wall structure creates a square in the middle when glued together.

 The tower has a square piece that is glued near the top.  The tabs are placed inward so that they do not show. I recommend placing the floor of the tower in first, aligning it correctly with the bottom of the zig zags and then add a drop of glue to keep the floor in place.

Completed level 1 with roof and pennants attached.

 Cut out all level 2 patterns.

 Glue the box structure but just glue the top ledge.  leave the sides unglued until you slide in the side piece then glue it.

Fold down the top triangles for the cone to be placed on it.  I recommend using glue dots to attach the cone roof.

Completed level 2


Level 3 is the middle structure and Level 4 is the tower to the left.

Completed castle

Monday, September 24, 2018

Miniature House #24 - Columned Colonial


The columns of this house reminds me of the White House in Washington, DC.  The tabs on the columns are too long and they need to be cut to the size of the square base.  I could have made the tabs smaller but then it would be difficult to glue.

I used 65 lb. card stock.

Here is the PDF.
https://drive.google.com/file/d/1r6DslJDZtMC1xSSolnJEXEEKiq7P7ir3/view?usp=sharing

Here is the .Studio file.
https://drive.google.com/file/d/1j6i4Q5YyM6xLms0JyWW3AmrZw5lNdKiH/view?usp=sharing


Sunday, September 23, 2018

Miniature House #23 - Bavarian Style


It is almost October and what better way to celebrate then to make a Bavarian style house for Octoberfest.  The window boxes have shredded green paper and pink dots are flowers. I think this model is another one of my favorites.  It is so cute!

I used 65 lb. card stock.

Here is the PDF.
https://drive.google.com/file/d/1Lfzog3_tq9nB9lRTfMnbD26X5KsSSPkg/view?usp=sharing

Here is the .Studio file.
https://drive.google.com/file/d/12bOsXb_o2Lc1HDsqQumsAjLzr0a-5r0J/view?usp=sharing