I did 25 houses in 25 days and I left the best for last. I made a four level castle. It is about 7 inches tall and 5 inches wide. It took me a few days to make this model but I think it turned out marvelously.
I used 65 lb. card stock.
Here is the PDF.
https://drive.google.com/file/d/1Bq5rmGyOM0V0SuMxxS0jyagpxyLMIpKX/view?usp=sharing
Here is the .Studio file.
https://drive.google.com/file/d/1UQpmz8PEdYN7vsLCtz4T28JlSEk80UZT/view?usp=sharing
Cut out all level 1 patterns first. Make sure that you don't flip the pieces over as the tabs need to be in the same direction.
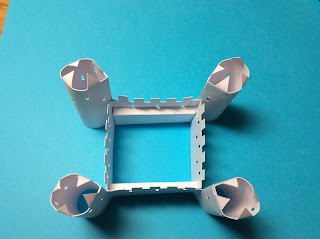
The four sides are folded to create a box which forms the wall.
The wall structure creates a square in the middle when glued together.
The tower has a square piece that is glued near the top. The tabs are placed inward so that they do not show. I recommend placing the floor of the tower in first, aligning it correctly with the bottom of the zig zags and then add a drop of glue to keep the floor in place.
Completed level 1 with roof and pennants attached.
Glue the box structure but just glue the top ledge. leave the sides unglued until you slide in the side piece then glue it.
Fold down the top triangles for the cone to be placed on it. I recommend using glue dots to attach the cone roof.
Completed level 2
Level 3 is the middle structure and Level 4 is the tower to the left.
Completed castle


No comments:
Post a Comment