This World War II Airplane carousel moves manually when a gear is turned. There are four aircraft represented in this design. They are a British Spitfire, a German Messerschmitt, a Japanese Zero and a US Wildcat. The Spitfire and the Messerschmitt were used over Allied territory in Europe. The Japanese Zero and US Wildcat were used in the Pacific theater.
To make a WWI version (red canopy above) refer to my previous blog posting https://papercraftetc.blogspot.com/2021/04/a-stem-project-world-war-i-airplane.html
To make the carousel, use the directions in this blog posting.
https://papercraftetc.blogspot.com/2019/06/a-stem-project-making-airplane-carousel.html
I used 65 lb. foil cardstock in iridescent, blue, red, aluminum, green and gold from Michaels to make the airplanes and carousel. I used Cricut acetate for the center column of the carousel. I recommend using Aleene's Tacky glue and tweezers for the adhering the small tabs. I used mini brads from Michaels to attach the propeller to the engine so that the propeller could rotate.
Here is the PDF.
https://drive.google.com/file/d/1Dt4ir_GeH6_bRm95CbDscOM5KHcfp6os/view?usp=sharing
https://drive.google.com/file/d/1wISRsH1JY6hGoKL-gVxVPBQxYfKJdMvy/view?usp=sharing
Here is the SVG.
https://drive.google.com/file/d/1Ob6_uAsNyJBz1l7b9VpJyy63l8lDsL8b/view?usp=sharing
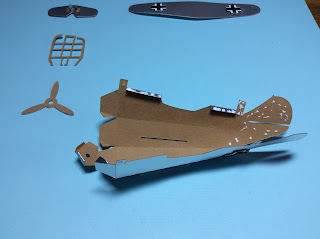
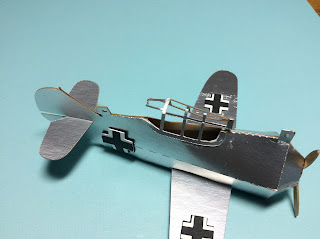
All of the airplanes have the same construction. I will show how to put together the German Messerschmitt. Follow these same instructions for the other three airplanes except for the US Wildcat where the embellishment is added to the tail after the tail wing has been inserted.


These are adorable! My brother in law is a huge history buff and I'd love to make both of these for him. I have a Cricut and see you have the SVG for the airplanes, but the carousel is a studio or pdf file. Can you make an SVG file? I tried a studio to svg converter program but it didn't work. Thanks and I love your work! It is so original! - Sue
ReplyDeleteThanks for telling me about the lack of an SVG. I will try to make one. It was just recently that I included SVG files. In the meantime, you can make the six inch canopy which is included in the SVG file given in the WWII posting.
ReplyDeleteThank you for adding the SVG file so quickly! Now I have to go buy some foil cardstock and acetate!
DeleteI love Michaels’s foil cardstock. It cuts really well. You could use the foil cardstock for the center column. However, I do like the acetate because you can see through it. If using the acetate, I highly recommend using Glue Dots. Ordinary glue does not hold the acetate.
Delete