Monday, February 11, 2019

Rectangular and Square Presentation Box


Rectangular and Square Presentation Box

Presentation boxes are basic boxes.  The internal components will change based on the model being assembled. While the box that is described below, is square.  These directions are the same for making the rectangular box. Please note that these boxes have a hole in the side for an axle.  Your model might not have this hole and these directions will not change for your designated model.

There are two boxes in this file...a square box and a rectangular box. Pick the one you want to make.
Here is the PDF.  I used 65 lb cardstock.
https://drive.google.com/file/d/1I5C0lUtHOp9UlBslF2PnGCaXv58jY7sp/view?usp=sharing

Here is the .Studio file.
https://drive.google.com/file/d/1nrz1KI5wwiLmSueAzl1w7MZmE--pFKYP/view?usp=sharing


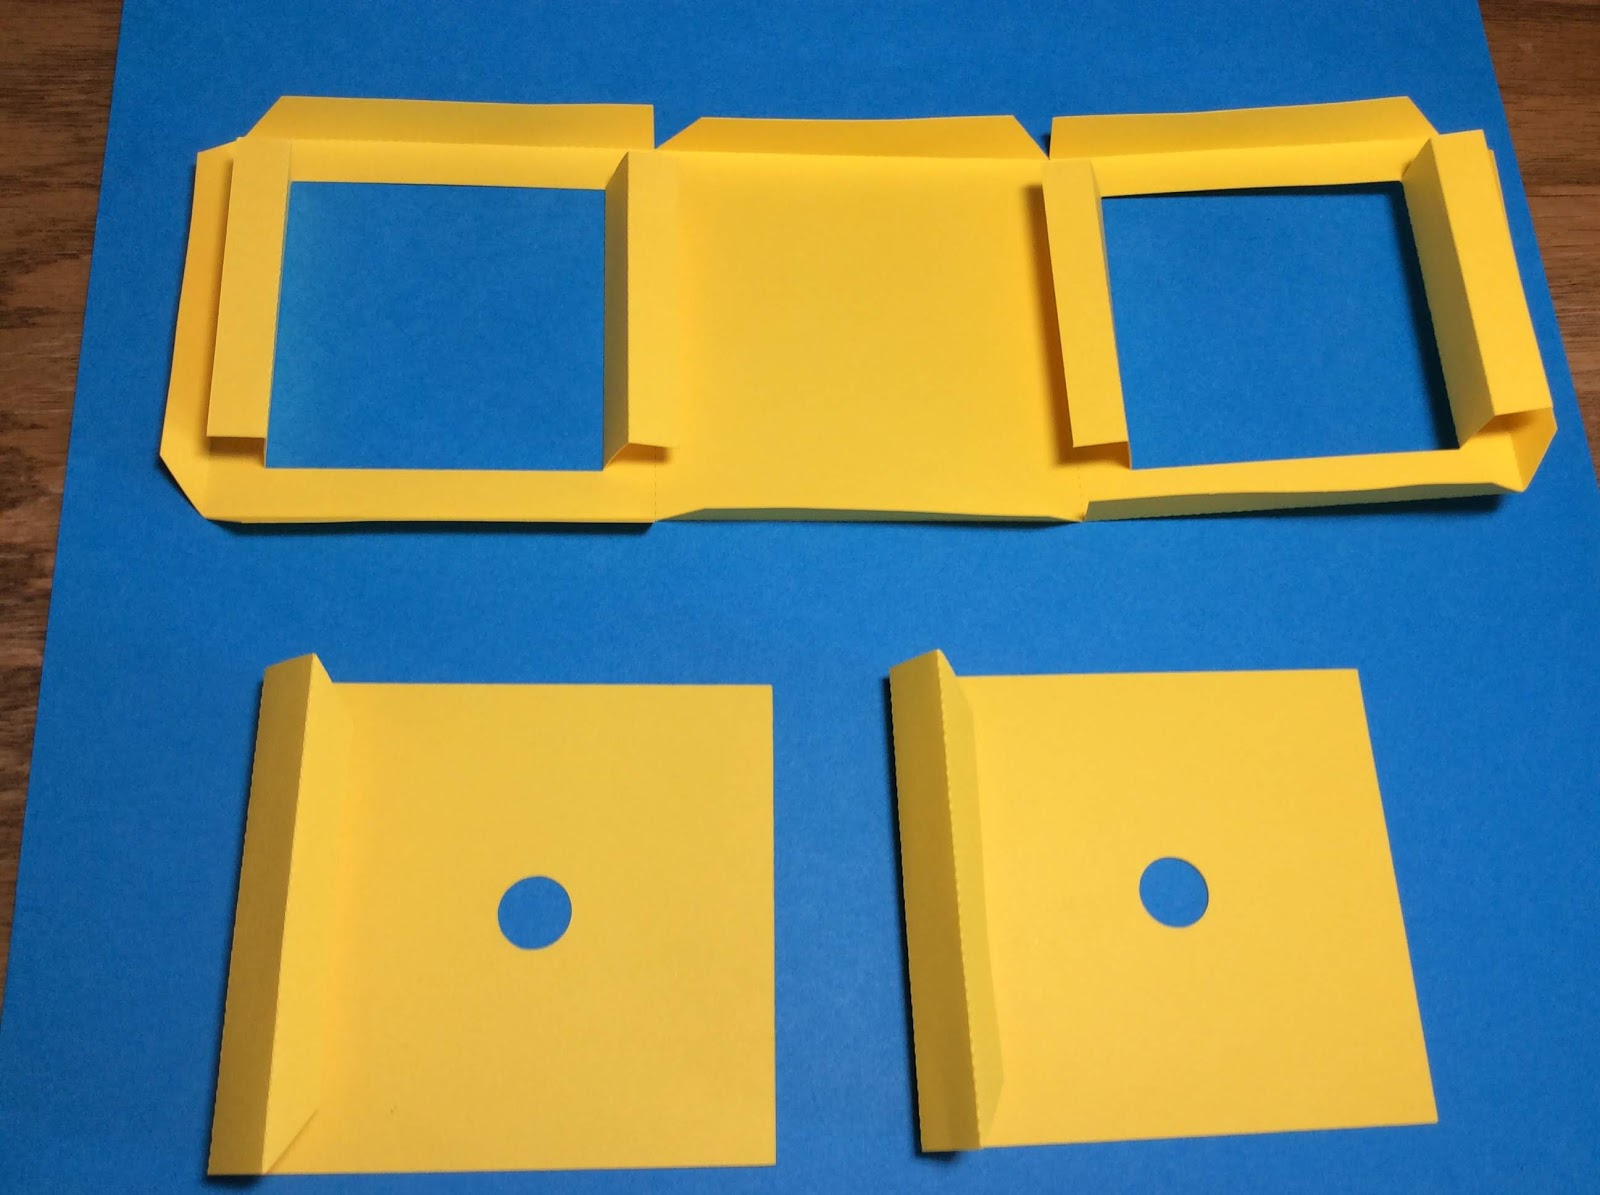
 Presentation Box Pieces
Crease the edges of the box as shown above.
 Apply glue to the tab of the side of the box.  Please do not put glue all the way to the point of each side.  This piece needs to slide into the main box piece. Put glue dots as shown.
 Adhere the isosceles triangle to the side wall for each side piece.  Triangles are a sturdy support feature of this box.
Glue four isosceles triangle on the main box piece.  
Notice that the top isosceles triangle forms a trapezoid at the top of the box ledge.
 Apply glue on all three sides as shown
 Adhere the side piece to the main body piece.  The isosceles triangle from the side piece slides into the main tab of the box. Repeat fo the other side piece.
 Apply a drop of glue in each of the four corners.
Completed Box

Thursday, February 7, 2019

Valentine Carousel Box


My carousel has been updated for Valentine's Day with hearts and cupids. This carousel can move because there is an axle built inside. Use my original directions from another blog post, to put the carousel together. https://papercraftetc.blogspot.com/2014/02/a-carousel-box-that-really-spins.html

Here is the PDF.  I used 65 lb cardstock.
https://drive.google.com/file/d/1ZmAVWGyCwVWt5gzAEmaZGL_gzEEVCsbT/view?usp=sharing

Here is the .Studio file.
https://drive.google.com/file/d/1CNeLtMnhpUcIK_mNAkxz4DJROJgy2PHM/view?usp=sharing


Happy Valentine's Day!

Friday, February 1, 2019

Valentine Pop-Ups - a Bear, Cat and Dog

Pop-up Bear, Cat and a Dog.  
I have included an envelope and a notecard in this file.

I love the way these Valentines pop-up when taken out of the envelope.  The envelope is not suitable for mailing but it is suitable for hand delivery.

I used 65 lb cardstock for the pop-up card.  I used copy paper for the envelope.

Here is the PDF.
https://drive.google.com/file/d/17RVcGIoKha_peBPCZN25SQTFbSV7DpET/view?usp=sharing

Here is the .Studio file.
https://drive.google.com/file/d/1Q_zO9lkcEhXVWI1Tj0KVLh2zPg3aqKE3/view?usp=sharing


 Fold the body pieces as shown above.
 Glue the accordion piece to the back side of the pet.
 Glue the heart to the back of the front piece.
 Apply glue to the accordion as shown.
 Quickly attach the front.  Move the heart if necessary for placement.  I recommend using Aleene's tacky glue as you can move the pieces a little before they adhere. Add a small heart to the pets chest and glue on its face.
 Beautiful collection of Pet Valentines
 Fold the envelope sides as shown above.
 Fold where the curve ends as shown above.
 Glue on the heart.
 I love the way that the cat is peaking out of the envelope.  The recipient will be surprised when the cat pops up when taken out of the envelope.
There is a tab closure on the envelope.


Wednesday, January 23, 2019

Valentine Cupid Box

This Valentine Cupid box stands 6 1/2 inches tall and would make a beautiful gift to give to your sweetheart.
There are directions for both of these models in this tutorial.

Here is the PDF.  I used 65 lb. cardstock.
https://drive.google.com/file/d/1mAeS1WC01kFWqcQdgVp2BqgsKFbtIKib/view?usp=sharing

Here is the .Studio file
https://drive.google.com/file/d/1eLtrM4vLhzM0YeE2y4oMD53Tv1pDXaLX/view?usp=sharing

Layout all of the pieces. The Cupid model consists of the small hearts and the Cupid.  The two hearts model consists of the small and large hearts. Everything has been cut out so that you can decide which model you want when the pieces are placed on the string to be hung up.

Using the template, place some glue in the white area and attach the heart.  Remove the template carefully and repeat for the remaining scallops.

Make the scalloped piece and rectangular piece into a hexagon shape as shown above.  Bend the tabs on the hexagons upwards.  There are two hexagons.  The smaller one is for the bottom of the box.  Glue the smaller hexagon to the hexagonal tube. Make sure that the bottom surface is flat all the way around. The larger hexagon is for the top of the box.  It is matched with the scalloped top.

When gluing the scalloped top, Make sure that the tabs do not show in the scallops.  A ledge is formed at the top of the box for the placement of the cage on top.

Notice the ledge on top of the box.

 Bend all the remaining pieces in half except for the cupids.

Glue three cage pieces together.  Repeat for the other side.
Glue five small hearts together. Repeat for the other side.
Glue five large hearts together.  Repeat for the other side.
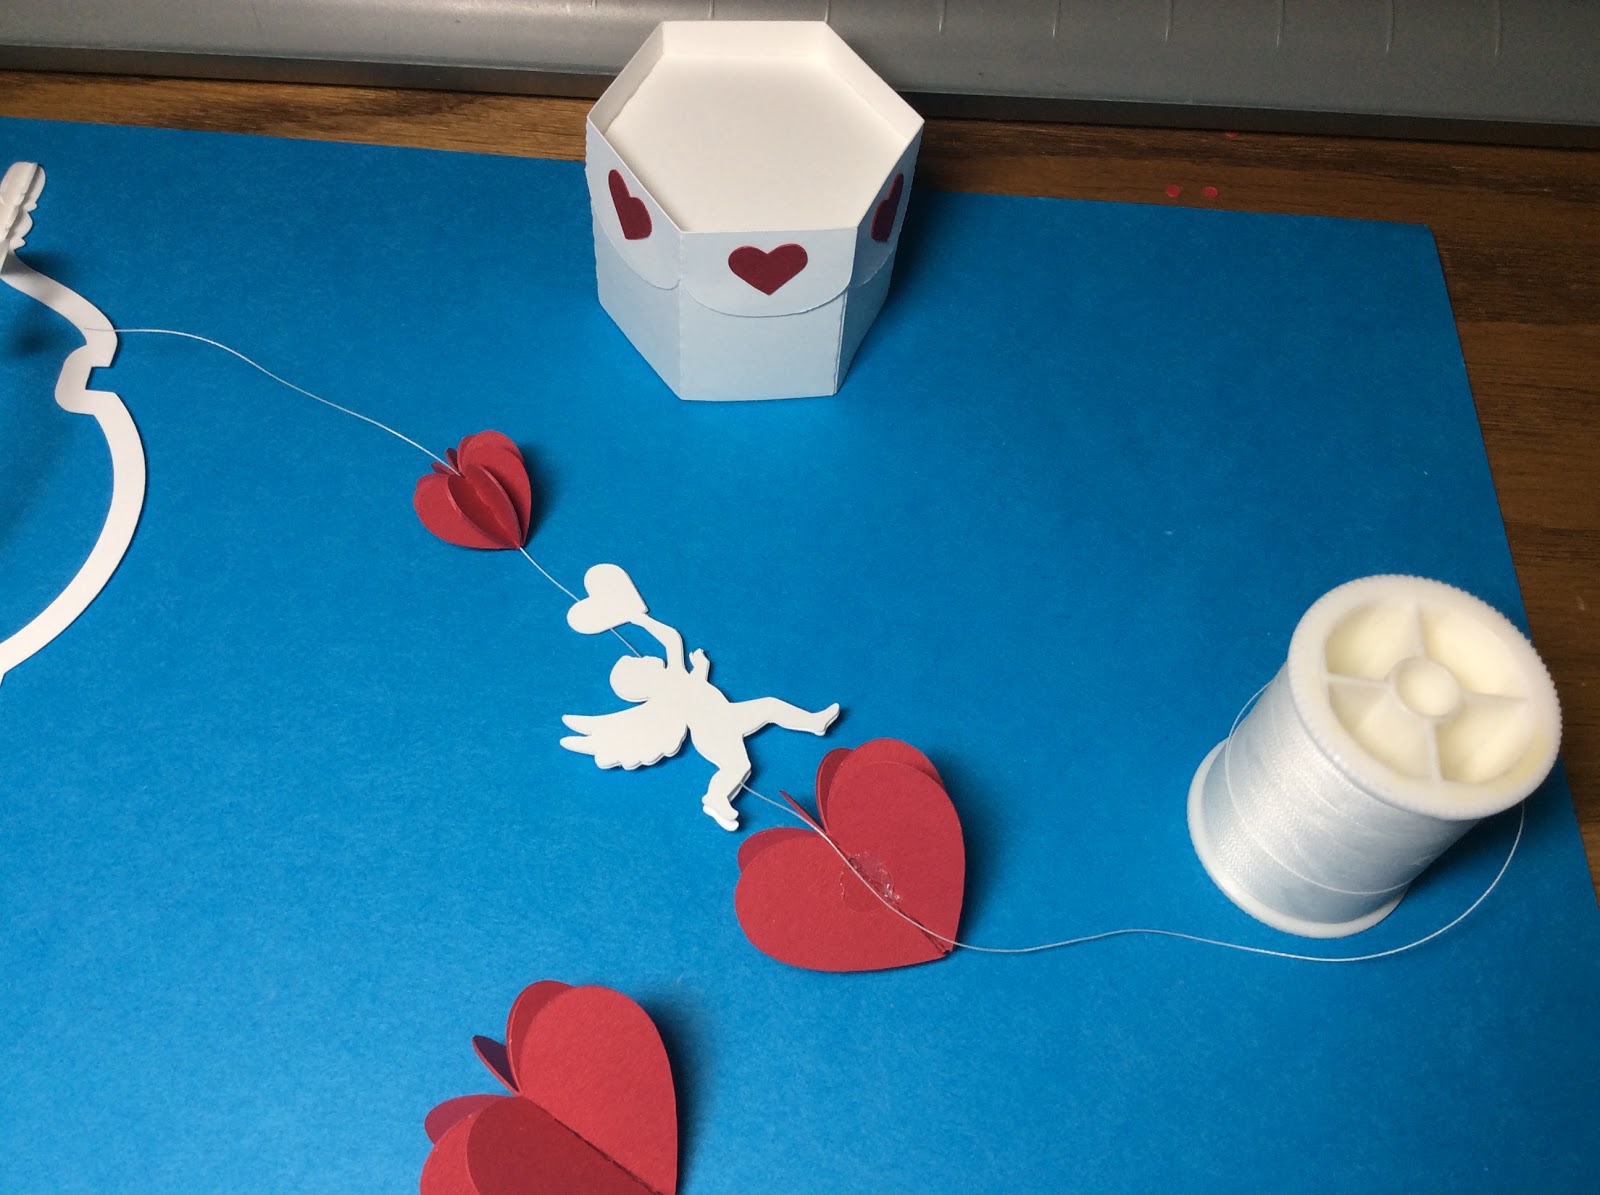
Your workspace should look like the above photo when completed.

At this point decide whether you want the Cupid or the two hearts.  You can't have both the Cupid and the two hearts because they do not fit.

 Using sewing thread, glue half of the small heart onto the string at about 4 inches.

Glue the other half of the small heart to itself.  At about 6 inches, glue on the larger heart to the string.  Do not touch anything for at least a few minutes.  Allow everything to dry sufficiently before proceeding.

Glue the string to the top and bottom of one half of the cage structure. Glue the edges the cage and attach the other half of the cage. Do not cut the string until the glue is thoroughly dry. at least 5 or 10 minutes.

I applied an extra dot of glue at the base of the string. When the glue is dry, slide the cage into the box base and glue down.

Two Hearts Box 

Cupid Box

Happy Valentine's Day!

Sunday, January 13, 2019

Cinderella Party Favor, A Castle Box and a Crown


 For my mother's birthday, I made party treats for the residents at her assisted living residence. I cut out 16 castles and one crown for the birthday girl.  The residents put the castle box together as a little party activity. One Hershey kiss fits perfectly inside the box.

One of the residents decorated the crown with glittery rhinestones.  Here she is wearing her crown.


I used glitter cardstock for the castle and 65lb. Neenah metallic paper for the box.

Here is the PDF.
https://drive.google.com/file/d/1zKiHjX7gis2V-4i8QyfqViWyzoZgdwZ-/view?usp=sharing

Here is the .Studio file.
https://drive.google.com/file/d/1hlAB7KgQ4tOMQyAwtyOA19cW8VsNk7dM/view?usp=sharing


 Glue the four tabs outward on the box.
Open the castle doors and then glue the castle to the box. 

Happy Birthday Mom!
Love,
Elaine 💕


Saturday, January 12, 2019

Cinderella Paper Shoes


Poor Cinderella.  I can't make her shoes out of glass but I can make them out of paper. I made the Cascade card from my previous post and decided that I needed to make an accompanying paper shoe. This shoe is made out of 65 lb card stock.  I do recommend making this shoe out of a lighter weight paper because the heel is difficult to bend into a semicircle with heavyweight paper. The shoes are lined with contrasting paper.  I used wrapping paper, lightweight cardstock and vinyl for shoe liners. The thinner the paper, the easier it was to glue to the inside of the shoe.

Here is the PDF.
https://drive.google.com/file/d/1Myb3IXfvA_g_3opG87paHec4bKAADjvA/view?usp=sharing

Here is the .Studio file.
https://drive.google.com/file/d/13ZL0TRNyTqO0RXR-MljyR7cYOpiNSXiw/view?usp=sharing

I made the shoe and then decided to make it smaller.  You can see the smaller shoe in the photo above. It is the silver shoe in the front. I have not included the smaller version in my file. If you want to make the design smaller, just resize the pattern.  I did decide to make another version of the shoe today with a smaller toe and I have included that file as shoe #2.

Shoe #1 on the left and Shoe #2 on the right
 Bend the tabs on the toe piece upwards at a right angle.
 Glue the outside of the shoe to the toe pieces shown.
 Bend the outside of the shoe into a U and then attach the other side of the toe piece. Notice that the two toe pieces overlap. 
 If you dont bend the toe piece at a right angle, the pieces will still come together but only slightly.  The shoe on the right shows what will happen if you do not make the angle correctly.  It will still look  good.
 Bend the tabs at a right angle for the tabbed insole.
 Glue the inside of the shoe as shown and insert the insole.
 Notice that the tabs from the insole are inside the shoe.
 Take the insole and place it above the tabs on the shoe inside.
 Notice that the tabs will not show inside the shoe.
 The tabs are glued to the bottom of the shoe.
 Glue a sole onto the bottom of the shoe as shown.
 Bend the tabs for both parts of the heel.  Try to condition the back of the heel to bend into a semicircle by rubbing it against a curved surface or a pencil. 
 Glue the heel into a curve around the outer edge.
Glueing the heel is a slow process. I had to walk away at this point. The glue needed to dry and it is best to come back later.
 Glue the completed heel to the bottom of the shoe.
 Another picture of the heel. 
Here is the shoe lined with a silver sparkle vinyl and adorned with a ribbon bow.