Monday, December 21, 2015

A Gingerbread House for Christmas

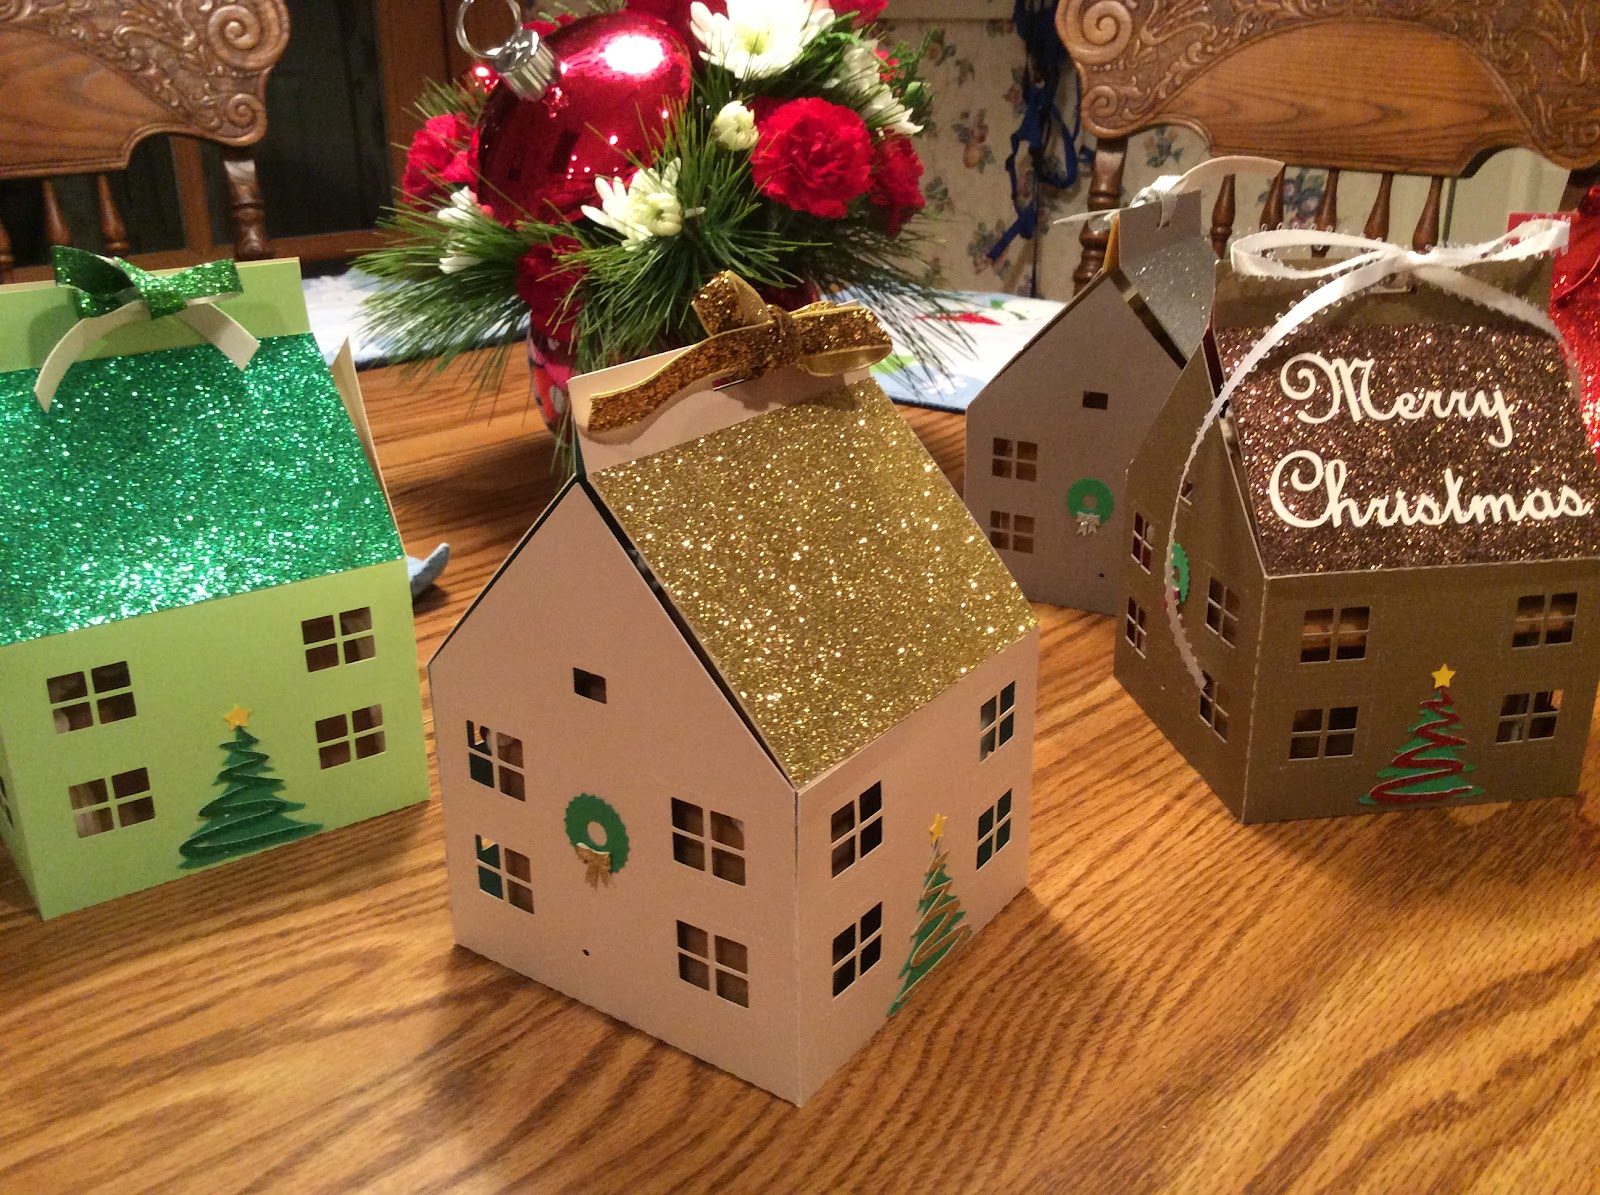
 A paper house to hold a delicious cookie gingerbread house.

I love making Gingerbread houses.  Here is a box which you can make for storing and gifting a gingerbread house. I have included my gingerbread cookie recipe and template to cut the cookie dough to the correct size to fit into this paper house.

I used cardstock and glitter cardstock to make the paper gingerbread house.

The instructions to make the paper house is easy.  Glue the four sides together at the tabs and glue the two roof pieces to the sides of the house. Glue the glitter roof pieces to the top of the roof. Glue the greeting to the top of the roof.  Insert the cookie house by placing the lifter at the bottom of the house and lowering it into the box. Thread a ribbon through the hole at the top and tie a bow.

Here is the PDF.  
https://drive.google.com/file/d/0B7oGIyVDbRGYZDVfN1JOZUpHOVU/view?usp=sharing&resourcekey=0-vUXFbTX2rt4ZOWGcuTilEA

Here is the .Studio file.
https://drive.google.com/file/d/0B7oGIyVDbRGYNTN0RFctOHJmWnM/view?usp=sharing&resourcekey=0-WTkQTln_USeRYY7AWlFoNA

Here is the SVG.  The file extends beyond the visible viewing area. Zoom out to see the entire file. https://drive.google.com/file/d/1d7mwg3kOIq2huZpmpXx6oiSvktjKONSo/view?usp=sharing


Recipe for Gingerbread House Cookie

My recipe to make gingerbread. 

Template to Make Gingerbread House Cookie

Here is a pdf of the house template.
Print it out on your printer and cut the pieces with scissors to make the template. Place the template pieces on your cookie dough and cut them out with a knife to make the house. Bake the cookie pieces according to the recipe.

Frosting Recipe To Assemble the House


Once the cookie pieces have cooled. Make this frosting recipe to assemble the house.

Assembly Instructions For the Gingerbread Cookie House

The base is lined with aluminum foil.
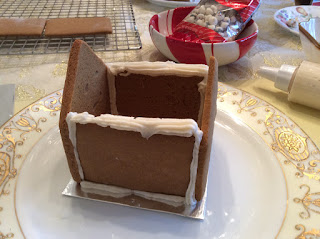
 Frost the outer edges of the side piece.
 Stand it upright on the aluminum foil.
 Repeat for the other side.
 Add the front.
 And back.
 Frost the peaks as shown.
 
 Add the roof pieces.
 Frost the roof line.
 I added some candy decoration.
 There is a piece of paper which I call the lifter which helps to lift the house out of the box.  Add it to the bottom of the aluminum foil before putting the house in the box.
Merry Christmas!


Thursday, December 17, 2015

Holiday House Treat Box


A Holiday House Treat Box

This treat box can holds six Hershey Kisses in one layer or twelve in two layers. I used regular cardstock for the house and glitter cardstock for the roof.

Here is the PDF file.

Here is the .Studio file.

Glue as shown in the above picture
Attach the glitter cardstock
Crease the edges and glue the tabs.
Make sure all of the angles are perpendicular and the bottom of the box is flat.
Cut a 12 inch piece of ribbon for the tie.

Glue on the wreath and bow.
Glue on the tree and holiday greetings.
Box with 6 Hershey Kisses.
Tie a bow to complete the house.

Merry Christmas and Happy Holidays!


Friday, June 19, 2015

Summer Flip Flop Shoe Box

Summer Flip Flop Shoe Box

Summer is finally here!  I designed a flip flop shoe box to hold some summer treats.  It is a small box that can hold a few pieces of candy.  It can hold 6 or 7 Hershey Kisses or 2 Lindt Chocolates. I made these boxes as presents for my co-workers at school. I will miss them as I decided to retire from teaching. However, I will have more time to make paper creations and blog about them...Yay! 

Here is the PDF file for the Flip Flop Box.  I used cardstock.

Here is the .Studio file.


 Put glue on the tabs as shown.   

Make a circle.  The tab should be on the inside of circle. This shorter height circle is the top of the box.
This taller height is the bottom of the box.

Fold the tabs on each of the circle as shown to make a ledge.

Place the smaller sole into the bottom of the box.  This is the circle with the taller height.  I like to put the seams halfway between the ends of the sole.

Put glue on each of the tabs as shown.

Attach the same size smaller sole.

Apply pressure to make sure the bottom is glued tightly. I used a glue stick to apply pressure.
The bottom is complete.

Place the sole in the lid as shown.

Cut two 3 inch pieces of ribbon. Cut a 3/8 inch piece of a drinking straw.

Slide the drinking straw onto the two pieces of ribbon. Place some glue on the sole as shown.

Thread the ribbon through the center hole.


Thread each ribbon to the sides. Apply glue to each of the tabs as you did before.

Attach the top of the flip flop. 

Cut two lengths of ribbon. One length is 8 1/2 inches and the other is 9 inches long.

Apply glue to the back of the ribbon.  The shorter length...8 1/2 inches is for the bottom of the box.

I started and ended the ribbon on the seam so all the seams are aligned.

Glue the longer length of the ribbon to the top of the box.

Here is the box with Lindt chocolate inside.

My Summer Flip Flop Boxes.


Enjoy! Happy Summer!

Thursday, March 19, 2015

Bunny Sliceform

Bunnies are an Easter tradition.  I love their pastel colors.  The bunnies presence really brighten a room. Sliceforms are my obsession; so what better way to combine my passion for both of them.

Here is the PDF file.  I used cardstock.
https://drive.google.com/file/d/0B7oGIyVDbRGYSHhrZ0MwTXpuckE/view?usp=sharing&resourcekey=0-EFv6ccsHVfDe9xz-9wRd7Q

Here is the .Studio file.
https://drive.google.com/file/d/0B7oGIyVDbRGYaDF3T3RycG9Vd0k/view?usp=sharing&resourcekey=0-0fDw3qbrM6AhNd_a1v8stw

 Separate the slices.  The rectangular slices should be ordered from longest to the shortest.
 Starting at the left hand side, slide the longest rectangle into the first left slot. Then slide the next shortest size. The middle piece is the shortest rectangle. The next two slices increase in size.  Above is a picture of what it should look like when all the rectangular slices are attached.
 Slide the bunny piece onto one side as shown above. 
 Turn the bunny over and repeat.
The bunnies are so cute.  They can fold flat for mailing.
Happy Easter!

Friday, March 6, 2015

A Tactile Paper Ruler


As a math teacher, I often find students having difficulty measuring with a ruler for a variety of reasons. The students don't know where to place the ruler because many plastic rulers have a quarter of an inch of plastic before the tick marks start or the students can't read the hash marks. This ruler that I created from glossy cardstock will help those students visually and tactilely see the different measurements.  The leading edge of the ruler begins the measurement.  There are three different size markings.  The inch marking is the longest slit, the half inch slit is a little smaller and the quarter inch slit is the smallest.  At the top of the ruler, there is a large notch at the inch mark and a smaller notch at the half inch mark. The ruler can be manipulated so that the student can fold up a portion of the ruler if needed to make sure a measurement is correct.

The ruler can be folded up and the slits can be turned upwards at the quarter inch and half inch marks.

Here is the PDF file.
https://drive.google.com/file/d/0B7oGIyVDbRGYc3lIXy0xalZHOUk/view?usp=sharing

Here is the .Studio file.  I used a glossy cardstock because regular cardstock will not cut out the numbers correctly.  The plasticized  surface of the glossy cardstock cuts the small numbers precisely. You will notice in the picture that there is a yellow and orange ruler that has their numbers not cut all the way through with the plain cardstock.
https://drive.google.com/file/d/0B7oGIyVDbRGYUElUZW5CY0Y4WHM/view?usp=sharing


Disclaimer: If you produce this ruler, please ensure that the measurements of this ruler are correct with an actual ruler.  I cut this with my Silhouette and it is off by a hair. I think I might need to recalibrate my Silhouette but I am a little wary and feel the minute difference does not warrant changing the settings.

Monday, March 2, 2015

Super Pi Day Ball

Super Pi Day is coming!  3.14.15 is a once in a century event.
 
 Pi Ball with different diameters of Pi

In honor of Super Pi Day, I decided to make a sliceform which represents the values of pi.  I created the five circles with multiples of 3.14.    The diameters starting at the smallest circle is 3.14 cm, 6.28 cm, 9.42 cm, 12.57 cm and 15.71cm respectively. I then placed the diameter of each of the four smaller circles on the edge of the largest circle at its midpoint to create a slit so that this sliceform could be created.


Looking at it head on when the sliceform is a sphere, starting from the smallest circle and going inwards, you can visually see the increase in values of pi from 1 pi to 5 pi.


Laying the sliceform down, the center is the largest circle of 5 pi and the other circles are skewed closer to the edge.

I made a sphere sliceform here. http://papercraftetc.blogspot.com/2013/07/sliceforms-are-my-new-obsession.html  I love the visual differences of the two sliceforms.


Poor Pi Ball does not have as much structure as a regular sphere sliceform.  The slices are not at fixed intervals but at a multiple of pi.


Here is the PDF of the Pi Ball sliceform.  I used cardstock to create the model.
https://drive.google.com/file/d/0B7oGIyVDbRGYR01KazczN25UOFU/view?usp=sharing&resourcekey=0-h41U31sF15w8yjA8pZHldA

Here is the .Studio file.
https://drive.google.com/file/d/0B7oGIyVDbRGYdTAzSGF5VW85SUU/view?usp=sharing&resourcekey=0-e8s8IUa0iHnFv32YDtr7NA

Happy Super Pi Day!