
I have reproduced the 1927 version of the Flivver.

Underside of the Flivver
Here is a Youtube video of the Flivver Carousel in action.
This model has four touch points which tell the story of the Ford Flivver.
In the late 1920s, Henry Ford didn't just want to put a car in every driveway. He wanted to put a plane in every garage. His dream machine was the Ford Flivver, a tiny "Model T of the sky" with a top speed of 85 mph. In 1928, test pilot Harry J. Brooks set out to fly it from Detroit to Miami, about 1,150 miles. He crashed off the coast of Melbourne, Florida, and Ford's flying-car-for-everyone dream ended there.
My project brings that story back to life as a Ford Flivver carousel model. It's powered by Roger Wagner's Makerport and coded in MicroBlocks, with the carousel turning at a servo speed of -10 (slow enough for a close look). NeoPixel LEDs add sparkle, and touching one of four sensors plays an audio clip covering a piece of the Flivver's history. The fourth sensor plays "Fly Me to the Moon," because it reminds me that it's good to dream beyond expectations.
The real Flivver's wingspan is about 22 feet; my model's is about 4 inches (roughly 1:62 scale). The fuselage, about 15 feet 6 inches on the real plane, measures about 3 inches on the model. This version carries the tail number Harry J. Brooks flew on his final flight and matches the plane now on display at the Henry Ford museum (the original prototype had no logos).
The presentation box, designed in TurtleStitch, combines 65 lb cardstock, foil aircraft details, and acetate columns for durability and visual impact.
This project blends history, engineering, art, and math: scaling real dimensions, programming motion and lights, and building a precise presentation box. It proves that maker technology can resurrect lost history, turning a nearly century-old aviation failure into an interactive learning experience. Sometimes the most powerful stories come from dreams that never quite took off, and with the right tools, we can help them fly again.
This Flivver carousel model is similar to a previous design where I recreated World War I and World War II airplanes. The key difference is that I am now using a Makerport to operate the carousel instead of a Hyperduino. I used Microblocks to code the Makerport. Here is my Microblocks code. https://drive.google.com/file/d/1Ee-l0Z119E5AGopJ3d01yc-ZeR_2e6Yn/view?usp=sharing
Materials and Construction
I used a Makerport with a servo, Neopixel LED and four earring backs as touch sensors. Cables to attach the LED and touch sensors.
I designed the presentation box in TurtleStitch so I can easily resize it for future models. I used 65 lb. white cardstock for the presentation box and foil cardstock in iridescent silver and blue from Michaels to make the airplanes and carousel. I used Cricut acetate for the center column of the carousel.
I used Silhouette brand chipboard to reinforce the top of the presentation box. I recommend using Aleene's Tacky Glue and tweezers for adhering the small tabs. I used mini brads from Michaels to attach the propeller to the engine so that the propeller could rotate.
Construction FilesHere is the PDF.
https://drive.google.com/file/d/1MV3Lxt506zfHZqnYcjMZaeBe3UPE599N/view?usp=sharing
Here is the .Studio file.
Here is the .Studio file.
Here is the SVG. The file extends beyond the viewable area. Zoom out to see the entire file.
Make the Flivvers
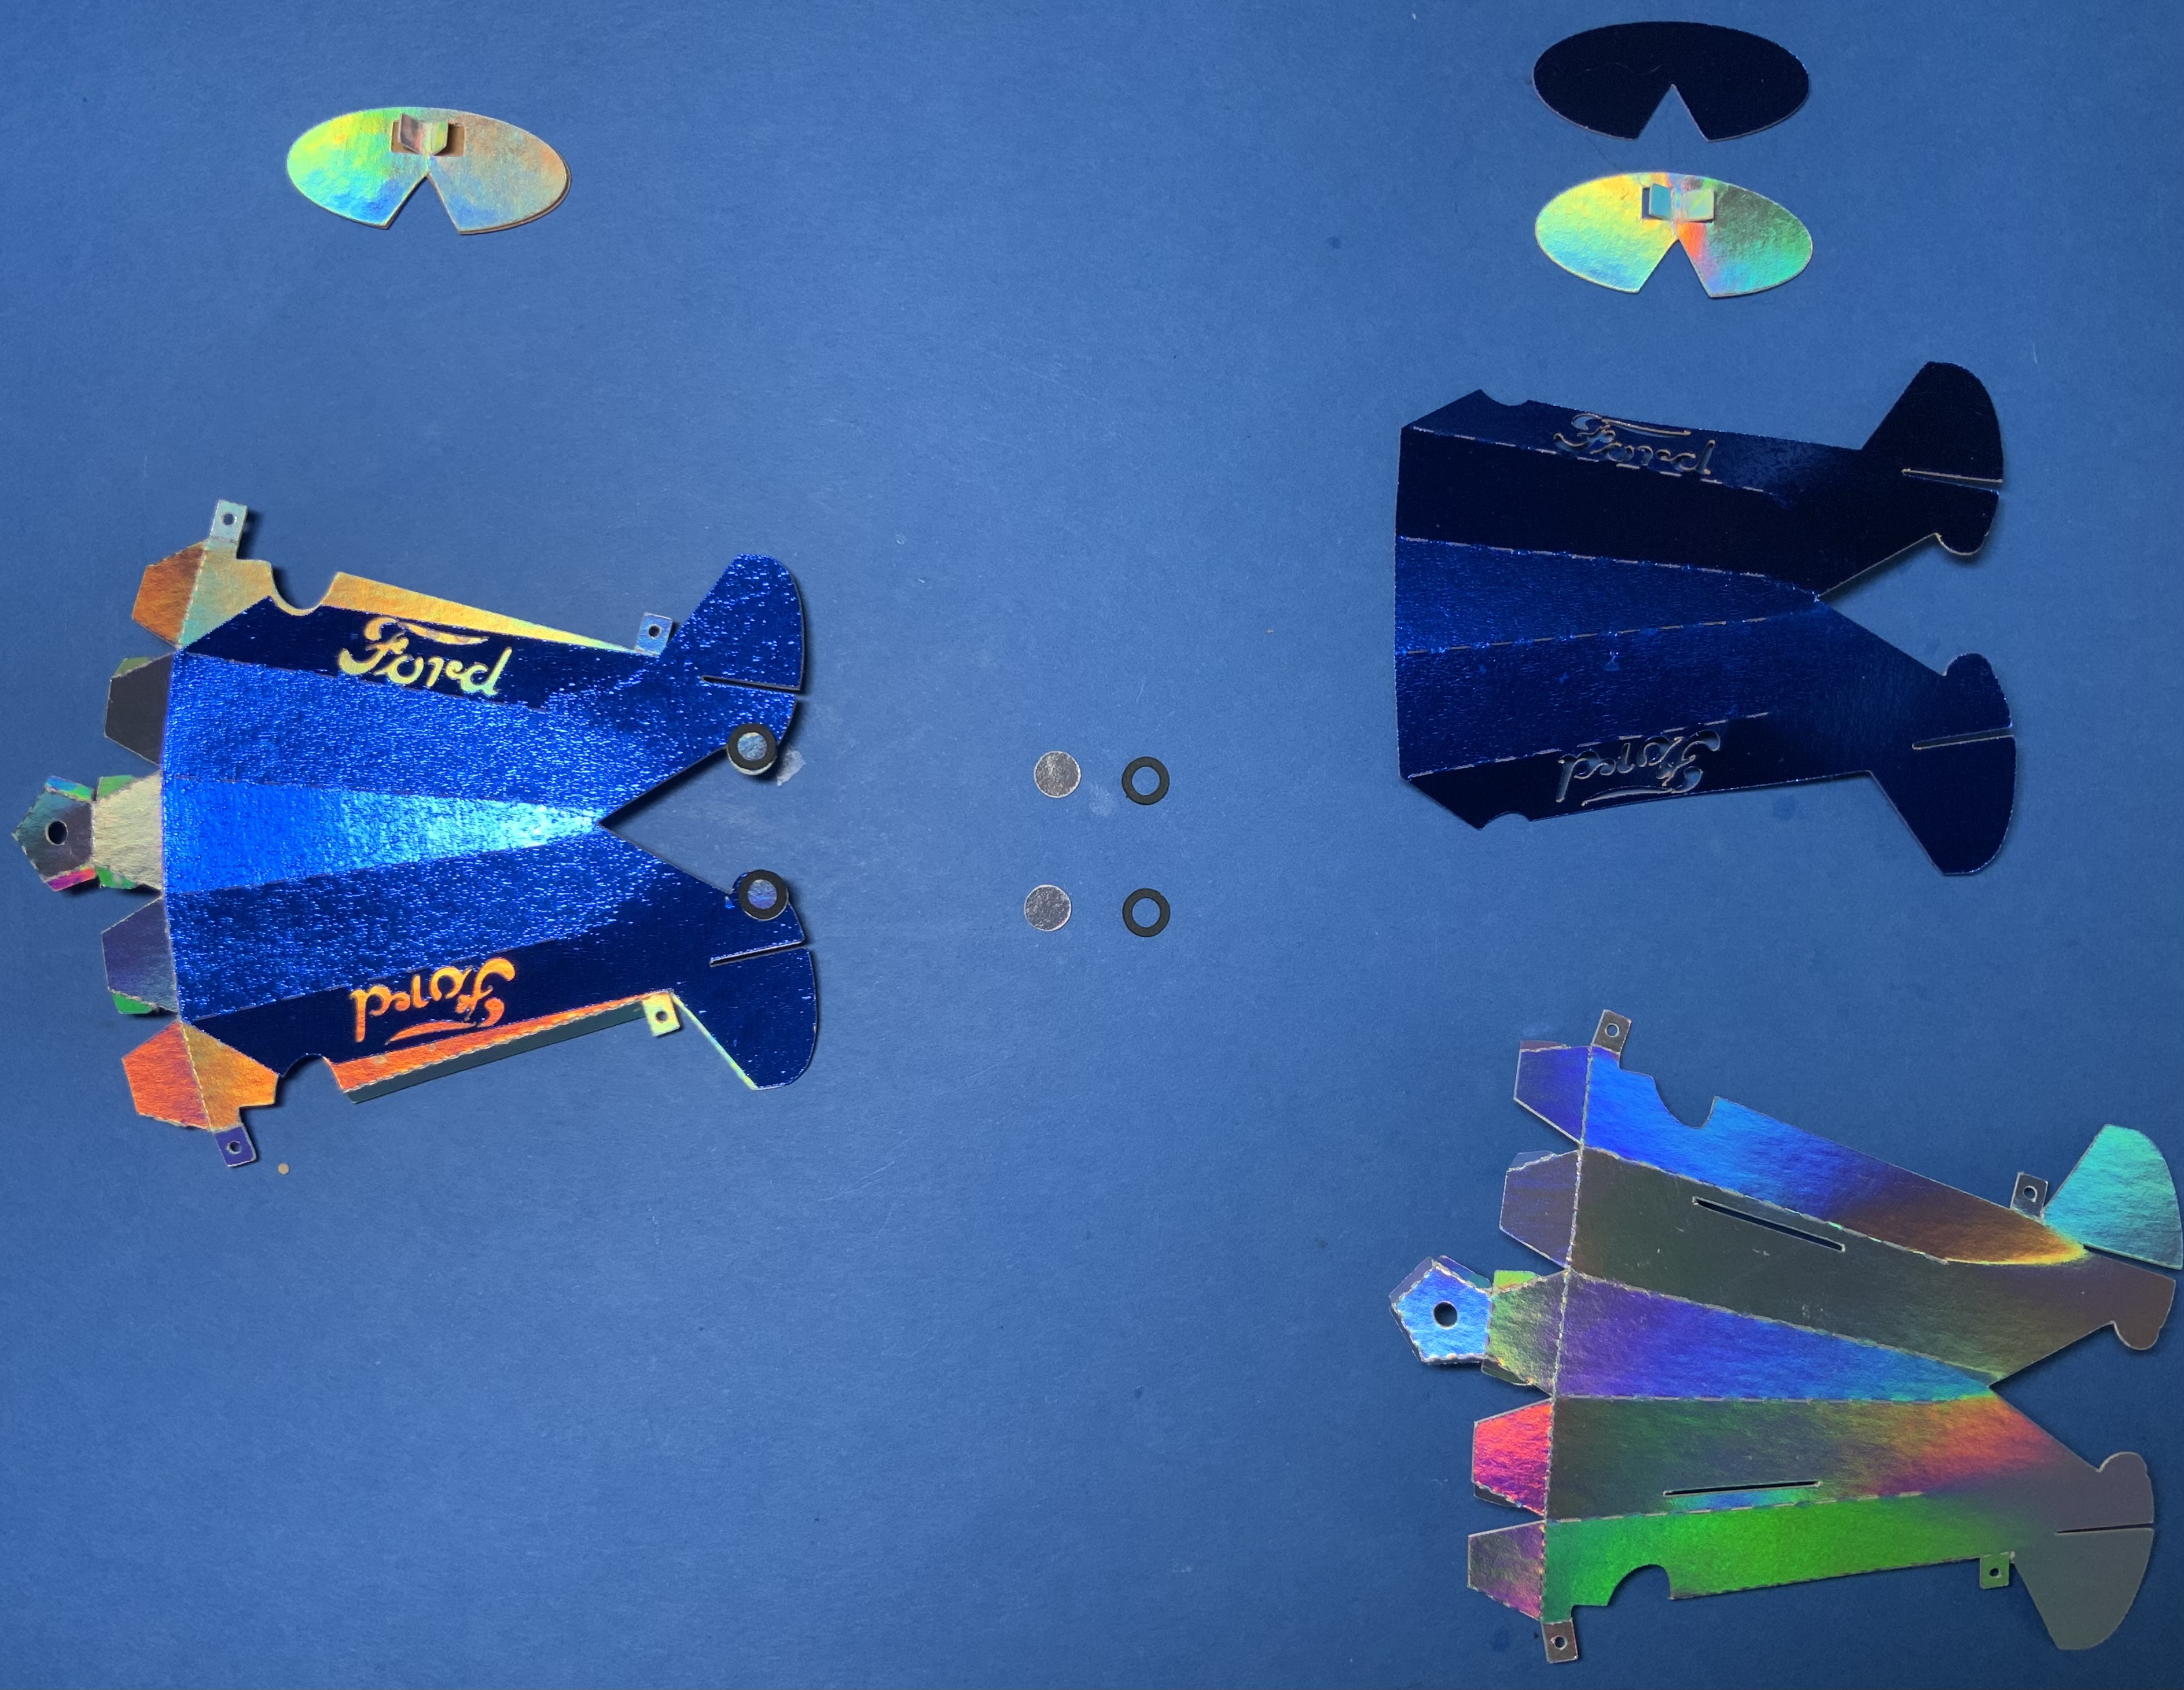
Glue the blue Ford body of the plane to the silver body.
Flare the tabs of the back wing and glue the silver wing to the blue wing as completed in the left view above.
Make all of the wheels by gluing the black wheels onto the silver portion of the wheel.
Make the propeller by gluing two of the propellers together.

Make the wing by flaring out the wheel struts/landing gear and gluing the two sides of the silver wing together.

Glue each of the tabs of the engine.

This is a slow process...do one at a time and allow the glue to dry before proceeding to the next engine tab.

Insert a mini brad into the center of the propeller and then into the center of the pentagon of the engine. Splay the prongs. Cut the prongs of a mini brad so that the prongs will fit inside the engine compartment.

Continue gluing the tabs of the engine.

Glue and adhere the two hangers.

Apply glue to the tabs of the fuselage and the tail and adhere.

Glue the word "FORD" and the numbers on the plane using the template provided.
Glue on the landing wheels to the landing gear/strut.
Center the wing and glue it to the fuselage.
Slide the horizontal stablizer onto the tail and glue the tabs to each side of the tail.
Repeat the above procedure three times to make a total of four Flivvers.
Make the Makerport Presentation Box

Crease the box parts as shown above.

Apply glue to the top tab as shown above and adhere to make a triangle shape.
Repeat for the other side of this piece.
Glue the bottom tab into a rectangle as shown above.
Repeat for the other side.

Glue on the sides of the box.

Another view.
Apply glue as shown to the side piece. The triangular area on each side of this tab needs to remain free of glue. Apply glue to the two tabs to make the box. The top of this side piece slides into the top side.

Adhere the sides so that it looks as above.

Completed box.

Apply foam dots to the Makerport so that the Makerport is seated firmly in the presentation box above the lip of the side of the box.
Make the Carousel

Center Column

Crease as above.

Apply Glue Dots on the seams and adhere together.

Apply Glue Dots on the top of each tab at the base.

Affix the circular star base.

Apply Glue Dots to the bottom of the circular star base and adhere a round acetate circle.

Affix another round acetate base with Glue Dots.

Glue the star piece onto the silver band

The star piece will start at the dotted tab line.

And will overlap on the other end. Make sure the glue dries before continuing.

Bend the semicircles at a right angle to create a ledge.

Apply glue to the rectangular area.

Affix it to the edge of the silver band.

Apply glue to the tab.

Adhere the tab to make a circular band. Set this aside.

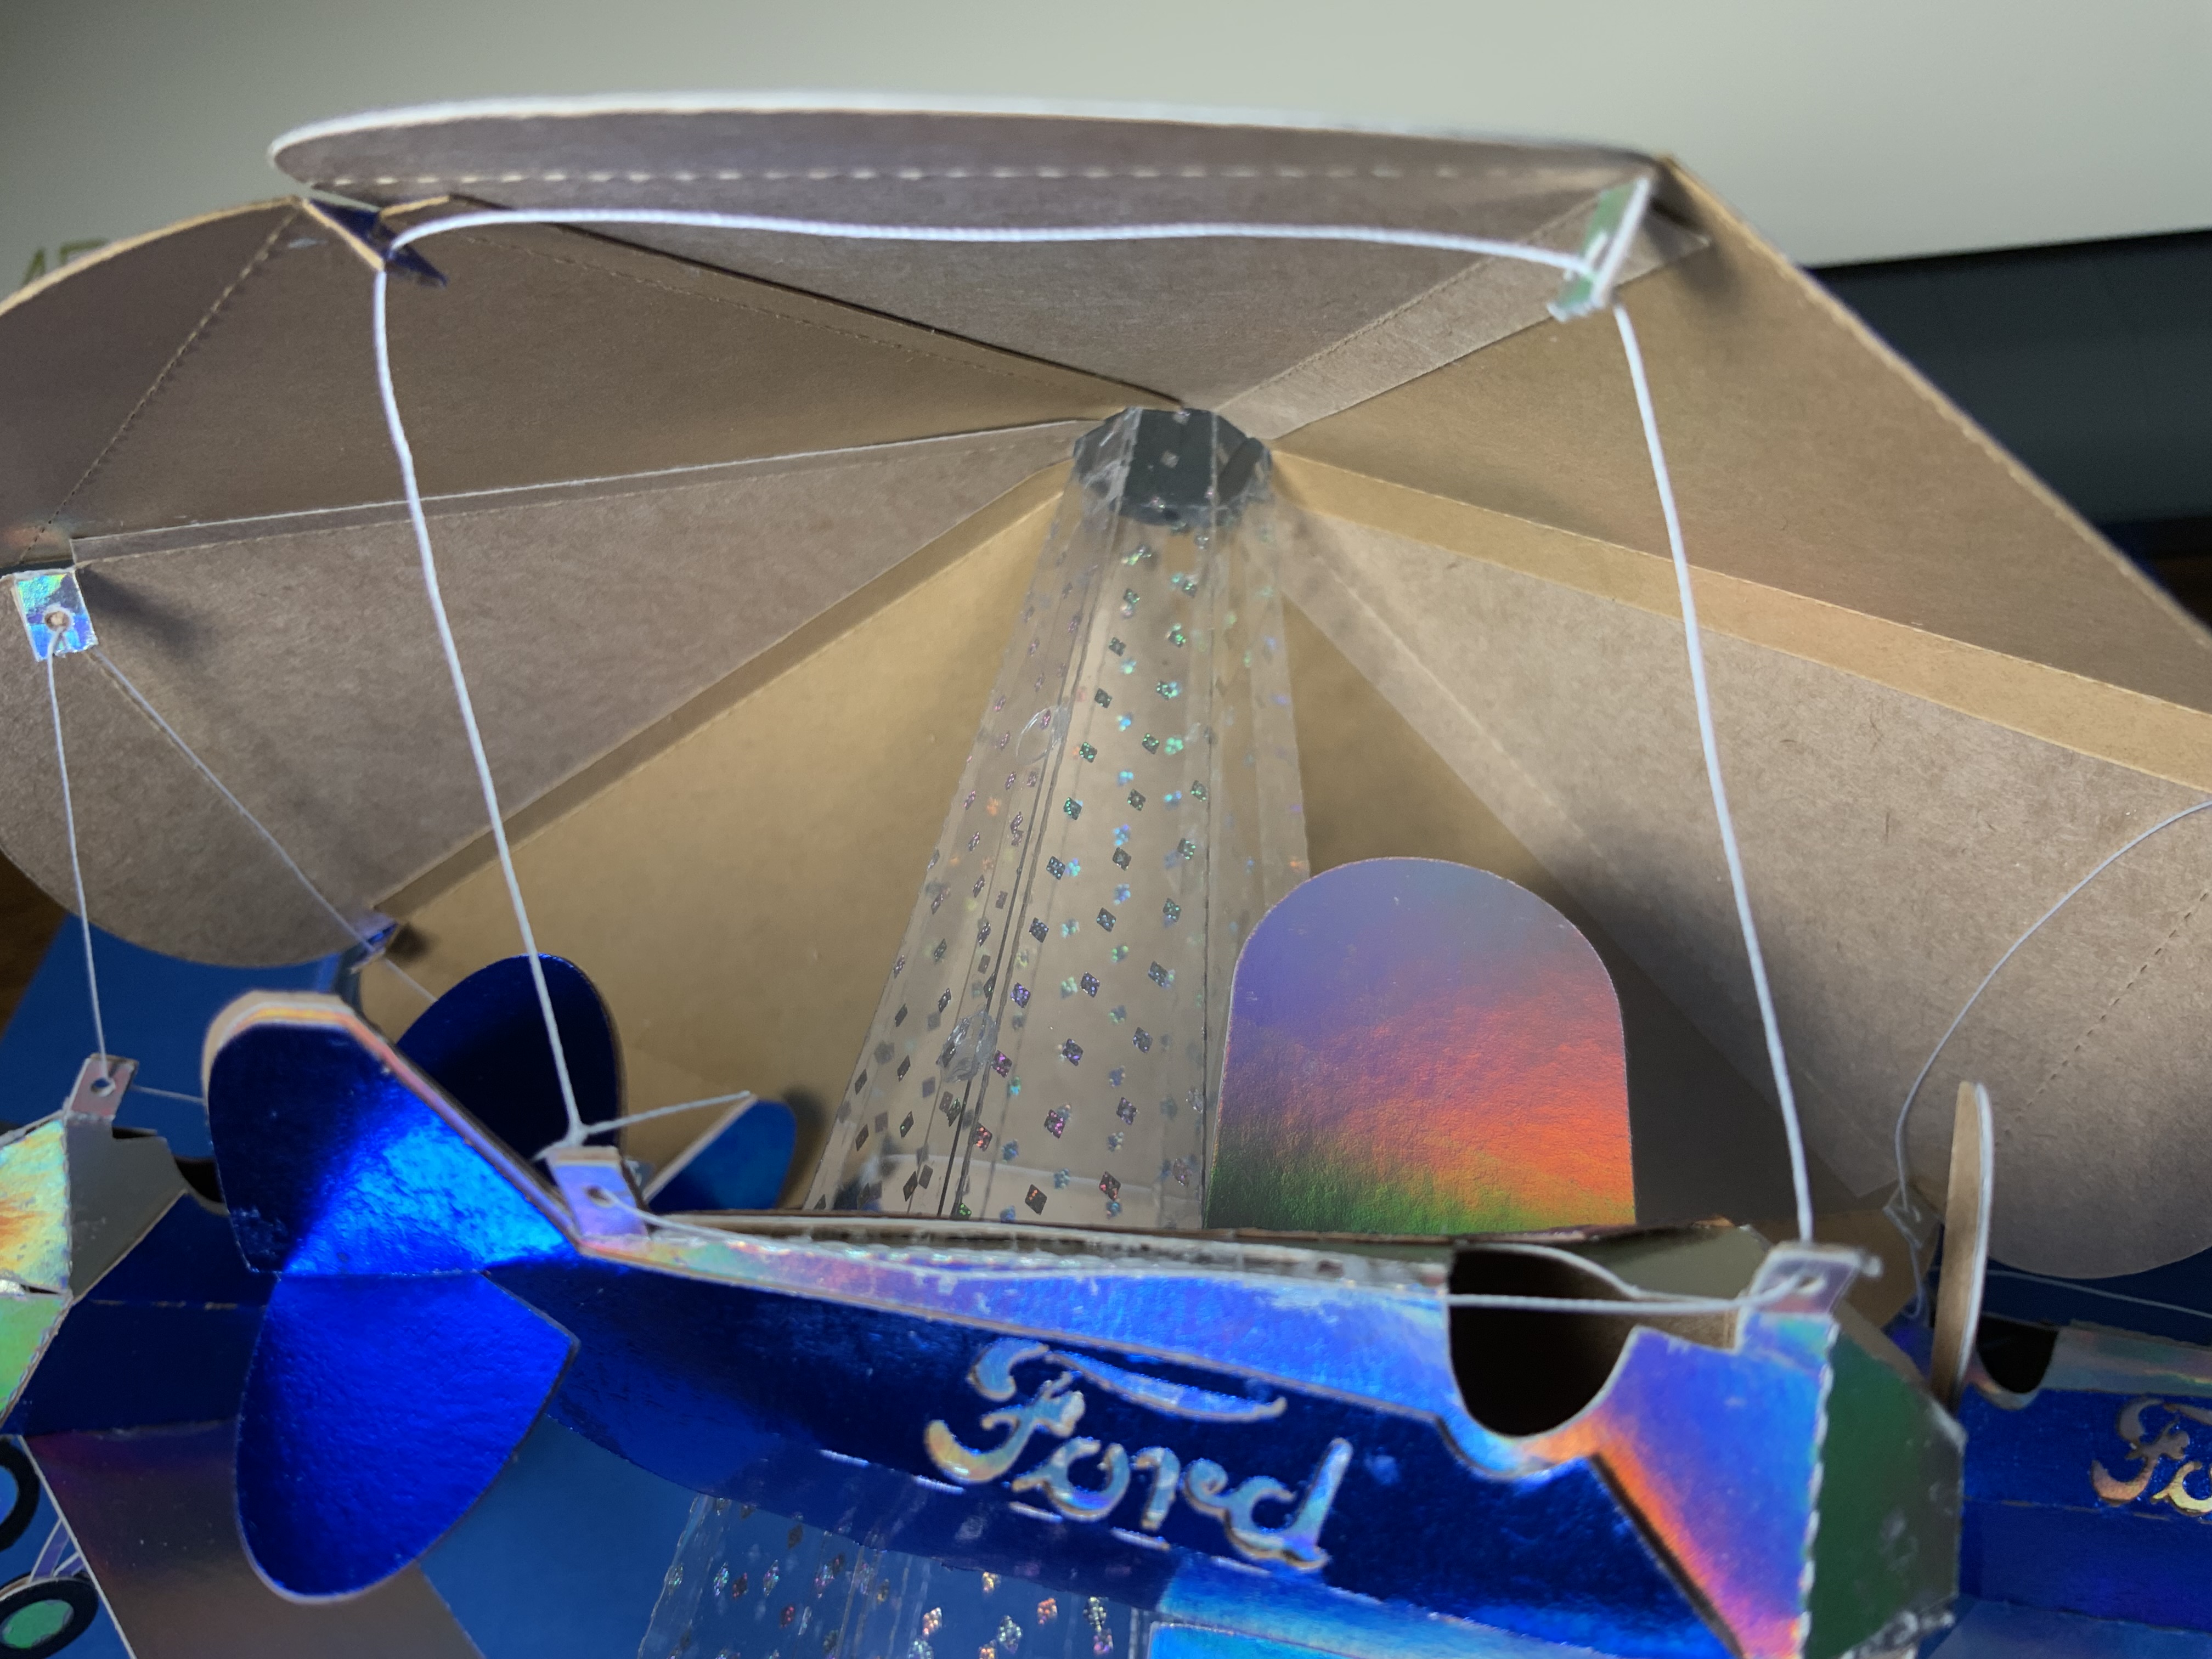
Make the canopy by bending the tab of the hanger upwards and then downwards to create a double sided hanger. Glue this together. Repeat for the remaining seven canopy pieces.

Bend the tab and the curved edge toward the back as shown above.

Apply glue to the the tab. Make sure that there is no glue on the hanger section.

Adhere the tab. The hanger is at a right angle to the piece. This will be where the airplanes will be attached to the canopy with a thread. Repeat until all of the canopy pieces are attached.

Completed canopy. Set this aside.

Assemble the carousel by applying glue to the shelf tabs on the center band.

I adhered the center column to the glued area and I felt that it needed more support. I added five Glue Dots to the bottom of the shelf area as shown above.

Slide the canopy onto the top of the center column. Apply Glue Dots to each of the center column tabs.

I adhered opposite side tabs first so that the canopy will be level.

View of top of canopy. Slide the center column with the canopy onto the axle.

Make the flag topper by gluing the two colored triangles outward so that the color shows through the star section.

Make the center axle by creasing the dotted lines and applying glue to the tab with the notch at the bottom.

Fold the axle in half to adhere the glue.

I inserted a wooden dowel to make the axle round and to make sure that the glue adhered correctly.

Slide the axle attachment onto the axle. Apply glue to the triangular tabs and adhere.

Attach the motor mount onto the axle attachment. I used Glue Dots to attach the motor mount.

Apply Glue Dots to each of the petal sections

Adhere the petal piece to the top of the canopy. I inserted the center axle into the canopy assembly to make sure that this piece is centered correctly and then removed the center axle.

Apply glue to the canopy topper and adhere into a cone shape.
Using a 24 inch length of thread and sewing needle, slide the threaded needle through the two holes in the fuselage. And then slide the threaded needle through the two holes in the hanger. Adjust the height of the plane and make a double knot in the thread. Cut off the excess thread.
Set the canopy aside.
Assemble the Presentation Box

The platform for the assembly is one piece of cardstock and one piece of chipboard that is glued together to make a sturdy platform for the Flivver Carousel.
Attach the servo with the paper strap and adhere the tabs. I used Glue Dots.
The servo is attached at pin 14.

I added four earring backs with stoppers to the back of the platform.
The touch pins are attached to the Makerport at pins 1, 3, 5, and 7.

I attached the Neopixel with the wires attached as shown above. Notice I have written down the position of all of the pins. This is important as I found the wires slipping out and then they needed to put back in the correct position.
The Neopixel is attached to the Makerport at pin 16.

I attached a ribbon cable for the four touch sensors. I recommend marking the colors of the touch sensors so that you will know which sensor goes to which pin. (The black heads of the ribbon cable are for the odd pins.)

Here is a view of the ribbon cable attached to the Makerport.

Here is the position of the NeoPixel and Servo on the Makerport.

Attach the axle to the servo.

Apply Glue Dots to each section of the petal piece and adhere it.

Slide on the canopy topper and flag. Use a glue dot to attach the final circle on top (not shown).
I recorded my voice by using the online program, https://online-voice-recorder.com/. It was easy to use. Click on the red button to start recording and record whatever you would like to say. Once completed, the sound bite can be appended by moving the blue vertical lines on either side of the sound bite. Save the sound bite to your computer. Change the name of the sound bite to a three digit number, like 001greeting.mp3. Copy this file from your computer to the MakerPort file. The Maker Port file is opened by moving the slider on the side of the MakerPort from "Code" to "File". You can find the Makerport files in the Finder menu. The name of the files is MPFILES. Once in the files, paste the sound bite to a folder, I made a new folder and I named it 003. I then pasted the sound bite to this folder. With each subsequent sound bite, I change the value of the voice recording to the next number and placed all of my sound bites here...for example, 002song...003poem, etc.
Change the slider on the MakerPort from "File" to "Code". The MakerPort needs to be in "Code" mode in order for it to connect to the MicroBlocks software. MicroBlocks, https://microblocks.fun is a block programming language which is dynamic. When your MakerPort is connected to MicroBlocks, the code is automatically updated in the MakerPort. This is a great time saver because it eliminates the step of copying and transferring the code manually from your computer to the MakerPort.
Once the Microblocks file is coded the Makerport is ready to be in standalone mode. Your program is stored on the Makerport for use. I used a MakerPort Power Bank to power my MakerPort.
Here is my Microblocks code that I used for my Makerport, https://drive.google.com/file/d/1Ee-l0Z119E5AGopJ3d01yc-ZeR_2e6Yn/view?usp=sharing You can use my file as an example as to how to animate your Flivver


Here are two screenshots of the Microblocks code that I used.
No comments:
Post a Comment