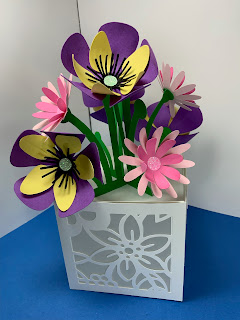
TurtleStitch Coded Flowers in a Square Vase and Cut with an Electronic Paper Cutter
(I have included all of the cut files. No coding is necessary. I would like the users of my blog to be inspired by the Turtlestitch coding.)
TurtleStitch is not just for embroidery. TurtleStitch can be used to design images for an electronic cutting machine like a Silhouette or the Cricut.
I used two different programs to produce the flowers.
According to Wikipedia, "A rose curve, also called Grandi's rose or the multifolium, is a curve which has the shape of a petalled flower. This curve was named rhodonea by the Italian mathematician Guido Grandi between 1723 and 1728 because it resembles a rose. The polar equation of the rose is generally given as
r = amplitude * sin(n * theta)
or
r = amplitude * cos(n * theta)
The sine version has the advantage that roses with odd n have a petal oriented vertically (up or down depending on n), whereas the cosine orientation gives a petal oriented to the right.
If n is odd, the rose is n-petalled.
If n is even, the rose is 2n-petalled."
I used n = 4 and n = 6 to get a rose which is 8-petaled and 12-petaled. The rose was resized in the Silhouette software to get petals that looked appealing.
The second program was coded by Simon Mong and I added the list of coordinates to make the flowers.
It produces petals which are coded as a list of points. The list of points, in the form (x,y), produce a curved line from one point to the next. The petal can be resized by changing the value of the move curve points.
From TurtleStitch to Silhouette
Once the program was coded in TurtleStitch, I saved the results as a DXF file. The file was then opened with the Silhouette software and resized according to my preference in order for me to make my flowers.
Cut Files
The following files are the flowers that I created in TurtleStitch. (I designed the vase in Silhouette.) You can cut out the flowers and vase with scissors by using the PDF file or with an electronic cutting machine by using the .Studio file for the Silhouette machine or the SVG file for the Cricut machine.
Here is the PDF. I used 110 lb. cardstock for the vase and green stems and 65lb. cardstock for the flowers. I used glitter cardstock for the center of each flower.
Here is the .Studio file.
Here is the SVG. The file extends beyond the viewable area. Zoom out to see the entire file.
Make the Vase
To make the vase, glue the vellum to the inside of the box sides. Glue the side tabs of the vase together to form a square. Bend the tabs of the bottom of the vase at a right angle. Apply glue to the tabs and slide the bottom into the vase body.
Make the stems of the flower by bending the stem piece in half at the center and the tabs of the buds at a right angle. Glue two of the stem half pieces together leaving the bud portion unglued at a right angle. This process will be repeated until all of the stems are glued back to back and resemble an X.
The bottom tabs of each of the four stems are slide into the corresponding X slot on the top of the vase and glued to the underside of the top.
To complete the vase and stem construction, the outer tabs of this top are bent upward at a right angle and glued to the inside of the vase body.
Make the Flowers
When making this flower arrangement, I suggest that you have fun with the design. Mix and match the different pieces to create unique flowers. Assemble the flowers in a pleasing pattern. There are a total of 12 flowers in this arrangement. Curl the petals upward. Assemble the flower by gluing one flower piece on top of another. Glue this flower onto the bud portion of the stem.
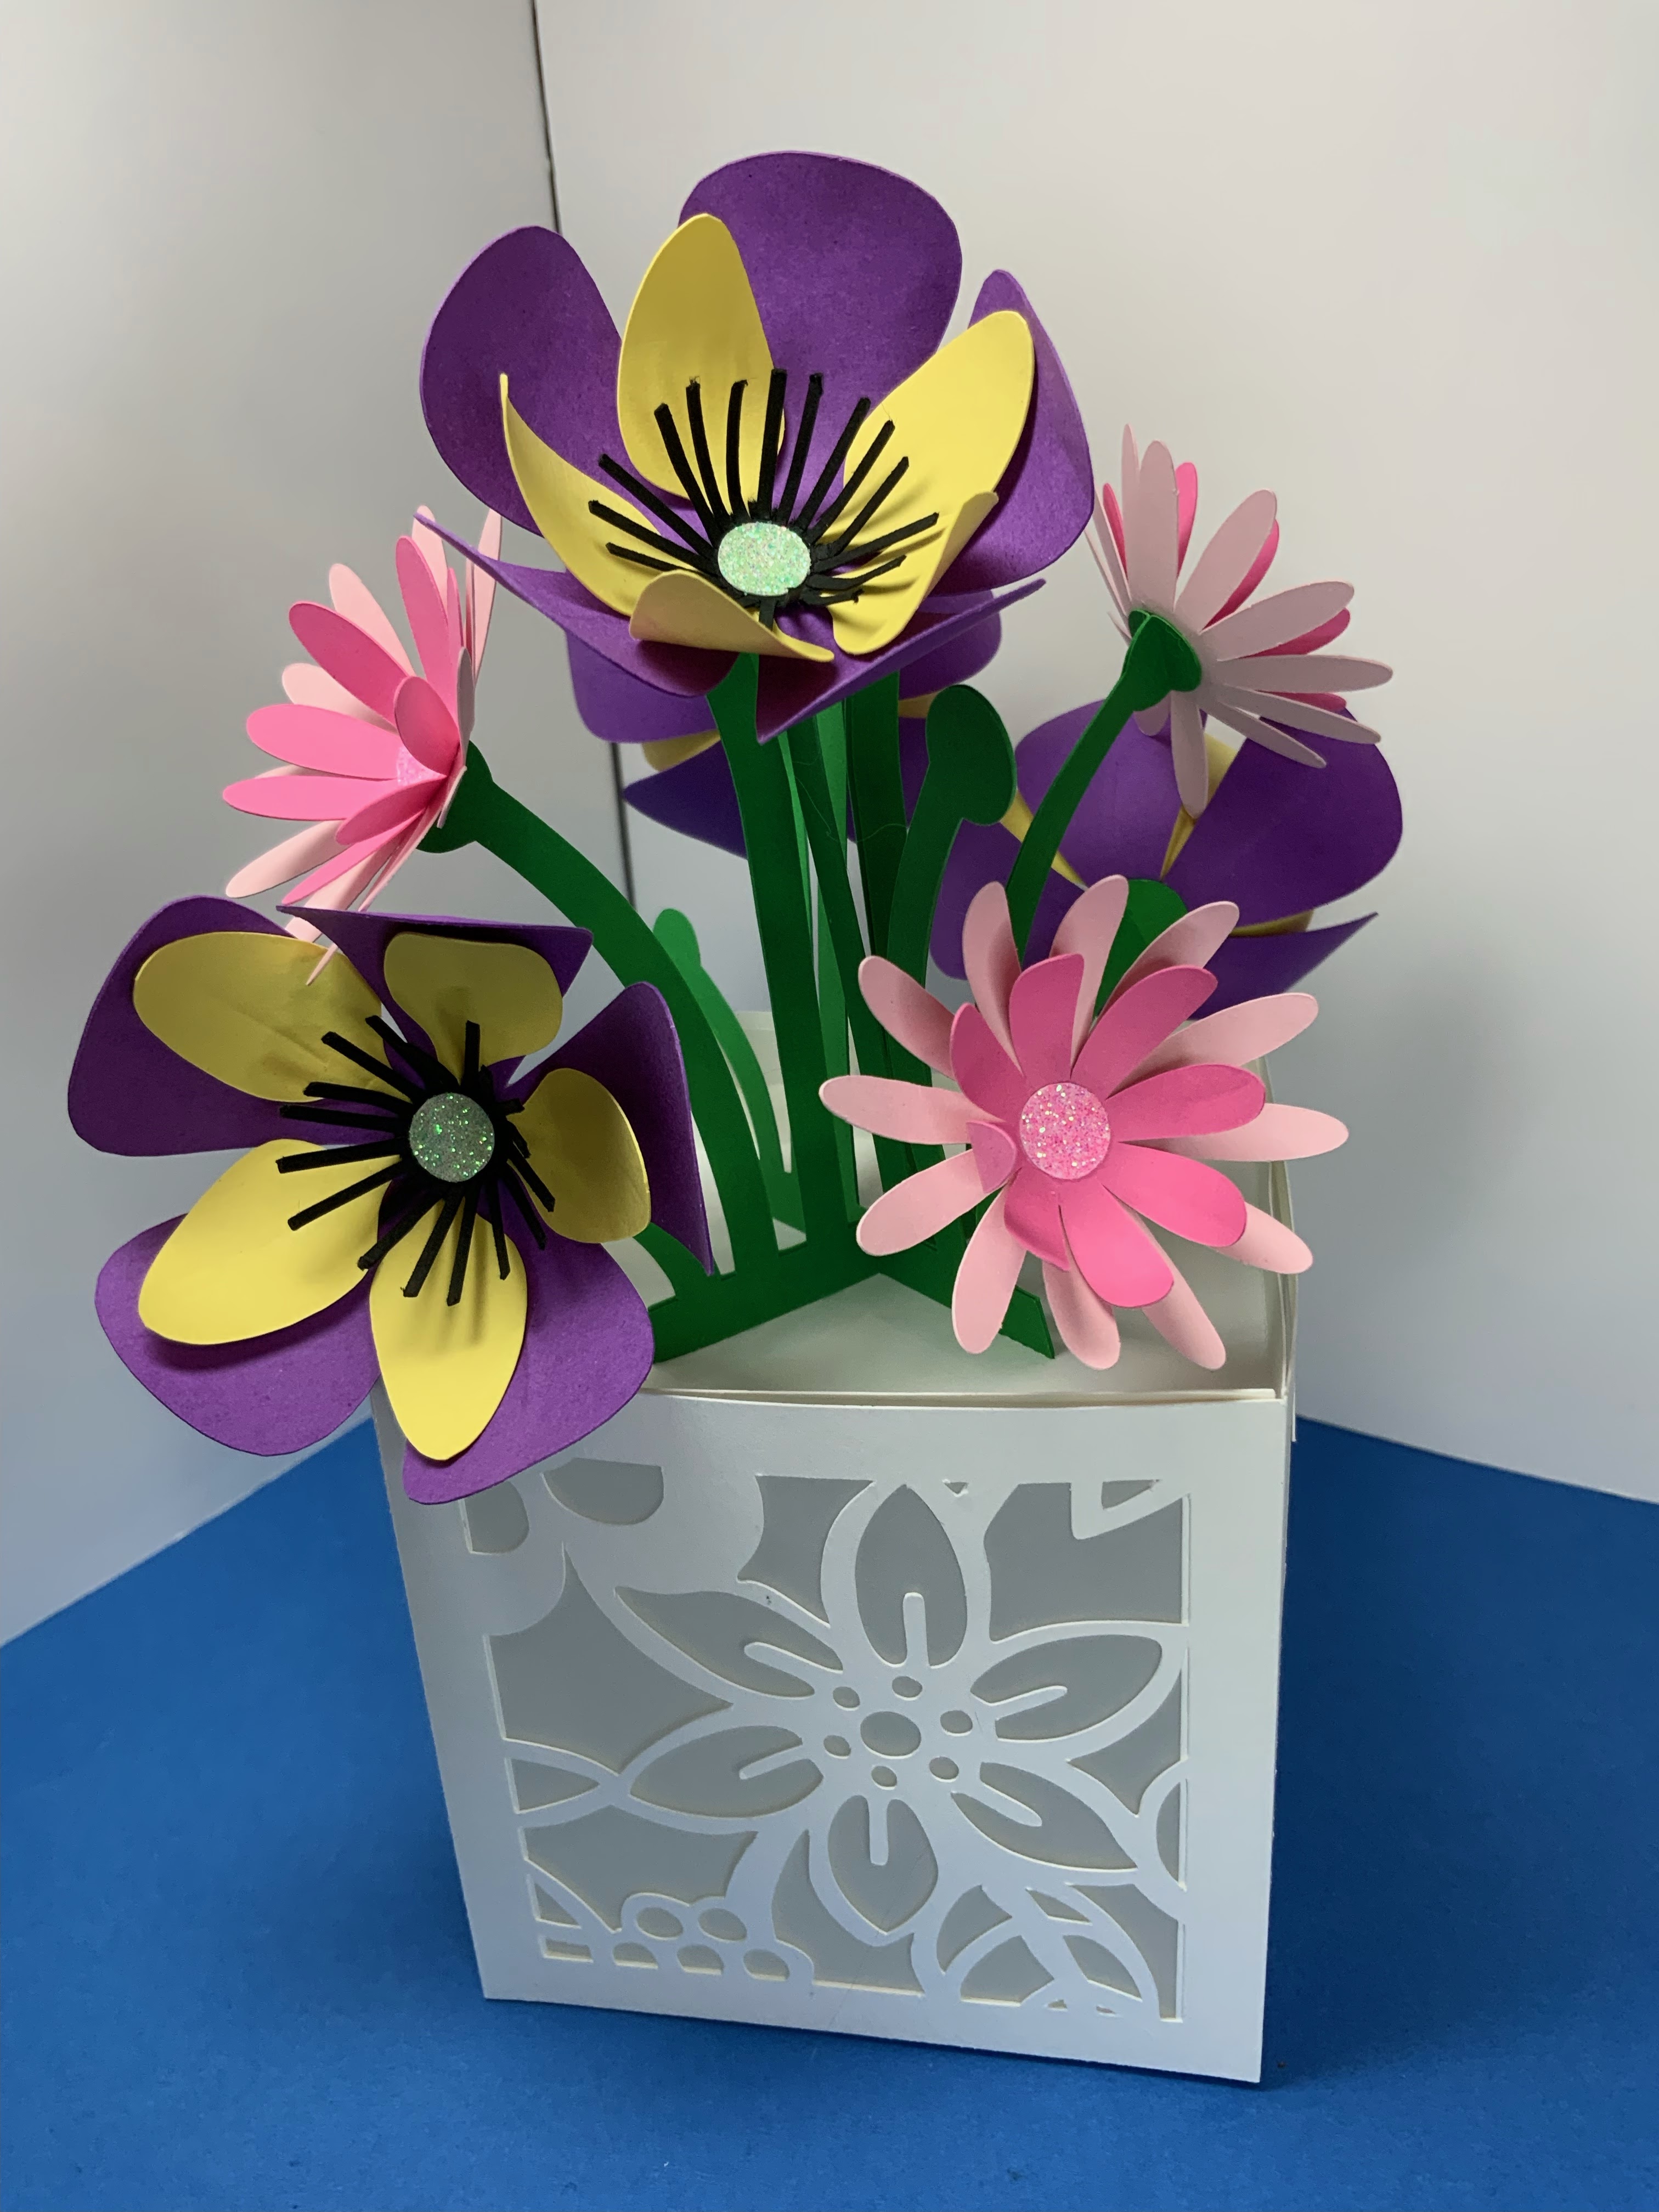
Another view, before the yellow flowers were added.

No comments:
Post a Comment