Zigzag Circus Birthday Card
This Zigzag Circus Birthday Card is a companion to the Circus Diorama Decoration from the previous blog posting, https://papercraftetc.blogspot.com/2023/05/circus-diorama-decoration-for-birthday.html
The birthday card is like a diorama.
There are five sections, which when folded together, create a three dimensional scene. Notice the zigzag that is formed when the sections are glued together. The tent design is placed on both sides of the front and also on both sides of the back.
Here is the PDF file. I used Neenah brand 65 lb White Gold metallic cardstock from Office Depot. I also used 65 lb. red foil cardstock and red sparkle cardstock from Michaels.
Here is the .Studio file.
Here is the SVG. The file goes beyond the viewable area. Zoom out to see the entire file.
Making the Zigzag Card
When cutting out the design, I recommend using overcut as the intricate pieces might not cut out correctly and also cutting the design with two passes. The five sections are glued together by a tab. Each section is numbered in the file to help with the placement.
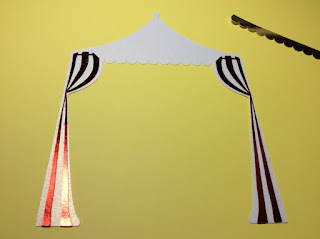
Make four of these tents.
The red curtains are centered in the middle of the side panels. Align the bottom of the red foil first and then glue down the rest of the curtain/
Align the gold scallops at the top corners and then glue the gold scallops down on the piece. Align the canopy on top and glue it down. Glue on the gold pinnacle to finish the tent. Repeat for the other three tents.
The tent pieces will be glued back to back at the top portion of the tent as shown above.
Slide the tent pieces onto the last slice of the zigzag.
Glue the lower portions of the curtain down, (on both sides). Repeat for the other side.
Cut out the Happy Birthday but do not remove the letters from the mat. Cut a string about 8 inches and glue each letter to the string at the same location as the mat.
Carefully remove the letters from the mat and make sure the letters are adhered correctly.
Cut the string to size and add a gem embellishments to the ends.


No comments:
Post a Comment