A Christmas Present: A Train That Revolves Around a Christmas Tree With a Gear
A Christmas Present: A Train That Revolves Around a Christmas Tree With a Gear
Video of the Train Revolving Around the Christmas Tree
I made this Christmas present for myself. I have been wanting a train that revolves around a Christmas tree with a gear for a while. Here it is the day before Christmas and the elf (me) has finally fulfilled the wish. I took a previous blog entry and modified the pieces. I added tabs to the bottom of the wheel platform so that the trains could be attached to the base and I simplified the engine grill. The engine grill is now attached on both sides. The sides are bent and glued to the inside of the engine compartment. The tab at the bottom of the engine is glued underneath the wheel platform as before.
Glue the five holes (one of the holes is the center of the template when cut) together. Precision gluing is necessary for the gear to operate properly.
Align the template with the outer gear casing. Glue the stack of holes which is the axle to the center of the outer gear casing.
Remove the template and throw it away as it is no longer needed.
Glue the two gears together.
Insert the two gears onto the axle. Make sure that the gear turns correctly. Set this aside.
Insert the tabs of the trains into the glitter gear and glue the tabs down on the underside of the gear.
Glue the glitter gear to the other two previous gears that were glued together.
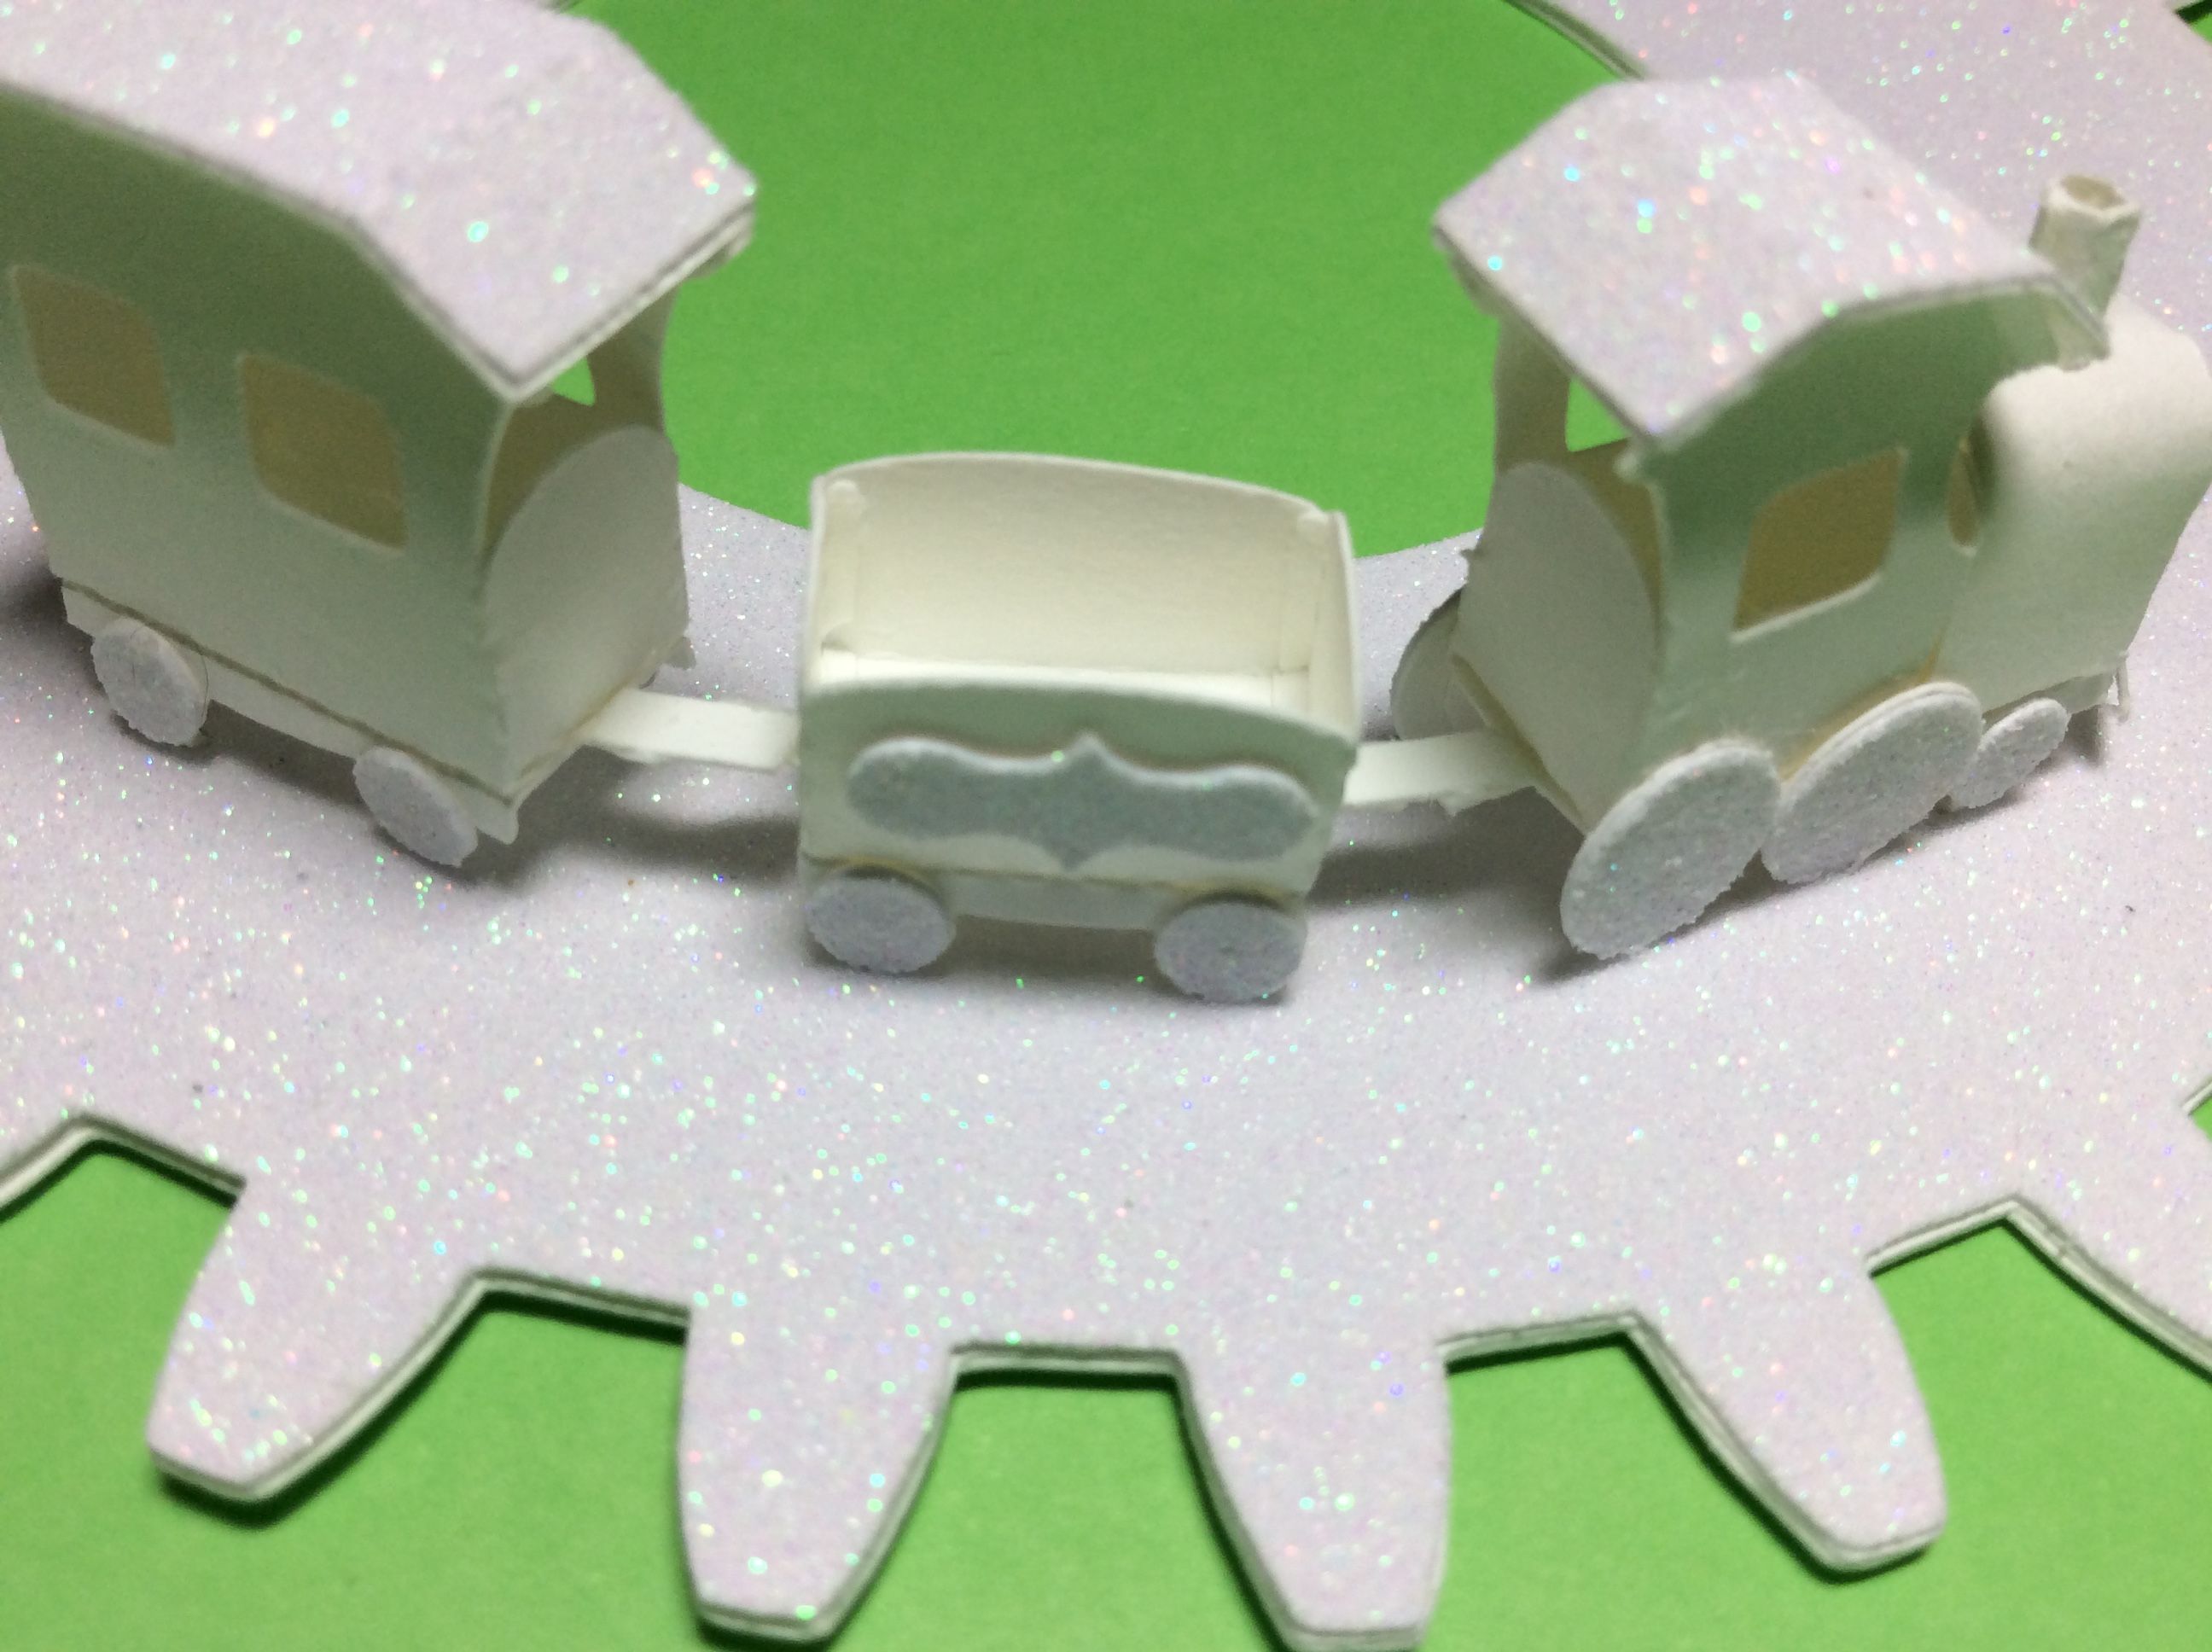
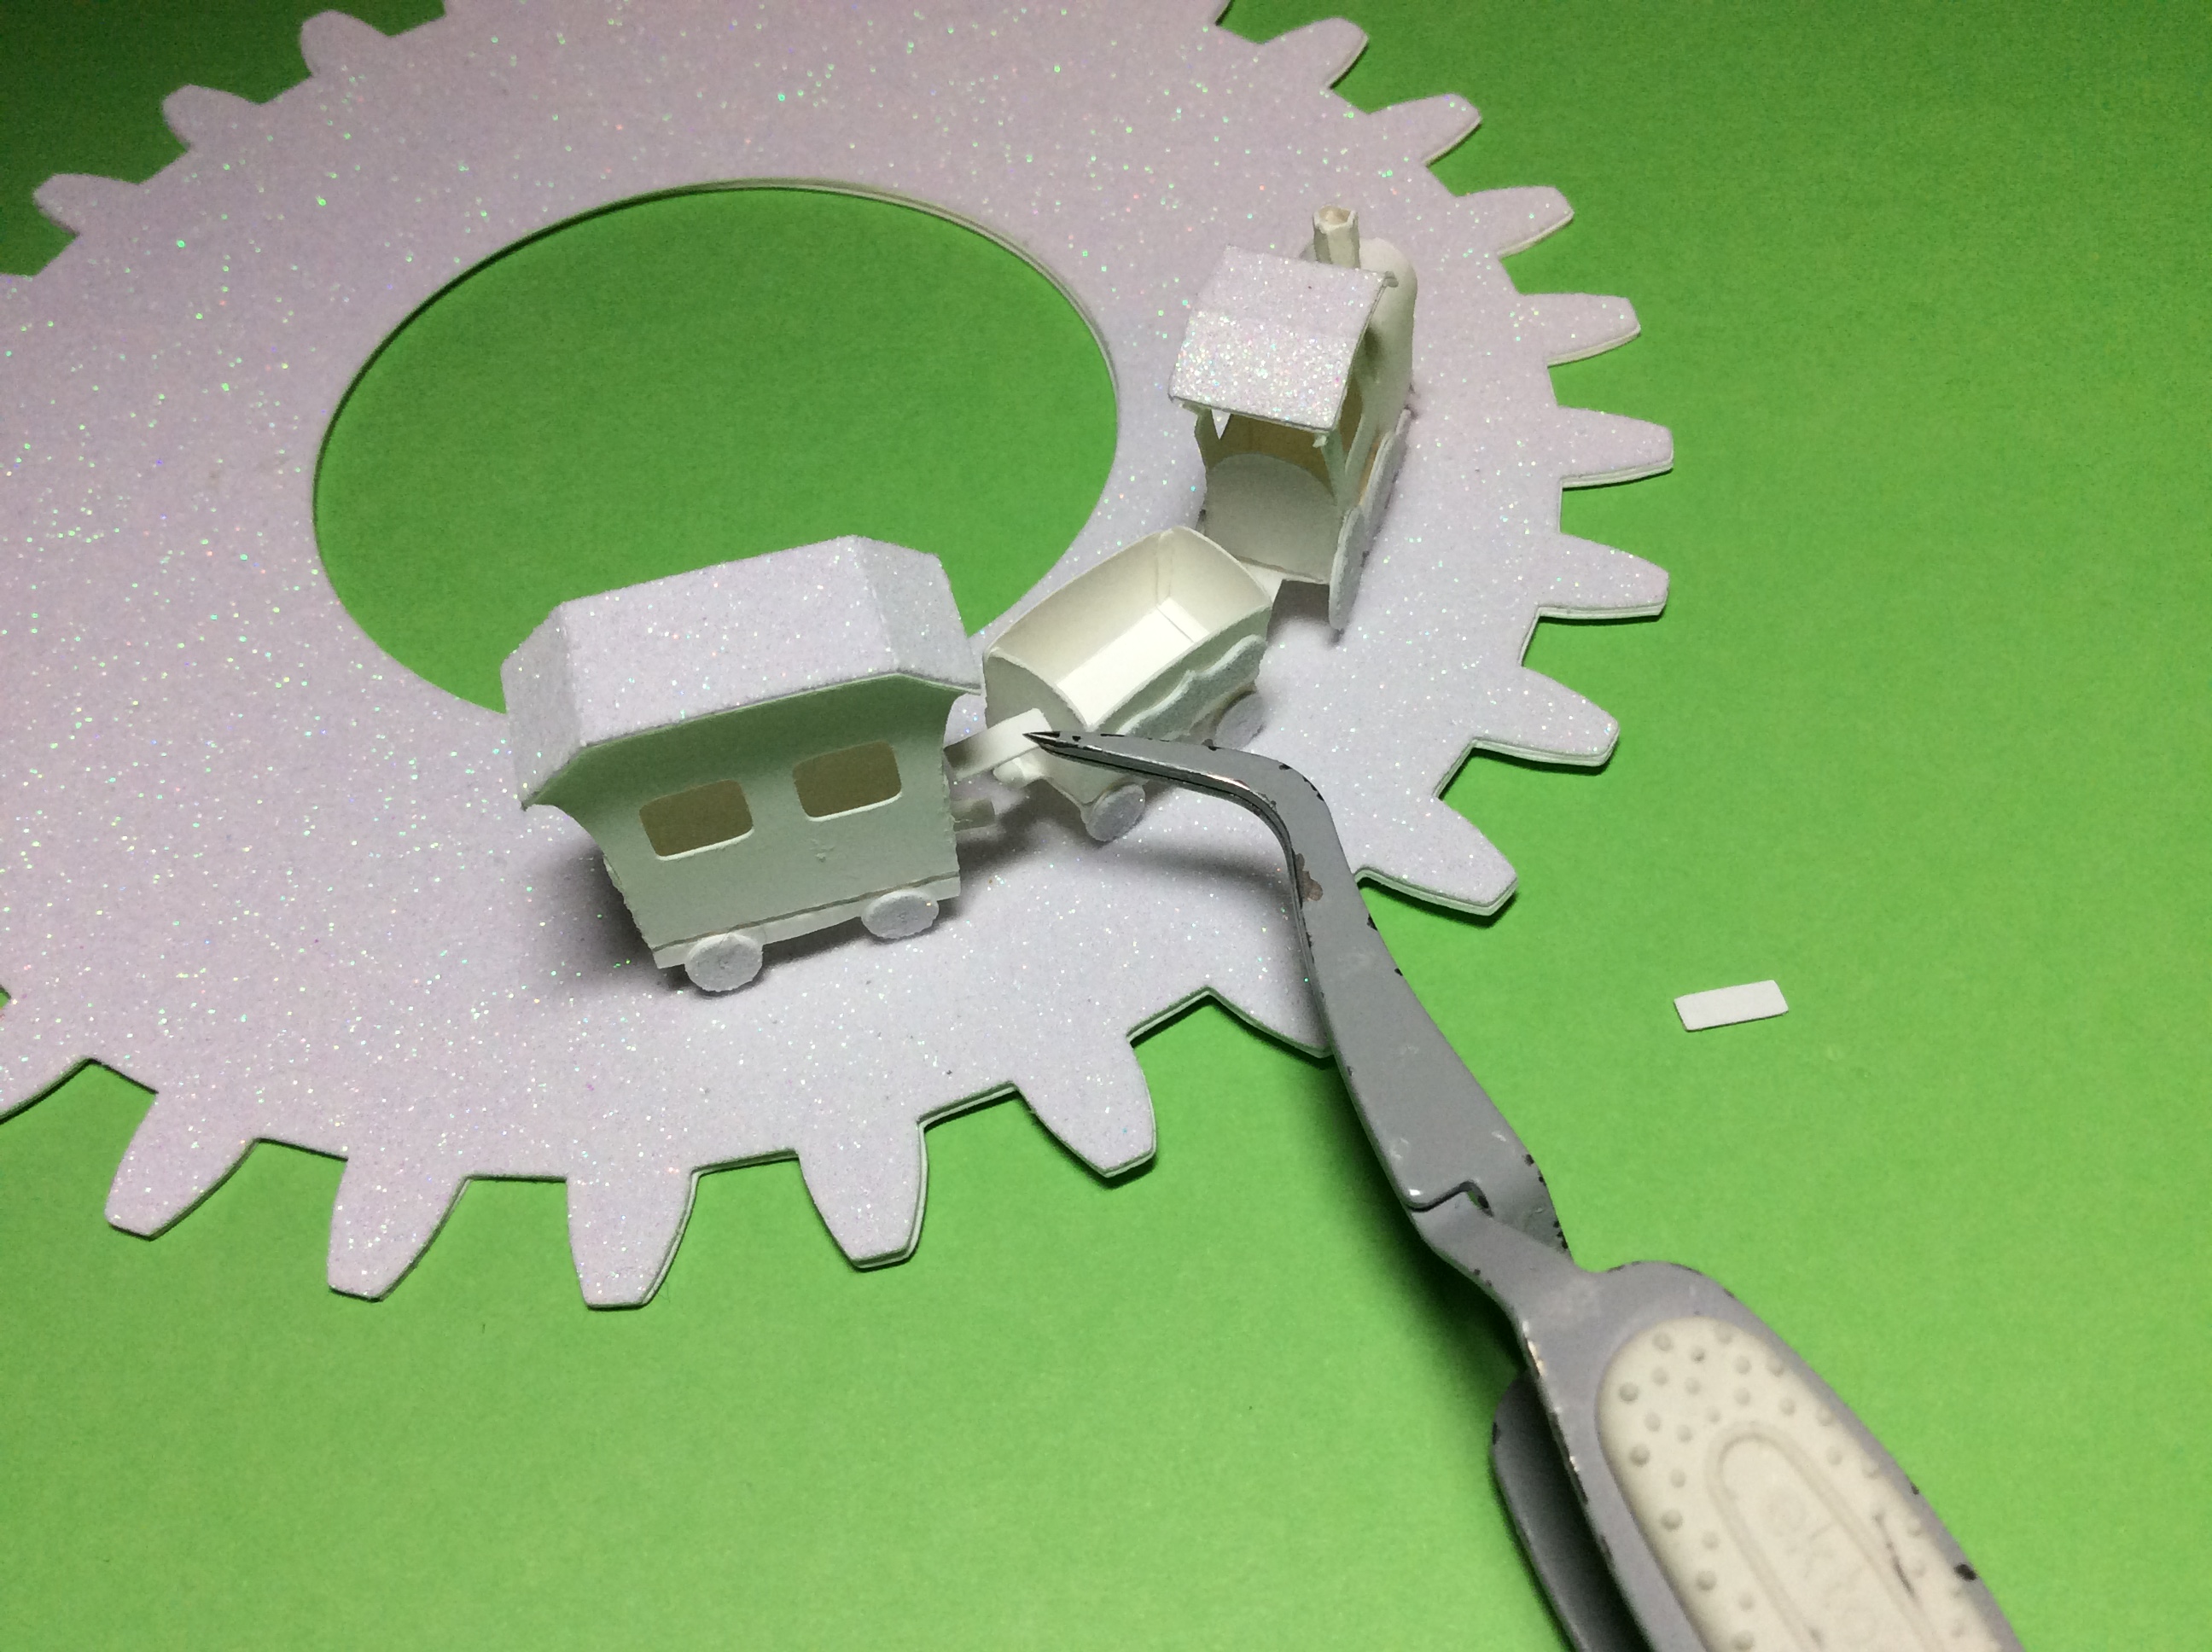
Glue the two connectors to the hitches between the trains.
Make the Christmas tree by gluing three of the tree sides together as shown above. Repeat for the other side.
Glue the Snowflake tree topper together and the tree base pieces together but leave the bottom tabs unglued.
Glue the Snowflake tree topper to the Christmas tree and the tree base as shown above.
Insert the tree base tabs into the glitter axle and apply glue the tabs. Adhere to the bottom of the glitter axle. Please note that this glitter axle piece is a little bit larger than the other axle pieces.
Apply glue to the center axle. Align the glitter axle to the center axle. There is a slight difference in size in the circle.
The axle difference is to prevent the gear from slipping out of the groove when the axle is turned.
Fold the tabs on the outer gear casing with the center hole as shown above.
Slide the outer gear casing with the hole over the Christmas tree and and encase the tabs around the bottom of the outer gear casing. Apply glue to each of the tabs and adhere to the underside of the piece.
The gear portion is now completed and the gear should move freely when turned. Set this aside.
Make the bottom of the box by gluing the sides together into an octagon.
Apply glue to the tabs inside the box and adhere the bottom octagon. Turn the piece over and apply glue to the tabs on the bottom of the piece. Adhere the other bottom octagon. The box has a two sided bottom for to provide extra support for objects placed in the box.
Make the top of the box by gluing the sides together into an octagon. The Snowflake cut outs from the sides are used to embellish the top of the gear casing.
Apply glue to the tabs inside the box and adhere the top octagon. Turn the piece over.
Apply glue to the tabs on the top of the box. Using a tape runner, apply tape to the top octagon. I did this two step gluing procedure together because it would be hard to apply the tape runner glue once the top octagon was glued on top. Center the top octagon with the tape runner glue on top.
Glue on the Snowflakes to the edges of the gear casing.
I added a small box to the train car. The tiny box is in the files. It is very small and requires patience to glue the tabs on each part of the box together with tweezers.
💕Merry Christmas from the Papercraft Christmas Elf!💕
I just found your blog and you are an amazing inspiration! I am a 4-H educator and I so want to bring some of your ideas into a STEM based after-school program! Thank you, thank you, thank you!


I just found your blog and you are an amazing inspiration! I am a 4-H educator and I so want to bring some of your ideas into a STEM based after-school program! Thank you, thank you, thank you!
ReplyDeleteI love 4-H. I was a Cloverbud leader! It is a fabulous program. I am so happy to share my creations with you.
Deleteamazing inspiration I like so much;)
ReplyDeleteI love it! I didn't get to make it last Christmas, but maybe next year!
ReplyDeleteCould we add a small solar motor?
ReplyDeleteI don’t recommend it because paper is flammable and it could cause a fire if left unattended.
DeleteI would love to try this pattern. The SVG link does not work. Can it be updated?
ReplyDeleteThe SVG file has been updated. Zoom out to see the entire file.
DeleteThank you so very much! I cant wait to try it!
DeleteThis is amazing. You are so clever (and generous).
ReplyDelete