A Small Moravian Star
For my Silhouette paper cutting friends, no coding is necessary as I have provided the files for two types of small Moravian Stars in my files. One star has equal sized points and the other star has two different sized points. The directions to assemble the stars are the same.
Here is the PDF file. I used 65 lb. white cardstock.
Here is the .Studio file.
Here is the SVG.
To Create a Moravian Star In TurtleStitch
1). Here is my generalized code for the Moravian Star in TurtleStitch, https://www.turtlestitch.org/run#cloud:Username=Elaine&ProjectName=Small%20Moravian%20Star Change the variable length for the side length of the largest point and variable angle for the angle degree of the points, if desired. Run the code in TurtleStitch. The second point will be 2/3 ads the size of the largest point.
2). Three designs will be created with a one inch block for reference. In the TurtleStitch drop down File menu, Export as DXF for a paper cutting machine. Export this design to your cutting machine.
3). If a Silhouette cutting machine is being used, I have observed that the dimensions are not preserved. It must be resized in the Silhouette software before cutting. I have included a one inch square for reference. Once in the Silhouette software, release the compound path and observe the size of the one inch square. Divide 1.00 inch by this observed value and then multiply by 100 to get the percentage that the figures needs to be changed. In the Silhouette's Transform Panel, resize the entire image using the scale window.
The image selected will be transformed 97.2% when the Apply button is pressed.
4). Using your paper cutting machine, cut out 18 copies of the large point, 8 copies of the small point and three rectangle strips from 65 lb. card stock.
Making The Moravian Star
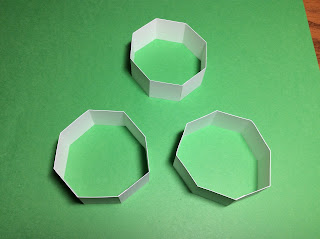
Fold the three strips of paper
Glue them into an octagon.
Apply glue on the two opposite squares of one octagonal strip. Slip the other octagonal strip over the glued area to form a structure as shown in the photo above.
Apply glue on the four middle squares as shown above.
Slide the third octagonal strip over the glued areas. This structure is now called a small rhombicuboctahedron
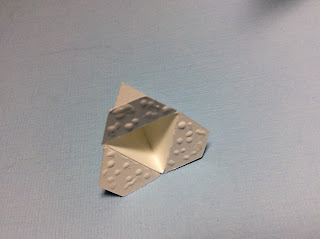
Fold the perforations of the small triangular pyramid. Apply glue on the left side which looks like a triangle.
Completed small triangular pyramid. Repeat for the remaining triangular pyramids.
Bend the large square pyramid and apply glue as shown.
Large square pyramid.
Glue all of the large square pyramids. If you want to hang up your Moravian star, tape a string in the center of the large square pyramid.
Glue the large square pyramid closed and allow the string to protrude from the center apex of the pyramid.
Completed parts before final assembly.
Apply glue to the four tabs of the large square pyramid.
Adhere large square pyramid as shown above.
Glue and adhere two more pyramids opposite to one another as shown above.
Apply glue to the small triangular pyramid tabs.
Adhere the tabs to the area where there is a triangle. Repeat for the remaining seven small triangular pyramids.
Glue and adhere the remaining large square pyramid to the open spaces with the tabs showing on the outside of the star.


Hi Elaine, this is a cool paper tutorial you made here ! I have never seen such process to generate a pattern. Could you please write me back I would love to ask you a few questions about it and talk about others paper related stuff. contact@nonitt.fr or on Instagram @nonitt thanks !
ReplyDeleteGlad to talk to you about my coding techniques.
DeleteI loved making these last year!
ReplyDelete