
In my last blog posting, https://papercraftetc.blogspot.com/2022/10/a-rubber-band-pop-up-haunted-house-for.html, I created a pop-up haunted house for Halloween. I belong to a group of educators who saw my pop-up and challenged me to recreate this pop-up mechanism in TurtleStitch. I knew it was an easy endeavor with just some basic math calculations using the Pythagorean theorem. In coding the mechanism, I decided to create a generalized form with variable dimensions so that I could use the code to design future rubber band pop-ups.
The rubber band pop-up mechanism is a cube with a diagonal in the middle. The diagonal is separated by a rubber band. When the base is pressed inward at the corners that are opposite to the internal diagonal, the mechanism becomes flat because a rubber band expands to fill the void in the diagonal. When the corner pressure is released, the expansion tension on the rubber band is released and the rubber band contracts to its natural state This phenomenon allows the form to deploy and become three dimensional.
The strip is divided into four sections. The first section represents the diagonal part #1, the second and third sections are the sides of the pop-up and the fourth section is diagonal part #2. The diagonal needs to divided into two parts for the rubber band to be expanded.The first part is generalized at 0.5 inches long. The second part is the remainder value of the diagonal.
Using the Pythagorean theorem, a^2 + b^2 = c^2 , the diagonal of the square is calculated. The variable "Length" in my code is the side of the cube.
To Create a Rubber Band Pop-up Mechanism In TurtleStitch:
1). Here is my generalized code for the rubber band pop-up in TurtleStitch, https://www.turtlestitch.org/run#cloud:Username=Elaine&ProjectName=Rubber%20Band%20Pop%2dUp%20Mechanism Change the variable side for the side length of the pop-up and variable height for the height of the pop-up, if desired. Run the code in TurtleStitch.
2). A rectanglar strip is created. In the TurtleStitch drop down File menu, Export as DXF for a paper cutting machine. Export this rectanglar strip.
3). Using your paper cutting machine, cut out two copies of these rectangle strips from 65 lb. card stock. The dotted lines are fold lines. Please follow the directions on when to fold the lines because the paper tends to warp and create uneven sides if the sides are folded too early. The lines with the circles on either end are slits where the rubber band is inserted. The rubber band that I used is a common Rainbow Loom rubber band.
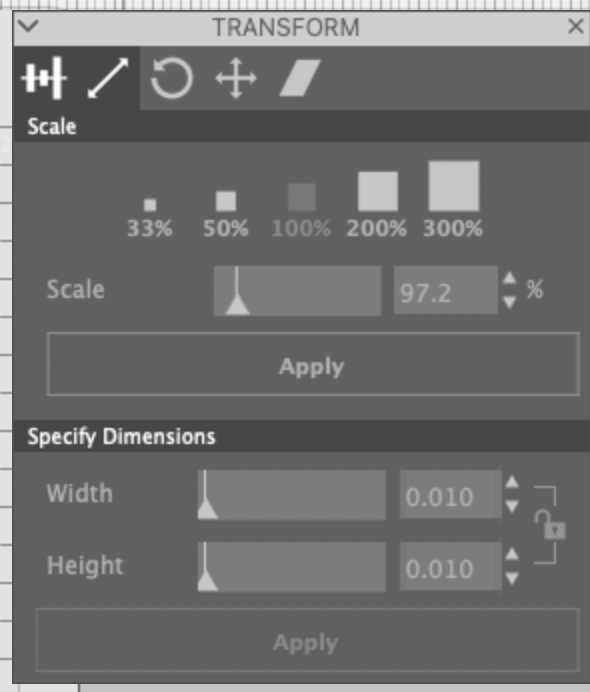
If a Silhouette cutting machine is being used, I have observed that the dimensions are not preserved. It must be resized in the Silhouette software before cutting. I have included a one inch square for reference. Once in the Silhouette software, release the compound path and observe the size of the one inch square. Divide 1.00 inch by this observed value and then multiply by 100 to get the percentage that the figures needs to be changed. In the Silhouette's Transform Panel, resize the entire image using the scale window.
Make the Pop-Up Rubber Band Base


No comments:
Post a Comment