
A Rubber Band Pop-Up Slice Form Easter Egg Card
This rubber band pop-up card is an engineering marvel. It combines a rubber band mechanism with a slice form egg and base that pops-up when removed from an A7 envelope. The entire design is about 6 1/2 inches tall. The recipient of this card will be astonished when the flat card opens into this amazing three dimensional Easter egg with a bunny inside.

The rubber band expands when the base is pressed down at the seam that is opposite to the internal diagonal. When the side pressure is released, the expansion tension on the rubber band is released and the rubber band returns to its natural state This phenomenom allows the slice form to deploy and become three dimensional.
Here is the PDF. I used 65 lb. cardstock. A one inch rubber band is required for the pop-up base. (The rubber band is similar to the rubber band used on a Rainbow Loom.)
Here is the .Studio file.
Here is the SVG.
There are three parts to this card. The rubber band pop-up base, a sliceform base and a sliceform egg. The rubber band pop-up base is easy to make. The slice form parts, egg and base, are not hard to make but they do require patience as it takes time to slide the correct slits together.
Make the Pop-Up Rubber Band Base

There are two sides to the rubber band base. Each side is folded over to create a two-ply base. Crease the paper as shown above.

Glue the folded sides together.

Glue the tabs together. Make sure that the slits are going in the same direction.

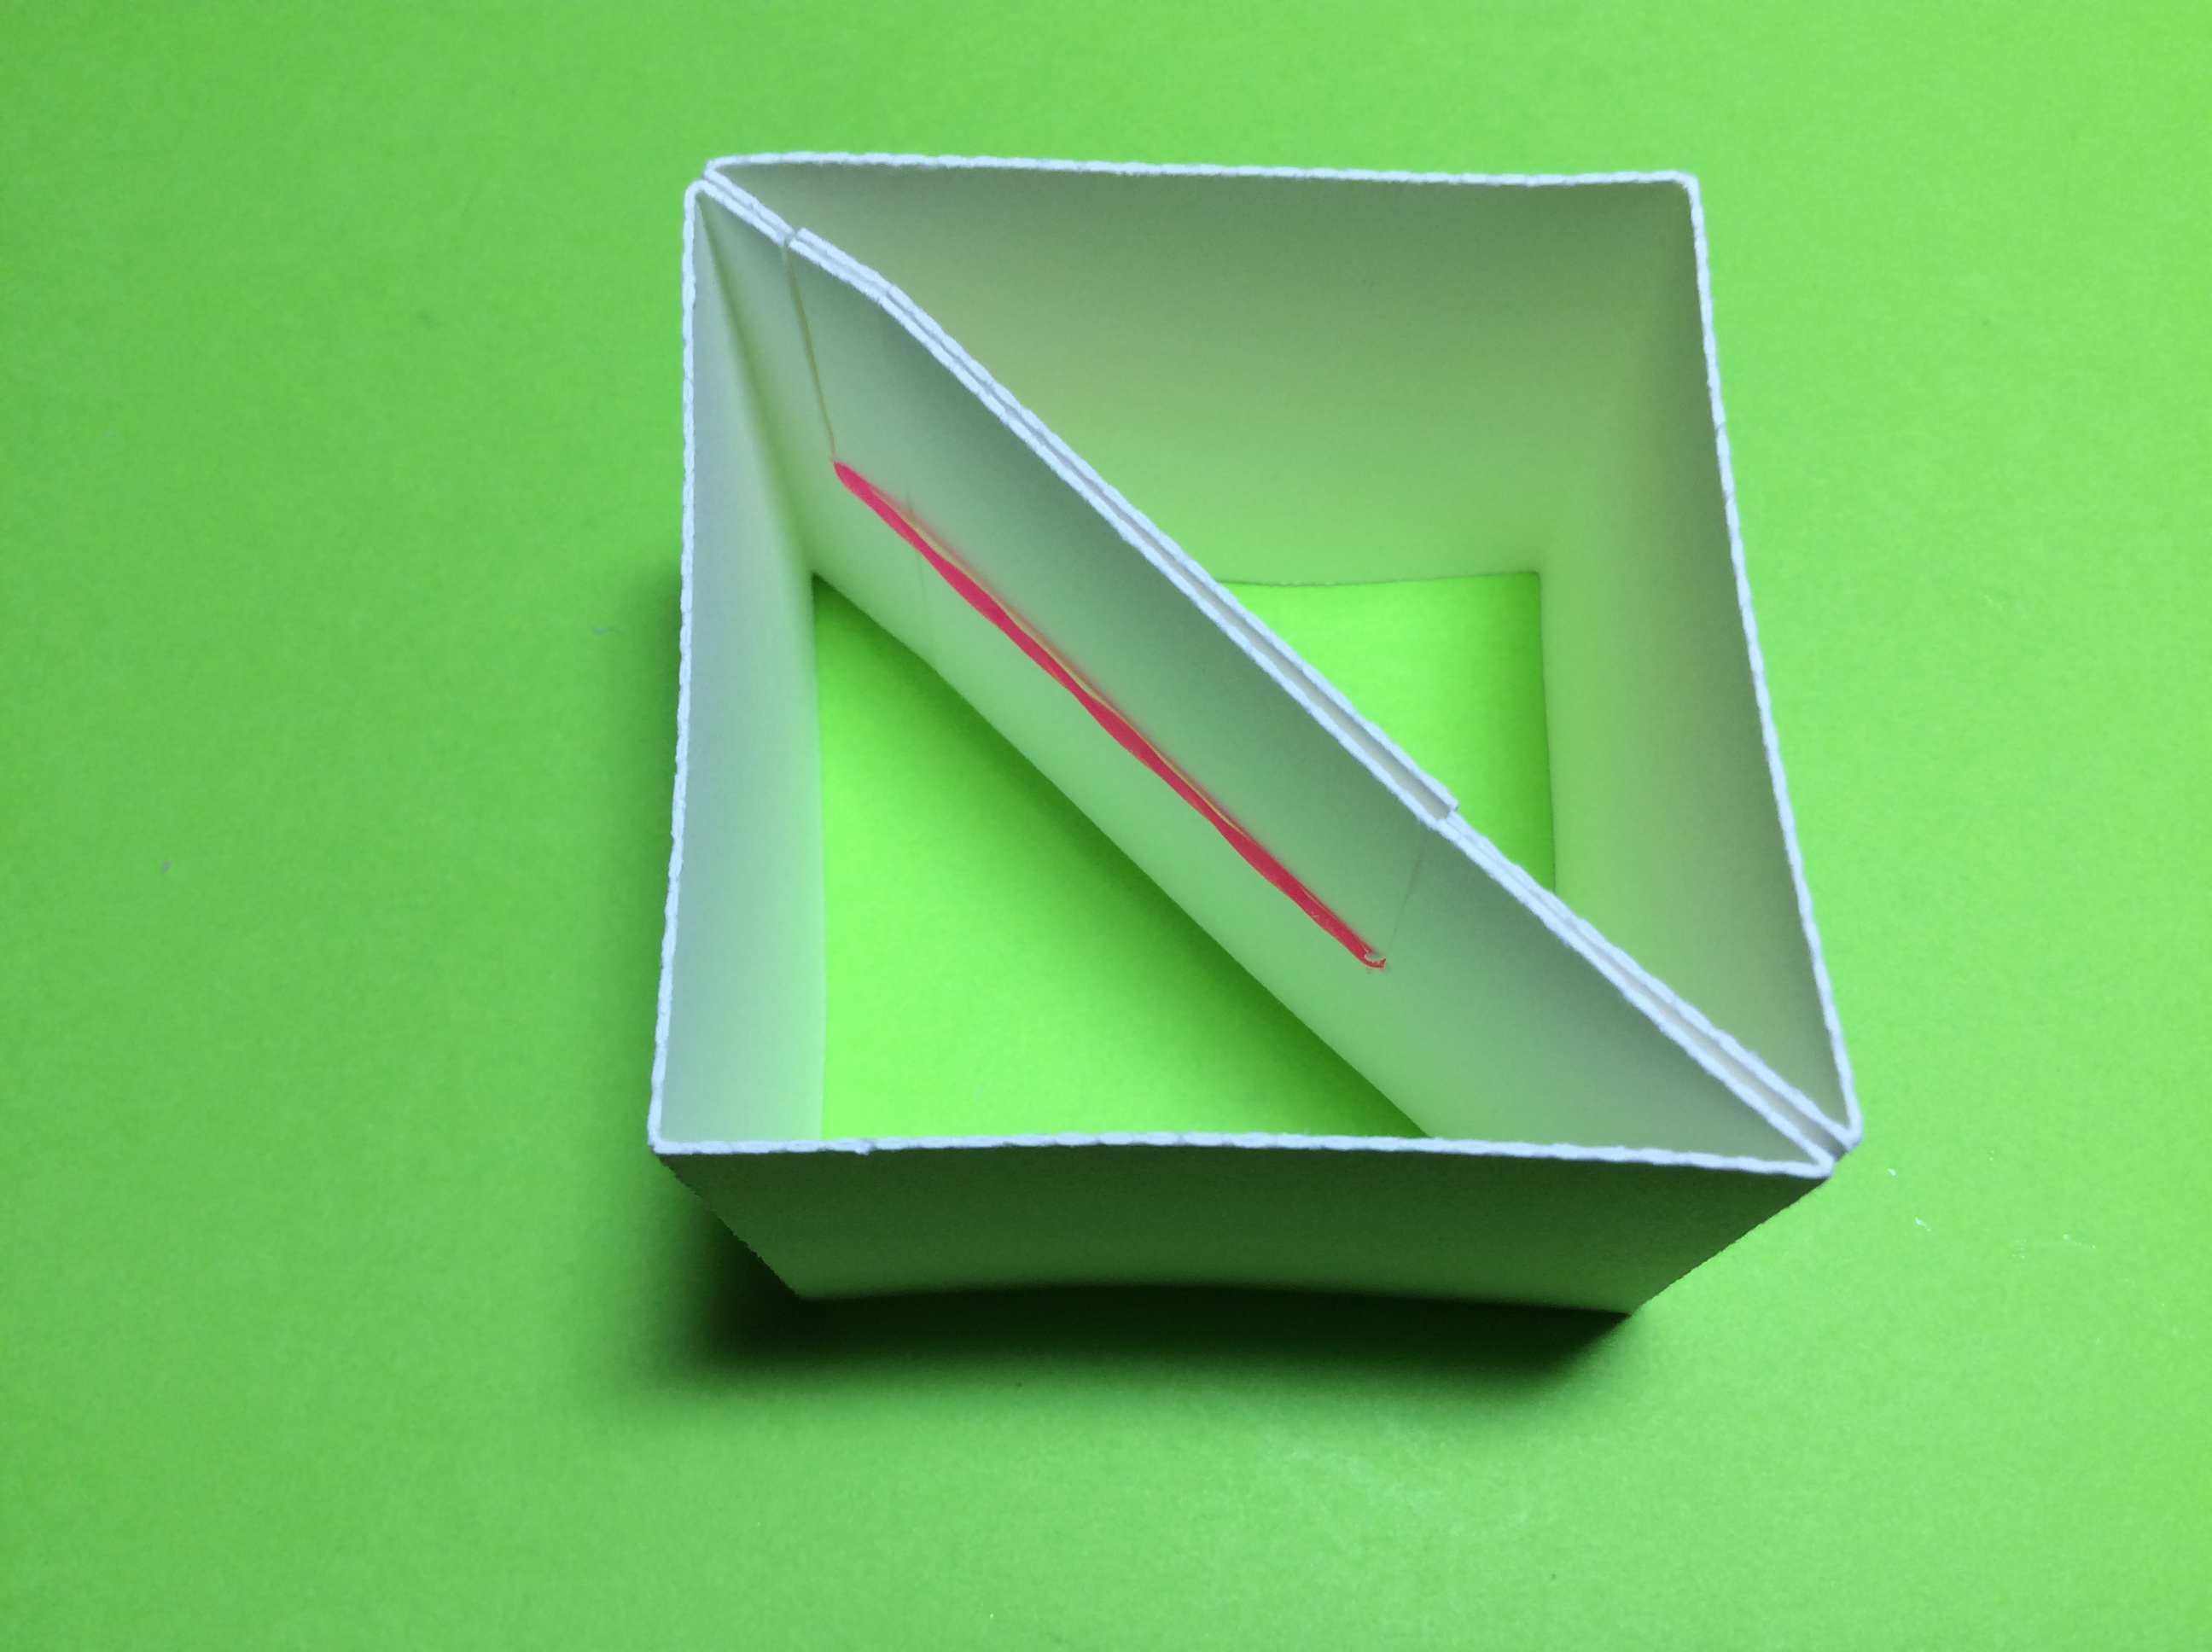
Slide the one inch rubber band into the slit and align the rubber band with the round hole in the base of the slit.

Fold the base so that a square is made with a diagonal in the middle. Slide the rubber band into the slit and align the rubber band as before. There is a gap in the diagonal.

Apply a Glue Dot into this gap.
Rubber Band Base

Use a glue runner to apply glue to the inside of the base wrap. (Regular glue will warp the paper.)

Attach the base wrap to the rubber band base.

Make the pop-up columns by creasing the paper into a square and gluing the tab together. Repeat for the other column.

Apply glue to the column on the two edges without the tabs. Glue the column inside the rubber band base with the column tabs facing inward.

Repeat for the other column. The base can be flattened when the corners with the columns are pressed inward.

Glue and align the blue bunnies onto both sides of the smallest slices. Arrange all of the slices by size. (The two slices at the top left of the photo are stacked with another slice.) Take the largest slice and slide them together to form a cross.

Continue sliding the pieces with the upward facing slits onto this assembly.

Slice the downward facing slits onto the assembly to create the slice form base.

There are two bunnies included in my design...a simple bunny with no embellishments.

And a bunny with embellishments. Decide which bunny that you want. Adorn the one with embellishments as shown above if that is the one that you choose.

Slide the two largest egg slices together.

Slide the upward facing slits onto the assembly. The upward facing slits will have to be bent inward in order for the slices to be inserted inside the egg. Next slide the downward facing slits.

Slide each of the corresponding downward facing slits onto the egg. The slices will need to be stretched a little so that they can be slid into the corresponding slits. Open and close the egg after you have inserted an entire slice. This will help align the slits.
Assemble the Slice Form Base and Egg Together

Apply glue to the two tabs of the slice form base.

Adhere the tabs to the back of the center slice on either side of the slice form egg. Allow the glue to dry before continuing. (tab is in the center of the photo)
Assemble the Slice Forms to the Rubber Band Pop-up Base

Apply glue to the tabs on the columns.

Adhere the slice form base as shown above. Repeat for the other column on the other side of the base. Wait for the glue to dry before deploying the rubber band mechanism.

Top View

Completed Rubber Band Pop-Up Slice Form Easter Egg Card
Thank you so much for sharing your creativity. I learn so much from you!
ReplyDeleteThank you for your kind words! 😊 I really appreciate it.
DeleteWow, your creation is adorable! If I start now, I might get one done for Easter next year! Thank you so much for sharing, your amazing work!
ReplyDeleteI am so happy that you like my design! Happy Easter! 🐣
DeleteYour designs are so amazing
ReplyDeleteDankeschön 🥰
ReplyDelete