I have always wanted to create a pop-up mechanism for my slice forms. I think this rubber band mechanism achieves my goal.

Slice form base with a rubber band pop-up base attached

When the side is depressed, the base lies flat.
In this blog posting, I will make a pop-up base for the slice form sphere that was created in a previous blog posting, https://papercraftetc.blogspot.com/2020/10/a-stem-project-how-to-make-slice-form.html#comment-form The entire design, slice form sphere, slice form base and pop-up base can lay flat as a two dimensional object and then it can be expanded into a three dimensional model with the help of a rubber band.
Here is the PDF. I used 65 lb. cardstock. A one inch rubber band is required for the pop-up base. (The rubber band is similar to the rubber band that is used on a Rainbow Loom.)
Here is the .Studio file.
The slice form sphere file and directions are in this blog posting, https://papercraftetc.blogspot.com/2020/10/a-stem-project-how-to-make-slice-form.html#comment-form

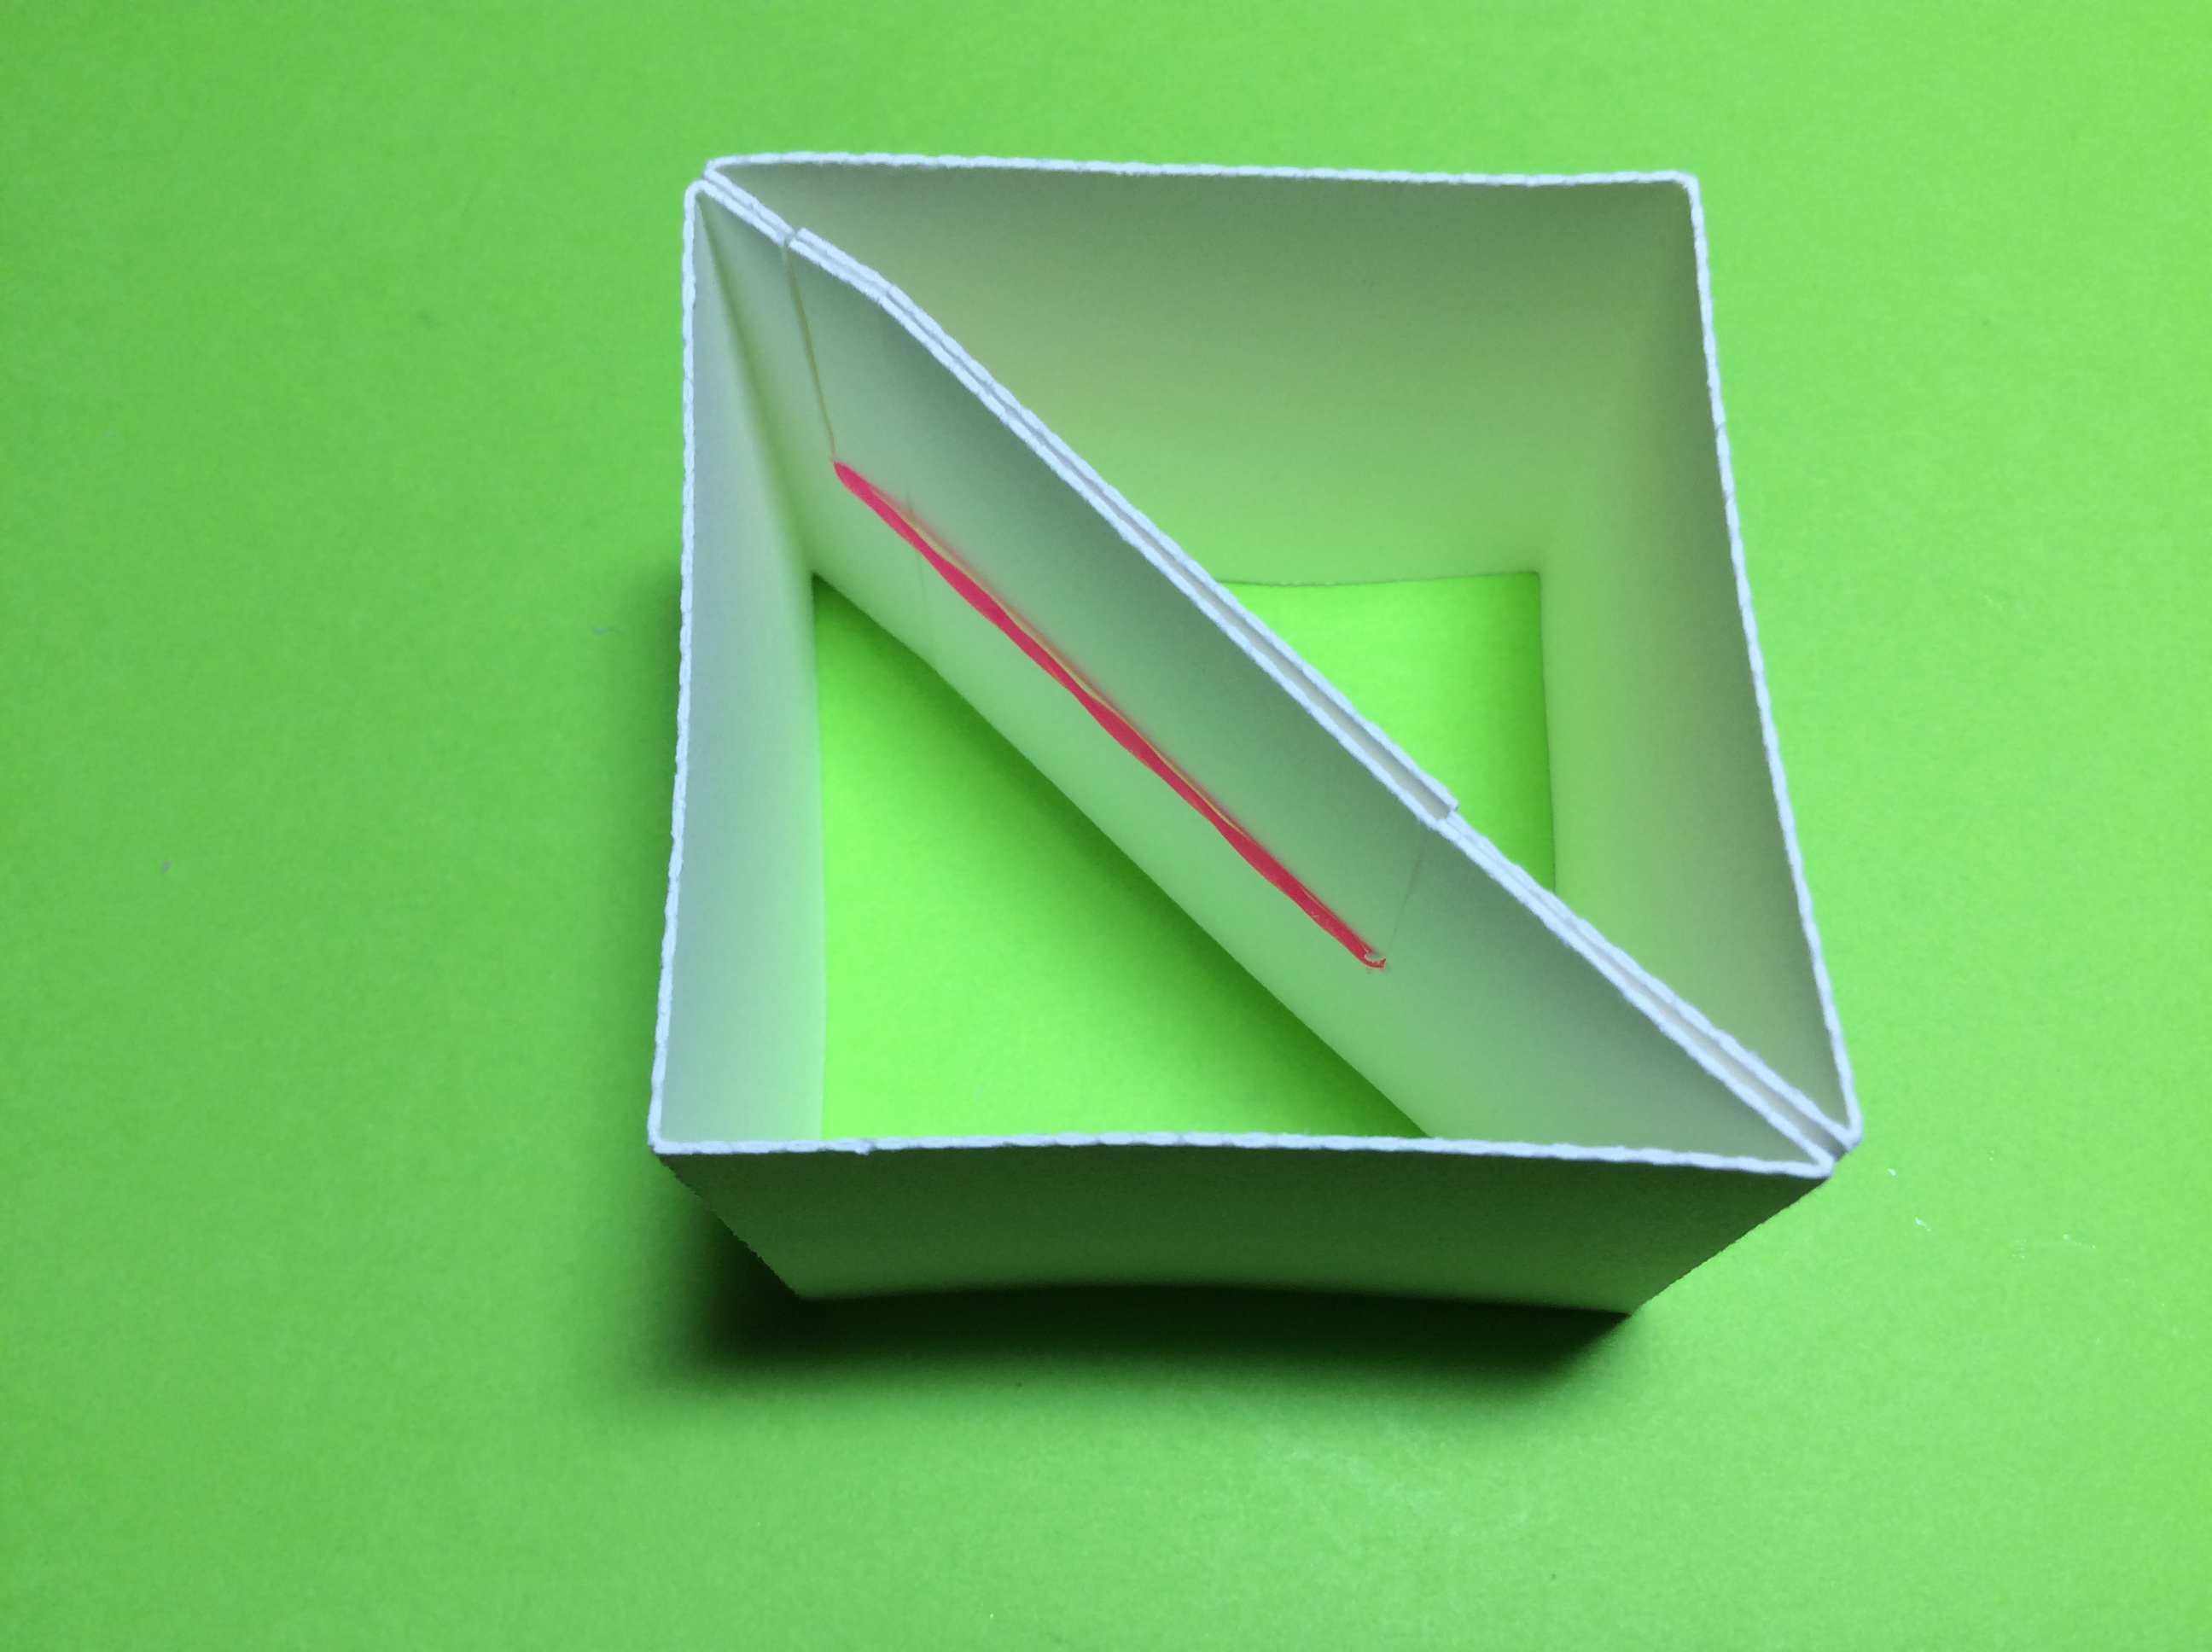
The pop-up base consists of a two inch square with a diagonal going across the square. This diagonal is cut into two lengths which equal the entire length of the diagonal. A rubber band keeps the two diagonal pieces together.

The rubber band expands when the base is pressed down at the corner that is opposite to the diagonal. When the side pressure is released, the expansion tension on the rubber band is released and the rubber band returns to its natural state This phenomenon allows the slice form to deploy and become three dimensional.

Pop-up base Calculations
Make the Pop-Up Rubber Band Base

There are two sides to the rubber band base. Each side is folded over to create a two-ply base. Crease the paper as shown above.

Glue the folded sides together.

Glue the tabs together. Make sure that the slits are going in the same direction.

Slide the one inch rubber band into the slit and align the rubber band with the round hole in the base of the slit.

Apply glue to the diagonal as shown above.

Adhere the other side of the diagonal. Make sure that the slits on the long side of the diagonal align.
Slide the rubber band onto the slit on the long side of the diagonal.

This rubber band base can now fold flat when the corner opposite the diagonal is pushed down.

Make the pop-up columns by creasing the paper into a square and gluing the tab together. Repeat for the other column.


Make the Slice Form Sphere Using the directions from this previous blog posting https://papercraftetc.blogspot.com/2020/10/a-stem-project-how-to-make-slice-form.html


Apply glue to the side of the column that has a tab. Attach this side to the right angle that is opposite the diagonal. Repeat for the other column.
Make the Slice Form Base

Arrange all of the slices by size. Take the largest slice and slide them together as shown above.

Continue sliding the pieces with the upward facing slits onto this assembly.

Slice the downward facing slits onto the assembly to finish making the slice form base.
Assemble the Three Parts of the Pop-Up

Apply glue to the column tabs as shown above.

Slide the slice form base onto the pop-up base. The tabs of the columns will be glued inside the slice form base. Flatten the base so that the glue adheres correctly.

The slice form base is now attached at two spots. In the photo above, it is attached on the left side. The right side is not attached as this allows the slice form to fold flat.

Top View

Apply glue to the tabs on the center slice of the slice form base.

Adhere the tabs to the center slice of the slice form sphere. Wait for the glue to dry before collapsing the pop-up.

The pop-up will fold flat.

Rubber Band Pop-Up Base with a Slice Form Sphere
very clever !
ReplyDelete