
Planetary Gears with Three, Four and Five Planets
Planetary gears are multiple wheels with teeth that rotate together to change the speed, torque (turning force on an object), and the direction of a power source. The center gear is called the sun and the outer gears are called the planets. This assembly of the sun and planets are held together by a carrier. This carrier rotates around a ring gear. If you would like to see a simulation of a planetary gear. Use the following simulator, http://www.thecatalystis.com/gears
I designed the gears using the following program. http://output.jsbin.com/oresos/latest After I learned how to make the planetary gears, I decided to design my own. See the previous blog post.https://papercraftetc.blogspot.com/2019/05/a-stem-project-how-to-make-gears-using.html
I used 110 lb. card stock from Michaels. Here is the PDF.
https://drive.google.com/file/d/1tZmzTg2fjFUfOCeEF7JVjeqPF1SjXibj/view?usp=sharing
Here is the .Studio file.
https://drive.google.com/file/d/1wGbAhgS7GHvgfN_XIxL0tLcTqIN-jp6-/view?usp=sharing
Precise gluing and allowing the glue to dry is a must for this model. I highly recommend using a Darice quilling glue bottle with an ultra fine tip applicator filled with Aileen's Quick Dry Tacky glue. These items can be found at a craft store or online.

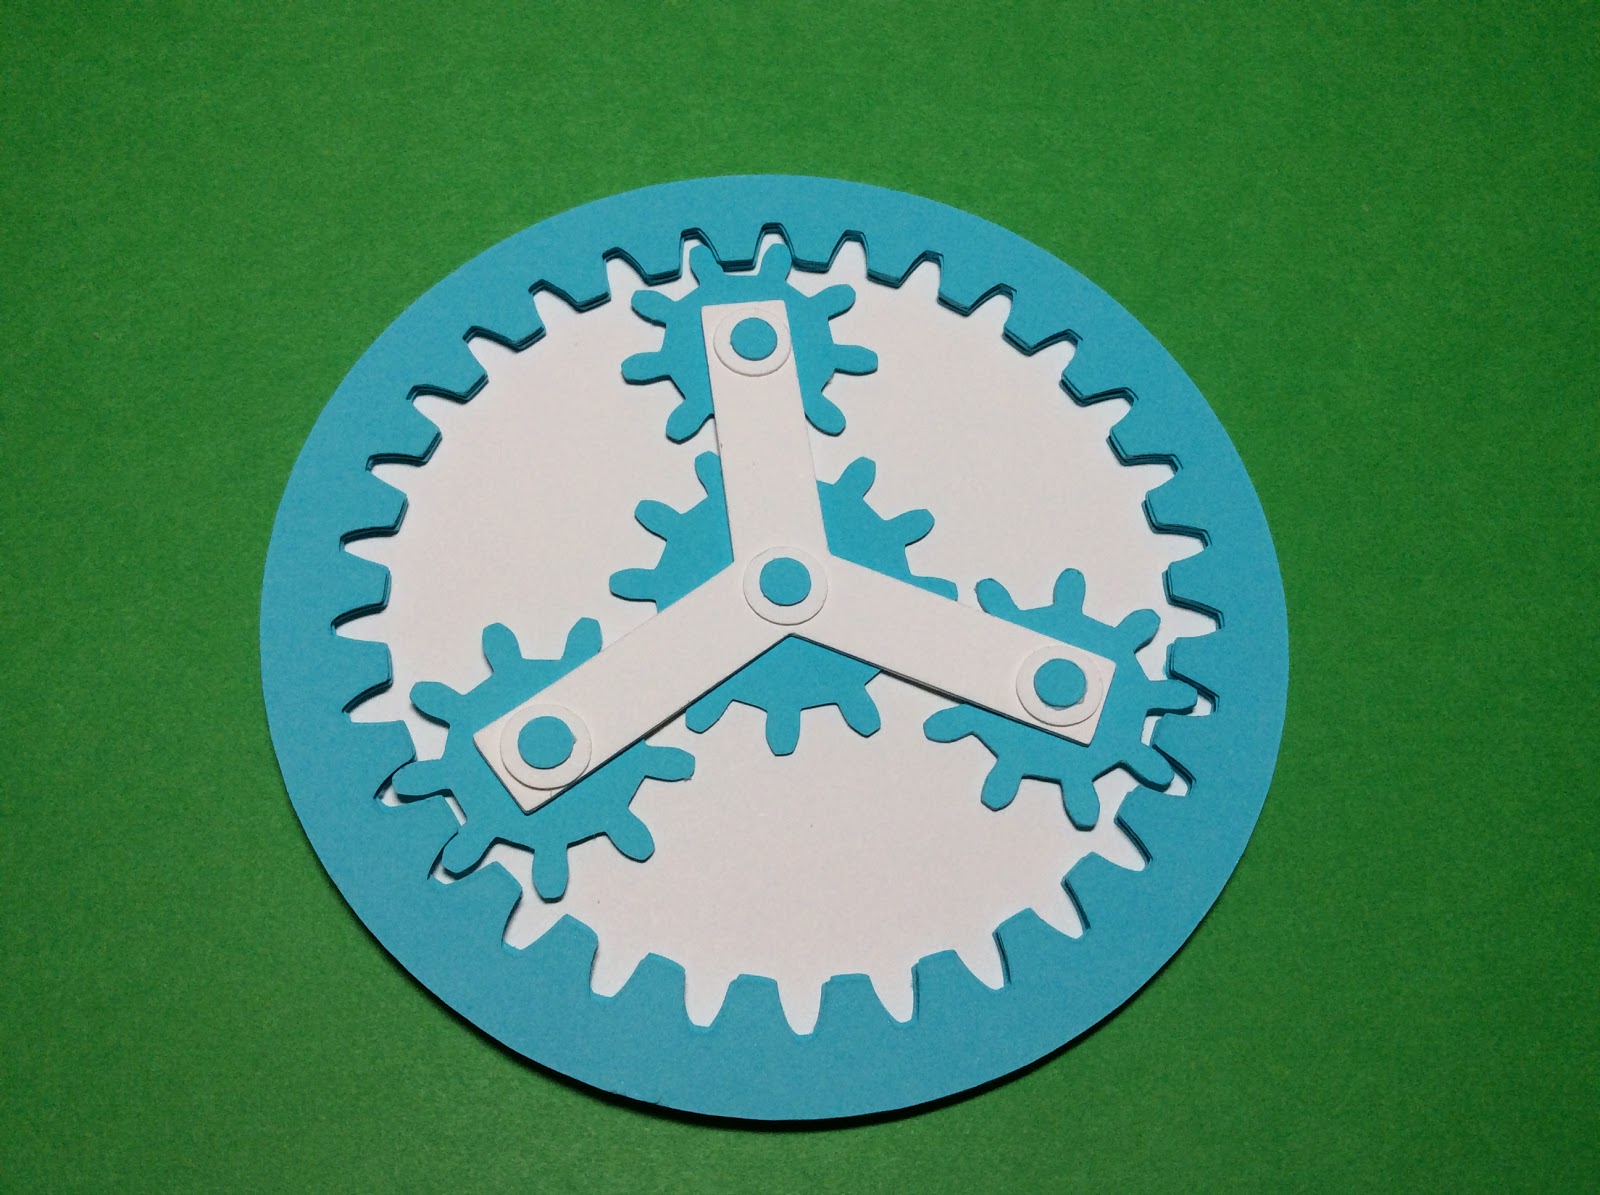
Ring Gear
Glue five layers together to form the ring gear. Make sure that they are aligned when gluing.

Glue the ring gear to the base.

Glue the two carrier layers together. A rivet is shown at the bottom of the above photo.
Make the planetary rivets by gluing four circles on top of one another for each planetary gear. Don't be messy with the glue and get glue on the edges of the circle. If you do, the rivets will not fit into the gear. A dot is all that you need to adhere the circles. Make sure they are stacked perfectly. The alignment needs to be exact for the gears to move smoothly. I recommend making a few extra and taking the best of the bunch to be used in the model. Allow the glue to dry sufficiently, either a few hours or overnight. The rivets are a crucial part of the model and they need to be thoroughly dry before the model is operated.
Make the sun rivet by gluing five circles on top of one another. Allow the glue to dry.

The carrier with the rivets attached.
Assemble the planetary gears. Starting with the planets, insert a rivet into the carrier. You will hear a slight snap when the rivet is placed correctly through the hole in the carrier. Thread the planet gear to the rivet.


The rivet head has been attached to all of the planets.

Attach the sun gear onto the center rivet.

Thread the sun gear rivet through the base and snap the rivet into place. The head of the rivet should be showing as above.

Put a drop of glue on the rivet and attach the head of the rivet.
Use the circle at the center of the gears as decoration for each of the rivets. Repeat the above directions for the other models.
Video of the planetary gears moving.
No comments:
Post a Comment