Wednesday, June 17, 2020

A STEM Project: A Carousel That Really Spins With An Axle

A carousel that really spins with an axle

In this project, I will take my popular carousel which spins because there is an axle built into the inside of the carousel and improve its construction.  I will also explain how the carousel was constructed using mathematics and the Silhouette software.

 Carousel spinning on the axle.

Here is the PDF. I used 65 lb cardstock.

Here is the .Studio file.  

Here is the SVG if you do not have a Silhouette paper cutter.


Making the Round Box 
   
Bottom of Box
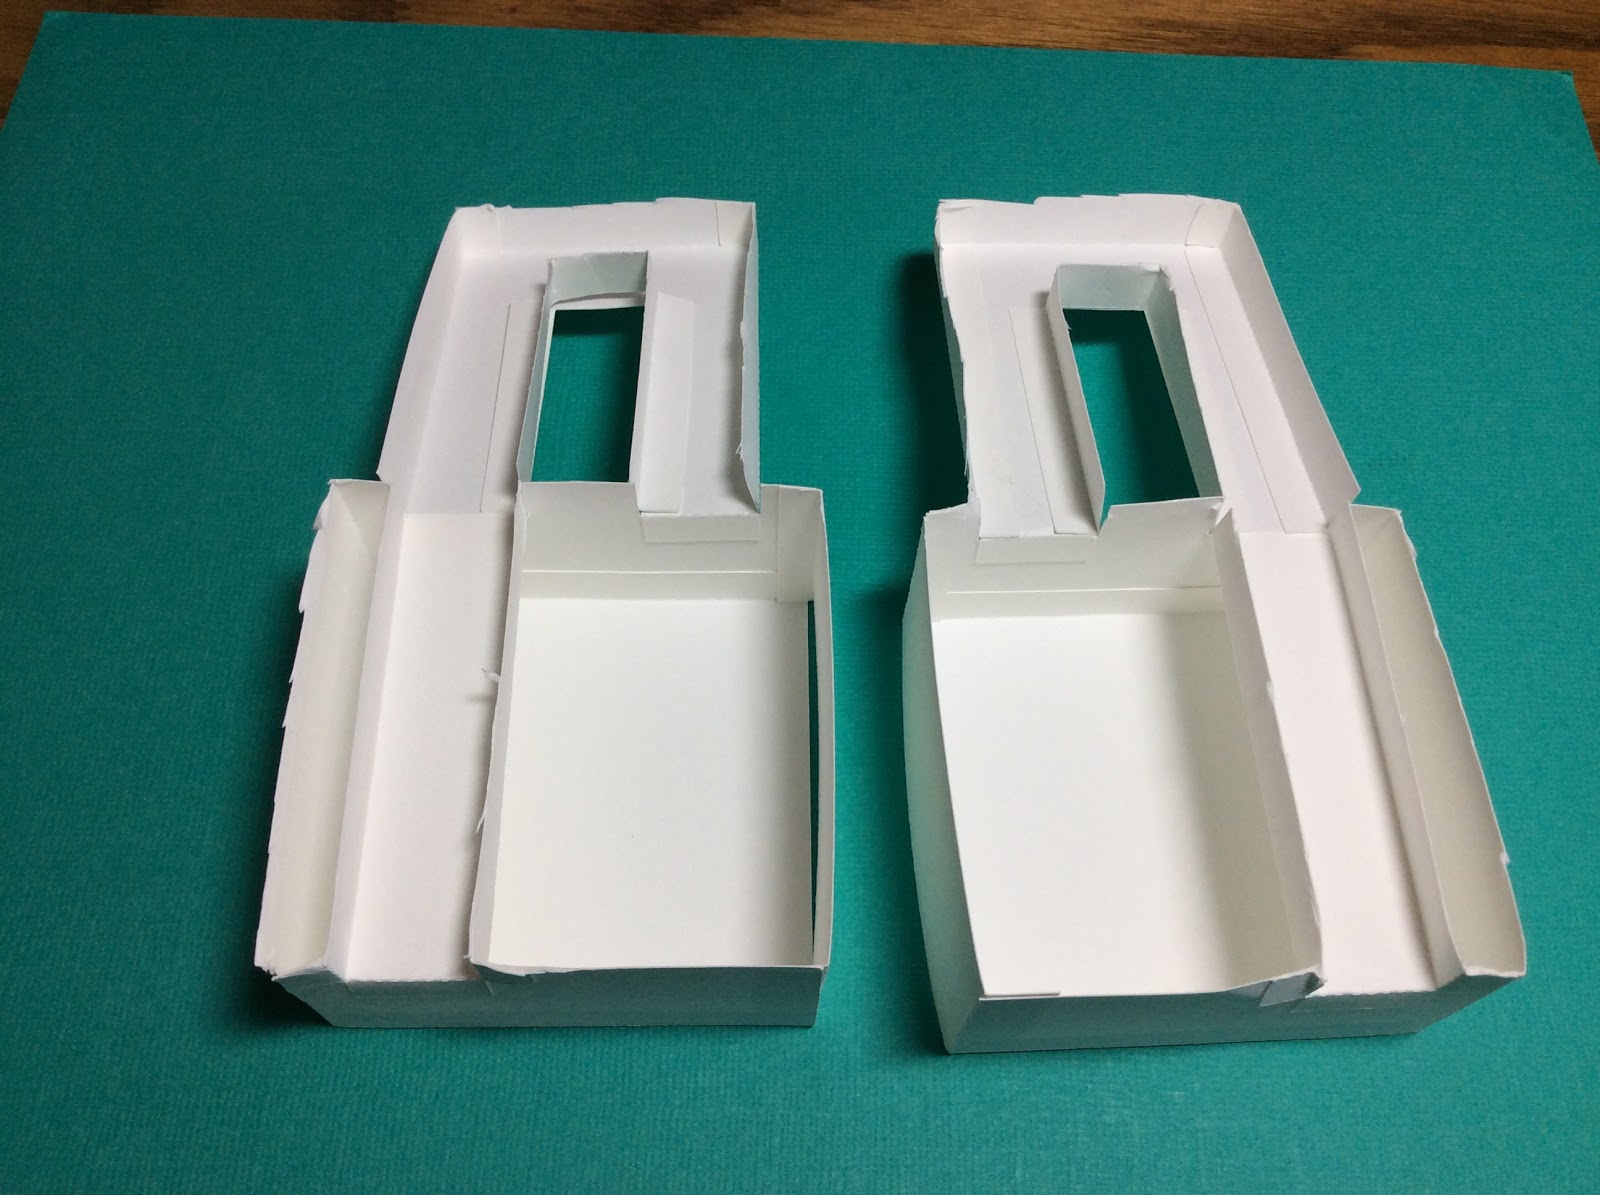
When making this carousel, the first thing that I needed to decide was the size of the round base.  I decided this number needed to be part of a divine proportion so that the carousel's proportions would be pleasing to the eye.  Phi, 1.618, is a number which appears frequently in nature and our eye is used to seeing this value.  I used this golden ratio number of Phi, 1.618 times 2 which equals 3.236 inches for the base of this round box. To determine the circumference of this circle, I needed to use the formula for circumference which is C = πd.  The calculated circumference is 10.161 inches. This value was used to create the length of the strip of paper for the side of the box.  I used the value of phi, 1.618 inches as the height of the box. Using these two values, I created a rectangle with the length of 10.161 inches and a height of 1.618 inches.  I added the tabs to complete this piece by repeating a series of trapezoids for the bottom circle and adjusted the length to fit with the Silhouette software. I welded these trapezoids to the rectangular shape. I added a dotted line to the edge of the trapezoids so that they could be bent at a right angle to make a ledge for the placement of the circles for the bottom of the box. I also welded a trapezoid shape to the side of the rectangle and added a dotted line to this tab to create an end tab.

I made two 3.236 inch circles with the Silhouette software to give the bottom of the box more support...one circle for placement inside the box and the other for the outside the box.
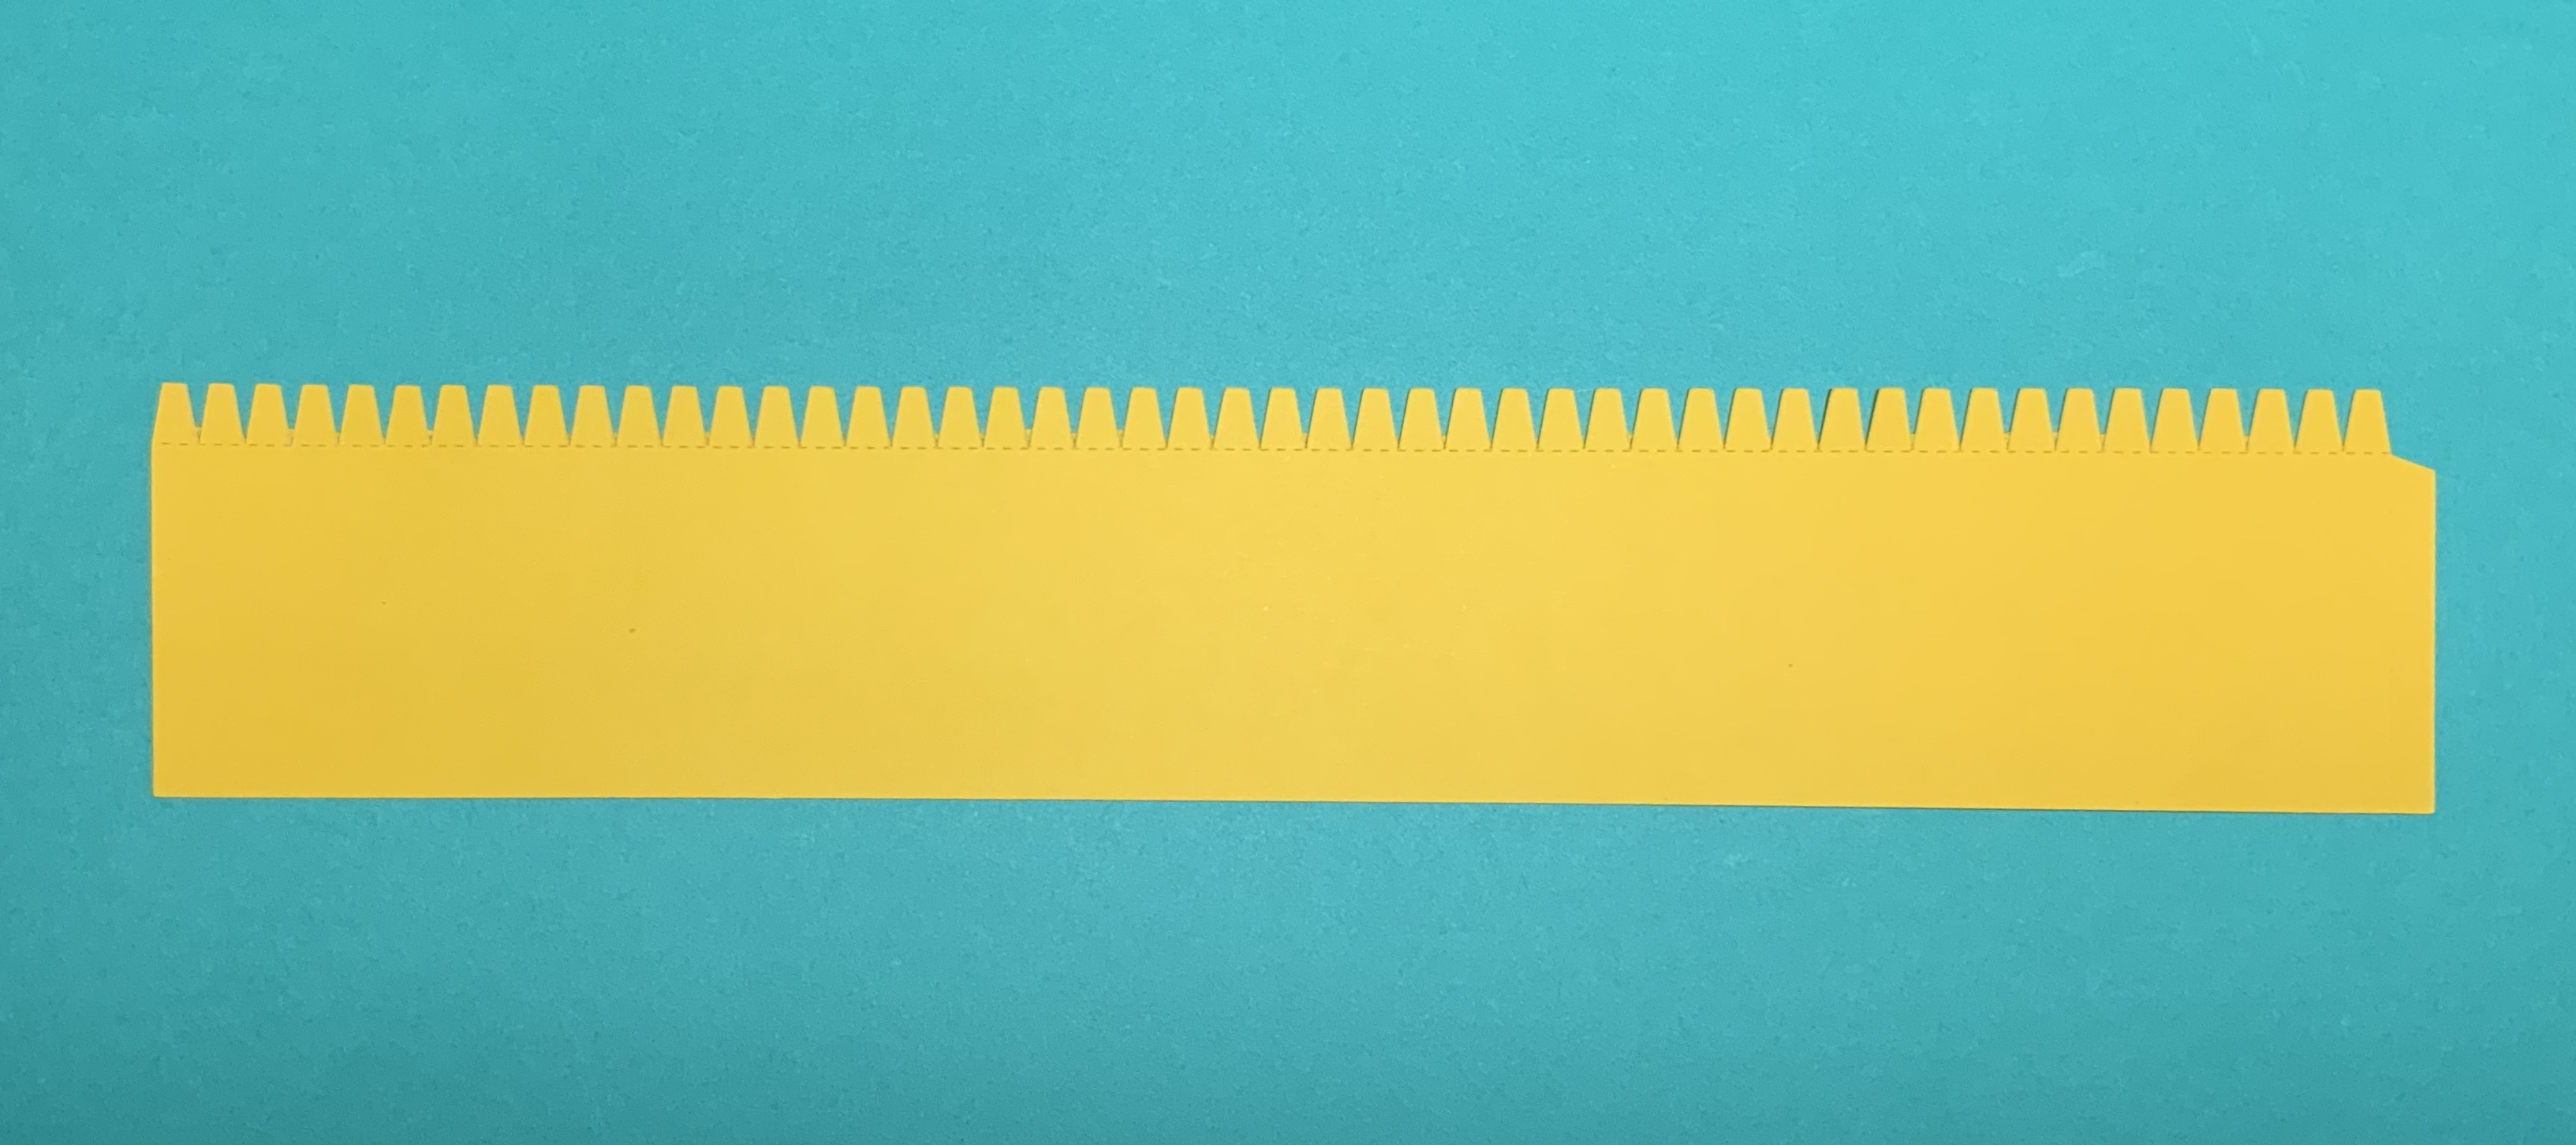
Strip used to create the side of the box.
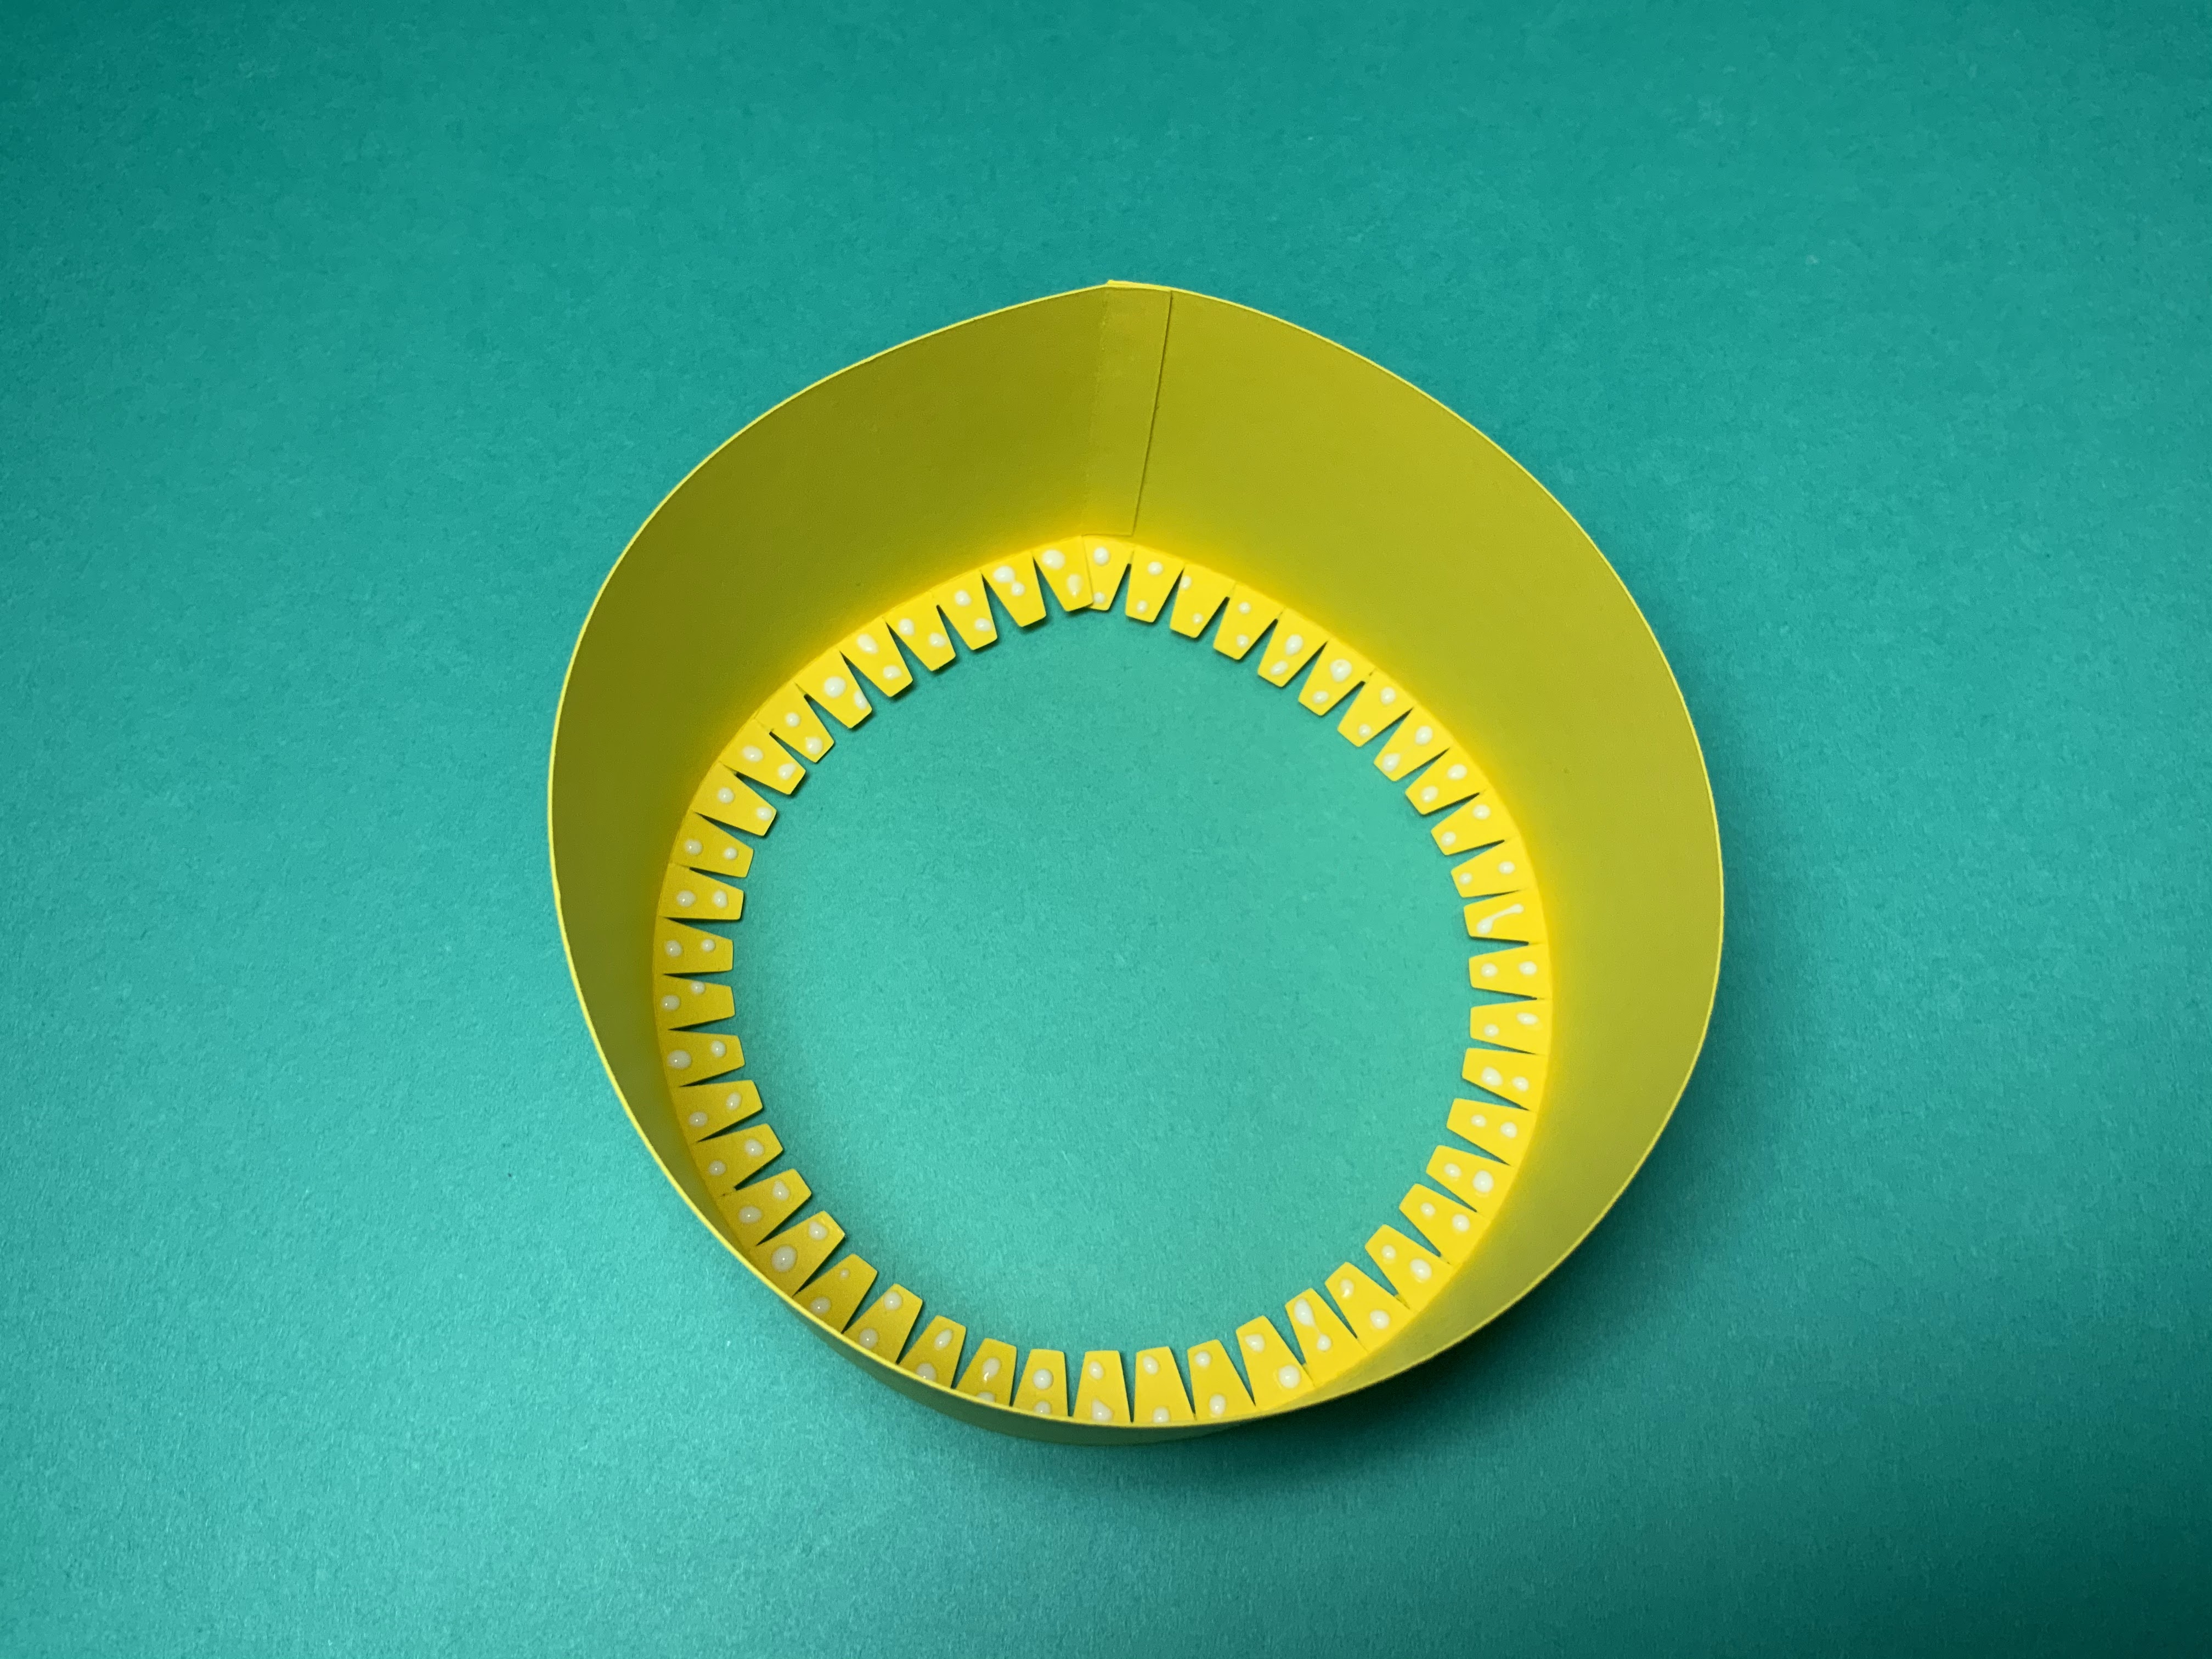
Apply glue to the tab on the side.  Adhere the piece into a circle. When gluing the tab, align the edge of the paper with the dotted line on the tab.  The edge of the paper should be directly above the dotted line of the tab. Gluing is a very important point as all of the calculations are based on exact measurements. Bend the tabs for the placement of the inner circle, at a right angle to the sides. Apply glue to these tabs and adhere a 3.236 inch circle to the tabs.
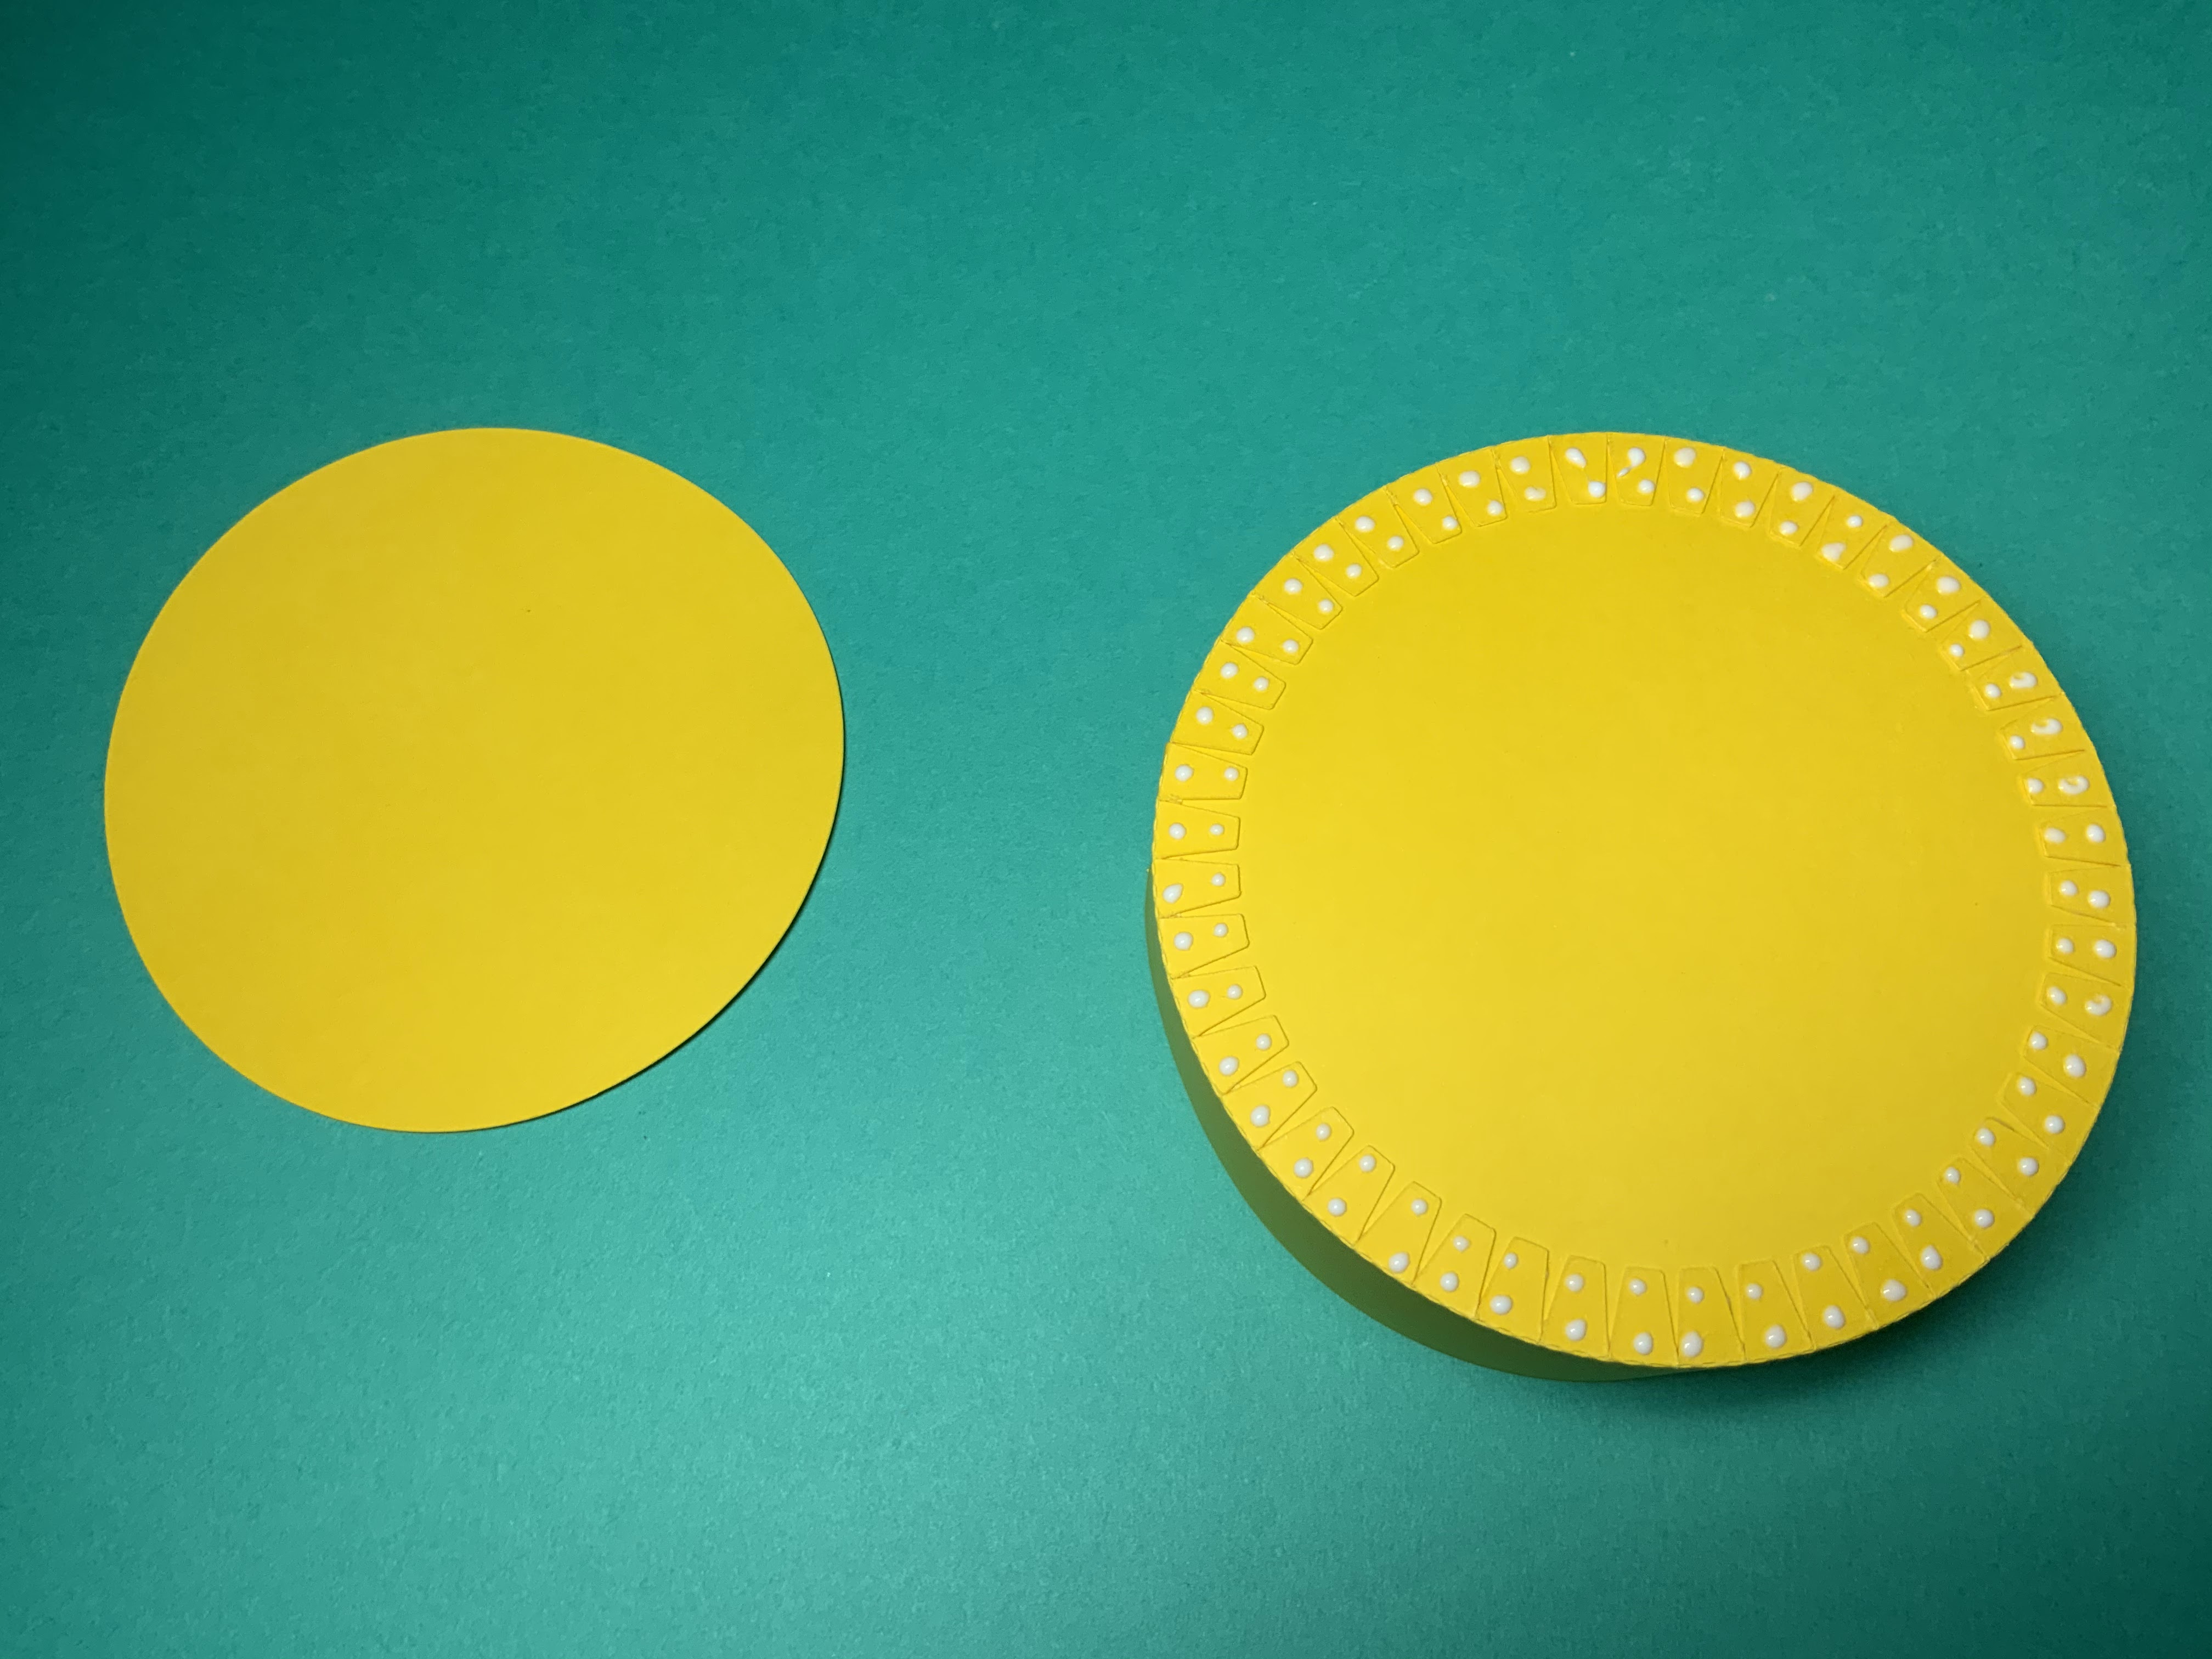
Turn the box over and apply glue to the tabs. Adhere the other 3.236 inch circle to complete the bottom of the box.

Completed bottom of the box


Top of Box

Making the Zigzag Bands
The top of the box needs to be a little larger than the bottom of the box so that it can easily slide on and off of the base. I added  0.1 inches to get 3.336 inches for the diameter of the top of the box. Using the circumference formula, C =πd, I got 10.475 inches as the size of the outer band of the box. I added 0.06 inches to the size to allow for paper allowance which gives 10.535 inches as the length of the top band.  Using these values, I made a rectangle and added an end tab. The zigzag embellishments on this band was made with a trapezoid design in the Silhouette software which were duplicated multiple times and welded to the rectangular shape on both sides of the rectangle. Two zigzag bands are needed for my design.

Making the Ledge
I duplicated the zigzag band and removed half of the design to create the inner ledge piece. I had to remove a portion of one of the trapezoid in order for the piece to fit correctly on the inside of the zigzag band. I added a dotted line to the trapezoids so that they could be bent at a right angle to make the ledge for the placement of the inner circle. Two ledges are needed for my design. I made them two different colors to differentiate their location on the box.

Making the Diamond Band
The diamond band was made by making a diamond shape and repeating it using the replicate function on the x axis with a distance of 0.5 inches.  A rectangle was made to enclose the design and adjusted with the Silhouette software to fit on top of the zigzag band. 

Making the Stripes
A rectangle shape was used to make the blue stripes which are 0.03 inches wide and 10.570 inches in length. The length is longer than needed.  This is due to stretching of the paper and I felt that it is better to have an overlap than not enough length.

Top of Box Pieces

Apply glue to the diamond strip and adhere to the zigzag band starting at the tab and going toward the opposite edge.  There will be a slight overhang of the diamond strip when the piece lays flat.  This difference will disappear once the band is bent into a circle.

Using the blue stripe, glide it over the top of a glue stick.

Adhere the blue stripe to the zigzag band as shown above starting at the tab and going toward the opposite edge.  There is an overhang of the blue stripe to allow for a gluing inconsistencies.

Turn the zigzag band over. Bend the ledge piece at a right angle.

Apply glue as shown to the edge opposite the trapezoid tabs.

Adhere the ledge as shown.  Notice that the trapezoid tabs are no longer at a right angle.  This was done to align the trapezoids to the corresponding edge piece.  Also notice that the ledge piece is not exactly the same as the band. The first trapezoid is cut in half. This was needed so that the pieces could align properly.

After adhering the ledge piece, pull the glued end slightly apart on the side with the overhanging blue stripes. The tab of the zigzag band will be inserted at this point between the pink and yellow paper.

Apply glue to the tab and insert it as stated above.

Realign the yellow trapezoids on the ledge so that they are at a right angle to the zigzag band.

  Repeat the above instructions to make another band which will have a red ledge. There is no difference between the two bands.  I used the two different colored ledges to help signify where it would be placed on the carousel.


Center Pole of the Carousel
I arbitrarily decided to use 0.3 inches as the diameter of the center pole.  Using the circumference formula, C =πd, I determined the circumference of the center pole would be 0.942 inches. However, I needed to subtracted .06 inches for paper tolerance since the center pole would be inscribed in a 0.3 inch diameter circle. The final value of the circumference would be 0.882 inches. The height of the center pole,  I decided,  would be 2.427 inches which is one and half Phi's. Using these values, I made the center pole with the Silhouette software and added a tab. I also evenly spaced seven dotted lines to make the paper piece appear to be rounded. I made tabs by replicating four evenly spaced trapezoids and welded them onto the rectangle.  I added these tabs to both the top and bottom of this piece. 

Carousel Horses
I made a rectangle for the pole of the horse in the Silhouette software.  I welded it to the horse to make the carousel horse. I added a tab to the bottom and top of the carousel horse. I made the height of the carousel horse, 2.427 inches to be consistent with the center column.

Carousel Horse Platform
To make the circle for the carousel horse platform, I used the diameter 3.236 inches which is also the diameter of the box base, two Phi. I centered a 0.3 inch hole in the center of the circle.  I added a small rectangle to the circle and replicated the rectangle at 72 degrees to make five rectangles that are evenly spaced around the circle for the placement of the carousel horses.

Carousel Horse Assembly

Form the center pole into a tube and apply glue to the tab as shown above.

Adhere the tube.  This tube can be folded flat so that the glue can be adhered correctly.  Do not leave the tube flat for very long as excess glue might keep the tube in this flat position.  Realign the piece into a tube once the glue has set a little.

Glue the center pole to the carousel horse platform.

Glue the carousel horses to the other circle.

Merge the two circles together by aligning the rectangle holes for the carousel horses.

Make sure the carousel holes align before gluing the center pole and then glue all the carousel horses in place.

Completed carousel horse assembly.


Axle which allows the carousel to spin
I subtracted 0.07 inches from the diameter of the center pole and used this value of 0.23 inches as the diameter of the center axle.  Using this value, I determined the circumference of the axle would be 0.722 inches. I subtracted 0.06 inches for paper tolerance and got the value, 0.662 inches for the circumference of the axle. To determine the height of the center axle, I used a 2 inch height for the cone plus height of the carousel horses, 2.427 inches, plus the width of the paper layers (3 x 0.06 inches thickness of the paper = .18)
                                               2 + 2.427 + .18 = 4.607 inches

 I added 0.358 inches more to the height for a flag pole that will stick up out of the carousel. 

                          4.607 + 0.358 = 4.965 inches for the height of the center axle. 

I made the axle in the same manner as the center pole with the Silhouette software. However, I did not put a tab at the top of the axle. A paper flag will keep the carousel assembly in place.

Cone Canopy 
The top of the carousel has three different sized cones.  


The slant height needs to be calculated using the Pythagorean theorem. Given the diameter of the round base will be 2 Phi plus an additional 0.1 inches to slide on the lid, the diameter of the cone is 3.336 inches. Therefore the radius of the cone will be half of the diameter, which is 1.668 inches.  I decided to make the height 2 inches because of the divine proportion of Phi. Using these values and the Pythagorean theorem, 
                                                               a2 +     b2     = c2
                                                               22 + 1.6682  = c2
                                                                         2.604  = c
The slant height of the cone is 2.604 inches which I rounded to 2.6 inches.

The pattern that you use to cut and fold the cone, also called the net, looks like a wedge shape. In order to make this shape with the Silhouette Flexishape tool, the angle of the wedge needs to be calculated.

                                                                   360 degrees (radius)
                                  Angle of Wedge  =  __________________  
                                                                         slant height


                                                                   360 degrees (3.336)
                                                           =  __________________  =    230 degrees
                                                                             2.6

The cone canopy was then constructed with the Flexishape tool with a wedge shape of 230 degrees and a slant height of 2.6 inches. I added a tab to the wedge and a 0.4 inch circle hole in the center of the wedge for the axle.

The angle of the wedge is the same for the two smaller sized cones. I determined the size of the other two cones to be 1 inch and 1.169 inches.  I made the 1 inch wedge with the Flexishape and removed the 0.4 inch circle from the center.  To make the scallops on the bottom edge of the cone, I then used the replicate function, object on path, to replicate a 0.16 circle. The circle has a grab handle in the middle and I placed it on the edge of the wedge shape.  I duplicated the circle until the outer edge was filled. I broke the replicate circle on the outer edge in half, to remove the circles in the area that I did not want them.  

The circles are along the one inch slant height wedge.  At this point, I need to go to Object to convert the figure. 

The circles are then welded to the wedge.  A tab is needed to complete the small cone. I repeated the above directions for the medium sized wedge which was 1.169 inches.

Apply glue to the tabs of each of the cone shapes and adhere into a cone. 

Apply glue to the inside of the medium and small cones as shown above. 

Align the seams and adhere the cone shapes.

Crease the folds on the axle and fold back the tab. Apply glue to the tab.

Fold the axle in half to adhere the glue.

Insert a skewer into the center of the axle to make sure that the axle is rounded.

Thread the tabs of the axle through the bottom of the carousel circle.  Glue the tabs.

Apply a dot of glue to each of the ledge tabs. Insert and adhere the red circle which is the inside box top circle,

Turn the lid over and apply a drop of glue to each of the tabs. 

Adhere the center axle assembly to the lid 

Apply a bead of glue to the top edge of the yellow ledge as shown above.  The cone will be adhered at this point.

Adhere the cone to this glued edge.

Turn the cone over to the other side.  Apply a drop of glue to each of the trapezoid tabs.

Adhere the top of the carousel circle to these tabs.

Apply glue to the top of the carousel horse assembly as shown above.

Slide the carousel horse assembly onto the axle.

Slide the cone canopy onto the axle and adhere the cone canopy to the top of the carousel horse assembly.

Apply glue to the flag, add the center yellow triangle. (Not shown) Wrap the flag around the top axle and glue the flag closed.

Completed Carousel That Really Spins With An Axle

Saturday, May 9, 2020

A STEM Project: The Magical Mathematical World of the Möbius Strip and the Klein Bottle

The world of mathematics can be magical.  Magicians have performed magic tricks which use mathematical concepts such as the Möbius strip to astound audiences and stimulate the imagination.

Afghan Bands

In the 1800's, there was a magic trick called the "Afghan Bands".  A magician took a long strip of paper and glued the ends together to create a loop.  He repeated the procedure for two more strips of paper. He cut each of the three strips down the center of the strip and the results amazed audiences because they were all different.

What did the magician do to make each result different? The answer was, he put a twist in the paper.  The first strip had no twist and the result was two loops.  The second strip had a half twist and the result was a strip that was twice as long as the original loop.  The third strip had two half twists in the strip and the result was two loops that were intertwined.

To recreate this magic trick, cut six 2 inch wide x 11 inch long strips of paper.  Each Afghan Band needs two of these strips.

Afghan Band #1

Tape two strips of paper together and then tape the ends together to form a loop. Cut the loop lengthwise in half. 

 The result is two loops with an inside and an outside surface.

Afghan Band #2


Tape two strips of paper together and then put a half twist on one end of the paper.  Tape the ends together to form a loop. This is a Möbius strip.

Cut the loop in half lengthwise.

The result is one loop which is twice as long as the original with four half twists or two full twists.


Afghan Band #3

Tape two strips of paper together and then put a half twist on one end of the paper.  

Using the same end, put another half twist on this end of the paper. Tape the ends together to form a loop. 

Cut the loop in half.

The result is two loops that are intertwined with two half twists.

Now that you are amazed by the creation of these Afghan Bands.  Who discovered this mathematical intrigue of twisting a piece of paper? It was a mathematician named Johann Benedict Listing at the University of Leipzig in 1858. He was interested in topology which is the study of surfaces. It was a fellow mathematician, August Ferdinand Möbius, who named the strip of paper with one twist, a Möbius strip. The Afghan Band #2 (see above), before it was cut, was a Möbius strip.

There are many variations of cutting a Möbius strip. Try them for yourself by making Möbius strips with different numbers of half twists. Here is a generalization which can be made about the twist variations that are cut in half down the center line.


Given n is a half twist and bisecting a Möbius strip:

If there are an odd number of half twists, the result will be one band with half the width and twice the length, with (2n + 2) half twists.

If there are an even number of half twists, the result will be two bands with half the width, each band will be of equal length, with n half twists.

For further explorations, try cutting Mobius strips into thirds and varying the number of twists  You will be amazed by the results. Compare them to the results that you achieved when the Mobius strips were cut in half down the center line.

An ordinary sheet of paper has two sides and one edge. A Möbius strip has been described as a "strip without a second side". 


Take a strip of paper, give it a half twist, and tape it together to form a loop. If you take a pen and draw a line along the center of the strip, you will see that the line runs along both sides of the loop. Thus giving the appearance that the Möbius strip has just one side.

However, the second side is still there. The half twist in the paper created a pathway for the opposite side to be connected.

If two bunnies are placed at the edge of a clear Möbius strip and one of the bunnies decides to circumnavigate the edge by hopping. Moving the clear strip to simulate the hopping of the pink bunny until the other white bunny becomes visible through the clear strip. 

 The pink bunny will have hopped half way around the clear strip, one circuit, when the white bunny is visible upside down on the opposite side of the clear strip. The pink bunny will need to continue hopping another circuit in order to get back to its original position. 

It takes two circuits to circumnavigate the entire Möbius strip. This concept is a valuable tool in manufacturing because it allows for conservation of resources. Both sides of a conveyor belt can be used with this concept because a Möbius conveyor belt wears evenly on both sides.

If you combine two mirror images of a Möbius strip, you will get a Klein bottle which is a unique vessel which has only one surface. When water is poured into it, the water goes out the same hole.  The Klein bottled was first described by Christian Felix Klein, a German mathematician in 1882.


 Klein bottle image from Wikipedia.

I have recreated this Klein bottle using paper. 

One end of the U-shaped tube flows into the bottle and the other tube flows through the bottle and comes out the bottom.

  Another view with lid retracted.

When my paper model was cut in half, two Möbius strips were produced.


This cross section view of the Klein bottle is similar to mine above.

If you would like to recreate my Klein Bottle, I am including a PDF file.  Print out the file, cut out the pieces and glue them together.

Here is the PDF for my paper Klein bottle.  I used 65 lb. cardstock.
https://drive.google.com/file/d/1Do29_dDjQREzOe8vibK13nDx0edUj5tE/view?usp=sharing

Here is the .Studio file if you have a Silhouette brand cutting machine.
https://drive.google.com/file/d/1XJCl-3k9Ot8gVfuqnOPemcTlDfQNjy-w/view?usp=sharing

Möbius strips can be explored in many unusual ways. Check out this tasty article which transforms a bagel into a Möbius strip http://www.georgehart.com/bagel/bagel.html

Here is another magic trick with a Möbius strip and a loop.

Cut two 2 inch x 11 inch strips of paper.  Tape one into a loop and the other into a Möbius strip.

Tape the two pieces of paper at a right angle to one another as shown above.

Cut the loop down the center.  The result will be the above figure when untangled. Next cut the white strip (see above, the right is a loop too, sorry for the bad picture) down the middle from the one loop to the other loop.

The result is a square.

Möbius strips are magical!


Monday, May 4, 2020

Making a Möbius Strip With Music Tape for the 15 Note Music Box


A Möbius Strip for a 15 Note Music Box

Möbius strip is a strip of paper with a twist in it.  The strip of paper is twisted and then taped together to form a continuous loop.  After creating 30 songs in my last blog post https://papercraftetc.blogspot.com/2020/05/30-songs-for-15-note-music-box.html, I made a Möbius strip with one of the songs, Mozart Sonata No. 16 in C. The result was a pleasant sounding song when both sides are played continuously.  The song starts and ends with the same note - C, also known as the key, which allows the song to transition easily between sides.  The key of  C specifies the collection of pitches in the song. When playing the opposite side, it inverts the music playing the same pitches but in a different order so it still sounds good on the opposite side.

The reason why this Möbius strip works is because:

    1. The key is the same.
    2. The pitches are the same. 
    3. The tempo and rhythm are the same.
    4. The chord progression is reversed but still sounds good because of the same key of C and use the same pitches.
    5. There is some symmetry in the original score because there is a sequence of notes that repeats itself on the opposite side. 


Mozart Sonata No. 16 being played on a 15 note music box as a Möbius strip

This Möbius strip is the essence of music improvisation which is the art of creating new music from the original score.  When you write music, you start in a chord progression which sounds good. To the human ear, there are certain tension chords and release chords. The music builds tension and then releases the tension. When you reverse the song, the music is still in the same key. The tension and release might be different on the second side but they still sound good because they are in the correct key. When music is played in the correct key, the correct chords need to be played.  Otherwise, there is dissonance.  Dissonance is the lack of harmony in musical notes.  When the music is played in the correct key, there is no dissonance.

To make the Möbius strip, you can use your own cardstock as indicated in my last blog post. It is song #24 in this post, https://papercraftetc.blogspot.com/2020/05/30-songs-for-15-note-music-box.html

I used the paper tape that came with the music box to create this music. In order to use the paper tape, you need a 24 inch mat.

Here is the .Studio file for the 12 x 24 inch mat so that you can use the original paper tape.


Tape two 12 x 12 pieces of cardstock together.

Cut out the two strips from my .Studio file using the Cut by Line feature; it is the red line.  Remove the two strips as shown above and adhere the two original paper tapes that comes with the music box to the location of the removed strips (not shown). Cut out the music using the Cut by Line feature; it is the black line. 

To make the Möbius strip, tape the song together to make one strip.  Insert the song into your music box and twist the end.   Take this end and tape it to the start of the song.  The holes need to be punched out where the tape was used or else these notes will not play.


Sunday, May 3, 2020

30 Songs for the 15 Note Music Box

The 15 note music box with paper tape music is a musical instrument which produces a melody programmed on paper tape. The paper tape is fed across a comb. The comb is a like a multi-pronged tuning fork made out of steel with fifteen different lengths of teeth.  Each tooth represents a different note.  The longer the tooth, the lower the note or frequency because the tooth vibrates slower. The shorter the tooth, the higher the note or frequency because the tooth vibrates faster. These vibrations create the sound which create the melody. The holes in the paper tape correspond to different notes. When a hole is encountered in the paper tape, the corresponding note is played because there is a prong sticking up which engages the corresponding tooth on the comb.

Music boxes have been around since the 18th century. Key features of music are pitch (fundamental frequency and harmonics) and timbre (amplitude of harmonic frequencies and resonance of specific frequencies). Each tooth vibrates with a fundamental frequency and multiples of other frequencies (harmonics) which generate a spectrum for each note.  The wood and design of the music box cause it to resonate, or amplify, certain frequencies in this spectrum, which generates its unique musical sound.  While new technology on a computer can attempt to simulate this spectrum, music must be played on a physical instrument in order to generate the correct frequency spectrum.

I made 30 songs for the 15 note music box with the Silhouette.  I especially geared it to my grandchildren who enjoy listening to music. I am sure young and old alike would enjoy playing these tunes. This could be a unique gift to give for a birthday, anniversary or wedding.

15 Note Music Box Playing Beauty and the Beast

Here are the songs that I have included in my .Studio file for you to make with your Silhouette:

1. Under the Sea
2. Pop Goes the Weasel
3. Twinkle, Twinkle Little Star
4. Ode to Joy
5. Beethoven Symphony #6
6. Brahms Lullaby
7. Wheels on the Bus
8. Camptown Races
9. Itsy Bitsy Spider
10. You are my Sunshine
11. Happy Birthday
12. Its a Small World
13. Fly Me to the Moon
14. Super Mario Bros.
15.  Heart and Soul
16.  On Top of Old Smoky
17.  Phantom of the Opera
18.  Beauty and the Beast
19.  Pachabel's Canon in D
20.  Star Spangled Banner
21.  Frere Jacques
22.  Bach - Jesu Joy of Man's Desiring
23.  How Much is the Doggie in the Window
24.  Mozart Sonata No. 16 in C
25.  Oh Susanna
26.  Music Box Dancer
27.  London Bridge is Falling Down
28.  Bach - Minuet in G
29.  Puff the Magic Dragon
30.  Blue Danube

The 30 songs were created on the website https://musicboxmaniacs.com There are links on that website to purchase the 15 note hand crank music box on Amazon.  The wooden music box without any paper tape or hole punch is about $15. I chose the wooden box which included paper tape and a hole punch.  The paper tape and hole punch are not necessary to buy since the Silhouette will be cutting the paper.  I bought the paper tape and hole punch to calculate the size of the holes necessary and the width of the paper. The size of the hole is 0.1 in wide and the width of the paper is 1.616 in. Please note, when purchasing the music box, it must be the 15 note music box for the paper tapes that I have created to work.

The https://musicboxmaniacs.com website has a create feature where you can make your own paper tape music.  I explain how to make the paper tape using your Silhouette software in this blog entry.  https://papercraftetc.blogspot.com/2019/11/how-to-make-paper-tape-music-for-15.html

I used 110 lb. /300 gsm cardstock to make the paper tape music. I purchased the cardstock at Michaels.  The music box needs the thicker paper so that the gears can grab onto the paper.  I recommend using a blade depth of 5 and cutting in 2 passes. I do recommend a new blade and cutting mat.  If the holes are not cut accurately, the music will not play correctly or not at all. I discovered this problem with my automatic blade on my Cameo 3.  The holes were not perfectly round because of a dull/misaligned blade.

I used a Silhouette sketch pan to write the name of each song on the paper tape and an arrow to show the direction in which to feed the music.

Many of the songs in this file are multiple strips of paper that need to be taped together.  I used regular Scotch tape.  The holes that are covered in Scotch tape need to be cut.  I used the hole punch that I received with the purchase of my music box to cut the holes through the Scotch tape.

Here is the PDF.
https://drive.google.com/file/d/1_1fFVvnQHGfJCSy9-3IVwD1cuC-WqZF2/view?usp=sharing


Here is the .Studio file.
https://drive.google.com/file/d/1Tu_huN6bdhUq2r4UZZji6i7KLn89XiRX/view?usp=sharing

If you would like to further your collection of paper tape music, I have made 25 songs for Christmas for the music box in this previous blog post. https://papercraftetc.blogspot.com/2019/10/25-songs-for-christmas-unique-advent.html


Here is a new song...Ultimo Piccola Stella for the Silhouette

Saturday, April 11, 2020

Easter Bunny Rubber Band Pop-Up with Envelope

The base of this Easter Bunny is a triamond triangular bicupola from from my blog post https://papercraftetc.blogspot.com/2020/02/a-stem-project-rubber-band-polyhedron.html
Using this as the base, I embellished it to create this pop-up bunny.

Rubber Band Easter Bunny Pop-Up

Video of the Rubber Band Easter Bunny Card in action. 

Here is the PDF. I used 65 lb. cardstock and copy paper for the envelope.

Here it the .Studio file.


Glue the bunny pieces together as shown above.

Make the triamond triangular bicupola by folding the pieces as shown.  Apply glue to the largest tab with a circle.

Knot a 1/8 inch rubber band in two locations so that the distance is 1.37 inches between the knots. Slide the rubber band into the hole. I used a Glue Dot to adhere the tail to the tab.  I also applied a piece of tape over the rubber and Glue Dot so that the rubber band will not slip out of the hole.

Apply glue to the tabs as shown above. Close the figure and adhere the tabs to the corresponding ones.

Apply glue to the tab with the small circle.  Adhere it to the corresponding tab.

Slide the rubber band into the hole.  Add a Glue dot to the tail and cover it with tape.

Completed base.

Apply glue as shown to the top of the trapezoid. Adhere the bunny head and the basket. Glue the bunny feet to the bottom half of the based the tail to the back of the bunny (not shown).

Make the envelope by folding the sides and gluing the heart tab. Collapse the bunny and make sure that it fits in the envelope.

Completed envelope and rubber band bunny pop-up.