
A carousel that really spins with an axle
Carousel spinning on the axle.
Here is the PDF. I used 65 lb cardstock.
Here is the .Studio file.
Here is the SVG if you do not have a Silhouette paper cutter.
Making the Round Box
Bottom of Box
When making this carousel, the first thing that I needed to decide was the size of the round base. I decided this number needed to be part of a divine proportion so that the carousel's proportions would be pleasing to the eye. Phi, 1.618, is a number which appears frequently in nature and our eye is used to seeing this value. I used this golden ratio number of Phi, 1.618 times 2 which equals 3.236 inches for the base of this round box. To determine the circumference of this circle, I needed to use the formula for circumference which is C = πd. The calculated circumference is 10.161 inches. This value was used to create the length of the strip of paper for the side of the box. I used the value of phi, 1.618 inches as the height of the box. Using these two values, I created a rectangle with the length of 10.161 inches and a height of 1.618 inches. I added the tabs to complete this piece by repeating a series of trapezoids for the bottom circle and adjusted the length to fit with the Silhouette software. I welded these trapezoids to the rectangular shape. I added a dotted line to the edge of the trapezoids so that they could be bent at a right angle to make a ledge for the placement of the circles for the bottom of the box. I also welded a trapezoid shape to the side of the rectangle and added a dotted line to this tab to create an end tab.
I made two 3.236 inch circles with the Silhouette software to give the bottom of the box more support...one circle for placement inside the box and the other for the outside the box.
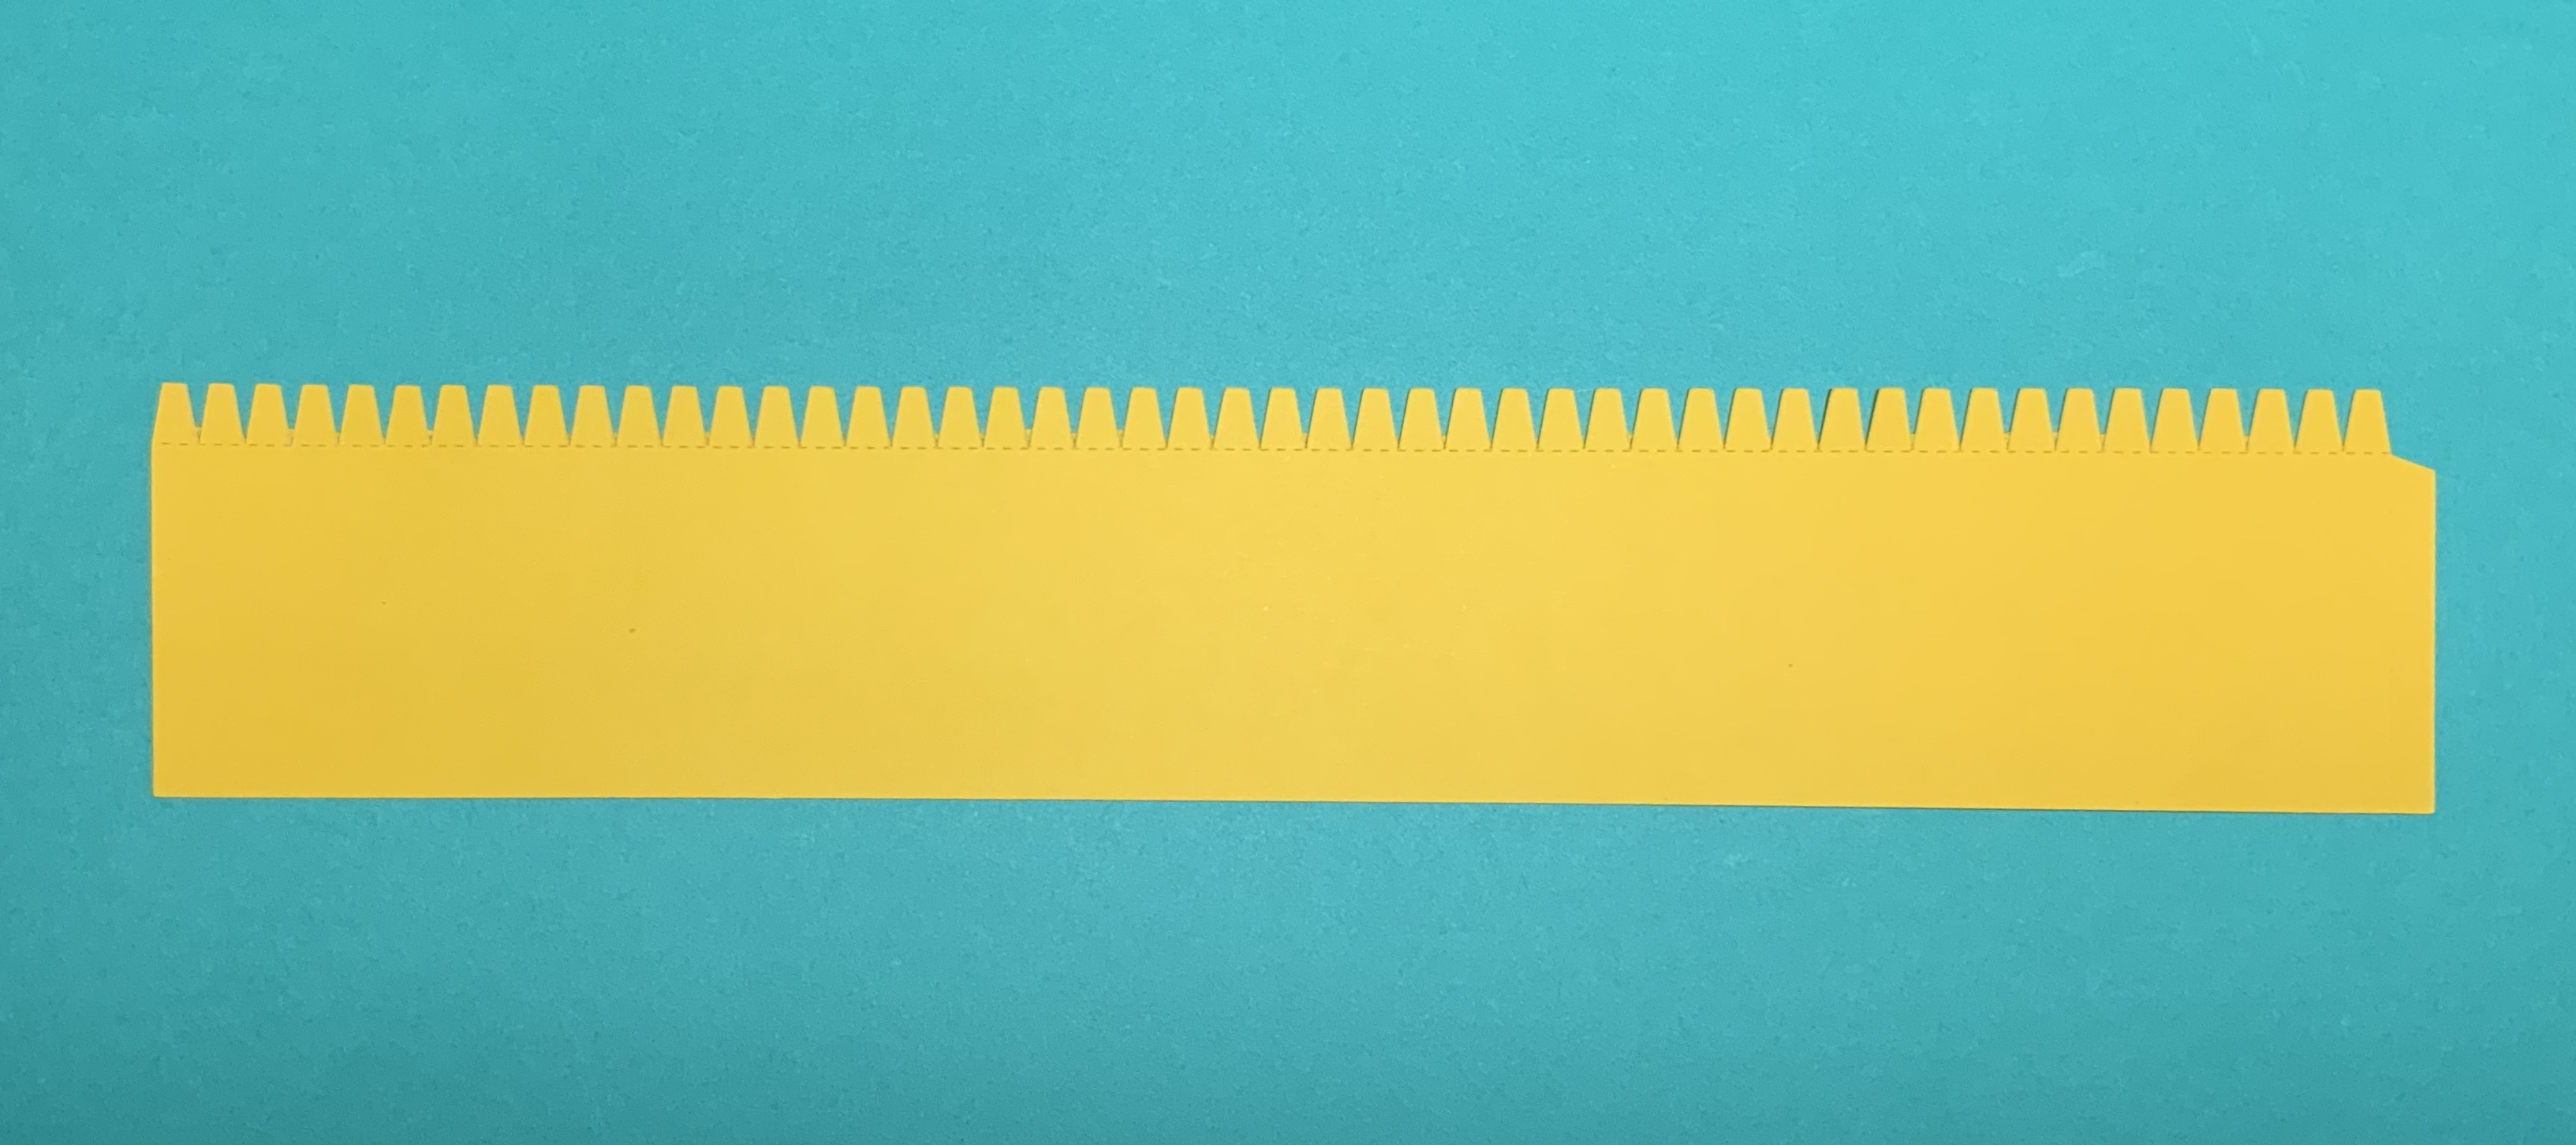
Strip used to create the side of the box.
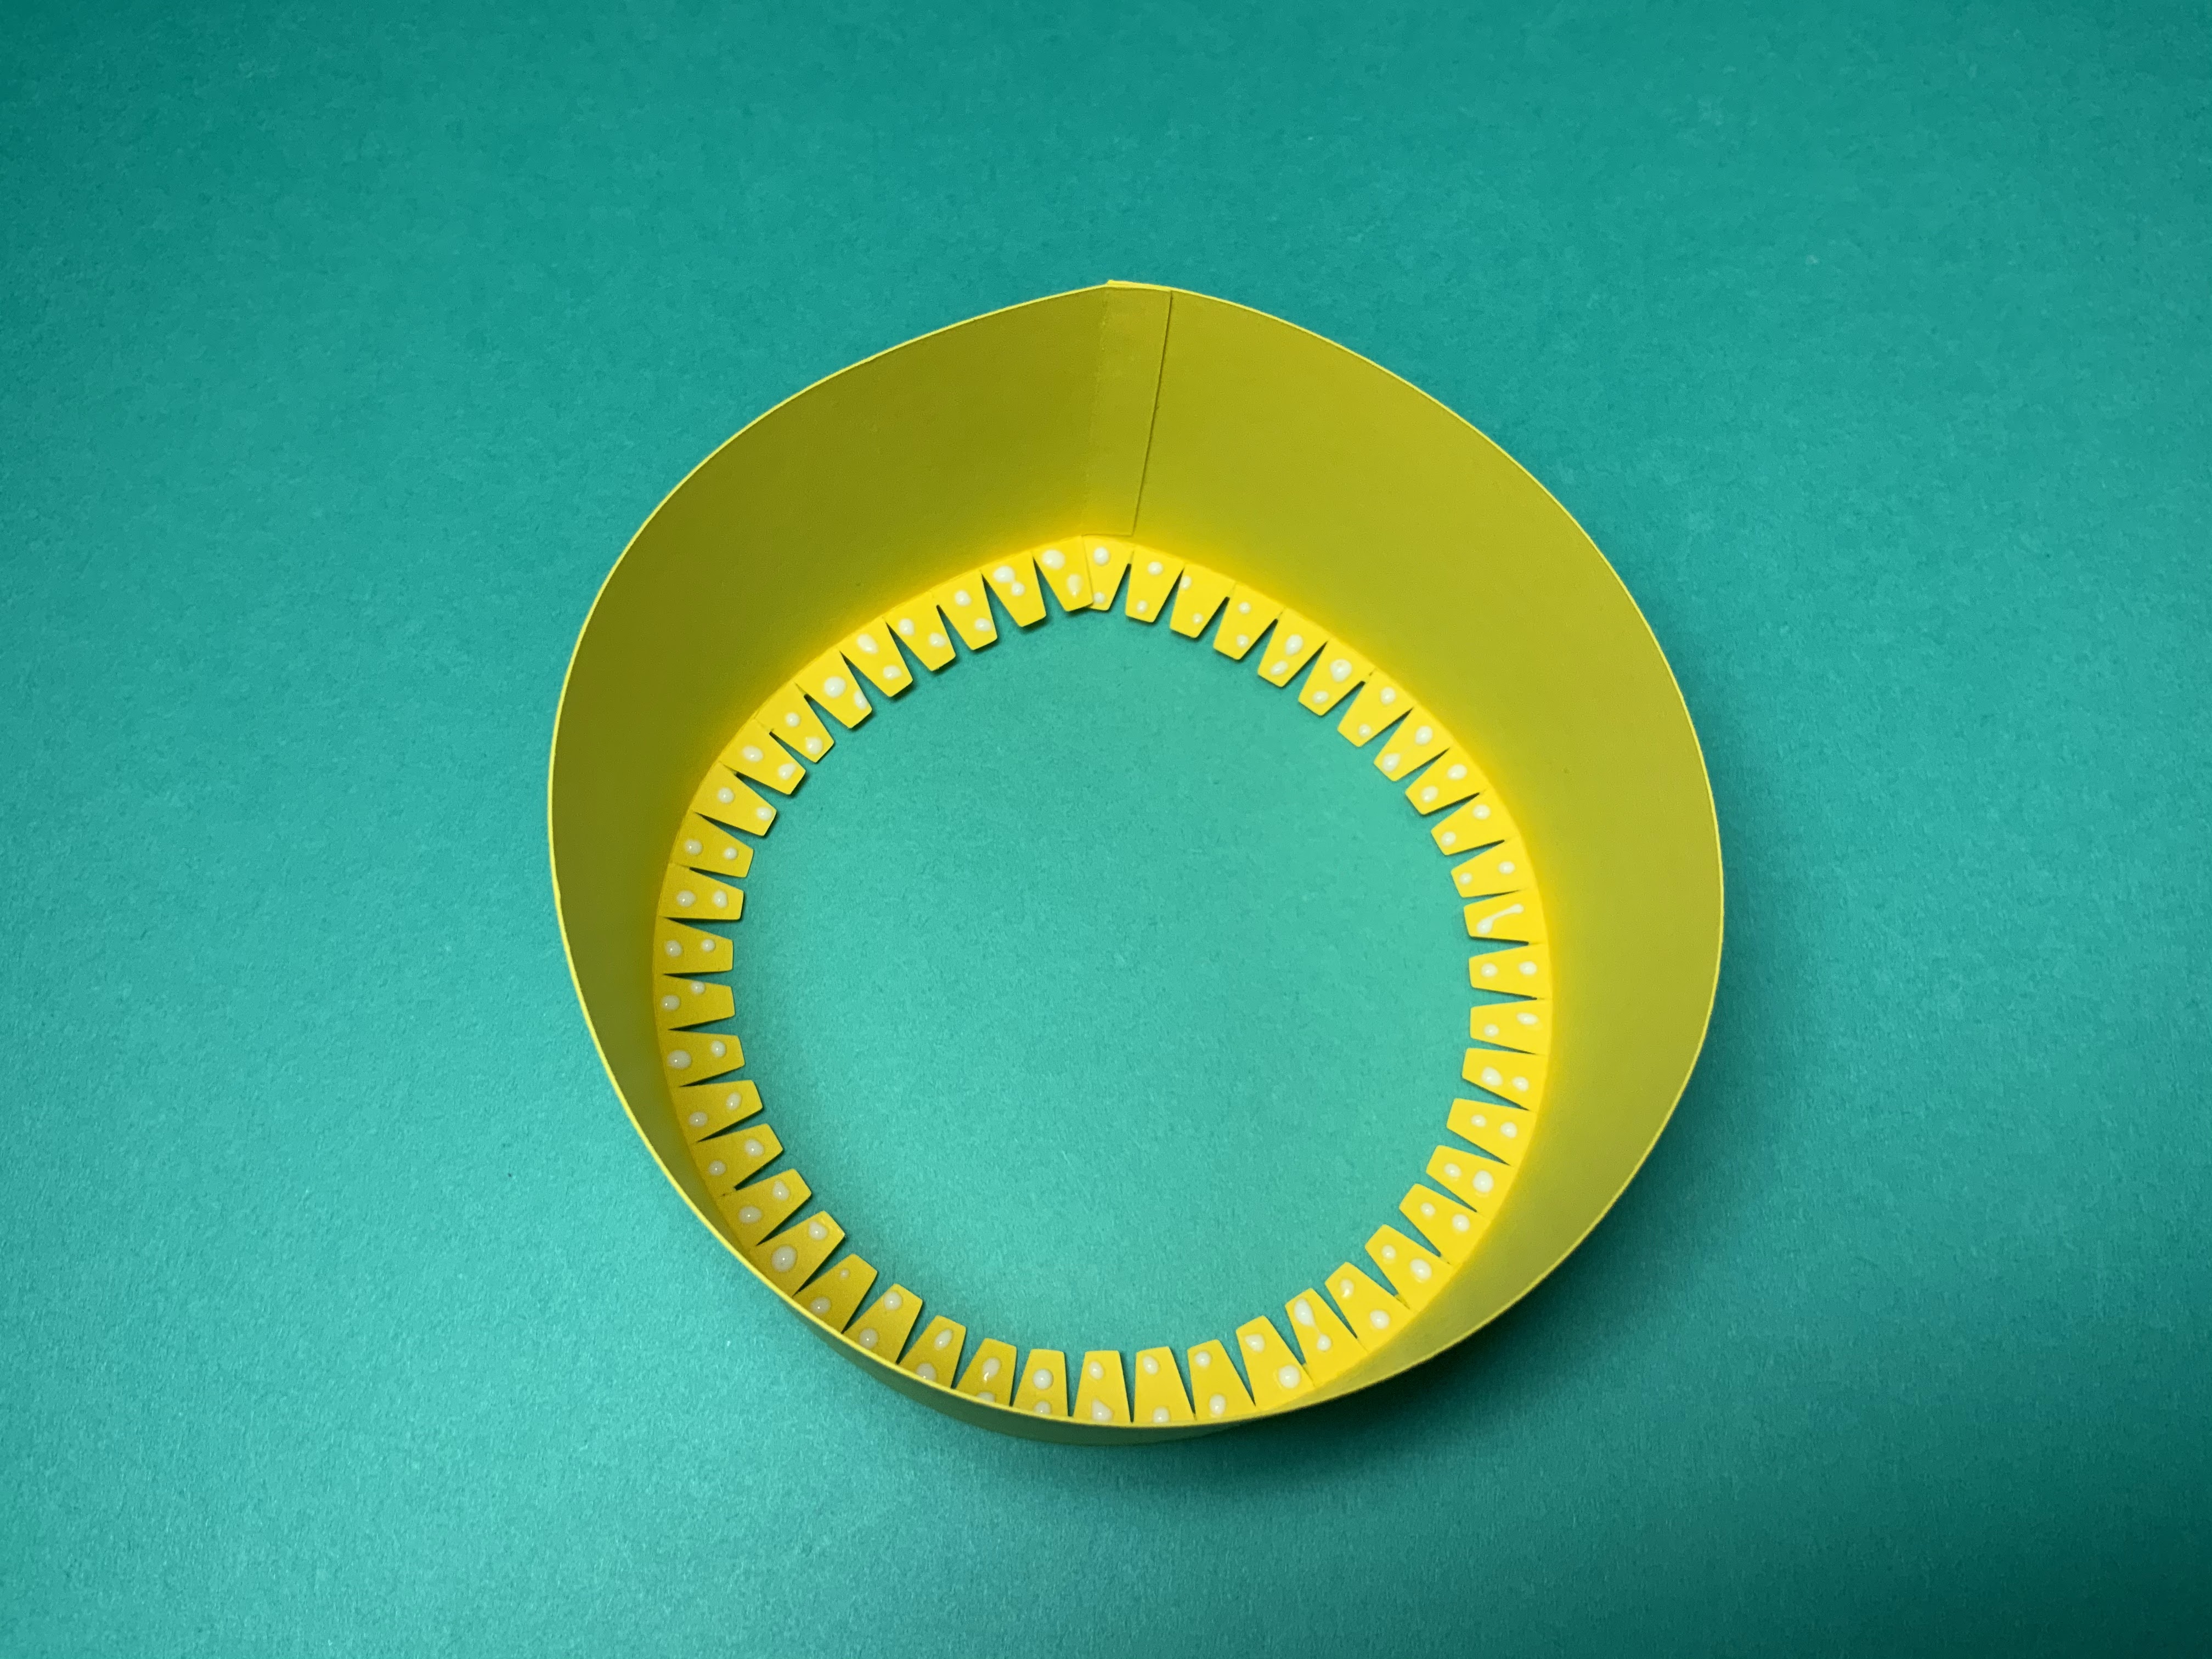
Apply glue to the tab on the side. Adhere the piece into a circle. When gluing the tab, align the edge of the paper with the dotted line on the tab. The edge of the paper should be directly above the dotted line of the tab. Gluing is a very important point as all of the calculations are based on exact measurements. Bend the tabs for the placement of the inner circle, at a right angle to the sides. Apply glue to these tabs and adhere a 3.236 inch circle to the tabs.
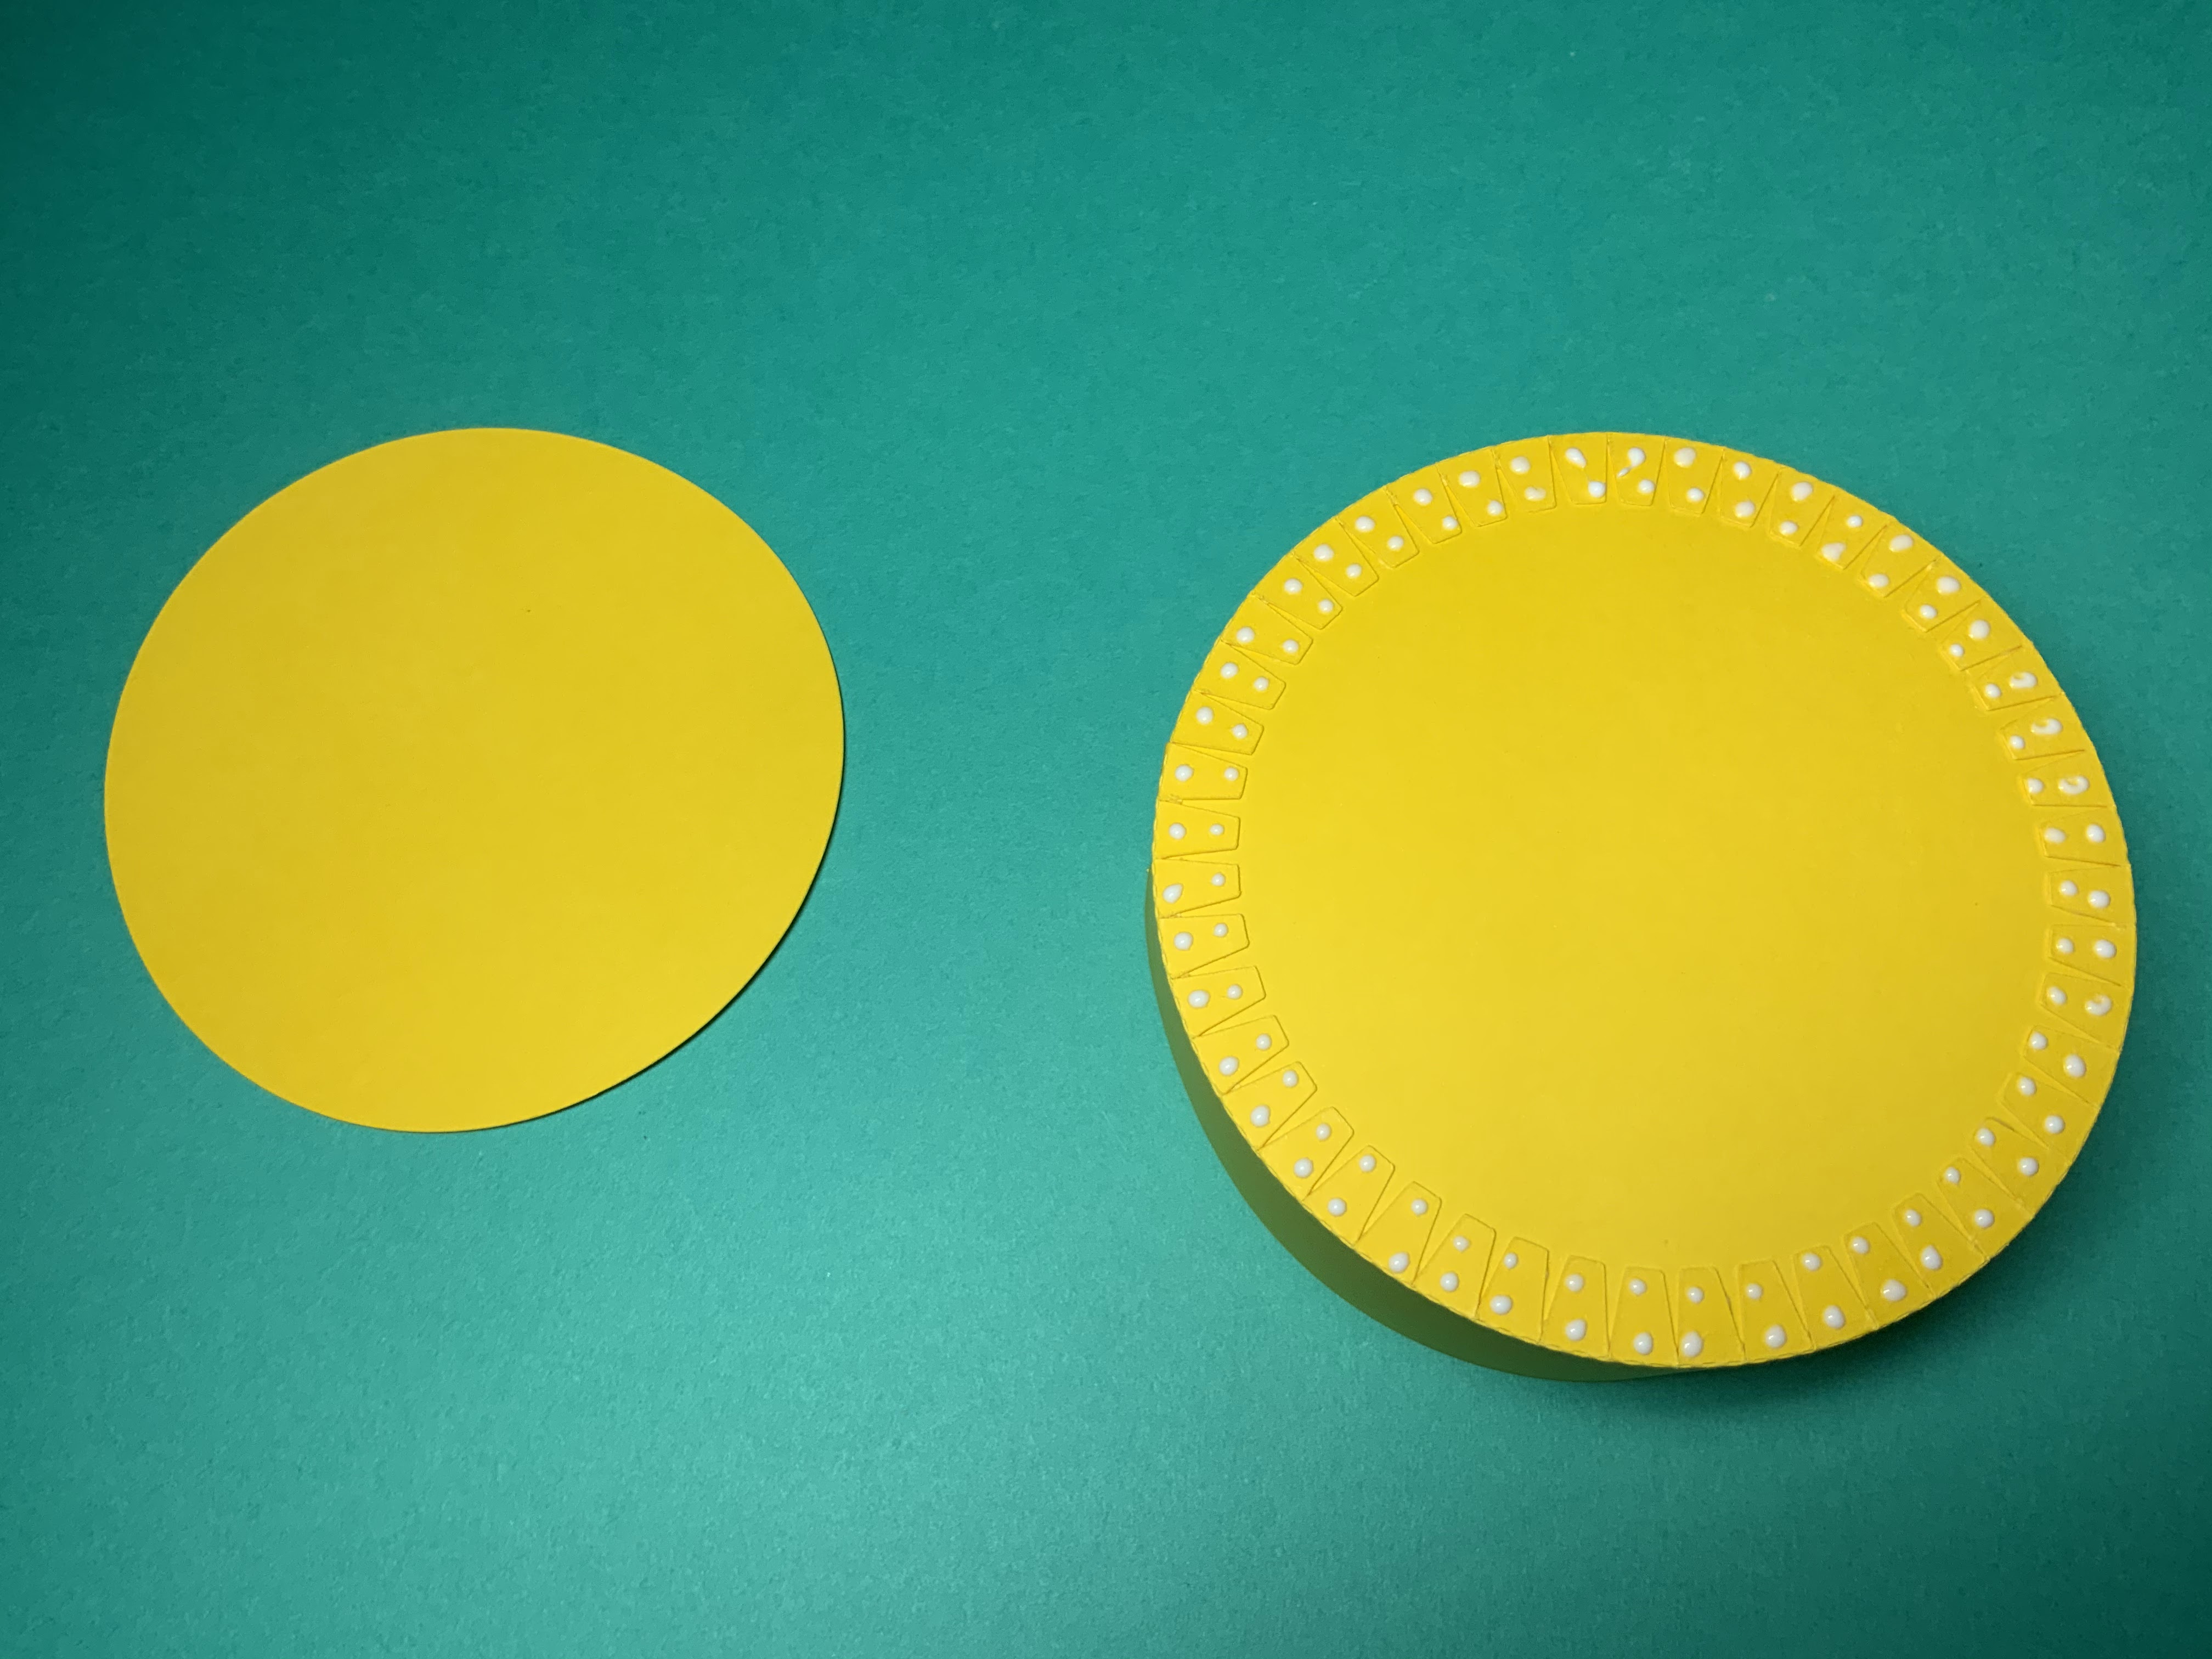
Turn the box over and apply glue to the tabs. Adhere the other 3.236 inch circle to complete the bottom of the box.

Completed bottom of the box
Top of Box
Making the Zigzag Bands
The top of the box needs to be a little larger than the bottom of the box so that it can easily slide on and off of the base. I added 0.1 inches to get 3.336 inches for the diameter of the top of the box. Using the circumference formula, C =πd, I got 10.475 inches as the size of the outer band of the box. I added 0.06 inches to the size to allow for paper allowance which gives 10.535 inches as the length of the top band. Using these values, I made a rectangle and added an end tab. The zigzag embellishments on this band was made with a trapezoid design in the Silhouette software which were duplicated multiple times and welded to the rectangular shape on both sides of the rectangle. Two zigzag bands are needed for my design.
The top of the box needs to be a little larger than the bottom of the box so that it can easily slide on and off of the base. I added 0.1 inches to get 3.336 inches for the diameter of the top of the box. Using the circumference formula, C =πd, I got 10.475 inches as the size of the outer band of the box. I added 0.06 inches to the size to allow for paper allowance which gives 10.535 inches as the length of the top band. Using these values, I made a rectangle and added an end tab. The zigzag embellishments on this band was made with a trapezoid design in the Silhouette software which were duplicated multiple times and welded to the rectangular shape on both sides of the rectangle. Two zigzag bands are needed for my design.
Making the Ledge
I duplicated the zigzag band and removed half of the design to create the inner ledge piece. I had to remove a portion of one of the trapezoid in order for the piece to fit correctly on the inside of the zigzag band. I added a dotted line to the trapezoids so that they could be bent at a right angle to make the ledge for the placement of the inner circle. Two ledges are needed for my design. I made them two different colors to differentiate their location on the box.
Making the Diamond Band
The diamond band was made by making a diamond shape and repeating it using the replicate function on the x axis with a distance of 0.5 inches. A rectangle was made to enclose the design and adjusted with the Silhouette software to fit on top of the zigzag band.
Making the Stripes
A rectangle shape was used to make the blue stripes which are 0.03 inches wide and 10.570 inches in length. The length is longer than needed. This is due to stretching of the paper and I felt that it is better to have an overlap than not enough length.

Top of Box Pieces

Apply glue to the diamond strip and adhere to the zigzag band starting at the tab and going toward the opposite edge. There will be a slight overhang of the diamond strip when the piece lays flat. This difference will disappear once the band is bent into a circle.

Using the blue stripe, glide it over the top of a glue stick.

Adhere the blue stripe to the zigzag band as shown above starting at the tab and going toward the opposite edge. There is an overhang of the blue stripe to allow for a gluing inconsistencies.

Turn the zigzag band over. Bend the ledge piece at a right angle.

Apply glue as shown to the edge opposite the trapezoid tabs.

Adhere the ledge as shown. Notice that the trapezoid tabs are no longer at a right angle. This was done to align the trapezoids to the corresponding edge piece. Also notice that the ledge piece is not exactly the same as the band. The first trapezoid is cut in half. This was needed so that the pieces could align properly.

After adhering the ledge piece, pull the glued end slightly apart on the side with the overhanging blue stripes. The tab of the zigzag band will be inserted at this point between the pink and yellow paper.

Apply glue to the tab and insert it as stated above.

Realign the yellow trapezoids on the ledge so that they are at a right angle to the zigzag band.

Repeat the above instructions to make another band which will have a red ledge. There is no difference between the two bands. I used the two different colored ledges to help signify where it would be placed on the carousel.
Center Pole of the Carousel
Carousel Horses
I made a rectangle for the pole of the horse in the Silhouette software. I welded it to the horse to make the carousel horse. I added a tab to the bottom and top of the carousel horse. I made the height of the carousel horse, 2.427 inches to be consistent with the center column.


Axle which allows the carousel to spin
I subtracted 0.07 inches from the diameter of the center pole and used this value of 0.23 inches as the diameter of the center axle. Using this value, I determined the circumference of the axle would be 0.722 inches. I subtracted 0.06 inches for paper tolerance and got the value, 0.662 inches for the circumference of the axle. To determine the height of the center axle, I used a 2 inch height for the cone plus height of the carousel horses, 2.427 inches, plus the width of the paper layers (3 x 0.06 inches thickness of the paper = .18)


I arbitrarily decided to use 0.3 inches as the diameter of the center pole. Using the circumference formula, C =πd, I determined the circumference of the center pole would be 0.942 inches. However, I needed to subtracted .06 inches for paper tolerance since the center pole would be inscribed in a 0.3 inch diameter circle. The final value of the circumference would be 0.882 inches. The height of the center pole, I decided, would be 2.427 inches which is one and half Phi's. Using these values, I made the center pole with the Silhouette software and added a tab. I also evenly spaced seven dotted lines to make the paper piece appear to be rounded. I made tabs by replicating four evenly spaced trapezoids and welded them onto the rectangle. I added these tabs to both the top and bottom of this piece.
Carousel Horses
I made a rectangle for the pole of the horse in the Silhouette software. I welded it to the horse to make the carousel horse. I added a tab to the bottom and top of the carousel horse. I made the height of the carousel horse, 2.427 inches to be consistent with the center column.
Carousel Horse Platform
To make the circle for the carousel horse platform, I used the diameter 3.236 inches which is also the diameter of the box base, two Phi. I centered a 0.3 inch hole in the center of the circle. I added a small rectangle to the circle and replicated the rectangle at 72 degrees to make five rectangles that are evenly spaced around the circle for the placement of the carousel horses.

Carousel Horse Assembly

Form the center pole into a tube and apply glue to the tab as shown above.

Adhere the tube. This tube can be folded flat so that the glue can be adhered correctly. Do not leave the tube flat for very long as excess glue might keep the tube in this flat position. Realign the piece into a tube once the glue has set a little.

Glue the center pole to the carousel horse platform.

Glue the carousel horses to the other circle.

Merge the two circles together by aligning the rectangle holes for the carousel horses.

Make sure the carousel holes align before gluing the center pole and then glue all the carousel horses in place.

Completed carousel horse assembly.
Axle which allows the carousel to spin
I subtracted 0.07 inches from the diameter of the center pole and used this value of 0.23 inches as the diameter of the center axle. Using this value, I determined the circumference of the axle would be 0.722 inches. I subtracted 0.06 inches for paper tolerance and got the value, 0.662 inches for the circumference of the axle. To determine the height of the center axle, I used a 2 inch height for the cone plus height of the carousel horses, 2.427 inches, plus the width of the paper layers (3 x 0.06 inches thickness of the paper = .18)
2 + 2.427 + .18 = 4.607 inches
I added 0.358 inches more to the height for a flag pole that will stick up out of the carousel.
4.607 + 0.358 = 4.965 inches for the height of the center axle.
I made the axle in the same manner as the center pole with the Silhouette software. However, I did not put a tab at the top of the axle. A paper flag will keep the carousel assembly in place.
Cone Canopy
The top of the carousel has three different sized cones.
The top of the carousel has three different sized cones.

The slant height needs to be calculated using the Pythagorean theorem. Given the diameter of the round base will be 2 Phi plus an additional 0.1 inches to slide on the lid, the diameter of the cone is 3.336 inches. Therefore the radius of the cone will be half of the diameter, which is 1.668 inches. I decided to make the height 2 inches because of the divine proportion of Phi. Using these values and the Pythagorean theorem,
a2 + b2 = c2
22 + 1.6682 = c2
2.604 = c
The slant height of the cone is 2.604 inches which I rounded to 2.6 inches.
The pattern that you use to cut and fold the cone, also called the net, looks like a wedge shape. In order to make this shape with the Silhouette Flexishape tool, the angle of the wedge needs to be calculated.
360 degrees (radius)
Angle of Wedge = __________________
slant height
360 degrees (3.336)
= __________________ = 230 degrees
2.6
The cone canopy was then constructed with the Flexishape tool with a wedge shape of 230 degrees and a slant height of 2.6 inches. I added a tab to the wedge and a 0.4 inch circle hole in the center of the wedge for the axle.
The angle of the wedge is the same for the two smaller sized cones. I determined the size of the other two cones to be 1 inch and 1.169 inches. I made the 1 inch wedge with the Flexishape and removed the 0.4 inch circle from the center. To make the scallops on the bottom edge of the cone, I then used the replicate function, object on path, to replicate a 0.16 circle. The circle has a grab handle in the middle and I placed it on the edge of the wedge shape. I duplicated the circle until the outer edge was filled. I broke the replicate circle on the outer edge in half, to remove the circles in the area that I did not want them.

The circles are along the one inch slant height wedge. At this point, I need to go to Object to convert the figure.

The circles are then welded to the wedge. A tab is needed to complete the small cone. I repeated the above directions for the medium sized wedge which was 1.169 inches.

Apply glue to the tabs of each of the cone shapes and adhere into a cone.

Apply glue to the inside of the medium and small cones as shown above.

Align the seams and adhere the cone shapes.

Crease the folds on the axle and fold back the tab. Apply glue to the tab.

Fold the axle in half to adhere the glue.

Insert a skewer into the center of the axle to make sure that the axle is rounded.

Thread the tabs of the axle through the bottom of the carousel circle. Glue the tabs.

Apply a dot of glue to each of the ledge tabs. Insert and adhere the red circle which is the inside box top circle,

Turn the lid over and apply a drop of glue to each of the tabs.

Adhere the center axle assembly to the lid

Apply a bead of glue to the top edge of the yellow ledge as shown above. The cone will be adhered at this point.

Adhere the cone to this glued edge.

Turn the cone over to the other side. Apply a drop of glue to each of the trapezoid tabs.

Adhere the top of the carousel circle to these tabs.

Apply glue to the top of the carousel horse assembly as shown above.

Slide the carousel horse assembly onto the axle.

Slide the cone canopy onto the axle and adhere the cone canopy to the top of the carousel horse assembly.

Apply glue to the flag, add the center yellow triangle. (Not shown) Wrap the flag around the top axle and glue the flag closed.

Completed Carousel That Really Spins With An Axle
No comments:
Post a Comment