A STEM Project: Making a Simple Machine - An Arcade Pinball Machine
A Simple Machine - An Arcade Pinball Machine
Disclaimer: Adult supervision is required when making/playing this arcade game as the 3/8 inch balls could be a choking hazard.
The board is inclined at a 6 degree angle.
Here is a video of the pinball machine in action.
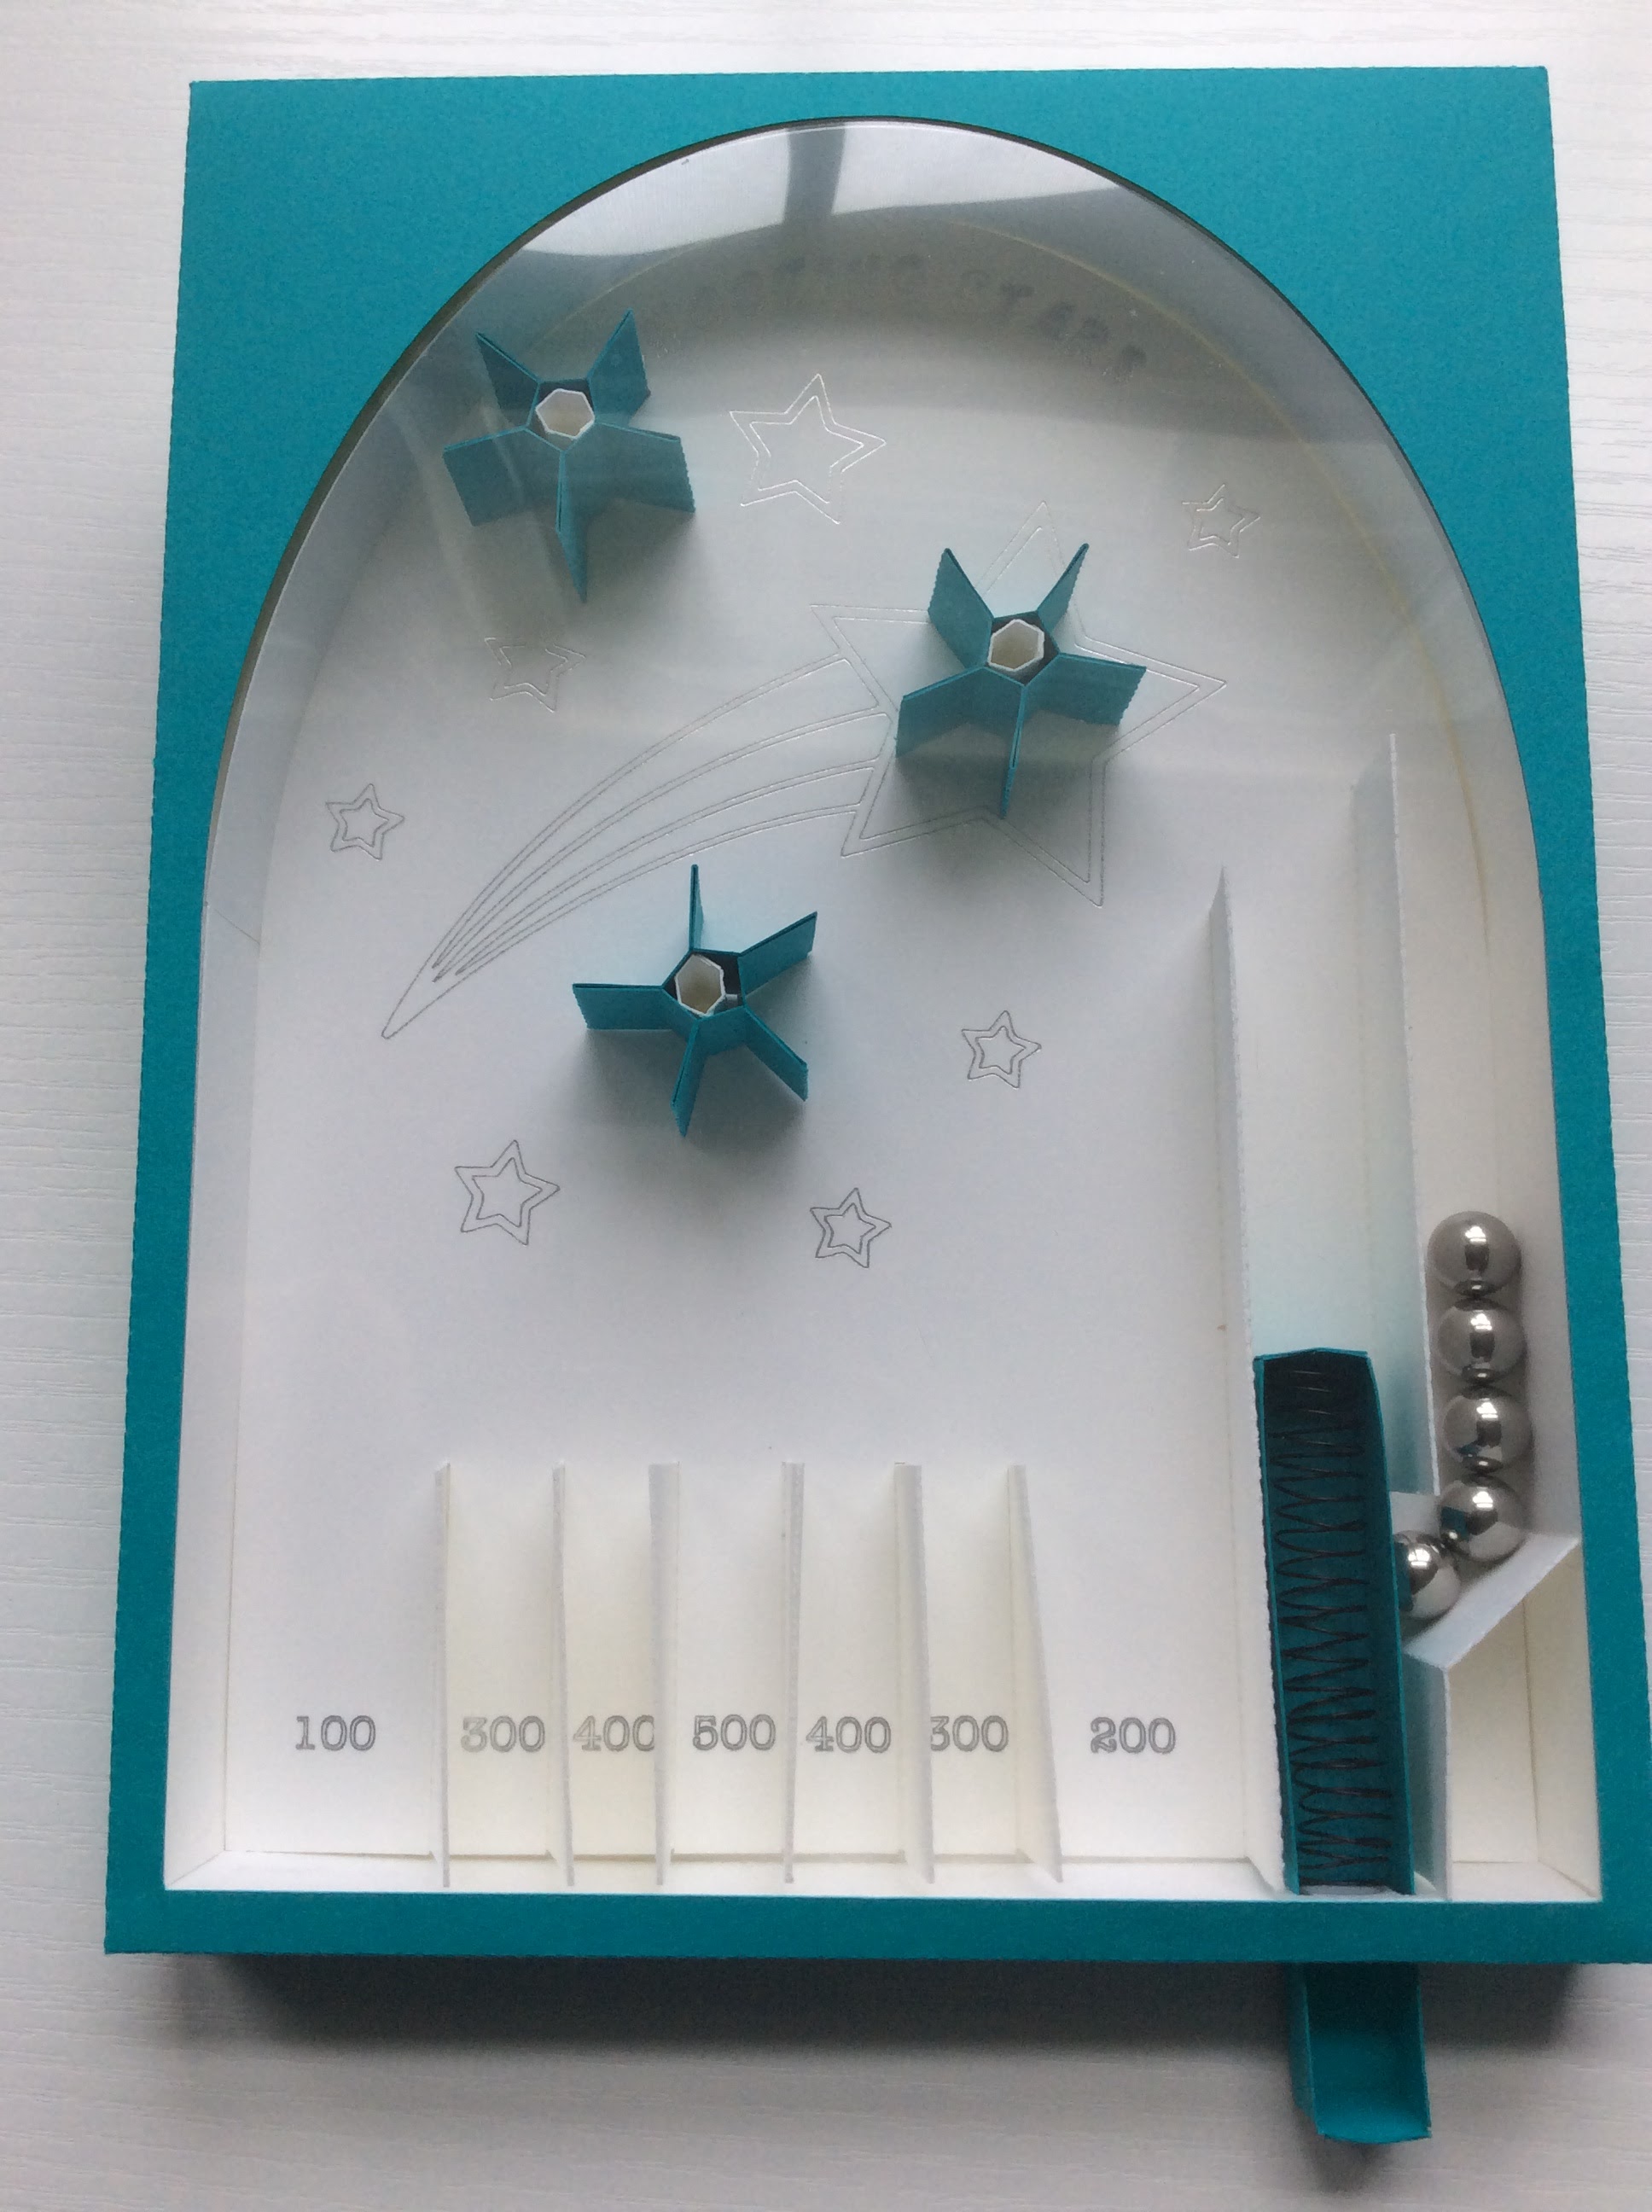
An Arcade Pinball Machine is a fun example of a simple machine at work. A simple machine changes the direction or the strength of an object. In my "Shooting Stars" Arcade game, three simple machines are combined to make this mechanical device. The three simple machines are a spring, an inclined plane and a wheel and axle.
To "work"(work is the transfer of energy) this "Shooting Stars" Arcade game, a spring is retracted whereby stored energy from the spring is released. A ball is then propelled by the force of the spring to the top of an inclined plane. The ball follows the curvature of the top of the pinball machine where it ricochets against one or more of the wheel and axles to realign the trajectory of the ball. The ball rolls downward with gravity into different slots. The slots values are based on the probability that it will land into a particular slot. The higher the slot value, the lower the probability the ball will land in that slot. In turn, the lower the slot value, the higher the probability that the ball will land in that slot.
I have designed this pinball machine so that the playing field can be removed.The basic box and spring mechanism can then be reused. This will allow the user to make a new playing field to explore their own designs and mechanisms.
The spring is made by winding a 24 inch length of 26 gauge wire around a tube. I used a 3/8 inch diameter pen to wind my wire around.
I used 65 lb card stock, Silhouette chipboard to reinforce the box where the plunger resides and five 3/8 inch balls. (Plastic beads can be used but the weight of the bead was not heavy enough to consistently move the wheel on the axle all the time.)
I Foil Quilled the background of the playing field. Foil Quill is a heat embossing tool which adheres foil to the paper. While Foil Quilling the background is nice, it is not necessary to complete this project.
Make the Box - This box is a double walled box which allows for a sturdy playing field.
Crease all of the sides of the box as shown above. Make sure all of the pieces are aligned in the same direction. Glue the four chipboard pieces to the center of the front piece. This is needed to reinforce the plunger area so that it does not bend. Make sure that the "U" is glued and aligned properly as this is the area that will be used to slide the spring mechanism.
Apply glue to the tab with the notch.
Adhere the glue so that a box is formed with a tab sticking out at the bottom.
Apply glue and adhere the left tabs. Please be meticulous when gluing these tabs as this will be the corner that wraps around the side of the box.
Apply glue and adhere the right tabs. Please be meticulous when gluing these tabs as this will be the corner that gets inserted into the wrapped around tab. These edges need to be at right angles to one another to make a nice rectangular box.
The front edge side the box is completed in the above photo. Glue the long tabs on each of the remaining pieces. The top piece shows the location of where to adhere the glue on the long tab. The other two sides have been folded flat to adhere the glue.
Glue and adhere the left and right side tabs as before.
Apply glue to the three surfaces on the wrap around tab.
Adhere a long side to this area and glue the wrap around tab to the outside of the box.
I used a square object to make sure that the corners were aligned properly and at right angles to one another.
Repeat for the remaining corners. Again, make sure to align everything correctly by placing straight edges on the outside of the box. Allow the glue to dry before continuing.
Apply glue to the top edge of the box. Insert the back of the box. Apply glue to the edge of the tabs.
Adhere all of the tabs. (View of the bottom of the box)
View of the top of the box.
Apply glue to the small side rail pieces and adhere to the bottom sides of the box. Insert the long strip so that each edge touches the sides. I applied a drop of glue at these contact points so that a natural curve can be attained for this large strip of paper.
Pinball should be played at a 6 - 6.5 degree angle incline. Make two legs to raise up the playing board. Fold and glue the legs as shown above.
The legs are designed with a diagonal piece in the middle which creates a structurally sound leg.
The legs are glued on the bottom of the pinball machine in the top left and right corners.
Completed Box
Make the Playing Board
Foil Quill the background onto the playing board. This is for esthetics only. Skip this step if you are not Foil Quilling the paper. I have included the playing board that does not need to be Foil Quilled. (The number values will need to be added to the slots.)
Make the axles by creasing the sides and glue the tab. The axle can be folded in half to adhere the tab. Once the tab is adhered, form into a tube.
Glue the tabs to the bottom of the playing board.
Fold and glue all of the dividers as shown above
Make the rotating star by folding the strip as shown above.
Apply glue to all of the peaks and form into a star.
Complete dividers and stars.
Apply glue to the dividers
Slide the dividers into place.
Bend the divider with the arm.
Apply glue and slide into place.
Slide the stars onto the axles.
Make the plunger by gluing the tabs on just one side. Do not do the other side until it has been inserted into the slot on the side of the box.
Insert the playing board into the box. Insert the plunger into the box.
Glue the tabs together on the other side of the plunger. The fit of the plunger might be a little tight. Move the plunger back and forth until it slides smoothly.
Make the cover of the box by gluing the four sides together.
Make the spring by wrapping a 24 inch length of 26 gauge wire around the barrel of a pen. (Try other lengths to see the effect of the spring.)
The completed spring length is 2 inches.
Lay the spring into the plunger. Add five 3/8 inch balls. Lay a sheet of acetate on top of the box and cover the box with the lid to complete the pinball machine.
To play the pinball game, on a flat surface, with your board placed near the edge of a table, place your finger on the plunger and compress the spring. Release the plunger to propel the ball.
Repeat for the rest of the balls. Add up the values in the location of your balls to get your score.
This is incredible! thank you for so generously sharing your files. I'm really looking forward to tinkering with this design and sharing with students :)


This is incredible! thank you for so generously sharing your files. I'm really looking forward to tinkering with this design and sharing with students :)
ReplyDeleteSo great - many thanks for sharing
ReplyDelete