
A Birthday Slice Form Sphere that Rotates
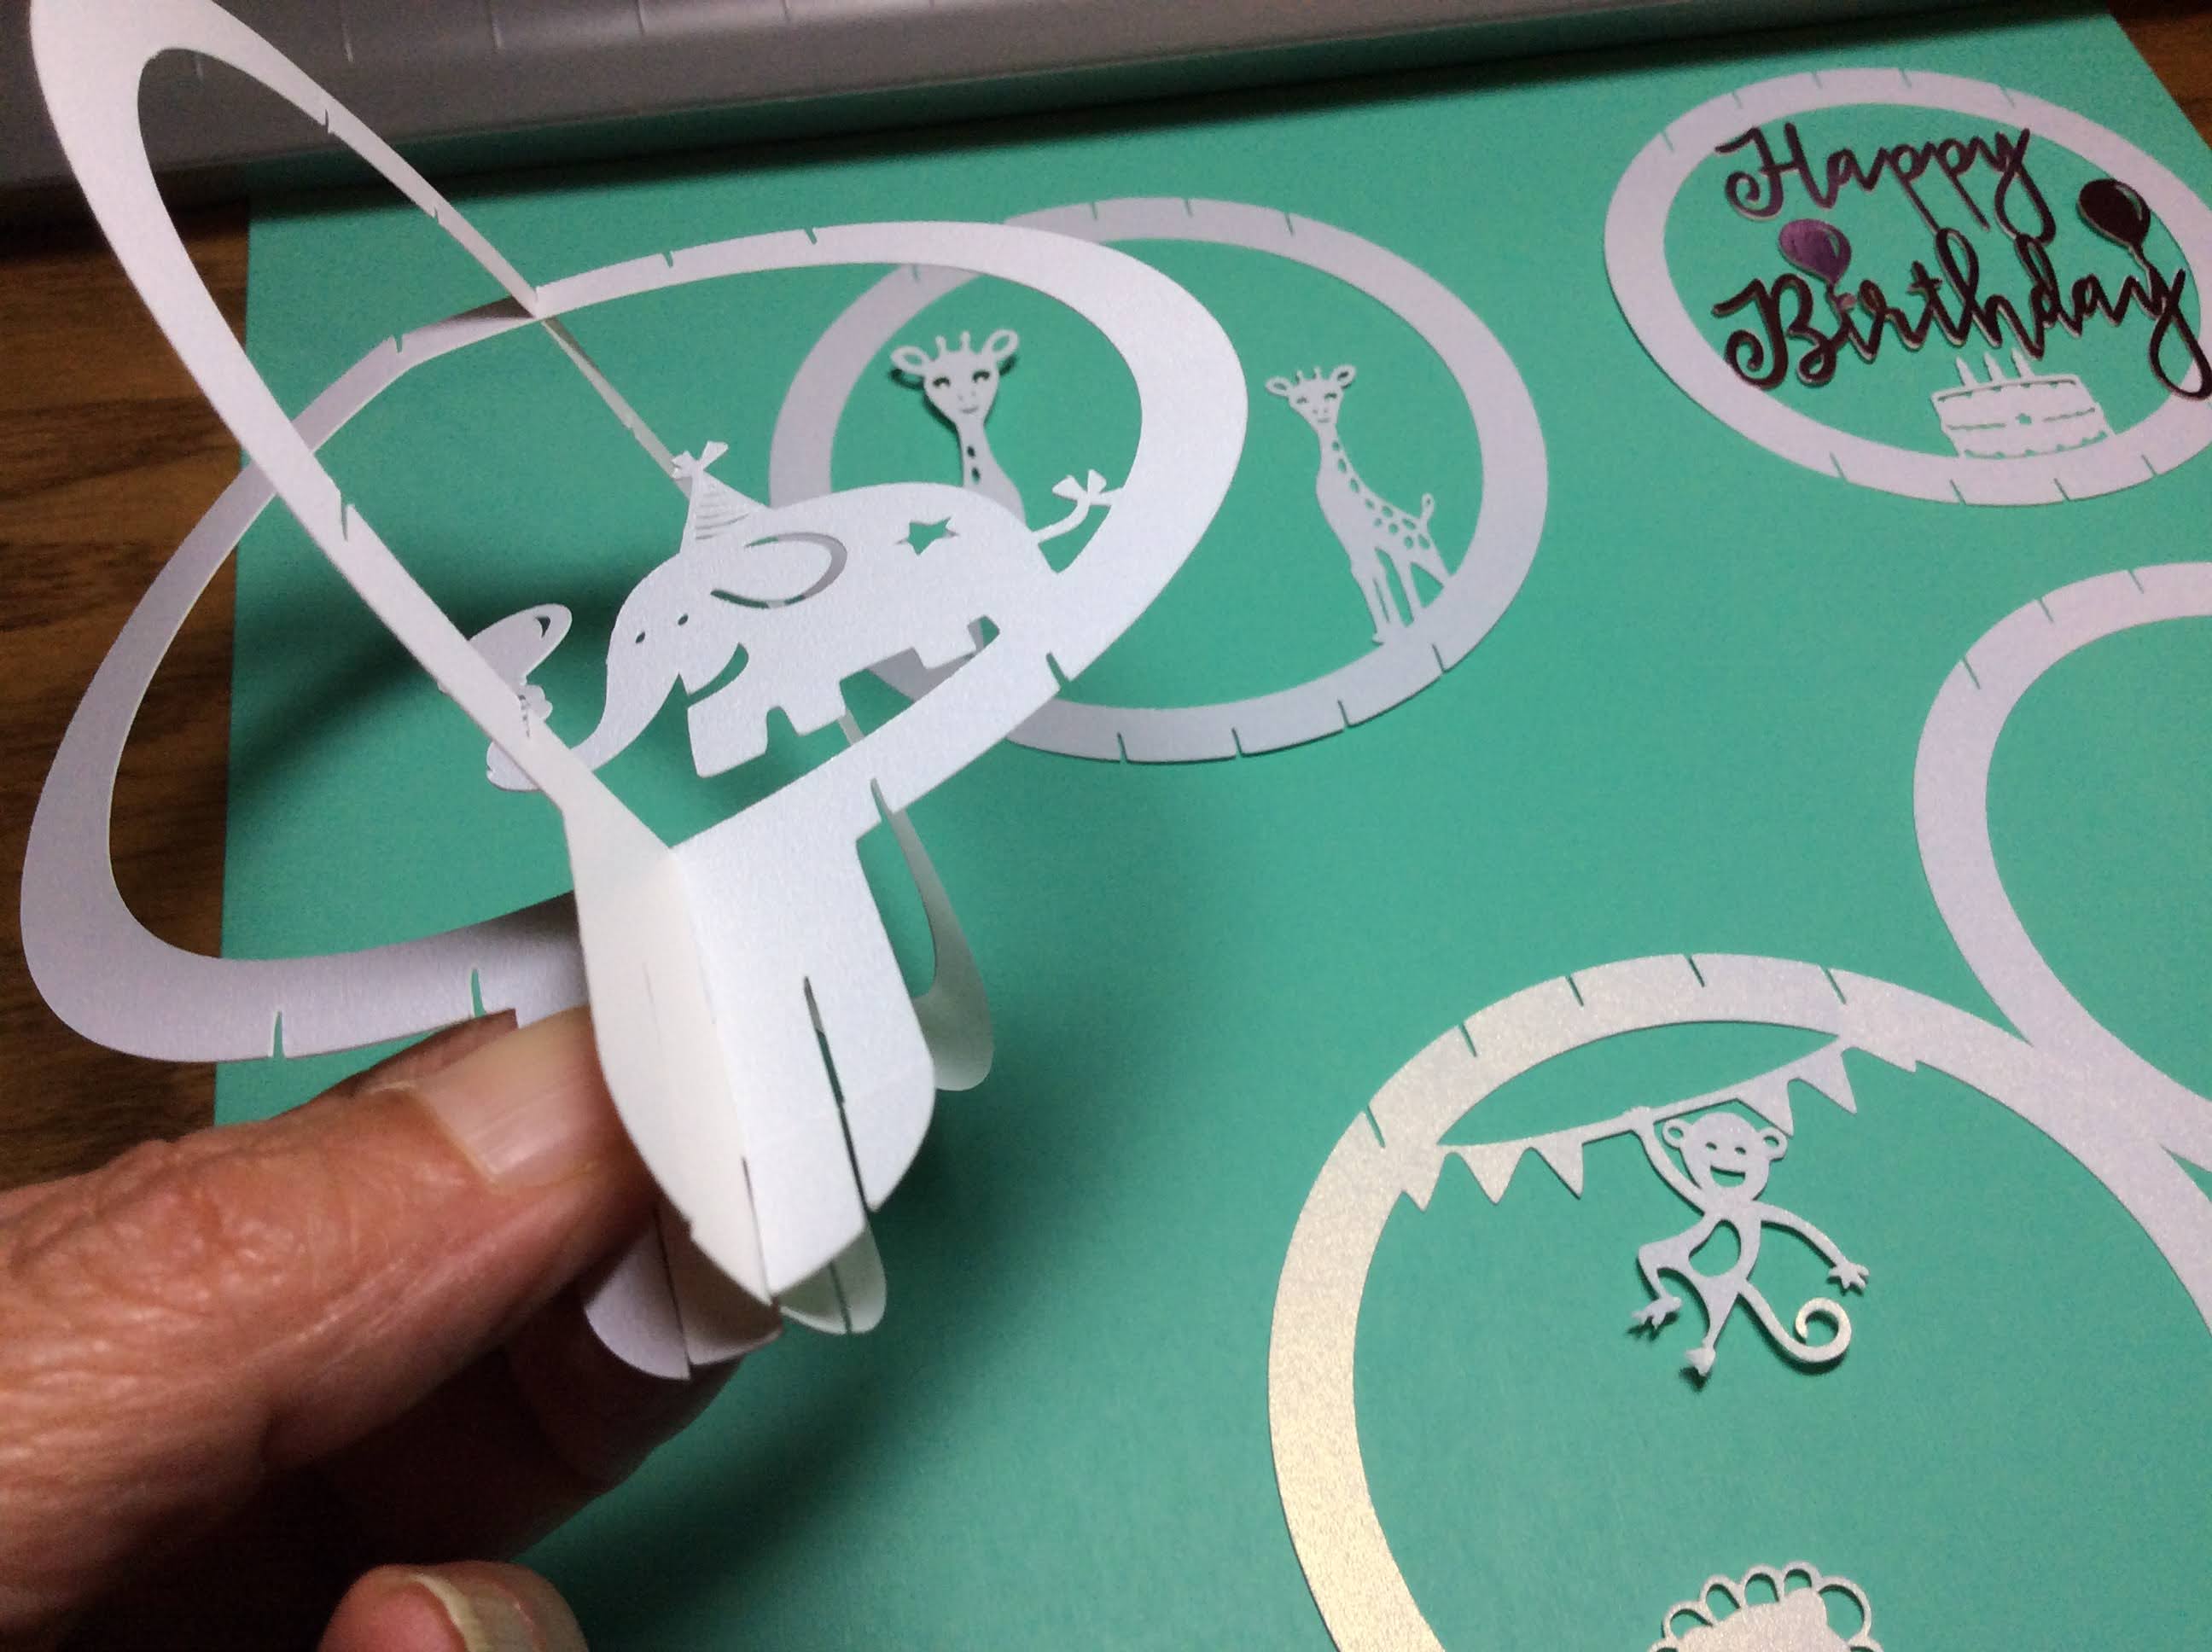
This Birthday Slice Form Sphere would make a beautiful birthday gift for a small child with it's zoo animal scenery inside. The gear mechanism in it's base allows the sphere to rotate.
Here is a video of the slice form sphere rotating.
I used 65 lb. Neenah metallic paper from Office Depot. The shiny metallic paper is Recollections brand foil cardstock from Michaels.
Here is the PDF.
Here is the .Studio file.
Here is the SVG.

Glue the Happy Birthday greeting onto the corresponding slice form circle.

I like how the metallic paper sparkles and gives the sphere a pop of color.

Arrange the outer slice form circles.

Arrange the inner slice form circles.
Slide the inner and outer corresponding center slice form pieces together. Bottom is shown.

This is what the top looks like.

Add the next largest outer slice form circle. The circles with scenery will be attached first at the top of the circle. (When I say attached, I mean the two corresponding pieces are slid into one another.)

The bottom is then attached.

The smaller slice is attached at the top.

The small slice is attached on the bottom. Repeat until all of the scenes are attached.

Attach the opposite direction pieces. Do not be afraid to bend the paper a little. The slices might come out of their slits but realign them gently.

Slide the top of the slice form first and then the bottom.

If you have any difficulty, make the slice form flat. This will align the slits. Push it down gently.

All of the slices have been attached.

Glue the foil base into a round and set aside.

Turn the slice form upside down and slide the center notched piece onto the slice form as shown.

Slide the other center notched piece onto the slice form as shown.

Slide the other two similar squares onto the base.

Another view of the base.

Fold the foil round tabs inward and apply glue to the tabs.

Adhere the round onto the foil circle.

Slide the foil round base onto the base of the slice form.

Bend the tabs of the gear casing upwards.

Slide this gear casing on top of the foil round.

Slide the Foil gear with the X over the slice form base tabs as shown above.

Bend and glue down each of the tabs.

All the tabs have been glued down.

Glue on the center circle.

Glue the three gears together.

Make sure that the foil is showing.

Apply glue to the gear on the slice form.

Adhere the sandwiched gears to the slice form gear.

Apply glue to each of the gear casing tabs and adhere to the other side of the gear cashing as shown above.

Completed gear case base.

The gear casing base might inhibit the movement of the gear. I inserted tweezers to enlarge the area once the glue had dried.

Completed Birthday Slice Form Sphere
Thank you again for another adorable design, I need to get to work making some of your designs! So far all I can do is admire them.
ReplyDeleteI am in awe of how amazing your designs are! Each one is better than the last!! I have been looking for great 3D / pop-up papercrafts and I feel like I’ve hit the jackpot by stumbling on to your site. I can’t thank you enough for so generously sharing your talent and beautiful creations with the world. Can’t wait to give them all a try!
ReplyDeleteMagnifique, merci !
ReplyDeleteHow do I download the file on a Mobile phone?n
ReplyDeleteThe .Studio and SVG files are not meant to be downloaded to a mobile phone as they need an electronic paper cutter to cut out the files. I think you should be able to view and print out the PDF file to a printer.
DeleteHi. This looks fab! But I was wondering how large the SVG file should be when loaded into Design Space? DS has a habit of reducing file size and it currently looks like the card would only be about 2" across! Many thanks.
ReplyDeleteI don’t have a Cricut. You can resize the entire design when you know the size of one objects in the design. The elephant in the largest circle with a tab is 5.792 in. high and 4.5 in. wide. Select the entire design and resize everything until the elephant is the correct size. This is a little tedious but it works. You resize the entire design and check the size of the elephant. Keep resizing until you get it to be the right size.
ReplyDeleteHi Elaine. Thanks for that, I shall do some "fiddling"!! If possible, could you provide the size of a design for those of us planning on using it in DS? I know some people simply put the size of the whole layout on a tab somewhere, and it's a great help as it needs less fiddling with!! Thankyou again.
DeleteAh, got it! For DS users, they'll need to resize the whole SVG file to 45.6 wide and 24.113 inches high. That will give the elephant as near as I can get to the size you've quoted! Thank you!
DeleteI just looked at my design and it is 24.092 in. high x 46.404 in. wide.
ReplyDeleteThe size that I save my image on my Silhouette design space is compressed in Cricut only. When my SVG design is opened in Inkscape, the SVG design is the correct size. Cricut needs to correct the problem.
Thanks for that - yes, I totally agree, Cricut could do with fixing the problem!!
DeleteThank you so much for your generosity in sharing your ideas and files! Your designs are so very clever and executed to perfection. I have purchased similar designs and found them quite difficult to complete without the desired effect, but you have shown me how! Thank you!!
ReplyDeleteThank you very much, it's a lovely design with all these intricate cuts, works like a charm ... Used these as centerpieces for a birthday party
ReplyDeleteGrazie mille per aver condiviso questi magnifici progetti, ho cercato a lungo dei file per capire come si realizzassero non avendo budget a disposizione per comprarli....
ReplyDeleteOoooh..... Merci beaucoup ! It's very very nice ! Merci!
ReplyDelete