
A paper carousel connected to a Hyperduino
Youtube Video of the carousel spinning is at the end of this blog entry.
Youtube Video of the carousel spinning is at the end of this blog entry.
This project is a multistep project which motorizes a carousel with a Hyperduino. The steps needed to operate the carousel include making the carousel, attaching the carousel to the Hyperdino and programing the code with Snap for Arduino.
Disclaimer:
- Adult supervision should be exercised when using the Hyperduino.
- This project involves a motor which could cause a fire. Do not operate this carousel unattended.
Here is the PDF if you would like to see the parts of the carousel or to cut them out with scissors. I used 65lb cardstock.
https://drive.google.com/file/d/1Ce4_-mAVHKBu4RQ0E8YstMcP1NljJTb8/view?usp=sharing
Here is the .Studio file to cut the carousel with a Silhouette paper cutting machine.
https://drive.google.com/file/d/14l-x0pvoa98HLpHrWKs5iOjsh8lJ990h/view?usp=sharing
Here is the SVG file if you have a Cricut or other paper cutting machine.
https://drive.google.com/file/d/13hkOK7UNyB9Wn7S_H9RS2lYn81j1zW35/view?usp=sharing
Make the Carousel
Gluing is an essential part of making this model. When adhering the tabs, make sure that the dotted line is parallel to the corresponding piece and that the dotted line is slightly visible.
Gluing is an essential part of making this model. When adhering the tabs, make sure that the dotted line is parallel to the corresponding piece and that the dotted line is slightly visible.

Apply glue to the tab of the cone shape. Bend the entire piece into a cone and adhere the tab at the dotted line. Repeat for the other two cones.

Apply a small amount of glue inside the two smallest cones. Adhere the graduated cones to the largest cone by lining up the seams.
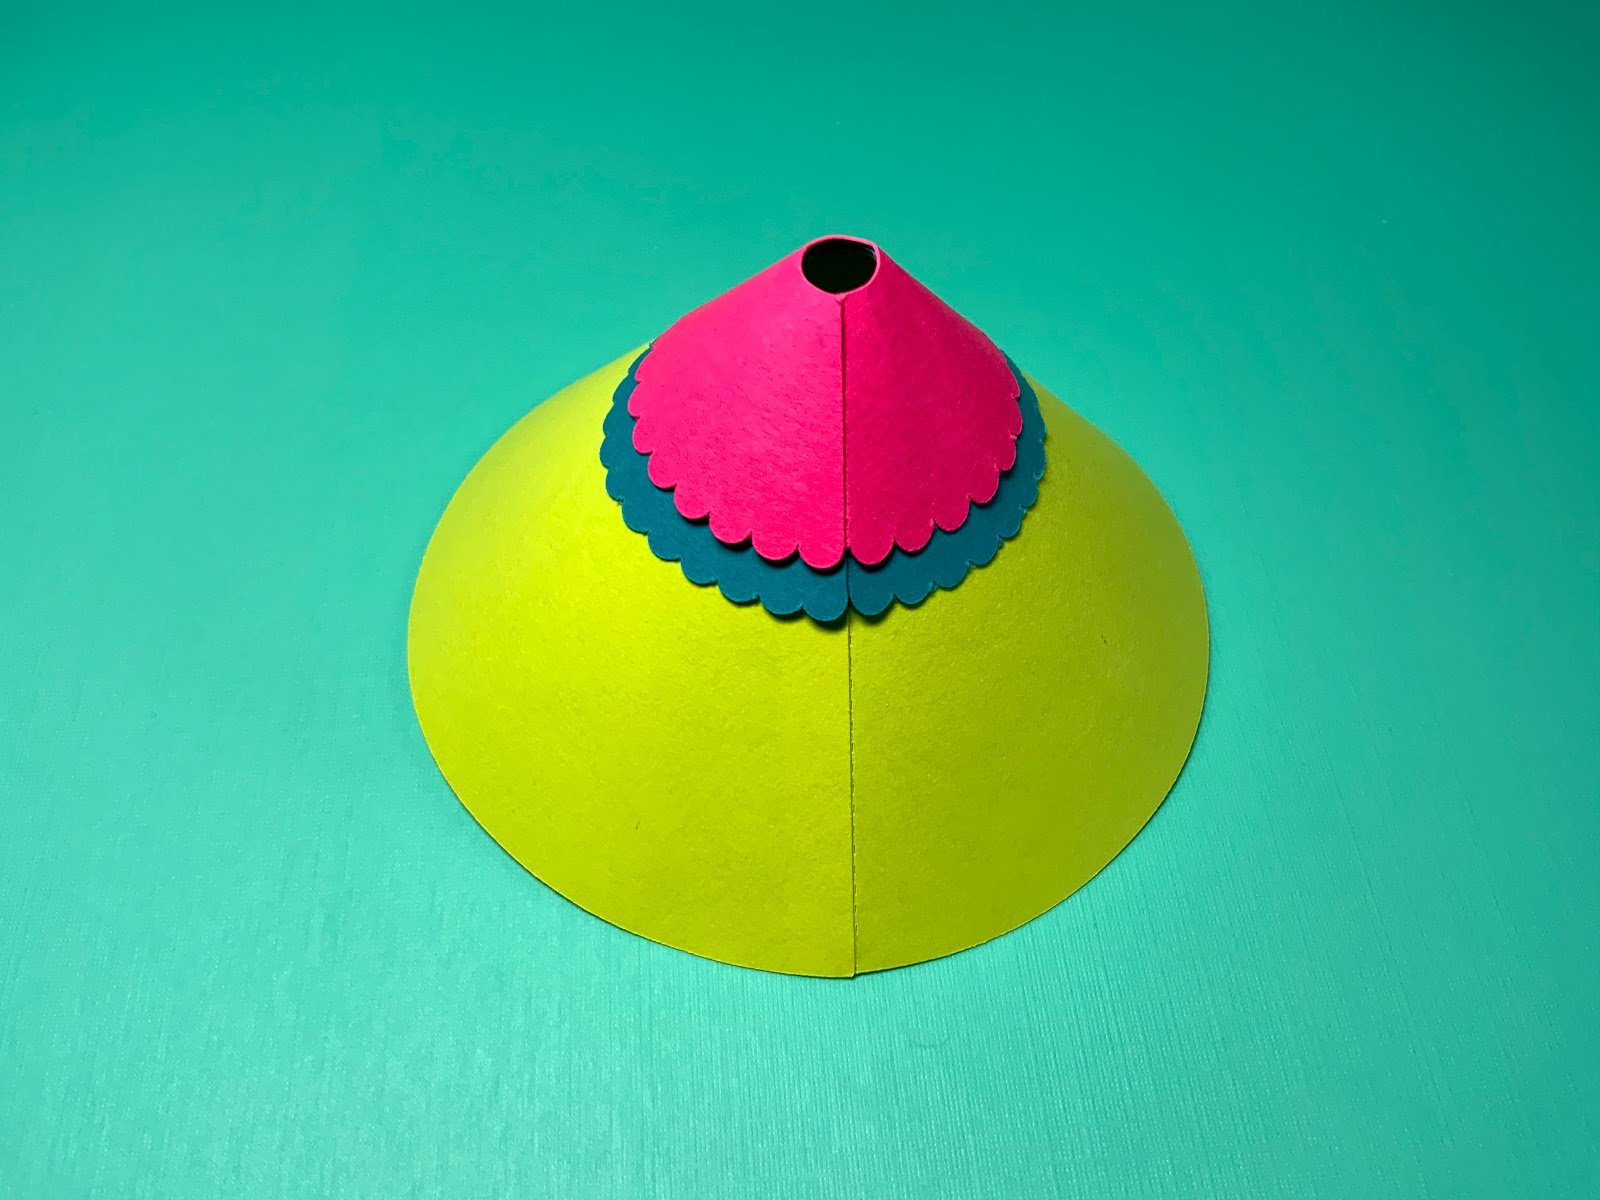
Completed Cone Section

Parts to make the Diamond bands

Glue the diamond shaped band to the zigzag shaped band as shown above. Notice that the diamond band is aligned with the dotted line on the zigzag band. There is a slight overhang of the diamond strip on the opposite side (not shown).

Slide the blue stripe over a glue stick and adhere one stripe to either side of the diamond band starting on the left side. There will be a slight overhang on the right side. This excess is necessary to account for the curvature of the band.

One diamond band assembled. Repeat for the other band.

Bend the trapezoid tabs towards you at a right angle to create a ledge. Turn the piece over to view a long rectangular strip. Apply glue this area.

Attach the ledge piece to the back of the diamond band, starting at the diamond tab and adhering to the right. Match up the trapezoids by unbending the trapezoids and aligning them. Notice that the last trapezoid on the right is not the same as the other trapezoids. This is required to allow for the curvature of the band once it is made.

Realign the trapezoids at a right angle.

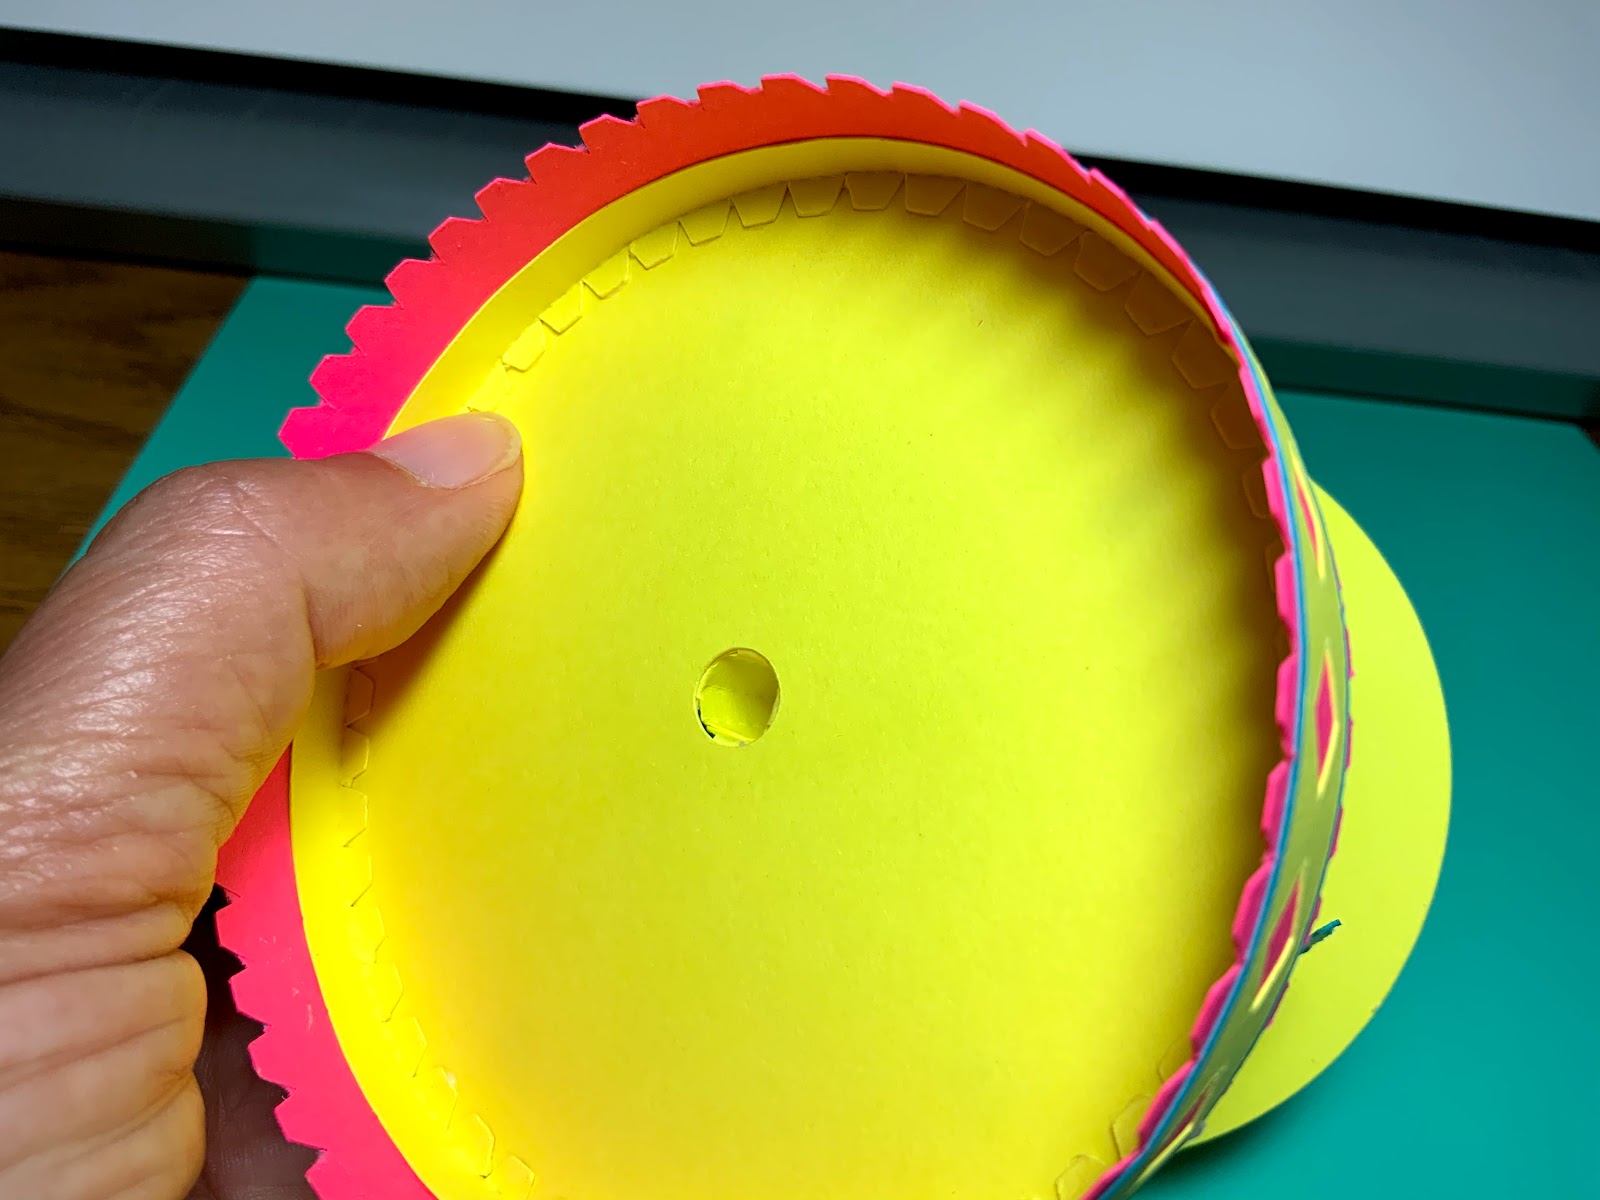
After adhering the ledge piece, pull the glued end slightly apart on the side with the overhang. The tab of the zigzag band will be inserted at this point between the yellow and pink paper.

Apply glue to the tab of the diamond band. Bend the diamond band into a circle and insert the tab into the location noted above.

Repeat so that you have two circular bands.

Glue the carousel horses onto the carousel circle. Make sure all of the horses are going in the same direction.

Roll the axle into a tube and unroll it. Apply glue to the tab as shown and adhere it. The axle can fold in half so that it is easier to adhere the glue. Do not leave it in this position too long as some excess glue might leave it folded.

Insert the axle into the hole of the carousel horse platform on the side with the carousel horses and glue the tabs of the axle down.

Insert the axle into the hole of the other carousel horse platform. Do not glue the tabs of the center axle at this point.

Glue the carousel pole to the corresponding hole at the bottom of the carousel platform. Repeat for all of the poles.

Glue the tabs of the center axle down.

Apply glue to the two carousel rounds shown above to give the carousel a sturdy platform. Adhere one to the top of the carousel and the other to the bottom of the carousel.
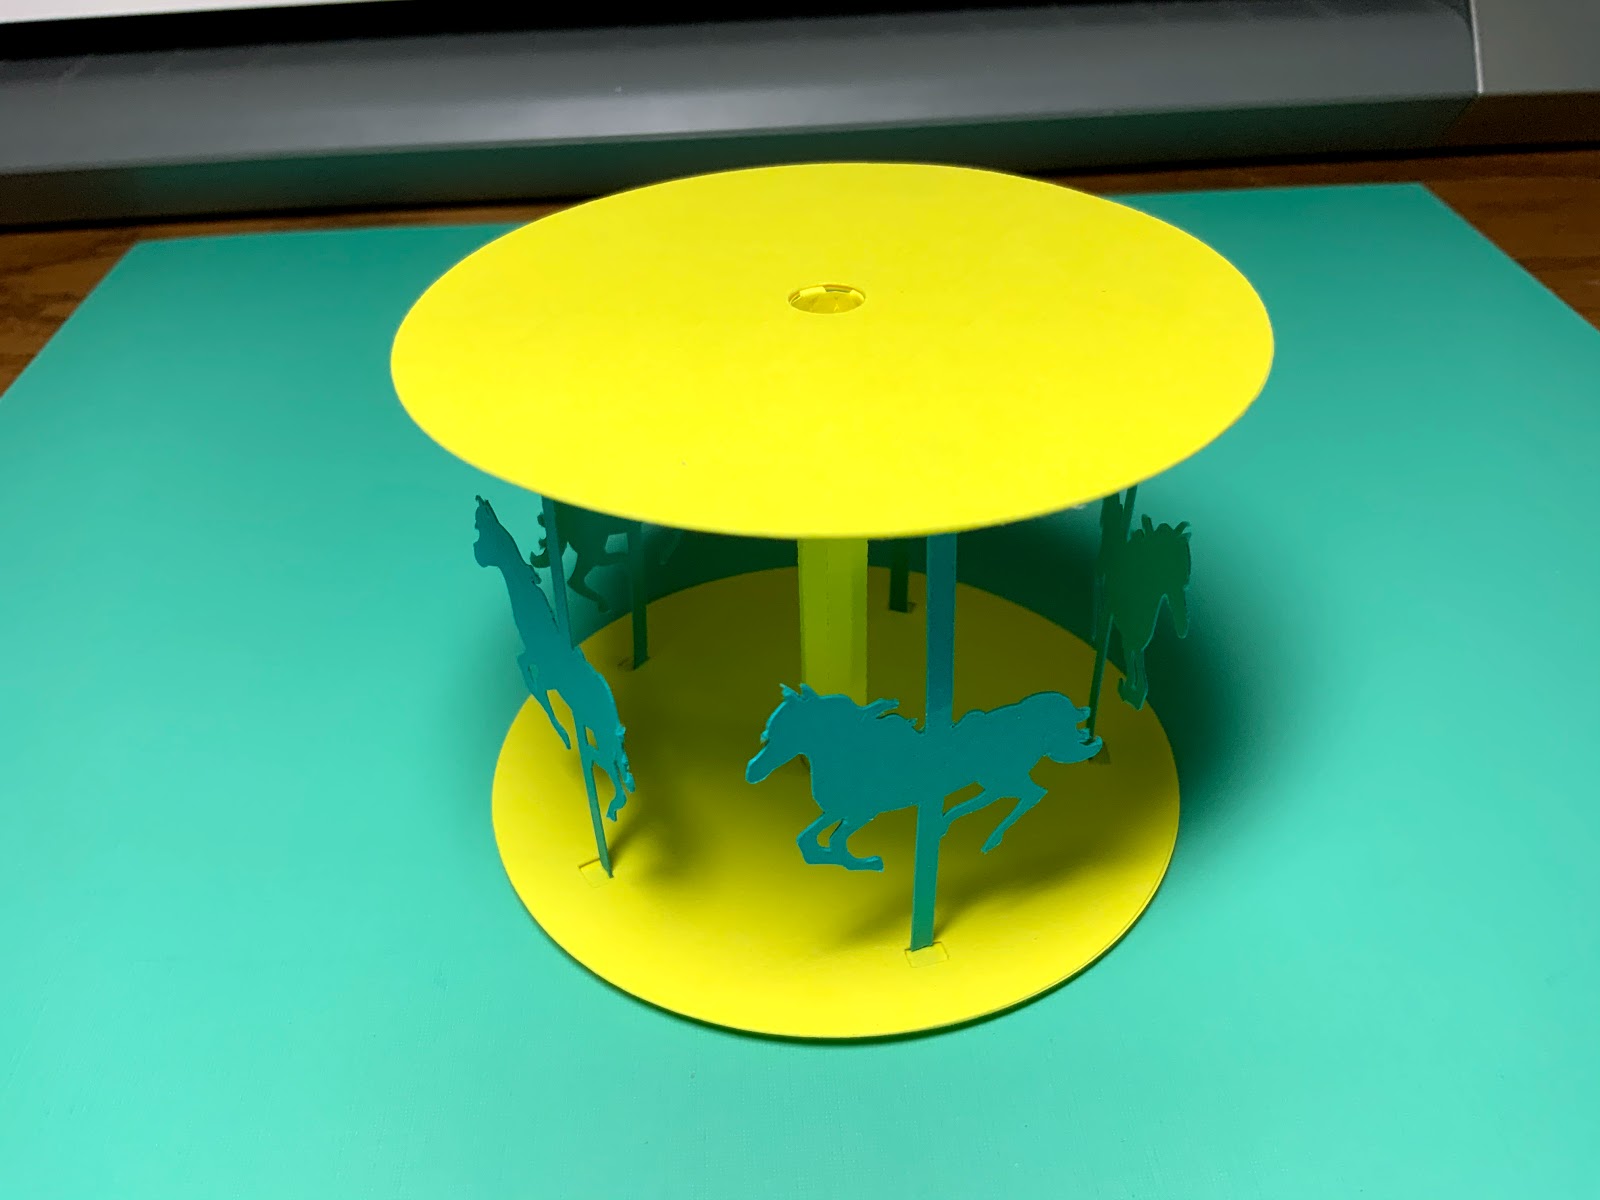
Completed Carousel horses.

There are now four carousel pieces which need to be glued together. The yellow ledge band is for the top of the carousel. The pink ledge band is for the bottom of the carousel.

Apply glue to each yellow trapezoid tab as shown above.
Adhere the tabs to the top of the carousel. Notice where I am holding the carousel. Apply pressure to each of the tabs by pinching the paper together. Do not push down on the carousel as this will bend the carousel horses.

Apply a bead of glue at the top of the yellow paper by the pink band. Notice I used a very tiny bead of glue. It is better to use the glue sparingly here as this is a noticeable part of the carousel.

Insert the cone and align the cone so that the seams align with the diamond band.
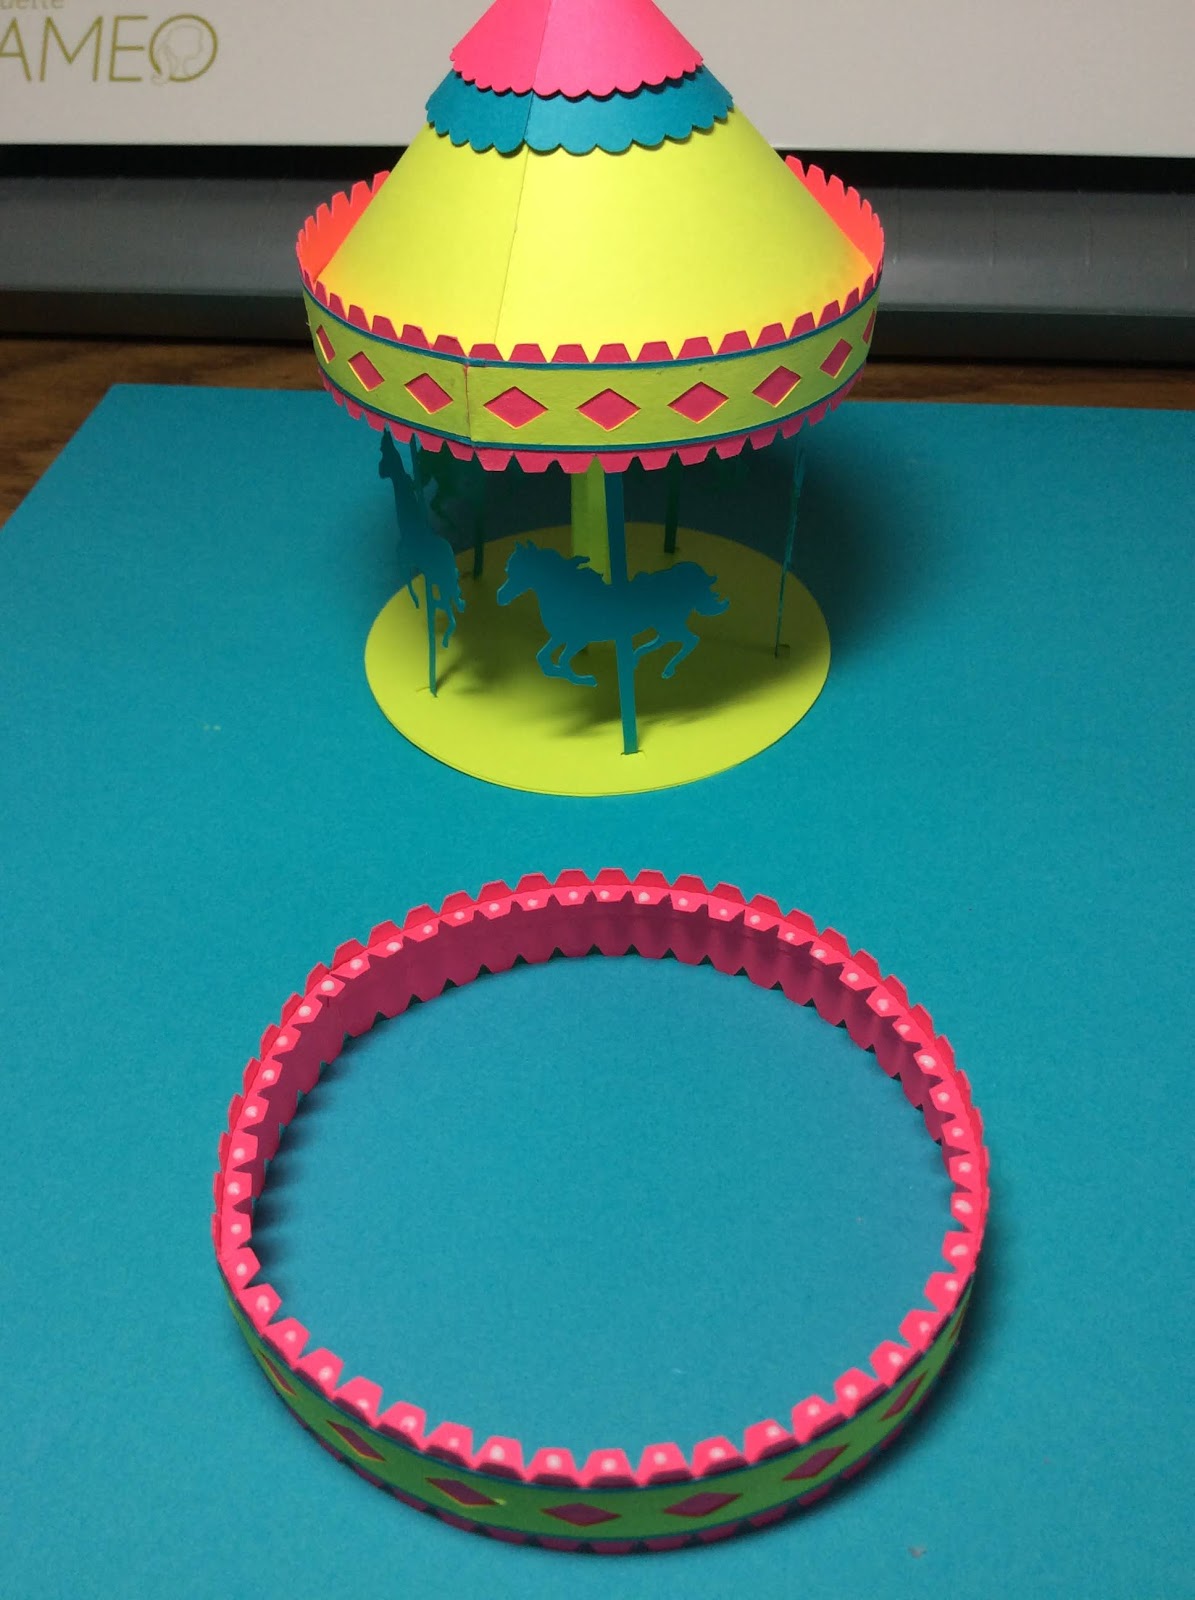
Apply glue to each pink trapezoid tabs as shown above.

Adhere the carousel assembly onto the pink trapezoid tabs by aligning all of the seams.
Set this carousel horse assembly aside.

Make the Hyperduino axle.

Roll the axle into a tube and unroll it. Apply glue to the tab and adhere it. The axle can fold in half so that it is easier to adhere the glue. Do not leave it in this position too long as some excess glue might leave it folded.

Insert the axle into the center hole of the washer. Apply glue and adhere the tabs down.
Make the Presentation Box

Apply glue to the two center tabs as shown above.

Adhere the two sides pieces at the dotted line. Crease all of the dotted lines to form a box.

Apply glue to the top tab as shown. Adhere to form a triangle. These triangles form the support structure for the box.

Apply glue and form the next triangle below.

Notice this creates a right angle and makes a sturdy support column for the box.

Repeat for the other side.

Apply glue as shown to the side that does not have a hole in the middle. The triangular area on each side of this tab needs to remain free of glue.

Make the box by sliding the corners together so that the angled corner is visible. The vertical tab slides into the area that was not glued as noted above. In the photo above, it should look like the top left corner. Repeat for the top right corner. I did not glue the corner because I want to be able to remove the Hyperduino for other designs and I do not want to destroy the box.
.

The motor assembly components. Bend the motor strap as shown above.

Align the motor so that the shaft is in the middle of the hole. Insert the motor strap on one side of the motor and glue it down. Insert the other side of the motor strap.

Glue the motor strap down.

Apply glue to the square. Notice that I used a lot of small dots of glue. This piece needs to adhere correctly to the corresponding piece which is the top of the presentation box.

Adhere the top of the box as shown above. Make the final support triangle by applying glue as shown. The triangular corners of this tab need to be free of glue.

Remove the backing off of the yellow foam on the left.

Attach it to the orange plastic base.

Apply four Glue Dots in the four corners.

Adhere the orange base to the presentation box.

Insert the Hyperduino. The Hyperduino is not attached in any way. You might want to use a Glue Dot to adhere it to its base if you want to make it transportable. I want to be able to easily remove the Hyperduino for other models so I am not gluing it down.

Apply a Glue Dot to the plastic strap which is seen in the middle of the above photo but don't attach it to anything until you close the box. The side tab will slide above the motor. Adhere the motor Glue Dot at this point making sure that the motor shaft is centered in the hole. Again, I did not glue the corners so that the Hyperduino can be removed for other purposes.


Make the corners of the box by sliding the tabs.

View of completed presentation box.

Attach the motor cables as shown. Push in the orange rectangle and insert the pin.

Slide the axle onto the motor shaft.

Slide the carousel onto the axle. I had a hard time sliding the carousel onto the axle. I used a wooden skewer placed inside the paper axle to help support it while I applied a slight amount of pressure to allow for the tight fit. (The tight fit was due to where I placed the seams when gluing.)

Make the flag by applying glue to the areas shown above. The flag is meant to be removable.

Adhere the red flag.

Bend the flag around the axle and adhere it. The flag can be slide up and over the axle for removal if necessary.

Attach the USB Connection.

Program the Hyperduino with the above code in Snap for Arduino
Youtube video of the Hyperduino spinning the Carousel
No comments:
Post a Comment