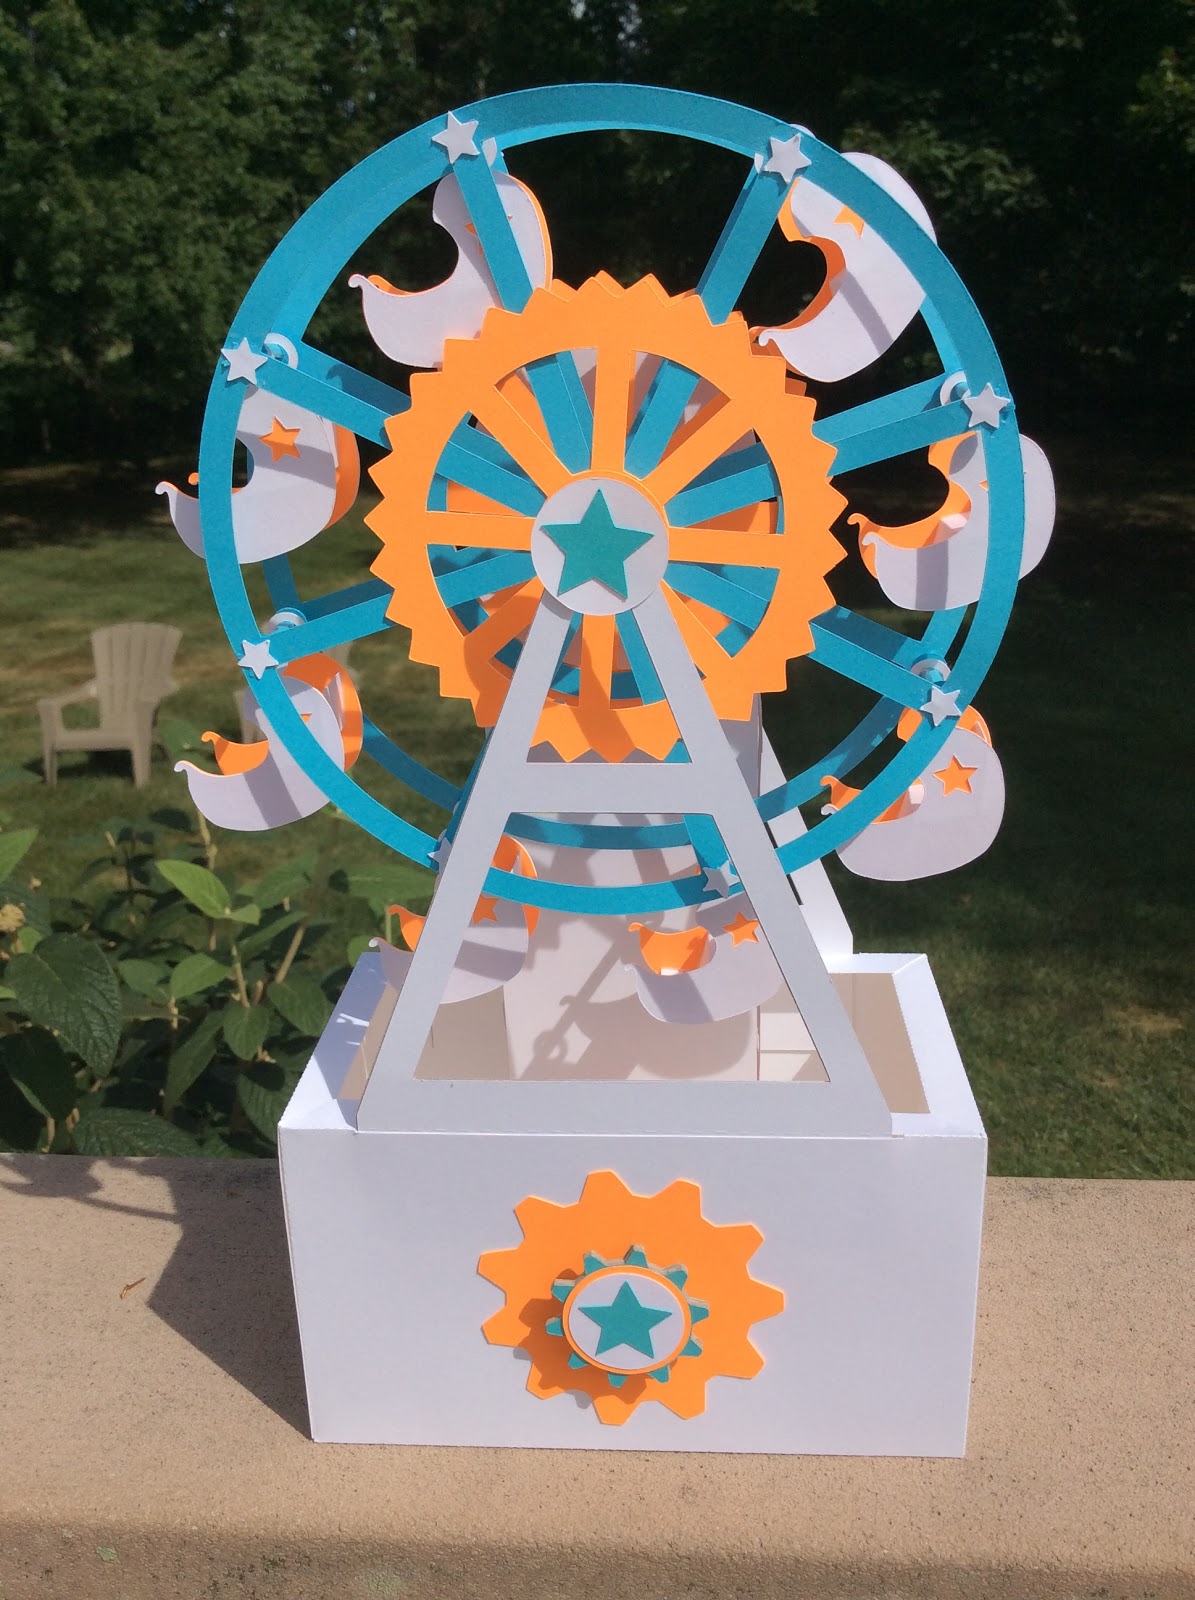
Ferris Wheel with a Gear and Timing Belt
One of my first models that I created was a Ferris Wheel. Here is the blog entry: https://papercraftetc.blogspot.com/2014/06/a-paper-ferris-wheel-that-really-spins.html This Ferris wheel rotated around an axle to allow it to spin freely when moved. In this current model, I used the wheel from this model and I incorporated a gear and timing belt which moves the Ferris wheel when the knob is turned.
Ferris wheel rotating when the knob is turned.
Side view of the timing belt in action
Here is the .Studio file.
https://drive.google.com/file/d/1i3Q0uSAgz1mSaK6MoXn9-VVhgZQ2mWoP/view?usp=sharing
I have included my calculations for making the gear and timing belt in both files.
Make the Ferris wheel. Please refer to the blog entry mentioned above for directions on making the wheel.

Make the axles. The square axle goes into the presentation box and the round axle is for the Ferris wheel. The square axle is the improved axle design with a cross beam in the center of the axle. It was made in this blog post. https://papercraftetc.blogspot.com/2019/06/a-stem-project-making-axle-for-gear.html

Align similar gears together and glue three pieces of chipboard. Sandwich two pieces of cardstock on either side of the chipboard. The photo above shows a completed gear on top. Repeat for the second gear.

Glue the casing together by aligning the circles and sandwiching the chipboard with the cardstock. When gluing the pieces together, don't use too much glue as the tabs need to be inserted. Later the glued pieces will be pulled apart to insert the tabs.

Photo above is not correct. The holes are not aligned on the casing on the right. Make sure to align the holes and sandwich the chipboard with the cardstock.

Completed casing with holes aligned correctly.

Make a line on the axle at the one inch mark. Do not include the tabs in this measurement. See photo above.

Make the spacers by aligning the tabs together and the center circle together. Repeat for the square center that is not shown. A total of four spacers are needed...two with circle centers and two with square centers.

Thread a spacer and the gear with the round hole in it to make the Ferris wheel axle.

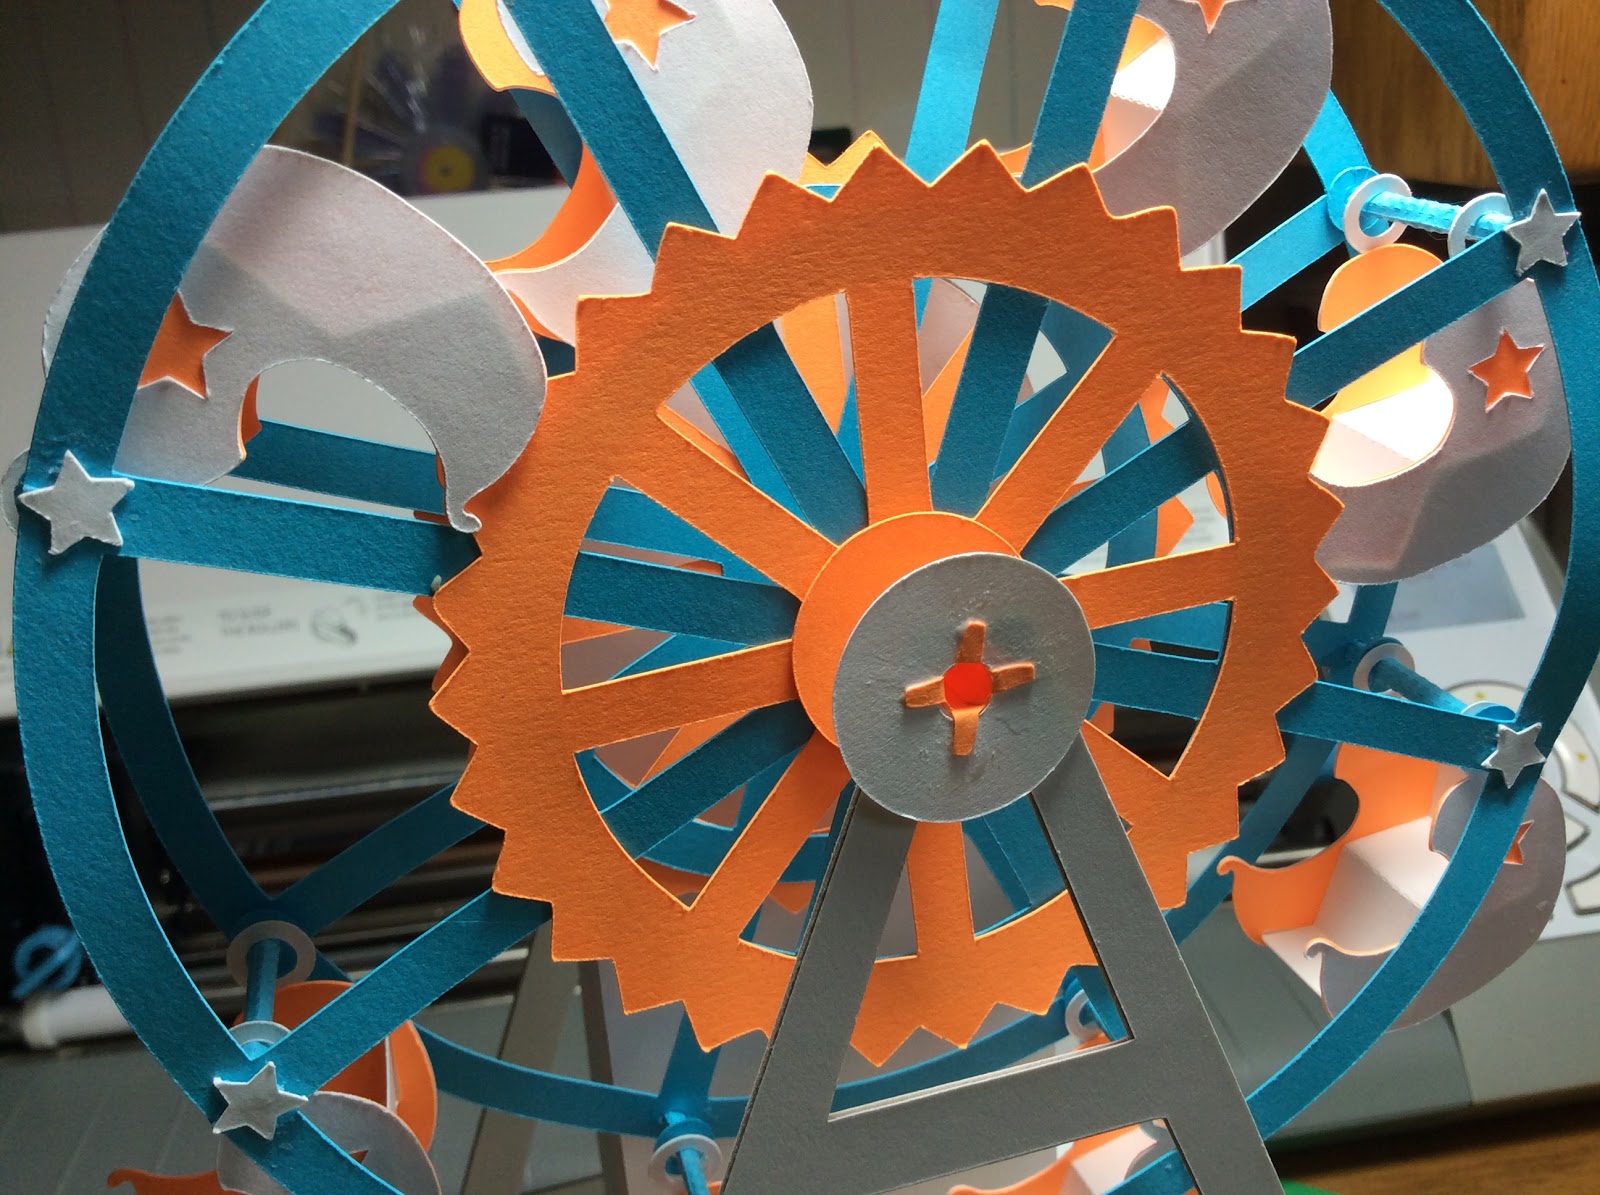
On the left, the gear has an X in the middle. Push this X outward with a pencil. The photo shows the difference between the two gears.

Thread this X gear onto the axle. Glue the X gear onto the gear and glue the tabs to the axle. Make sure that the axle is glued at the one inch mark that was previously placed on the axle. Gluing the gear to the axle is necessary to prevent the gears from slipping. I did not need to do this for the square axle because the design of square corners prevented the slipping. Thread another spacer onto the axle to complete the axle assembly.

Repeat for the square axle. Again, make sure that the gear is aligned at the same location as the previous gear. Everything needs to be aligned properly for the gears to rotate correctly. Complete this axle assembly by threading a spacer onto the axle.

Here is what a completed square axle assembly looks like.

Make the timing belt by gluing it together to make one long strip.

Thread the axles onto the casing. (not shown)
Glue both center tabs to the casing by prying open the seam and inserting the tabs. I indented the center cross piece a little so that it does not interfere with the timing let's movement. Mesh the timing belt through the teeth on one gear and then the other. Glue the timing belt together.

Pry apart the glued casing ends and insert the tabs. Glue the tab to the casing.

Repeat for the other tab.

Timing belt and gear assembly

Presentation Box

Insert the square axle into the presentation box.

Thread a gear onto the axle and glue down the tabs to the gear on one side.

Make the knob for the axle by gluing four pieces of chipboard together and gluing two pieces of cardstock onto either side of the chipboard.

Thread a gear onto the axle. The axle extends about a quarter of an inch from the presentation box. Thread the knob onto the axle.

Glue the tabs of the axle onto the knob.

Glue the support pieces together by gluing the cardstock onto either side of the chipboard. Repeat for the second support piece.

Glue the support piece to the inside of the presentation box at the dotted line on the support piece. Repeat for the second support piece.
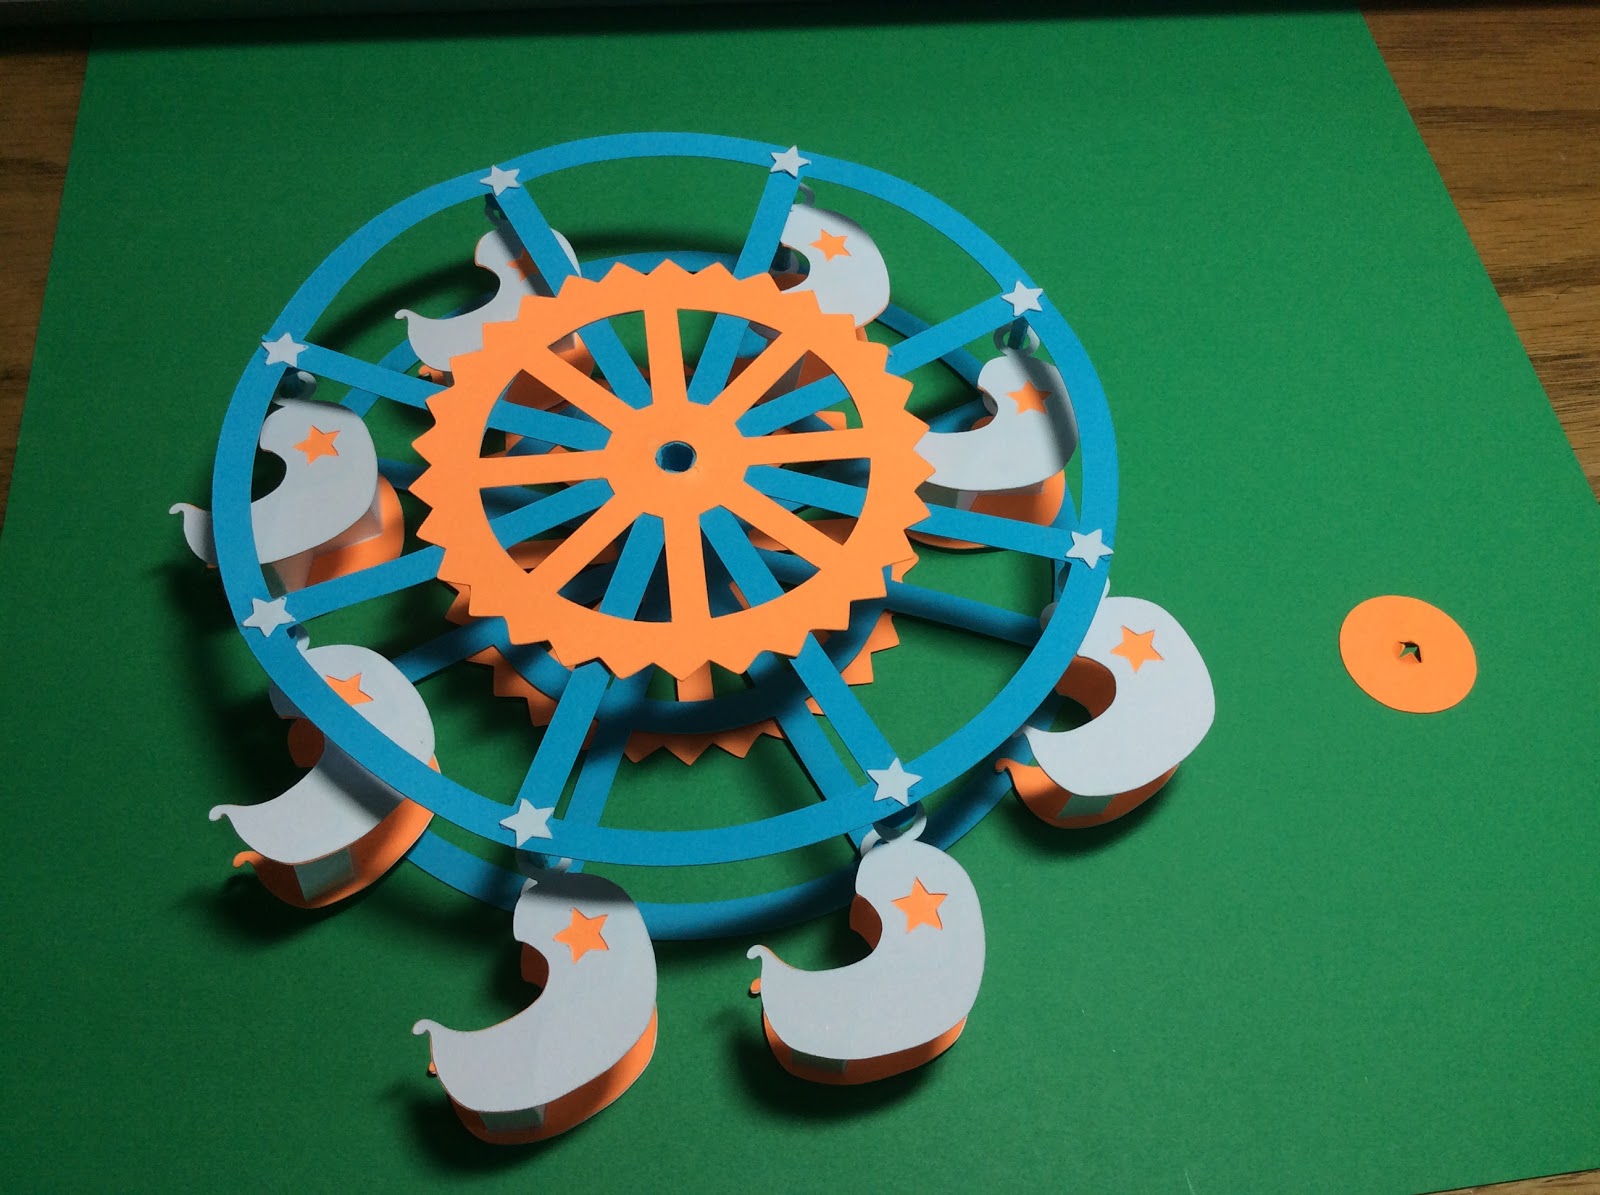
Ferris wheel and X circle.

Thread the Ferris wheel onto the axle. Glue the X circle to the Ferris wheel and apply glue to the tabs of the X circle. Adhere the tabs to the axle. Thread the axle through the supports.

Thread a round circle with a hole in the center to the axle. Repeat for the other side.
Glue the tabs of the axle to this circle. Repeat for the other side.

Glue a star onto the center of the circle. Repeat for the other side.

Glue the sides of the presentation box as shown. Do not apply glue to the ends because this is where the side slides onto the front piece. Repeat for the second side.

Apply glue as shown

Slide the top of the ends into the slot at the top and then align the bottom of the box. Repeat for the other side.

Glue the corners down on the presentation box.

Corners glued down.

Pieces to make the knob.

Glue them together and glue onto the center of the knob.

Align and glue the gear to the center of the presentation box gear.

Completed Ferris wheel with gear and timing belt.
Is the Ferris wheel the same size as the one of the pdf?? Or you have to make it bigger ?
ReplyDeleteYes, the Ferris wheel is the same size as the PDF.
DeleteI absolutely love this project! I have a question how exactly do you make the second axle not the square one the other one???
ReplyDeleteThe crease lines will form into a tube. When the tab is glued to the inside of this piece, a tube can be made by inserting a dowel or pen Into the piece.
DeleteHey! This is my first time trying to make a Ferris wheel I was wondering is there any additional measuring I have to do in order to make it? Or can I just cut the template out and go from there? Absolutely love this model
ReplyDeleteAll of the pieces and instructions have been included. I recommend taking it slow and do a little each day. I think one of the hardest things to do is to allow the glue to dry. I use Aleene’s Tacky Glue in a fine point glue bottle so that it doesn’t take too long to dry. If you encounter any problems, please don’t hesitate to ask.
DeleteI was wondering what all the materials were that you used?
ReplyDelete65 lb. card stock, copy paper and chipboard
Delete