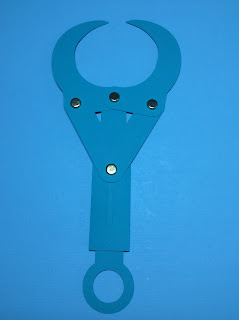
A claw is a mechanical device that can grab or pick up objects. In this blog posting I will make a simple mechanical claw and a 3D mechanical claw. By pulling up on the claw arm, you can pick up objects. To release the object, pull the claw arm down. In my next blog posting, I will make an amusement park arcade game using a smaller version of the 3D mechanical claw to pick up pompoms. https://papercraftetc.blogspot.com/2021/07/a-stem-project-amusement-park-arcade.html
A simple mechanical claw and a 3D mechanical claw
Four regular size brads or fasteners are needed for the simple mechanical claw and six regular size brads are needed to make this 3D mechanical claw.
Here is the PDF. I used 65 lb. cardstock.
Here is the .Studio file.
Here is the SVG.
#1. Simple Mechanical Claw
Layout the pieces to make the simple mechanical claw and four brads (paper fasteners)
Fasten one of the arm pieces to the claw piece with a brad. The claw on the right shows the underside of the piece on the left.
Align the two claw holes and the top of the body holes together as shown above.
Fasten a brad to this point.
Align the bottom hole of the arms to the center area of the body and insert a brad into the hole.
Turn the assembly over, making sure not to dislodge the brad.
Slide the pull arm hole onto the brad and splay the brad as shown above.
Fold the two sides of the body over the pull arm. Apply a piece of Scotch tape over the center seam
Completed simple mechanical claw. To operate the claw move the pull arm down to open the claw.
Move the pull arm upward to retract the claw.
#2. 3D Mechanical Claw
Layout the pieces to make the 3D mechanical claw and six brads (not shown).
Bend the semicircle(dotted line) at the bottom of each claw at a right angle to the claw. Glue two of the claws together to make a two layered claw with a circular base. The photo shows two completed claws on the top and right of the photo.
Bend the dotted lines on the body and pull arm pieces as shown above.
Insert a brad into the hole on the top of the body assembly. I paired a claw and an arm together in the left of this photo as these will be the two pieces that will be attached next.
Insert an arm hole onto the brad.
Insert the claw piece onto the brad with one side of the brad threading on the left of the hole and the other side of the brad threading on the right of the hole.
Here is a better view of the brad positioning.
I cut the tip of the brads because they were too long.
Repeat the above procedure for the other two claws. The above photo shows all of the claws attached to the body assembly.
Place the pull arm piece underneath the body assembly, aligning the holes of the arm to the pull arm piece.
Fasten a brad to each of the three holes with the splayed area on the interior side of the pull arm. Check the tension on the brads to make sure that the claw can freely move up and down.
Fold the pull arm and body into a triangular prism.
Apply glue only to the outer tab of the body assembly. The inner tab of the pull arm is folded inward and remains unattached.
Completed 3D Mechanical arm


No comments:
Post a Comment