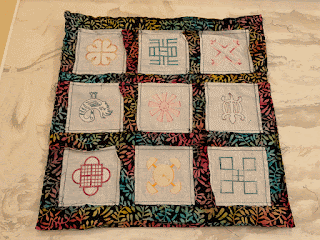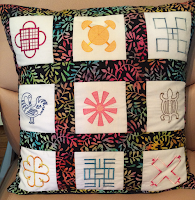
A 16 x16 inch Pillow Using Nine Squares of TurtleStitched Adinkra Embroidery Panels
Adinkra are African symbols which represent different concepts, proverbs or aphorisms
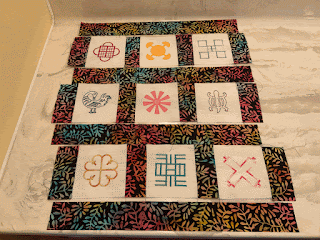
. Nine of these Adinkra designs were used to create this 16 x 16 inch pillow. I recreated these designs by coding them and embroidering them using TurtleStitch. Here are my coded Adinkra designs in TurtleStitch.
https://www.turtlestitch.org/projects/search/adinkraWhen TurtleStitching the design for this pillow, I coded each design so that each would be no bigger than 2 1/2 x 2 1/2 inches. Once embroidered, each of the nine designs were cut to create nine, 4 x 4 inch squares.
Materials Needed To Make a 16 inch x 16 inch pillow
9 - 4 x 4 inch TurtleStitch embroidered squares
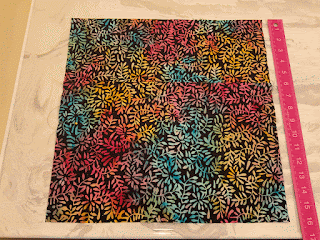
1/2 yard backing fabric
16 x16 inch Pillow Form
Cutting Layout - Cut out the strips using the cutting diagram below for the backing fabric
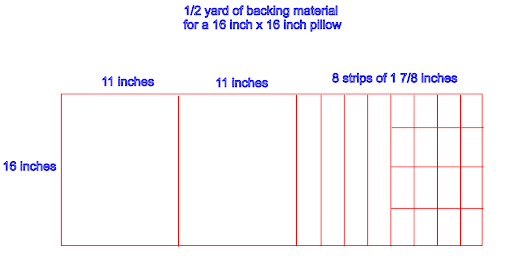
The result of the cuts will be:
- Two strips of 16 x 11 inches
- Eight strips of 16 x 1 7/8 inches of which four of the strips are cut further to create sixteen strips of 4 x 1 7/8 inches
Please note: The final measurement of the pillow is 15 1/2 x 15 1/2 inches. This measurement allows for a plumper pillow.
Sew the Squares Together
Arrange the strips of fabric around the nine TurtleStitched squares.
Using a 1/4 inch seam allowance, sew the 4 x 1 7/8 inch strips to the sides of the squares as shown above. Repeat for all rows.
Using a 1/4 inch seam allowance, sew the four 16 inch x 1 7/8 inch strips to the rows of three squares.
My 1/4 inch seam allowance was not exact so I evened up the 16 inch square by cutting the excess fabric around the edges. Set this piece aside.
Sew the Back Panels of the Pillow

Fold the 16 x 11 inch piece of fabric under a 1/4 inch on the 16 inch long side. Repeat to make another 1/4 inch fold and sew an 1/8 inch seam.
Repeat for the second piece of 16 inch by 11 inch fabric.
Place the two 16 x 11 inch pieces of fabric with the seams overlapping so that the backing fabric is a 16 x 16 inch square. The right side of the fabric is facing upward.
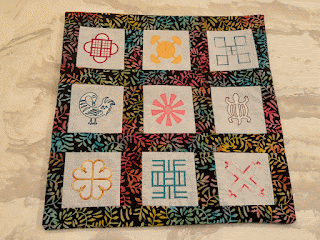
Place the embroidered 16 x 16 inch square on top of the back panels. Sew the four sides of the square using a 1/4 inch seam allowance.
Turn the fabric right side out and insert the pillow form to complete the pillow.
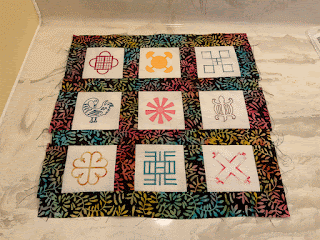
The meaning of the Adinkra designs starting at the top left of the pillow are:
Abusua Pa - A symbol of family unity, kinship ties, and family support.
Akoma Ntoso - understanding and agreement, harmony within communities.
Nsaa - It is a symbol of excellence, genuineness, authenticity
Sankofa - if you forget and you go back to get it, there is nothing wrong with it.
Ananse Ntentan - means spider web. a symbol of wisdom, craftiness, creativity, and the complexities of life.
Denkyem - means “crocodile.” It is a symbol of adaptability, cleverness
Name Due - Symbol of God's presence and protection
Nea Onnim - a symbol of knowledge, life-long education and the continued quest for knowledge.
Abab - It is a symbol of strength, seat of power, authority, and magnificence.