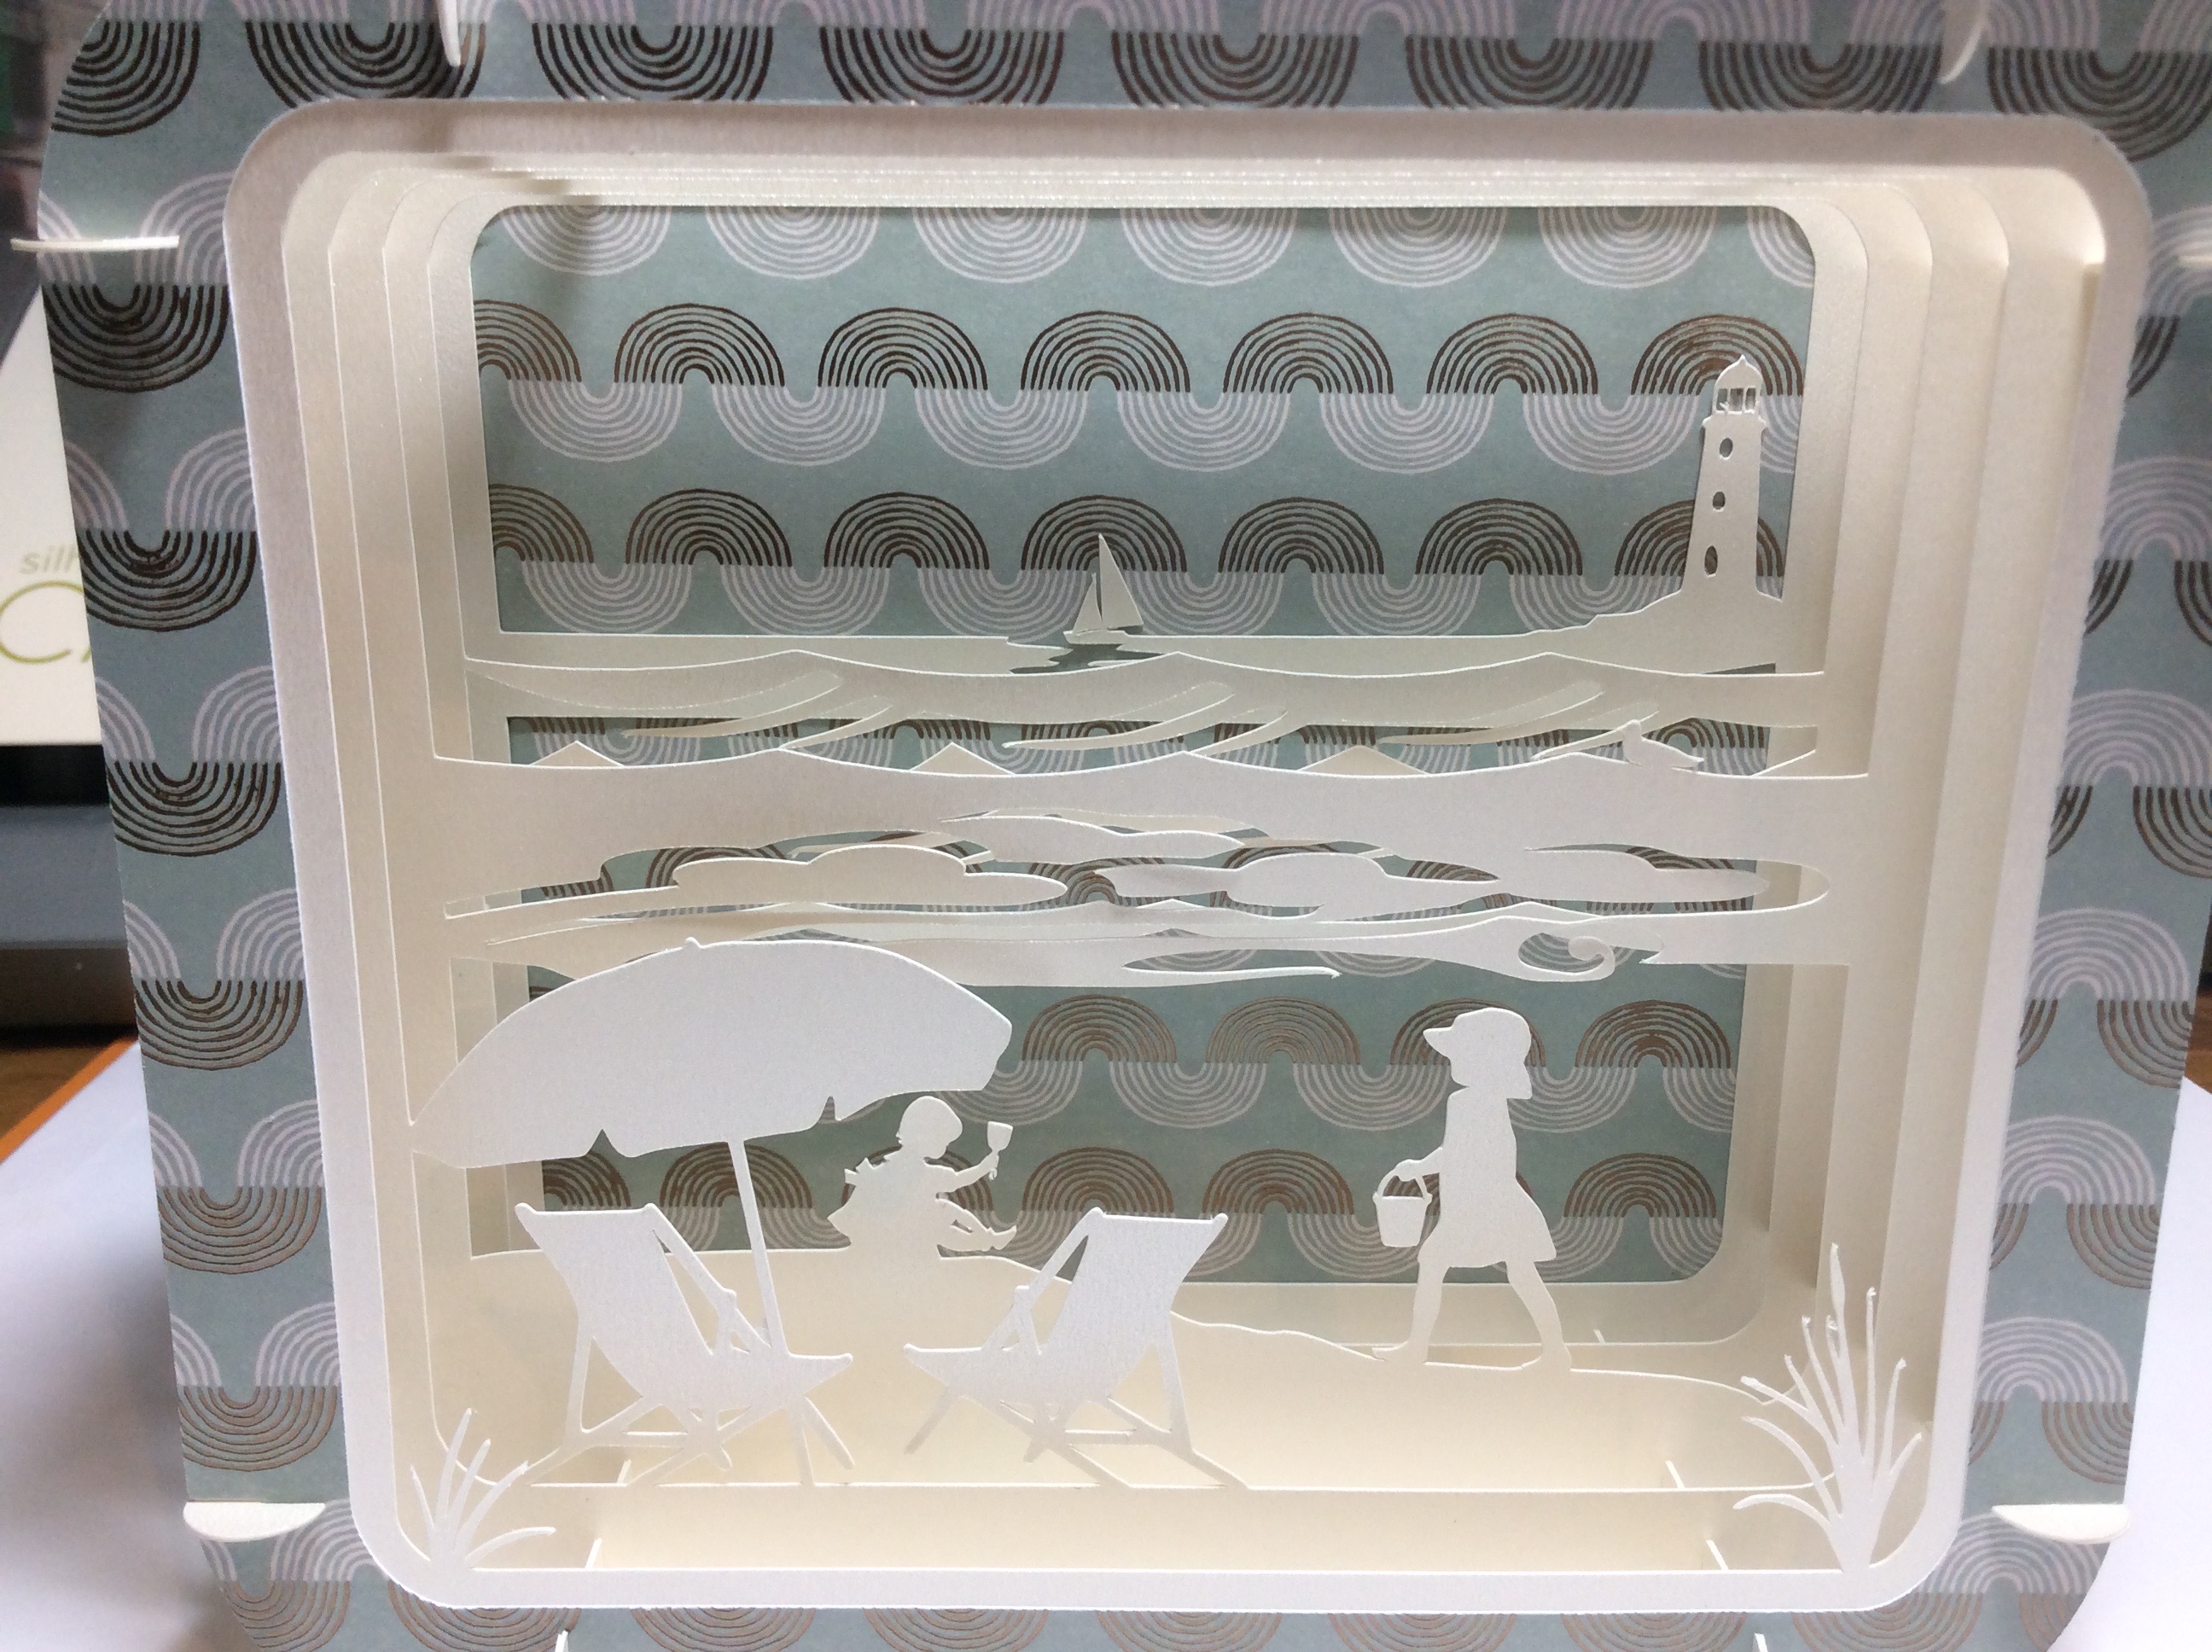
The cam is an eccentric circular cam. The cam is off center when placed on the axle. This causes the follower bridge to moves left to right horizontally with a continuous oscillating motion.
Crease the sides. Apply glue as shown and adhere the tab. There is no glue on the left and right of the trapezoid. This is necessary so that this piece can slide into the side of the box. Repeat for the second side.
Crease the box as shown above. Apply glue and adhere the glue where applied. The box will become three sided.
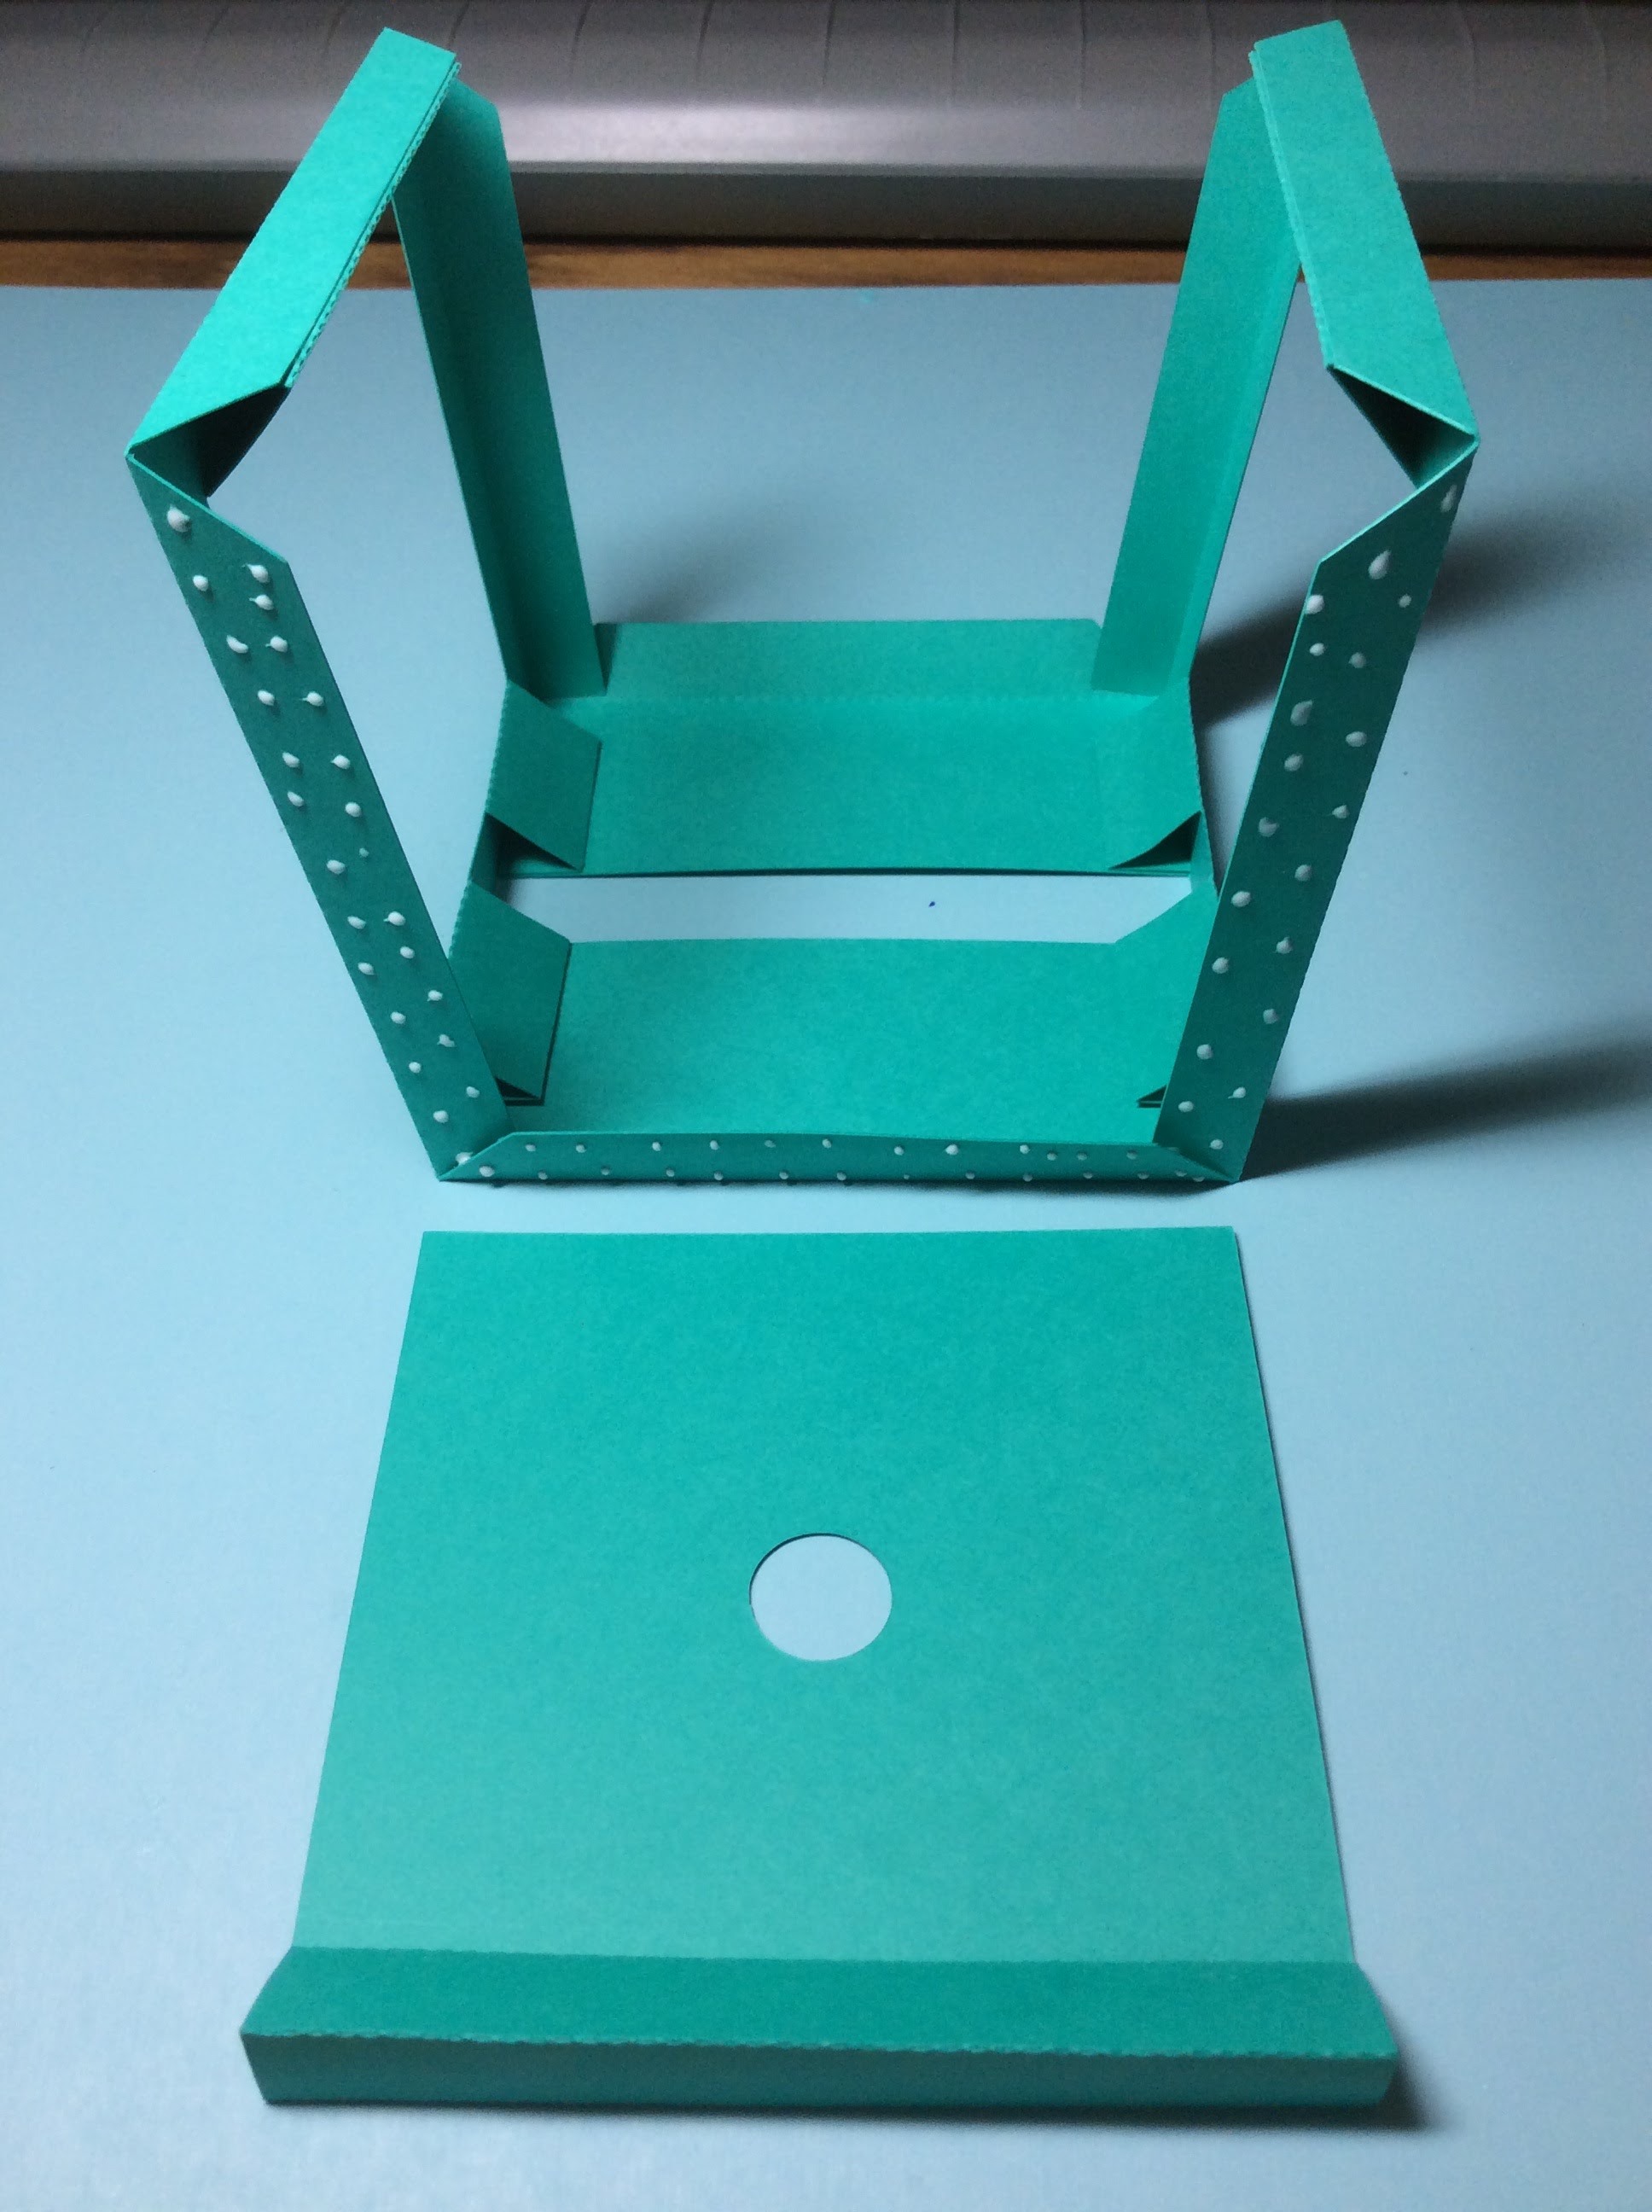
Apply glue as shown above. Adhere the bottom first and then the sides. The top edge on each side is slid into the top triangle. Repeat for the second side.
Make the slider bridge by applying glue to the two top tabs and the sides.
Adhere the glue to create the structure shown above.
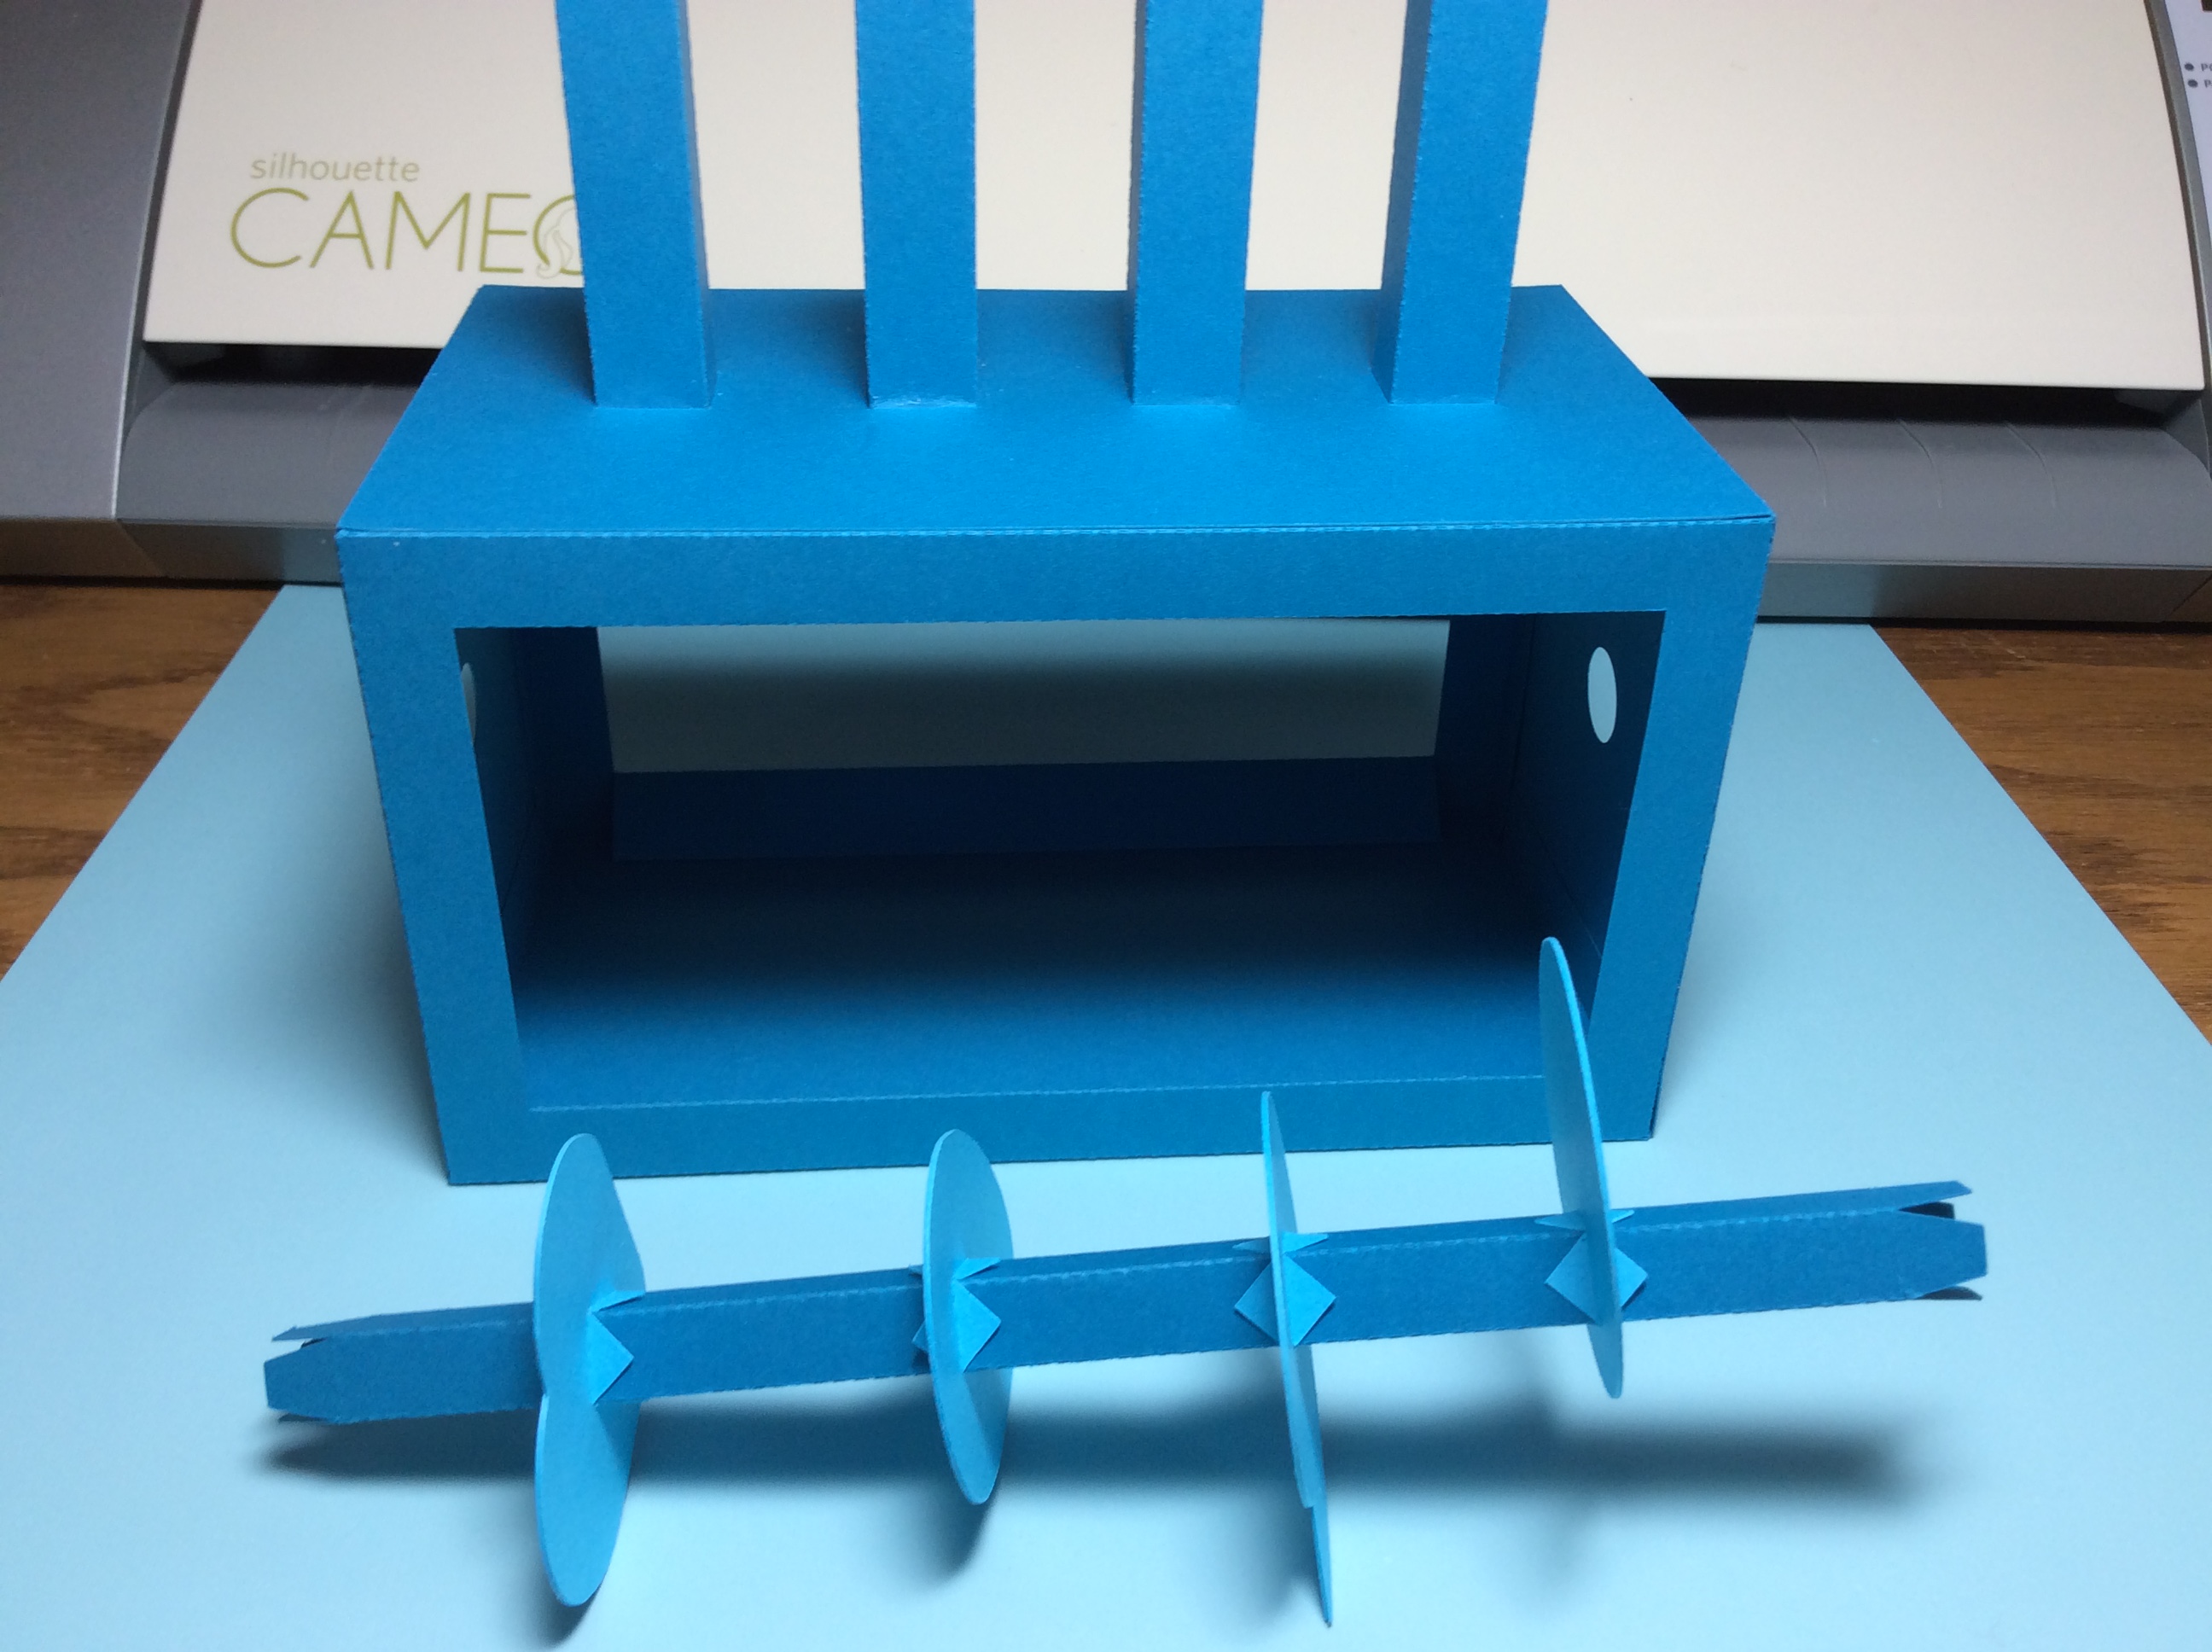
Make the axle and the rod. Applying glue to both and adhere into prisms. The ends of the rod are glued down.
Glue the rod to the center of the slider bridge.
Splay the V's of the eccentric circular cam as shown above. Apply glue to one side and adhere the other side by aligning the squares.
Slide the cam onto the axle.
Insert the axle with the cam into the box. Slide the decorative gear onto the end of the axle. Apply glue to the axle tabs and adhere to the decorative gear. Repeat for the other side of the box.
Make a handle for the second decorative gear as shown above.
Glue on the handle to the decorative gear.
Apply glue to the decorative gears and adhere one to each side of the box.
Side of box.
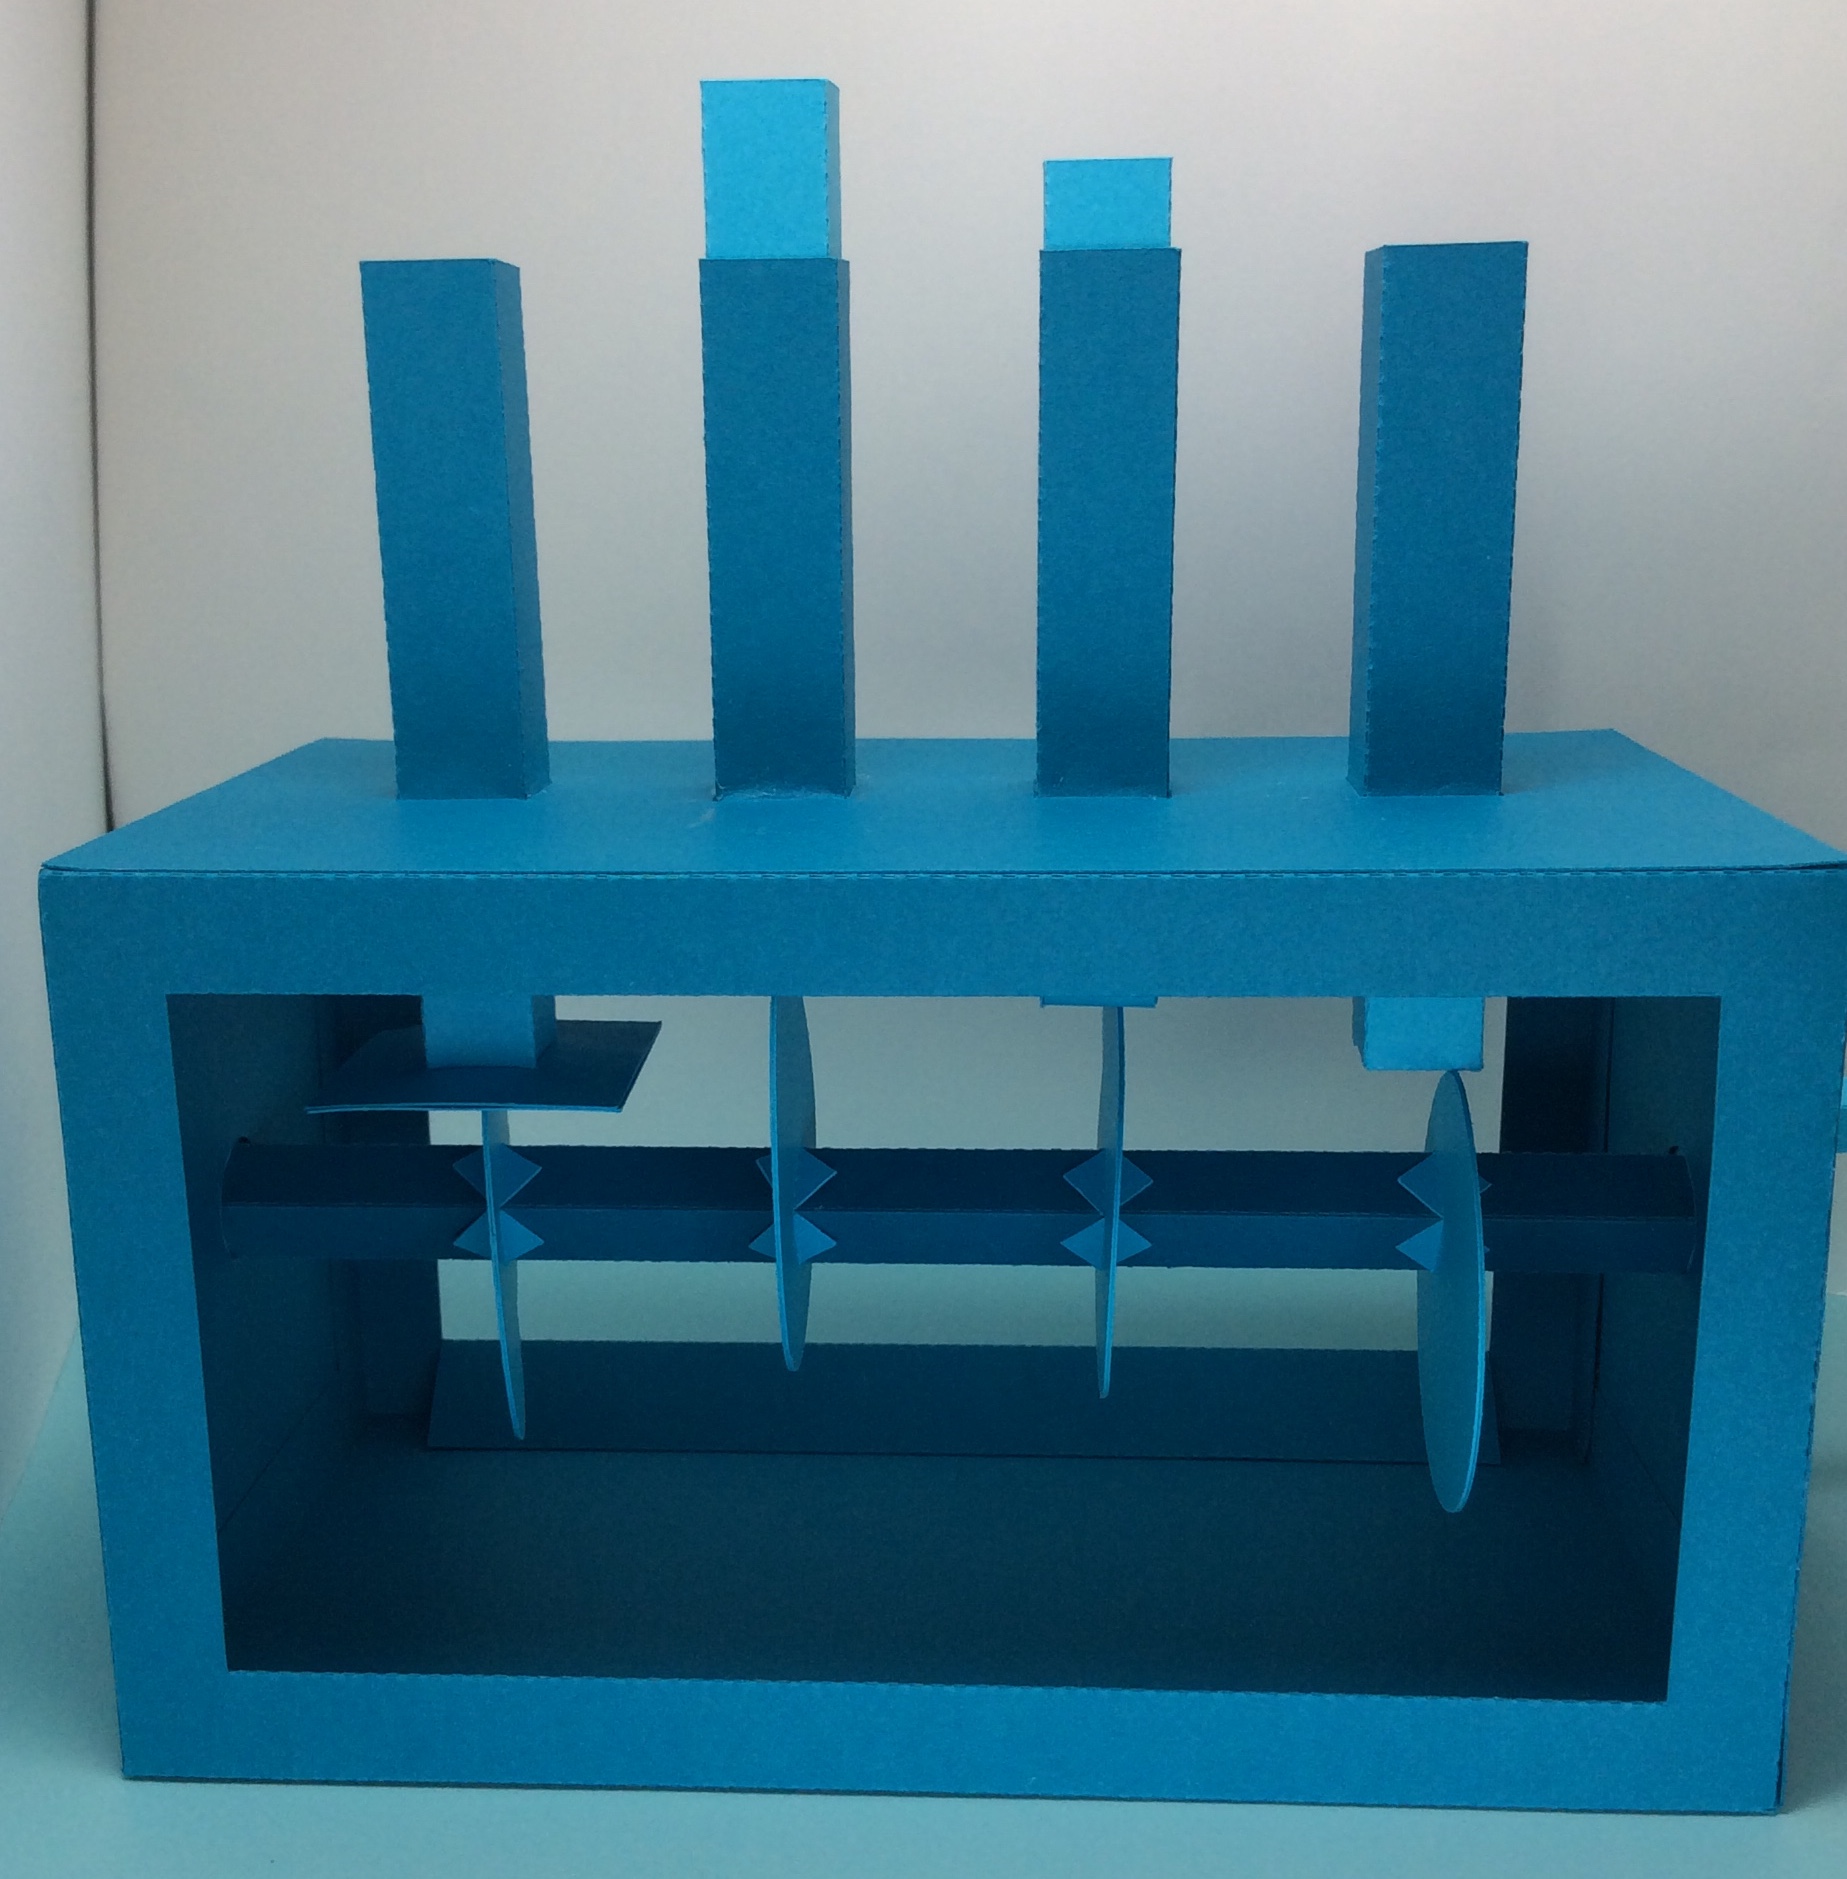
Slide the slider bridge into the top slot of the box and slide the bridge over the cam.
This is the view of the cam as it is now sandwiched by the slider bridge.
Apply glue to the rod stabilizer.
Glue the rod stabilizer to the top of the box as shown above. Allow the glue to dry before operating the cam mechanism.
Two Trick-or-Treat Dioramas make a beautiful display for Halloween.
The diorama depicts two different sets of trick-or-treaters for Halloween. The first diorama has three characters which are a witch, a fairy and a devil. The second diorama has two princesses. The first two slices of the diorama is the Halloween characters. The next three slices are the same for both dioramas. Choose the first two slices (I think you can mix or match but you might have to flip the direction the trick or treater is facing.) and then cut the other background slices.
Pretty paper is glued to the front of the first scene.
The tabs slide into the sides of the scenes.
Eight double thickness tabs keep the diorama scenes together.
Here is the PDF file.I used Neenah brand 65 lb Champagne Pearl metallic cardstock from Office Depot and a sheet of 6 x 6 in DCWV paper called Halloween Town. I recommend using a new blade and overcut to cut out this design as the intricate pieces might not cut correctly.
A STEM project that compares four different types of cam and followers.
The four cams are a heart-shaped cam, pear cam, snail or drop cam and an eccentric circular cam.
The four followers are a flat follower, curved follower, roller follower and a knife or point follower.
Here is a video of the cam mechanisms in action.
A cam mechanism is a type of linkage for a machine which transmits power from a rotational motion into a linear motion. This mechanism consists of three parts, a cam, a follower and a slide. These parts are mounted in a box attached to an axle. The movement of the axle turns the cam which in turn moves the follower up and down inside the slide. The slide provides stability for the follower.
Cams can be made into different shapes. The shape and size of the cam determines the amount of movement and distance the follower will traverse. The type of cam also determines the direction the cam can operate when the axle is turne, clockwise or counterclockwise. The four most common shapes are circular, snail or drop, pear and heart-shaped or constant velocity. Each cam is used for different purposes.
An eccentric circular cam is used in the crankshaft of a car engine. The cam is off center and the follower moves up and down with a continuous oscillating motion.
A snail or drop cam is used in a production line to produce evenly spaced holes or cuts in an item. The snail cam can only rotate in one direction as the follower remain stationary for a half of a turn before suddenly falling. The snail cam produces one event per revolution.
A pear cam is used in car engines to control valves which do not need to move frequently. This cam has a long dwell time whereby the follower does not move.
A heart-shaped cam or constant velocity is used in a sewing machine to wind bobbin because the thread needs to be wound evenly and steady. The follower rises and falls with no stationary period with a uniform velocity.
The purpose of a follower is to move up and down to follow the edge of a cam. The more precise the follower, the more accurate the movement will be. Followers can be made into three different types. The three types are flat, point or knife, and roller.
A flat follower has a lot of friction because it sits flatly on the cam and it is not very accurate. It is used because it can stand up well under a heavy load.
A point or knife follower has a narrow point to follow a cam. It is very accurate with low friction but the point wears down quickly.
A roller follower has low friction. It is accurate and can withstand a load but they are costly to produce. I have two versions of this follower. One version is a rounded edge and the other has an axle with a rotating roller.
Fold and glue the four sliders. Glue the slider tabs to the top piece as shown above.
Apply glue to the top surface of the presentation box and adhere the four sliders.
Fold and glue the axle as shown above.
Make the Cam
Splay the inner X outward on the cams and glue like cams together.
The V-shaped protrusions should be facing outward after the cams are glued together.
Make the Followers
Fold follower #1 and apply glue as shown. Adhere and make into a rectangular prism.
Apply glue to the tabs and insert into the center of the square. Adhere the tabs. Apply glue as shown and adhere the square.
Follower #1 is shown on the left. Fold the other followers as shown above. Apply glue to the side tab and adhere the followers into a rectangular prism.
The ends of the followers should look as above. In the photo above, they are a flat follower,
a curved follower, a roller follower and a point follower.
Assemble the Cam Mechanism
Slide the cams onto the axle.
Insert the flat follower into the bottom of the first slide.
Insert the end of the axle into the side of the presentation box and slide on the decorative gear. Apply glue to the tabs of the axe and adhere to the decorative axle.
Glue on the second decorative gear.
Repeat for the opposite side by gluing on the axle to the decorative gear. Make a handle for the second decorative gear as shown above. Glue on the decorative handle.
Insert the followers into the sliders. Make sure the curved follower is curved facing forward.
Align the cams so that they are in the middle of the slider.
Please note that this cam mechanism is directional because of the snail cam.
The diorama depicts two little girls playing in the sand at the beach. The older girl is carrying a bucket of water to her sister who is sitting under an umbrella playing with a shovel. A seagull is enjoying the scene by swimming in the sea. A lighthouse is keeping watch over the peninsula so that sailboat can avoid the shoreline.
Eight double thickness tabs keep the diorama scenes together.
Pretty paper is glued to the front of the first scene.
The tabs slide into the sides of the scenes.
Here is the PDF file.I used Neenah brand 65 lb Champagne Pearl metallic cardstock from Office Depot and a sheet of Bo Bunny Brighton paper from Joanns. I recommend using a new blade and overcut to cut out this design as the intricate pieces might not cut correctly.
Sierpinski's Triangle is a fascinating structure whereby an equilateral triangle is reduced in size by one half to produce a smaller equilateral triangle.
Starting with an equilateral triangle, divide this into four smaller equilateral triangles using the midpoints of the three sides of the original triangle as the new vertices. Remove the center triangle. You now have three equilateral triangles within the original equilateral triangle.
By repeating the process of dividing the equilateral triangle and removing the center, the progression will look as above after three divisions or stage 3. This division is a fractal which is self-similar, the small parts are copies of the whole.
Stage 3 Sierpinski's Triangle
My 3-D representation of Sierpinski's Triangle is created by taping 64 equilateral triangle together. My equilateral triangle net does not require any tape as there are tabs which keep the triangular net together.
The equilateral triangle net is folded to create a triangular pyramid. The net is held together by three tabs which are inserted into their corresponding slots. Make 64 triangular pyramids.
Tape four of the triangular pyramids together to form a Stage one Sierpinski triangle. Shown in the photo above on the right side.
Four of Stage one Sierpinski triangles are needed to make a Stage two Sierpinkski Triangle. In the photo above, four Stage two Sierpinski triangles were made.
By arranging these four Stage two Sierpinski triangles, a Stage three Sierpinski triangle is created.