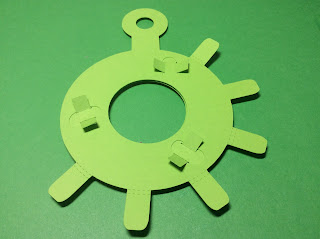
An iris mechanism is one of the components of a camera. The blades in the center of the mechanism open and close together to expose light to the underlying film. In this blog posting, I will make four different iris mechanisms each with a different number of blades. My iris mechanism consists of three main parts a base plate with a handle, blades, and a blade ring. Paper tabs are used to attach the blades to the assembly. When the handle on the base plate is moved, the iris opens and closes.
I will explain how to assemble a three blade iris mechanism. The assembly of the four, five and six blade iris mechanisms are exactly the same but with an additional blade.
Iris Cutting Files
Here are the files to make the iris mechanism. I have three versions of the files. The first is a PDF where you can cut out the pieces with scissors. The second file is for the Silhouette and the third file is all other electronic paper cutting machines.
Materials needed. - Glue Dots or glue and 65 lb cardstock
Make the blades by creasing the tabs and placing a dot of glue in the center of the tab. Insert the tab into the top of the blade. On the other side, insert the tab at the bottom of the blade in the opposite direction resulting in one inward facing tab and one outward facing tab. The orientation of the tabs are the same for all blades.
Repeat for all of the blades.
Insert the top tab of the blade into the base plate with a handle. The tab will be inserted from the bottom of the base plate. Splay the tab outward. Repeat for all of the blades.
Flip the base plate over. Align all of the blades into a circle. The first blade will be on top of the second blade and the second blade will be on top of the third blade and so on. The last blade will be on top of the first blade.
Lay the blade ring with the ring tabs oriented to the right and the curve facing left as shown above. Insert the blade tabs into the holes in the blade ring and splay the tabs outward.
Make sure the iris mechanism works before attaching the decorative rings. Open and close the mechanism a few times. It might be a little tight to begin with but it should loosen with repeated opening and closings.
Flip the iris mechanism over. Apply glue or Glue Dots to the six tabs of the blade ring. (The photos show seven tabs. A tab was eliminated after these photos were taken.) I like Glue Dots better because it allows the mechanism to move a little when the iris mechanism opens and close. Lay the decorative ring on top of the iris mechanism.
Loosely fold over the tabs. Adhere all of the tabs.
Flip the iris mechanism over. Apply glue to the areas away from the blade tabs on the blade ring. If glue is applied by the tabs, the mechanism will not work.
Adhere the decorative ring.


