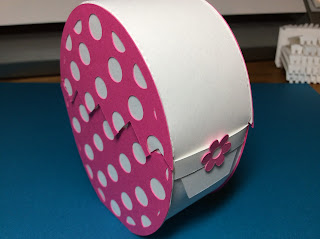
The closure tab on the side is slid into place to hold the top piece closed.
Here is the PDF file.
https://drive.google.com/file/d/1KmdA7vGyuOTFpXq2wadEY8rA2OoFbDFC/view?usp=sharing
Here is the .Studio file.
https://drive.google.com/file/d/1IrT7pLfnVJdbaJ7WMrE8TZ3t5ysg00um/view?usp=sharing
I used 65 lb. cardstock to make the egg box.
https://drive.google.com/file/d/1KmdA7vGyuOTFpXq2wadEY8rA2OoFbDFC/view?usp=sharing
Here is the .Studio file.
https://drive.google.com/file/d/1IrT7pLfnVJdbaJ7WMrE8TZ3t5ysg00um/view?usp=sharing
I used 65 lb. cardstock to make the egg box.
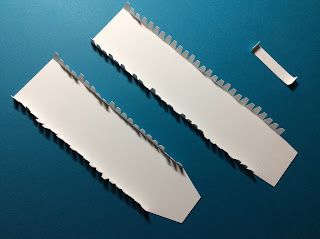
Bend the tabs upward
The center of the closure tab does not get any glue because the top tab needs to slide through. Using the longest side piece, place one drop of glue on the inside of the closure tab that is bent toward the notches on both sides.
Apply glue to each notch on one side. Now comes the tricky part. Attach the face to the notch. Hold in place with the tweezers until it adheres. Curve the side halfway and adjust the edges. Continue curving the side until all of the notches are glued. Please note that gluing starts at the bottom of the crack on the face piece.
I used the tweezers on the other side too to help adhere the face piece.
Inside photo of egg.
Make sure that the zigzags are aligned before gluing the second side. The zigzags should be identical on both sides.
Repeat the above directions for the top of the box.
Glue the sides together by putting glue on the outside of the bottom piece and adhering the tab to the inside of the top piece.
Glue the flower to the center of the closure tab as shown.
Glue the polka dotted sides as shown. There is a right side and a wrong side. Make sure that the bottom zigzag edges align.
Repeat for all of the sides.
Happy Easter!


