Monday, December 30, 2013

We Will Drink a Sliceform Cup of Kindness Yet, For Old Lang Syne


Sliceform Cup and Bowl

It's time to sing Auld Lang Syne.  Don't ask me what the song lyrics mean because they don't really make any sense.  However, traditions abound and I will celebrate with my new sliceform cup.

First, I created a sliceform bowl which I then transformed into the cup. (Isn't it amazing how things evolve from one design to another.) I have included instructions for both templates of a sliceform bowl and the cup.  I used a good quality cardstock as the slices need to be exact and there is little tolerance for hanging chads.

Here is the .Studio file of the sliceform bowl.
https://drive.google.com/file/d/0B7oGIyVDbRGYUTRtRnJYM1dBQkk/view?usp=sharing&resourcekey=0-nGNKz2RCUv5V5UeRAk32xw

Here is the PDF of the sliceform bowl.
https://drive.google.com/file/d/0B7oGIyVDbRGYb0l2dlR5cy1jbE0/view?usp=sharing&resourcekey=0-FvU6dkhrfKNhMynT8boDVg

Here is the .Studio file for the sliceform cup.
https://drive.google.com/file/d/0B7oGIyVDbRGYUDFnQ2YxVElVVzg/view?usp=sharing&resourcekey=0-gvem1U2USTL7ejlTsbhe-w

Here is the PDF of the sliceform cup.
https://drive.google.com/file/d/0B7oGIyVDbRGYRWR2d0E4eS04Z28/view?usp=sharing&resourcekey=0-YHQlQuuH0Vu_4EcFi9Ca5Q

Here is the SVG for both the cup and bowl.
https://drive.google.com/file/d/1cgBSVuiriZjWA9jz_tPElGkmgJ8Pep_i/view?usp=sharing

 Arrange the pieces according to the slits


 Do the largest piece first.

 Do all of the slits in one direction and then in the other direction.

 I love the way the bowl looks when it is lying flat,


The underside pattern of the bowl...beautiful!

Here are the pieces for the cup.
 Insert the stem pieces and then train the paper to wrap around the stem.

Glue as as shown and fold the stem into a circle to produce the completed stem. 


 Insert into the whole in the circular base and fold the tabs as shown.  Glue to the base.

 Put glue on the circle and attach to the base so that the bottom is sturdy.

 Make the bowl as shown previously.


Completed Cup of Cheer...Happy New Year 2014!


Here are the lyrics for Auld Lang Syne so you can be as confused as I am about the meaning of the verses.


Marley's ready to celebrate the new year.
Happy New Year!


Math for bowl:
Spheres: x^2+y^2+z^2 = radius^2
Torus (for top edge): (Edge radius - sqrt(x^2+y^2))^2 + z^2 = tube radius^2
tube radius is one half of spacing between spheres

Friday, December 27, 2013

How to Make a Miniature Math Book

Miniature Math Book

I started the day by making a bulletin board for my math class. I bought the design from the Silhouette store.  I think the snow bunny by Stinkin Cute is exactly what the name says...stinkin cute!

Here are the figures that I enlarged for the bulletin board.

I needed a theme for the bulletin board and I came up with the following title..."Every Bunny Loves Math".  I wanted to put something in her hand and I decided to use a math book. I had a miniature math book that I made from a few years ago. I attached it to the bunny and thought...Eureka...why not do this project again with my students.


Here is a page from this book.

Making a miniature math book is a fun project for math students. It gives them the opportunity to be creative and to make up their own math problems.  In addition, you can have them make up an answer key on a separate sheet of paper.  The books can then be passed around to other students who have to solve the problems on a separate sheet of paper. The author of the math book could then correct the answers to their book.  It can also be adapted for older students.  For example, students can outline a chapter in their math book. It could include definitions and sample problems as a chapter review.

Here is the PDF file for the book pattern.
https://drive.google.com/file/d/0B7oGIyVDbRGYMDNmQnd0RjdhdjA/view?usp=sharing&resourcekey=0-e6AZ7mJ9_T93K92SxVryTA

Here is the .Studio file. I used fabric for the cover of the book, copy paper for the pages, chipboard for the interior support of the book cover and cardstock for the front and back covers for the students to design.
https://drive.google.com/file/d/0B7oGIyVDbRGYUThiQXBzeVVjdFk/view?usp=sharing&resourcekey=0-s6G7TsJW3L5OWL_wJzlTdg


This project should be done over the course of a few days.  Ideally, it can be done in the last ten or fifteen minutes of the class when classwork is completed. Students will have everything they need already cut out...thanks to the Cameo Silhouette.  They will take the fabric as shown with the printed side down and they will glue the cardstock as shown...centering it in the fabric with a quarter inch separating the cardstock, in the middle, for the spine of the book. (I would place the cardstock in the correct position as you hand it out to the students.)


Put glue on the cardstock and flip it over when done.
 
 
Put glue on the cardstock as shown.


Fold over the top and bottom fabric.

 
 Put dots of glue in the four corners by the cardstock on the fabric and then
 origami fold the corners into a triangle. Apply glue to the outer edge of the cardstock.

 
Fold the remaining fabric over the cardstock. It should now look like the above picture.

 
 Staple the pages together in the middle crease in two places as shown. (You could do this before class to eliminate this step.)

 
 Put glue on the entire cover except in the middle where the spine will be.
 

 First, attach the pages to the one side.
 
 
 And then to the other side.

 
 Design a front and back cover. Glue when completed.


Teacher Alert: At the end of the class, make sure the pages are loose and not glued together. It is easier to unglue the pages while the glue is still fresh. 
There are six pieces of copy paper that make up this book. This allows for 22 pages of blank space to be written on. Another alternative is to start on the right side and give the answer on the left side of the next page. (This would leave the first and last page that are attached to the book cover to be blank.)  The students would then have 10 problems with 10 answers.

The students can make up a title for their math book.  Here are a few funny titles from www.joe-ks.com:

                            How to get an "A" on your Math Test by Cal Q. Later
                            Advance Math by Smart E. Pants
                            I Love Mathematics by Adam Up
This math book has so many possibilities. I had my students make these books for Mother's Day one year.  A few students said their moms loved it and that they were going to keep it forever. What a wonderful compliment!


Monday, December 23, 2013

Spinner Ornaments


Spinner ornaments are shapes which are offset numerous times using the Silhouette designer software.  Each offset is held onto the next with a small sliver of paper.  These ornaments are a little delicate so do not spin the paper too many times or else you will tear the paper.  I have seen these ornaments as mobiles that can be hung outdoors.  In fact, if you cut it on a plastic material such as a transparency, you can hang them up outdoors.

These spinners can also be used as gift tags for a present.
 

Here is the PDF of the spinners.
https://drive.google.com/file/d/0B7oGIyVDbRGYUjh6MWdEWVlIMjA/view?usp=sharing&resourcekey=0-2lvAN4A7hLmO03CKq9qJLA

Here is the .Studio file.  I used cardstock to cut out the spinners.
https://drive.google.com/file/d/0B7oGIyVDbRGYWVJySlAwVmZIT3c/view?usp=sharing&resourcekey=0-t7YP2pBe7UGTU_wkejvXJg


Sunday, December 22, 2013

Nativity Scenery for Snow Globe

Christmas Nativity Snow Globe

I added a nativity scene to my snow globe.  You need to use the previous post's instructions for the snow globe.  http://papercraftetc.blogspot.com/2013/12/paper-snow-globe-sliceform-for.html

Here is the PDF for this nativity scenery.
https://drive.google.com/file/d/0B7oGIyVDbRGYM3VESXlMWnFlNkE/view?usp=sharing&resourcekey=0-0cxc6LkxTM9FLUQNHGRa-w

Here is the .Studio file.
https://drive.google.com/file/d/0B7oGIyVDbRGYeTdwc3Yyem1oYms/view?usp=sharing&resourcekey=0-X1bdbUd2NfbIPCWQ2-63Kg

I added some beads to the top of the snow globe with wire and threaded it through the top of the snow globe at the center.


Merry Christmas!

Thursday, December 19, 2013

Paper Snow Globe Sliceform for Christmas Gift Giving


 Snow Globe Sliceform

This snow globe is adorable.  It took me hours to design but it was worth every second. This is a wonderful Christmas present.  I am sure that any recipient would love to receive it.  It can be mailed as the base is not glued to the globe and everything can fold flat.

 Here is the PDF.
https://drive.google.com/file/d/0B7oGIyVDbRGYMHdtSUtrc2hyb28/view?usp=sharing&resourcekey=0-5mbrSDFh1JAfxZRI5b68dg

Here is the .Studio file.  I used cardstock.
https://drive.google.com/file/d/0B7oGIyVDbRGYZ01BSFJxT3hCNkE/view?usp=sharing&resourcekey=0-FvZNgAguZR8xhMvXLKhtbw


 Glue the six scenes together as shown

 Add the tabs to the center of the scenery as shown.

Completed scenery

 Arrange the snow globe base pieces according to size and type of slit.
 Attach all of the top facing slits first.


Completed base.
 Arrange the globe sliceforms according to size and slit position.


 Glue the scenery to the center sliceform as shown.  Be careful not to cover the slit.


 Another view of the attached scenery.

 Continue adding the sliceforms.
 I like to do all of the upward facing slits first.


Completed Snow Globe


Math used for the base were cone minus sphere equations:
Cone slice z = (height of cone/radius of base) x sqrt( x^2 + y^2)
Sphere slice x^2 + y^2 + (z - translation distance)^2 = (radius)^2
Translation distance = (height of cone cutoff) - (sphere radius) - (sink height)
Height of cone cutoff "a" comes from solving: (radius of bottom)/(radius of top) = ((height of base)+a)/a
Sink height = radius of sphere - h
h comes from solving h^2 + (radius of top)^2 = (radius of sphere)^2

#sliceform #paper snow globe


Wednesday, December 11, 2013

Sliceform Christmas Ball Ornament with a Snowflake Inside


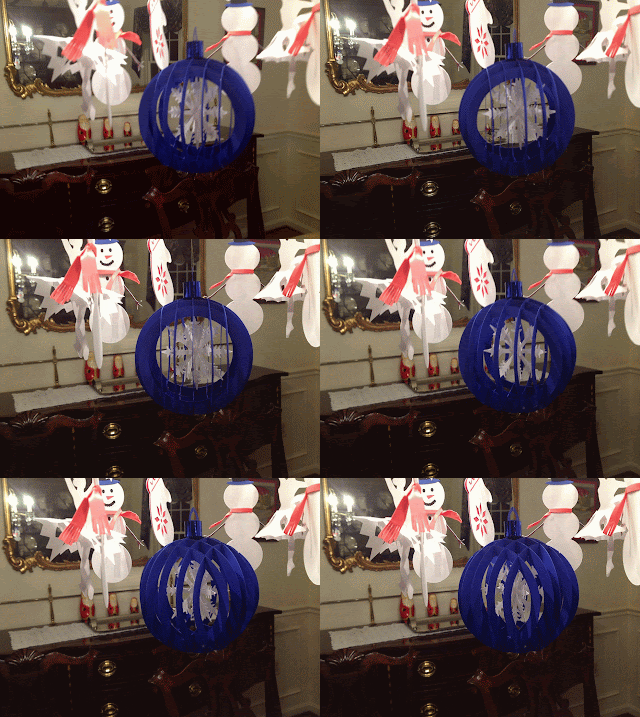
This sliceform Christmas ball ornament has evolved from my first globe sliceform which was a solid sphere. It is essentially the same design with the center cut out.  When making this ornament, I would recommend using good quality cardstock.  The slits need to be exact as this will cause the slices to insert correctly into one another and look evenly spaced.

Here is the PDF file.
https://drive.google.com/file/d/0B7oGIyVDbRGYQ0R6dzZFWUlkQlE/view?usp=sharing&resourcekey=0-n5fW7_3GLgzXgD0ryuiTKg

Here is the .Studio file.
https://drive.google.com/file/d/0B7oGIyVDbRGYRUh0dHZyOVBtZjg/view?usp=sharing&resourcekey=0-bTVuQ4Q4gJlX8Mv2pFnLIA

Here is the SVG.
https://drive.google.com/file/d/1h-_URh_Fp8fXOG3PwIJ98Mdp2-wbll8l/view?usp=sharing


 Make the Sliceform Ball by starting with the center and going outward.
Make the Snowflake by bending the two pieces with the perforated edges and inserting it into the piece without the perforations and a little slit in the center.
 
Glue the snowflake into the center of the Christmas Ball by attaching the two slits together.
Make the hangar by wrapping the rectangular piece into a circle as shown above.
 
Add the rest of the slices to complete the Christmas Ball.
I added an additional rectangular piece of shiny paper around the hangar for interest.
 
Another Christmas Ornament to add to my collection...Lovely!
 
Update...
 
I added a new perfect snowflake design since the one above is a little complicated.  I made five of them for the administrative assistants in my office.  As I was making them, I thought of another snowflake design that is easier to assemble.  It folds like an accordion into a six sided snowflake.
 
Here is the PDF of this new snowflake design.
 
 
Here is the .Studio file.