This Christmas Train Ornament is similar to the Christmas Train Tabletop Ornament from a previous blog posting. https://papercraftetc.blogspot.com/2022/12/a-christmas-train-tabletop-decoration.html The directions to make this ornament are exactly the same as train #1 except for the addition of the hanger inserted and glued to the top of the engine roof and the name of the train is now placed on the side of the engine. A piece of a cotton from a cotton ball was added to the smoke stack.
Here is the PDF file. I used Echo Park Santa Claus Lane paper from a 6 x6 Mega Pad which was a double sided paper.
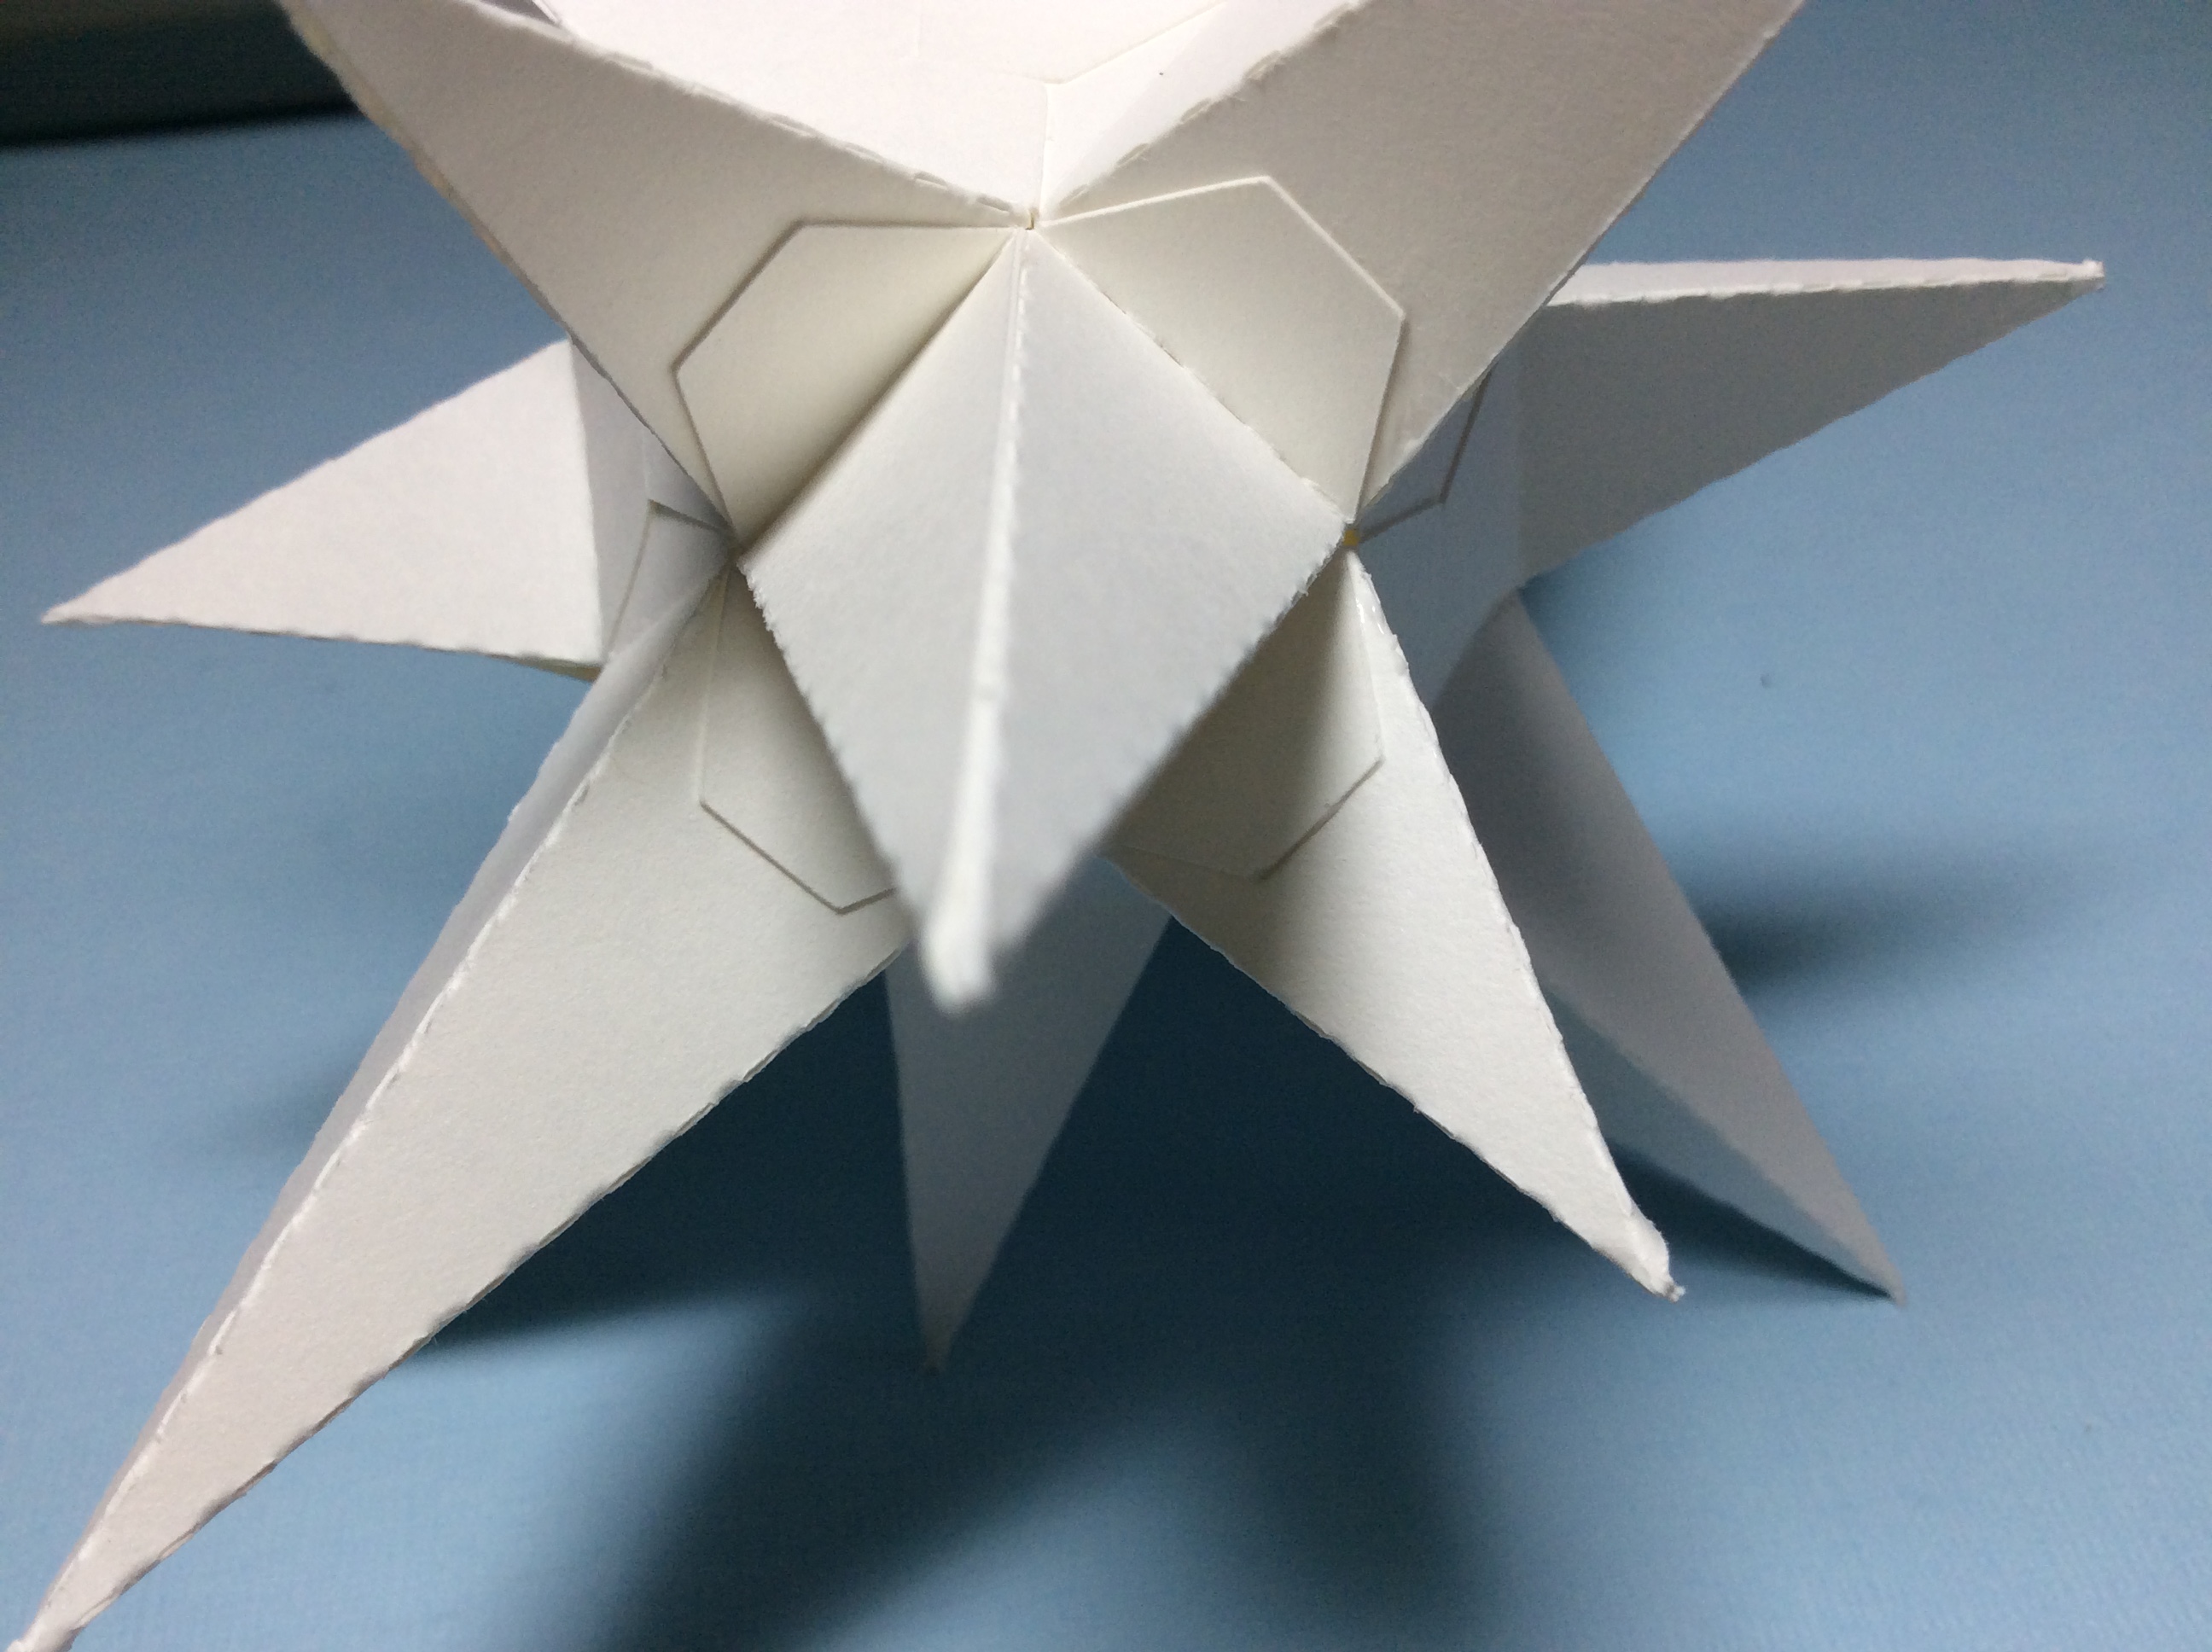
For my Silhouette paper cutting friends, no coding is necessary as I have provided the files for two types of small Moravian Stars in my files. One star has equal sized points and the other star has two different sized points. The directions to assemble the stars are the same.
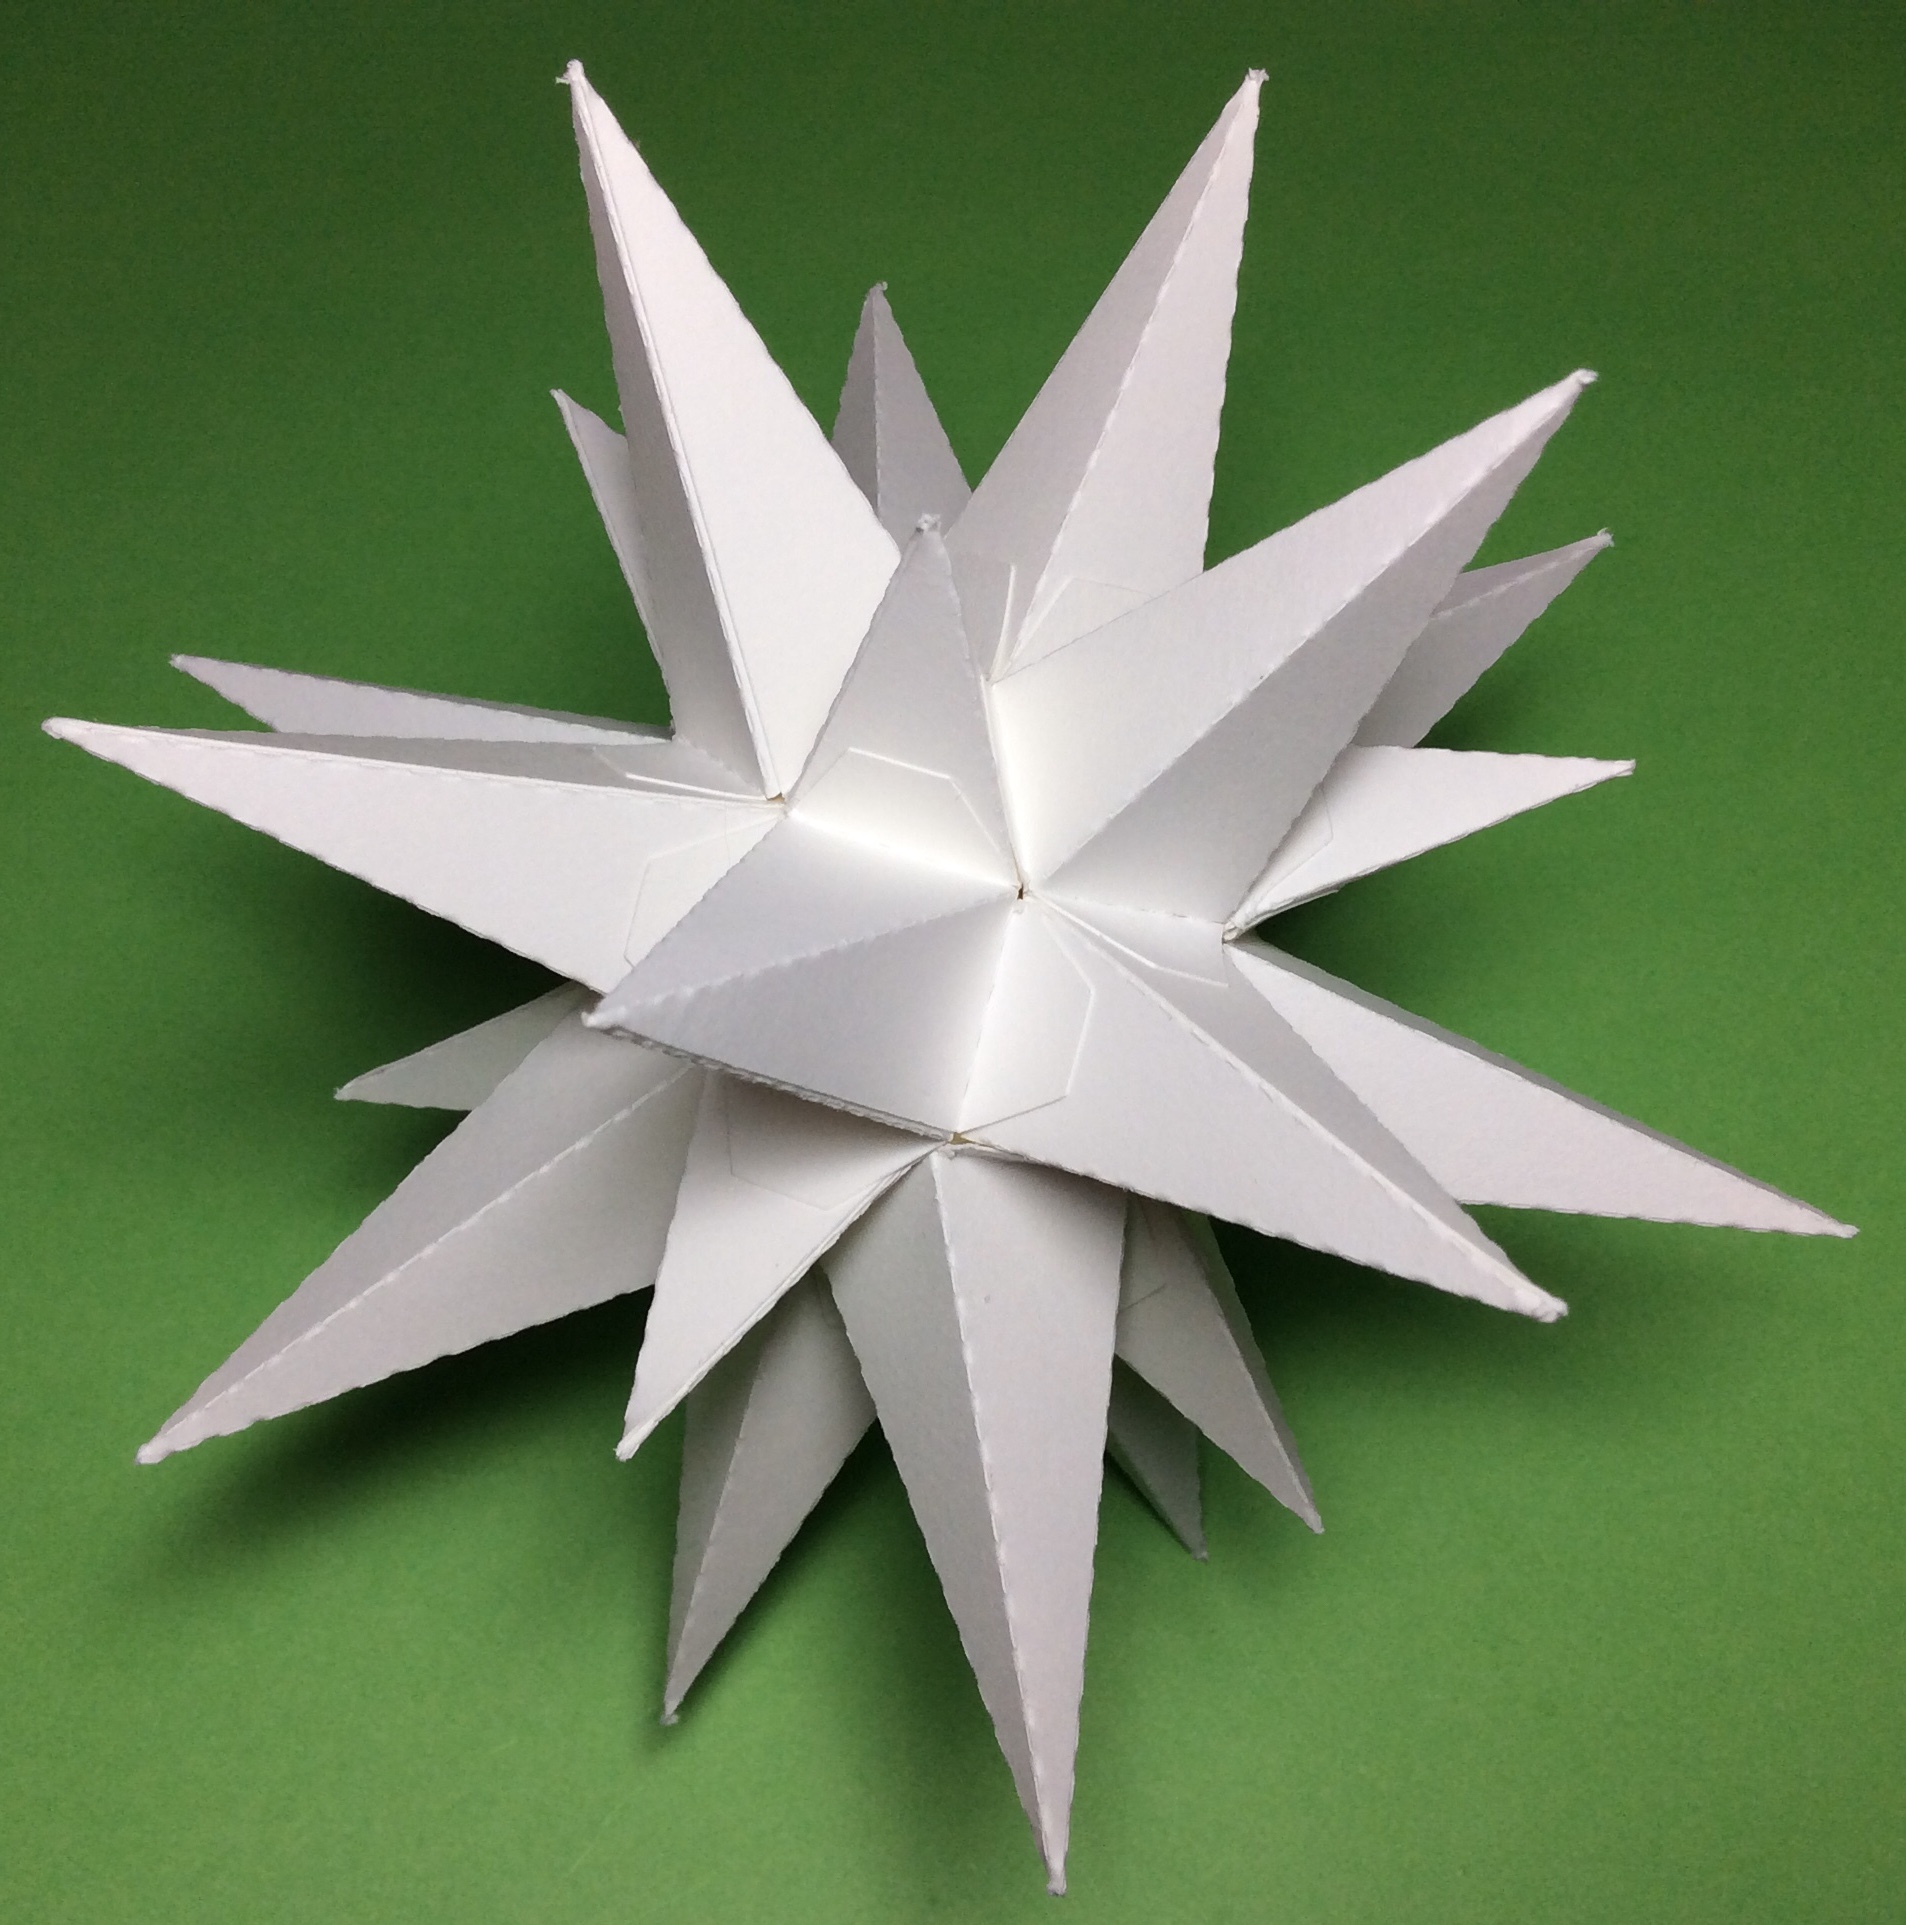
This small Moravian star is 6 inches wide and will make a beautiful ornament for your Christmas tree. A larger version of this Moravian star can be found in a previous blog posting https://papercraftetc.blogspot.com/2019/11/a-stem-project-moravian-star-model.html The Moravian star is made up of 18 large points and 8 small points.
Here is the PDF file. I used 65 lb. white cardstock.
1). Here is my generalized code for the Moravian Star in TurtleStitch, https://www.turtlestitch.org/run#cloud:Username=Elaine&ProjectName=Small%20Moravian%20Star Change the variable length for the side length of the largest point and variable angle for the angle degree of the points, if desired. Run the code in TurtleStitch. The second point will be 2/3 ads the size of the largest point.
2). Three designs will be created with a one inch block for reference. In the TurtleStitch drop down File menu, Export as DXF for a paper cutting machine. Export this design to your cutting machine.
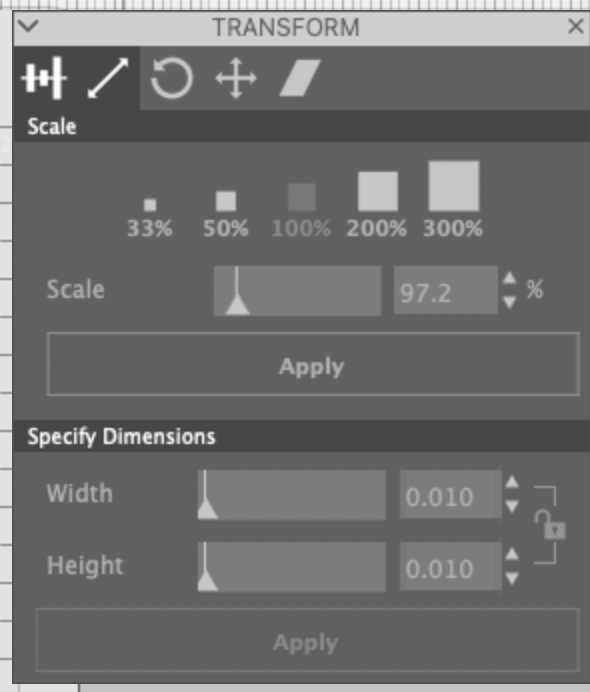
3). If a Silhouette cutting machine is being used, I have observed that the dimensions are not preserved. It must be resized in the Silhouette software before cutting. I have included a one inch square for reference. Once in the Silhouette software, release the compound path and observe the size of the one inch square. Divide 1.00 inch by this observed value and then multiply by 100 to get the percentage that the figures needs to be changed. In the Silhouette's Transform Panel, resize the entire image using the scale window.
The image selected will be transformed 97.2% when the Apply button is pressed.
4). Using your paper cutting machine, cut out 18 copies of the large point, 8 copies of the small point and three rectangle strips from 65 lb. card stock.
Making The Moravian Star
Fold the three strips of paper
Glue them into an octagon.
Apply glue on the two opposite squares of one octagonal strip. Slip the other octagonal strip over the glued area to form a structure as shown in the photo above.
Apply glue on the four middle squares as shown above.
Slide the third octagonal strip over the glued areas. This structure is now called a small rhombicuboctahedron
Fold the perforations of the small triangular pyramid. Apply glue on the left side which looks like a triangle.
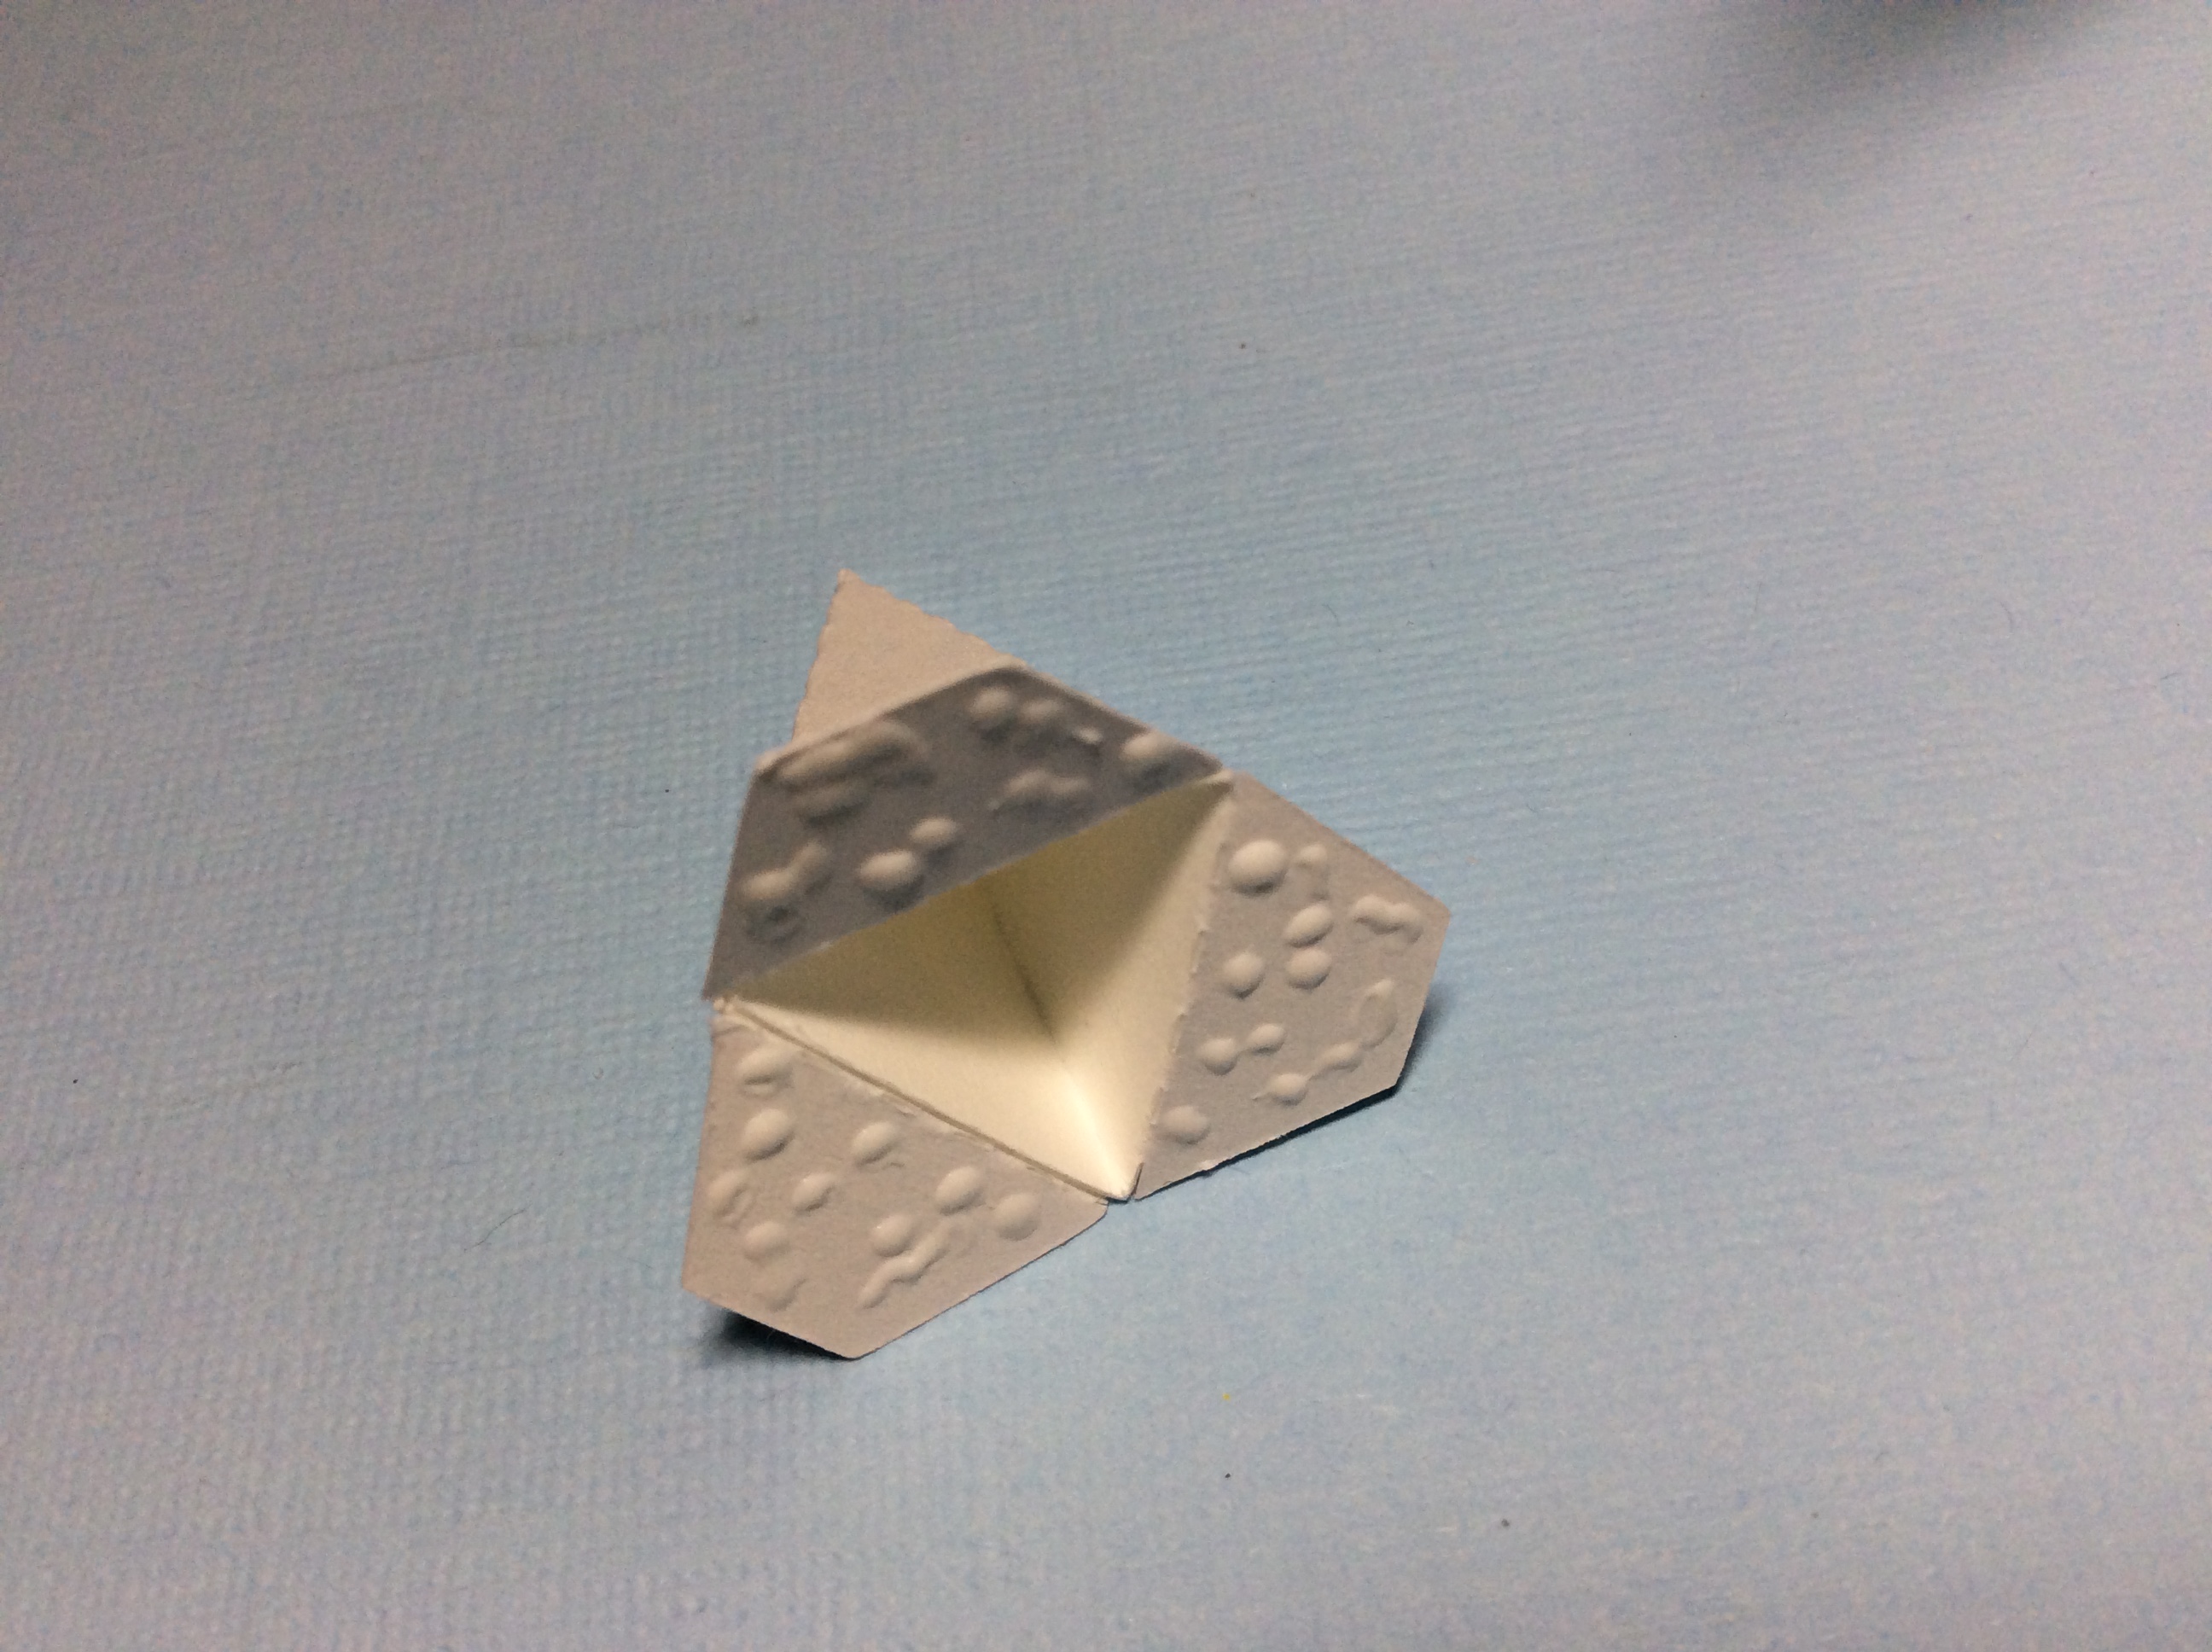
Completed small triangular pyramid. Repeat for the remaining triangular pyramids.
Bend the large square pyramid and apply glue as shown.
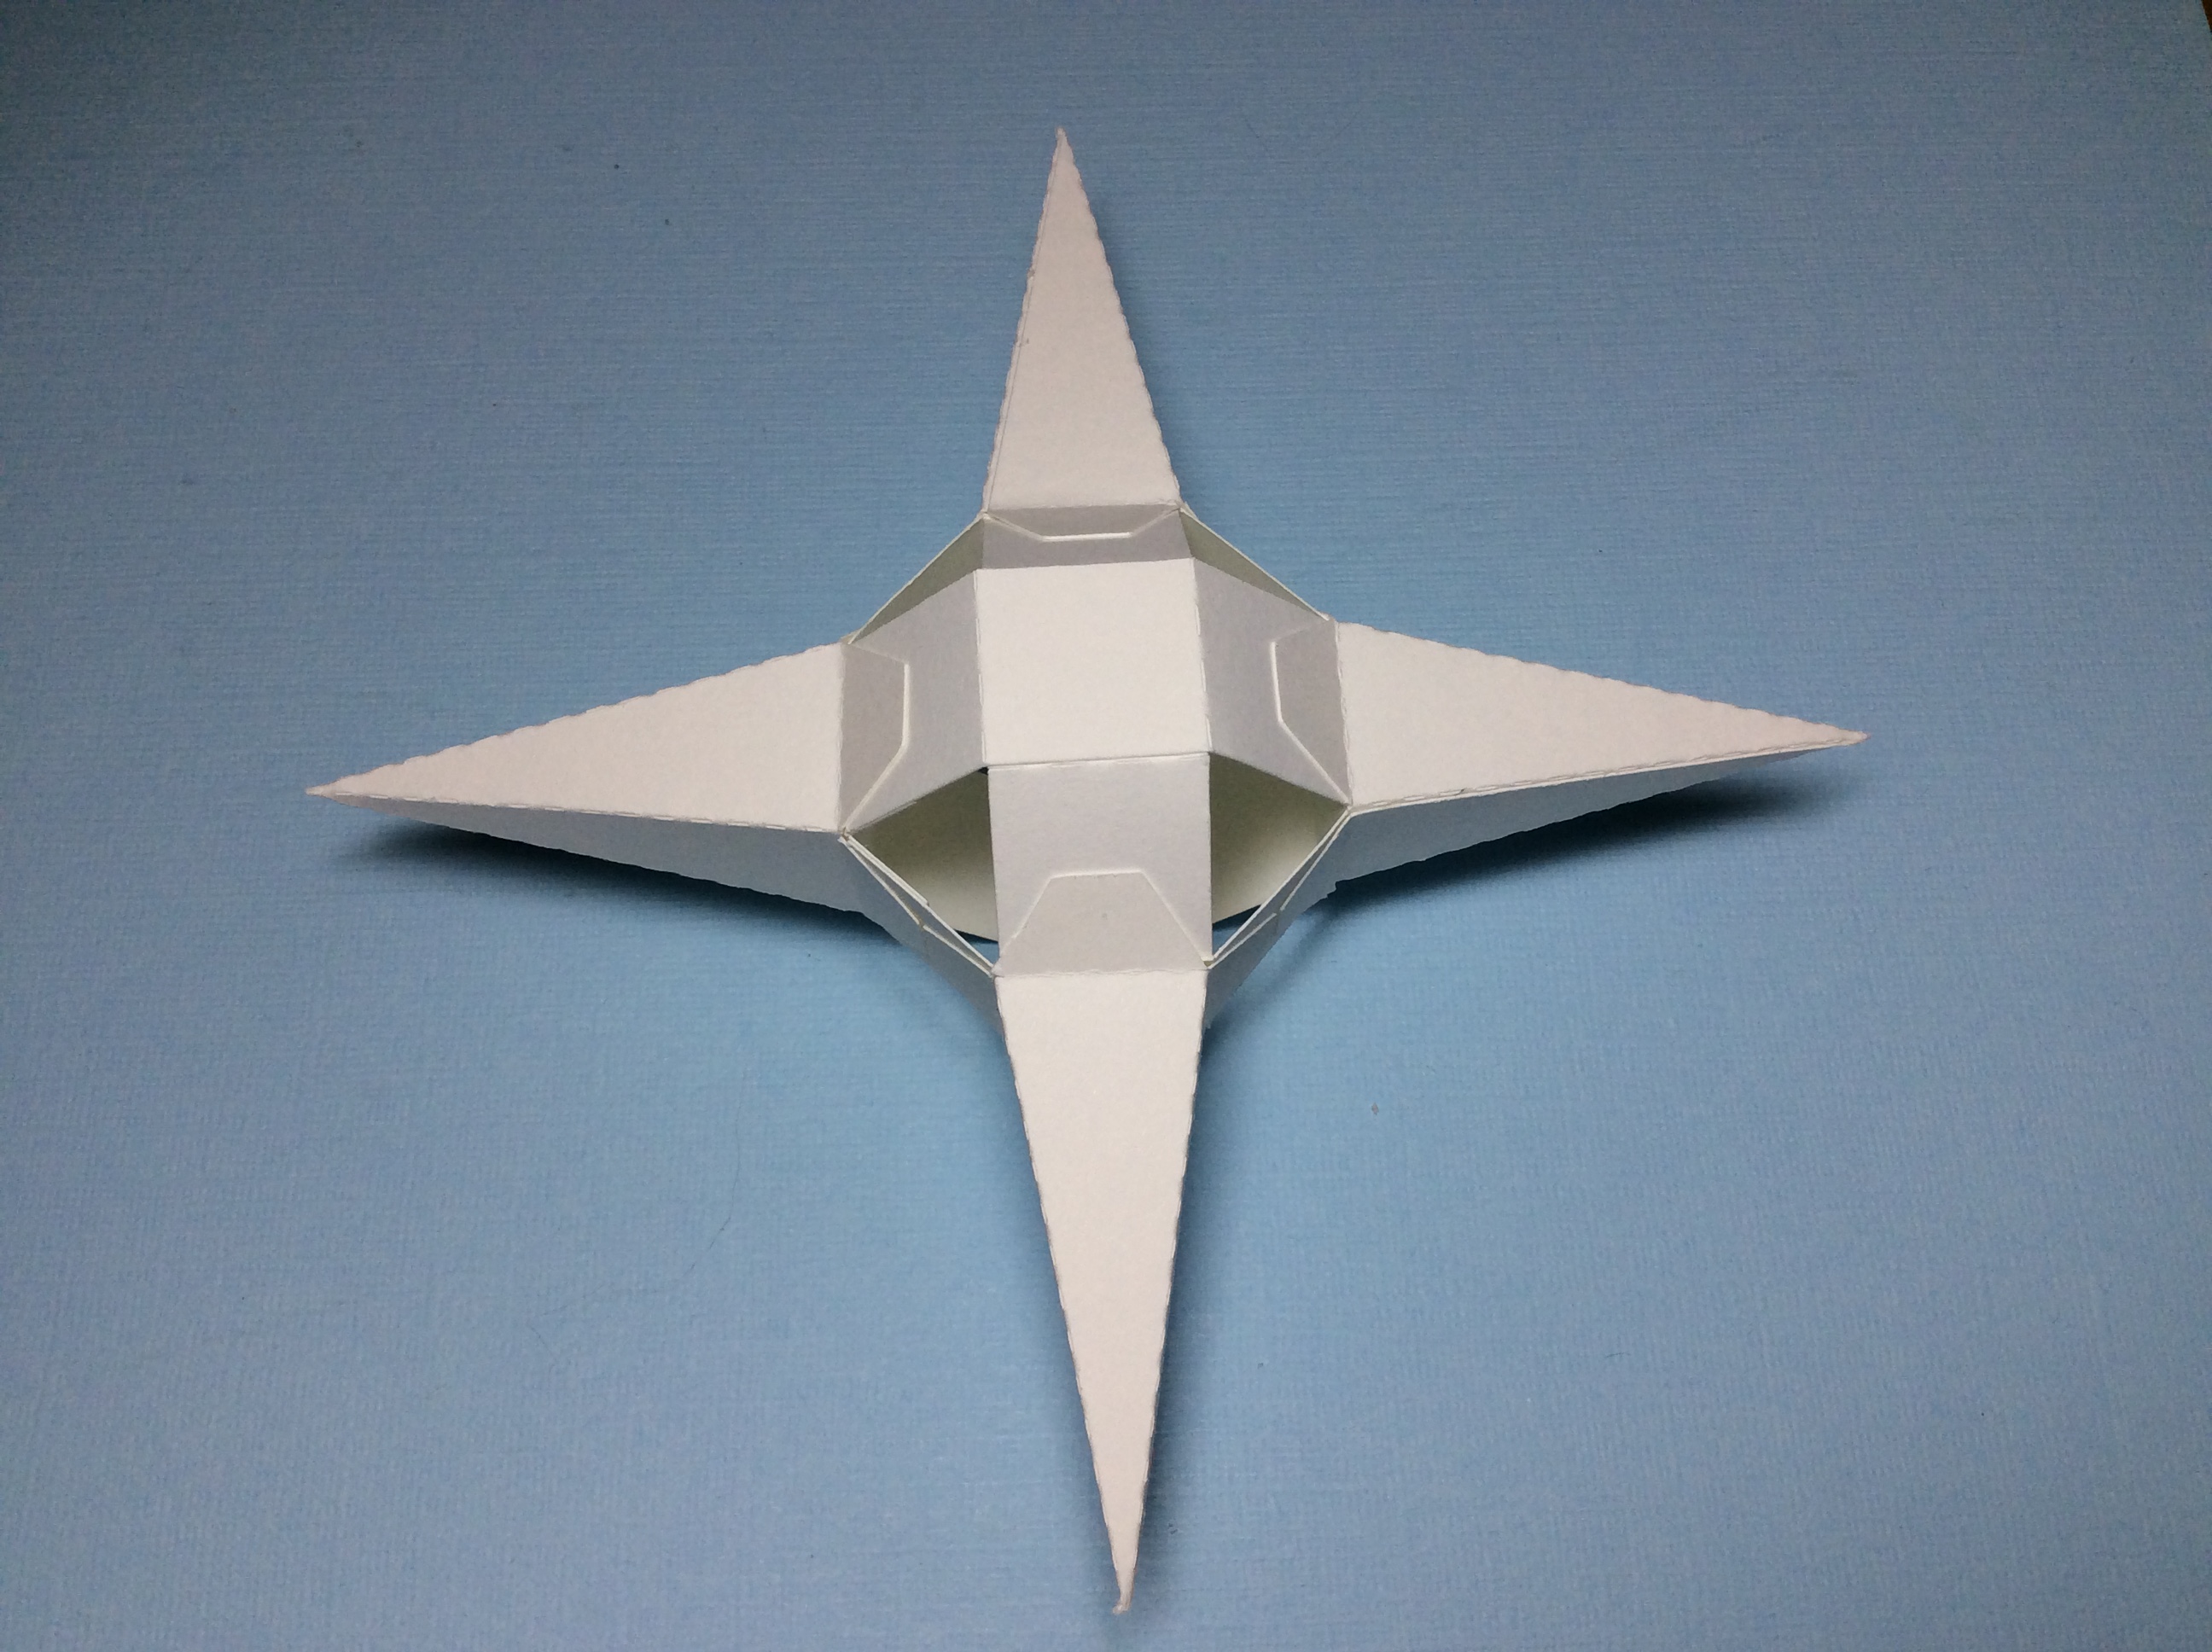
Large square pyramid.
Glue all of the large square pyramids. If you want to hang up your Moravian star, tape a string in the center of the large square pyramid.
Glue the large square pyramid closed and allow the string to protrude from the center apex of the pyramid.
Completed parts before final assembly.
Apply glue to the four tabs of the large square pyramid.
Adhere large square pyramid as shown above.
Glue and adhere two more pyramids opposite to one another as shown above.
Apply glue to the small triangular pyramid tabs.
Adhere the tabs to the area where there is a triangle. Repeat for the remaining seven small triangular pyramids.
Glue and adhere the remaining large square pyramid to the open spaces with the tabs showing on the outside of the star.
This Christmas Train makes a beautiful tabletop decoration. The train consists of an engine, a coal car and a caboose. I put some cotton bellowing from the smoke stack in the engine to add some interest. It is 7 1/2 inches long when all of the cars are connected to one another. I added three presents to the coal car. Each present is large enough to contain one Christmas Mint M&M. My granddaughter was thrilled to open the tiny present and eat the treat when I gave her the train as a delightful addition to her home's holiday decorations.
Here is the PDF file. I used Echo Park Santa Claus Lane paper from a 6 x6 Mega Pad which was a double sided paper.
Cut out all of the pieces for the engine. Crease and glue the engine together.
Make the smoke stack. Insert and glue into the engine. Crease, fold and glue the curved engine pieces together. One curved piece on either side. Glue on the engine light.
Crease the base as shown above. Glue and align the wheels onto the base. The holes in the wheel should align with the hole in the base.
Glue the base to the undercarriage of the train. Align and glue the four big wheels.
Crease the roof tabs outward.
Align and glue the roof to the engine.
Make the caboose with the same methods as used above.
The undercarriage is aligned as shown above.
Make the coal car using the same methods as before.
Completed coal car. Make some presents to put into the coal car.
The hitch is made with a strip of folded paper as shown above. Insert the folded paper into the hitch by inserting it on a diagonal and turning to align it. The tabs will be glued on either side of the square. Insert the hitch from the previous car. The hitch needs to be inserted on the diagonal and then turned. This motion will lock the hitch into place to connect the cars without slipping out easily.
Add a piece of a cotton from a cotton ball to the smoke stack to complete the train tabletop decoration.
This card depicts a scene of a Pilgrim Thanksgiving. An American Indian family is sharing their bounty with a Pilgrim family who are reciprocating with their gifts to them. The Pilgrims homestead is seen in the foreground along with the Mayflower ship. The card is 5 inches x 5 1/2 inches.
Card laying flat.
The scenes are glued together, starting with the front scene. The tab is glued to the back of the next scene to create the Mayflower Thanksgiving card.
The scenes are connected in a zig zag design.
The back of the card looks just as good as the front of the card. The back scene has the tab glued first and then the metallic paper is glued on top of it. The oval is centered in the back of the this scene.
I used 65 lb cardstock to make this card. The white metallic paper is Neenah brand White Gold 65 lb. card stock from Office Depot.
The Tumble Cube Advent Box looks pretty when wrapped with a bow.
This Tumble Cube Advent Box is the third and last box of my tumble cube series which includes a Birthday Cube and a Hanukkah Cube. I have included a box pattern to contain the tumble cube and a scalloped edged box for the 25th present.
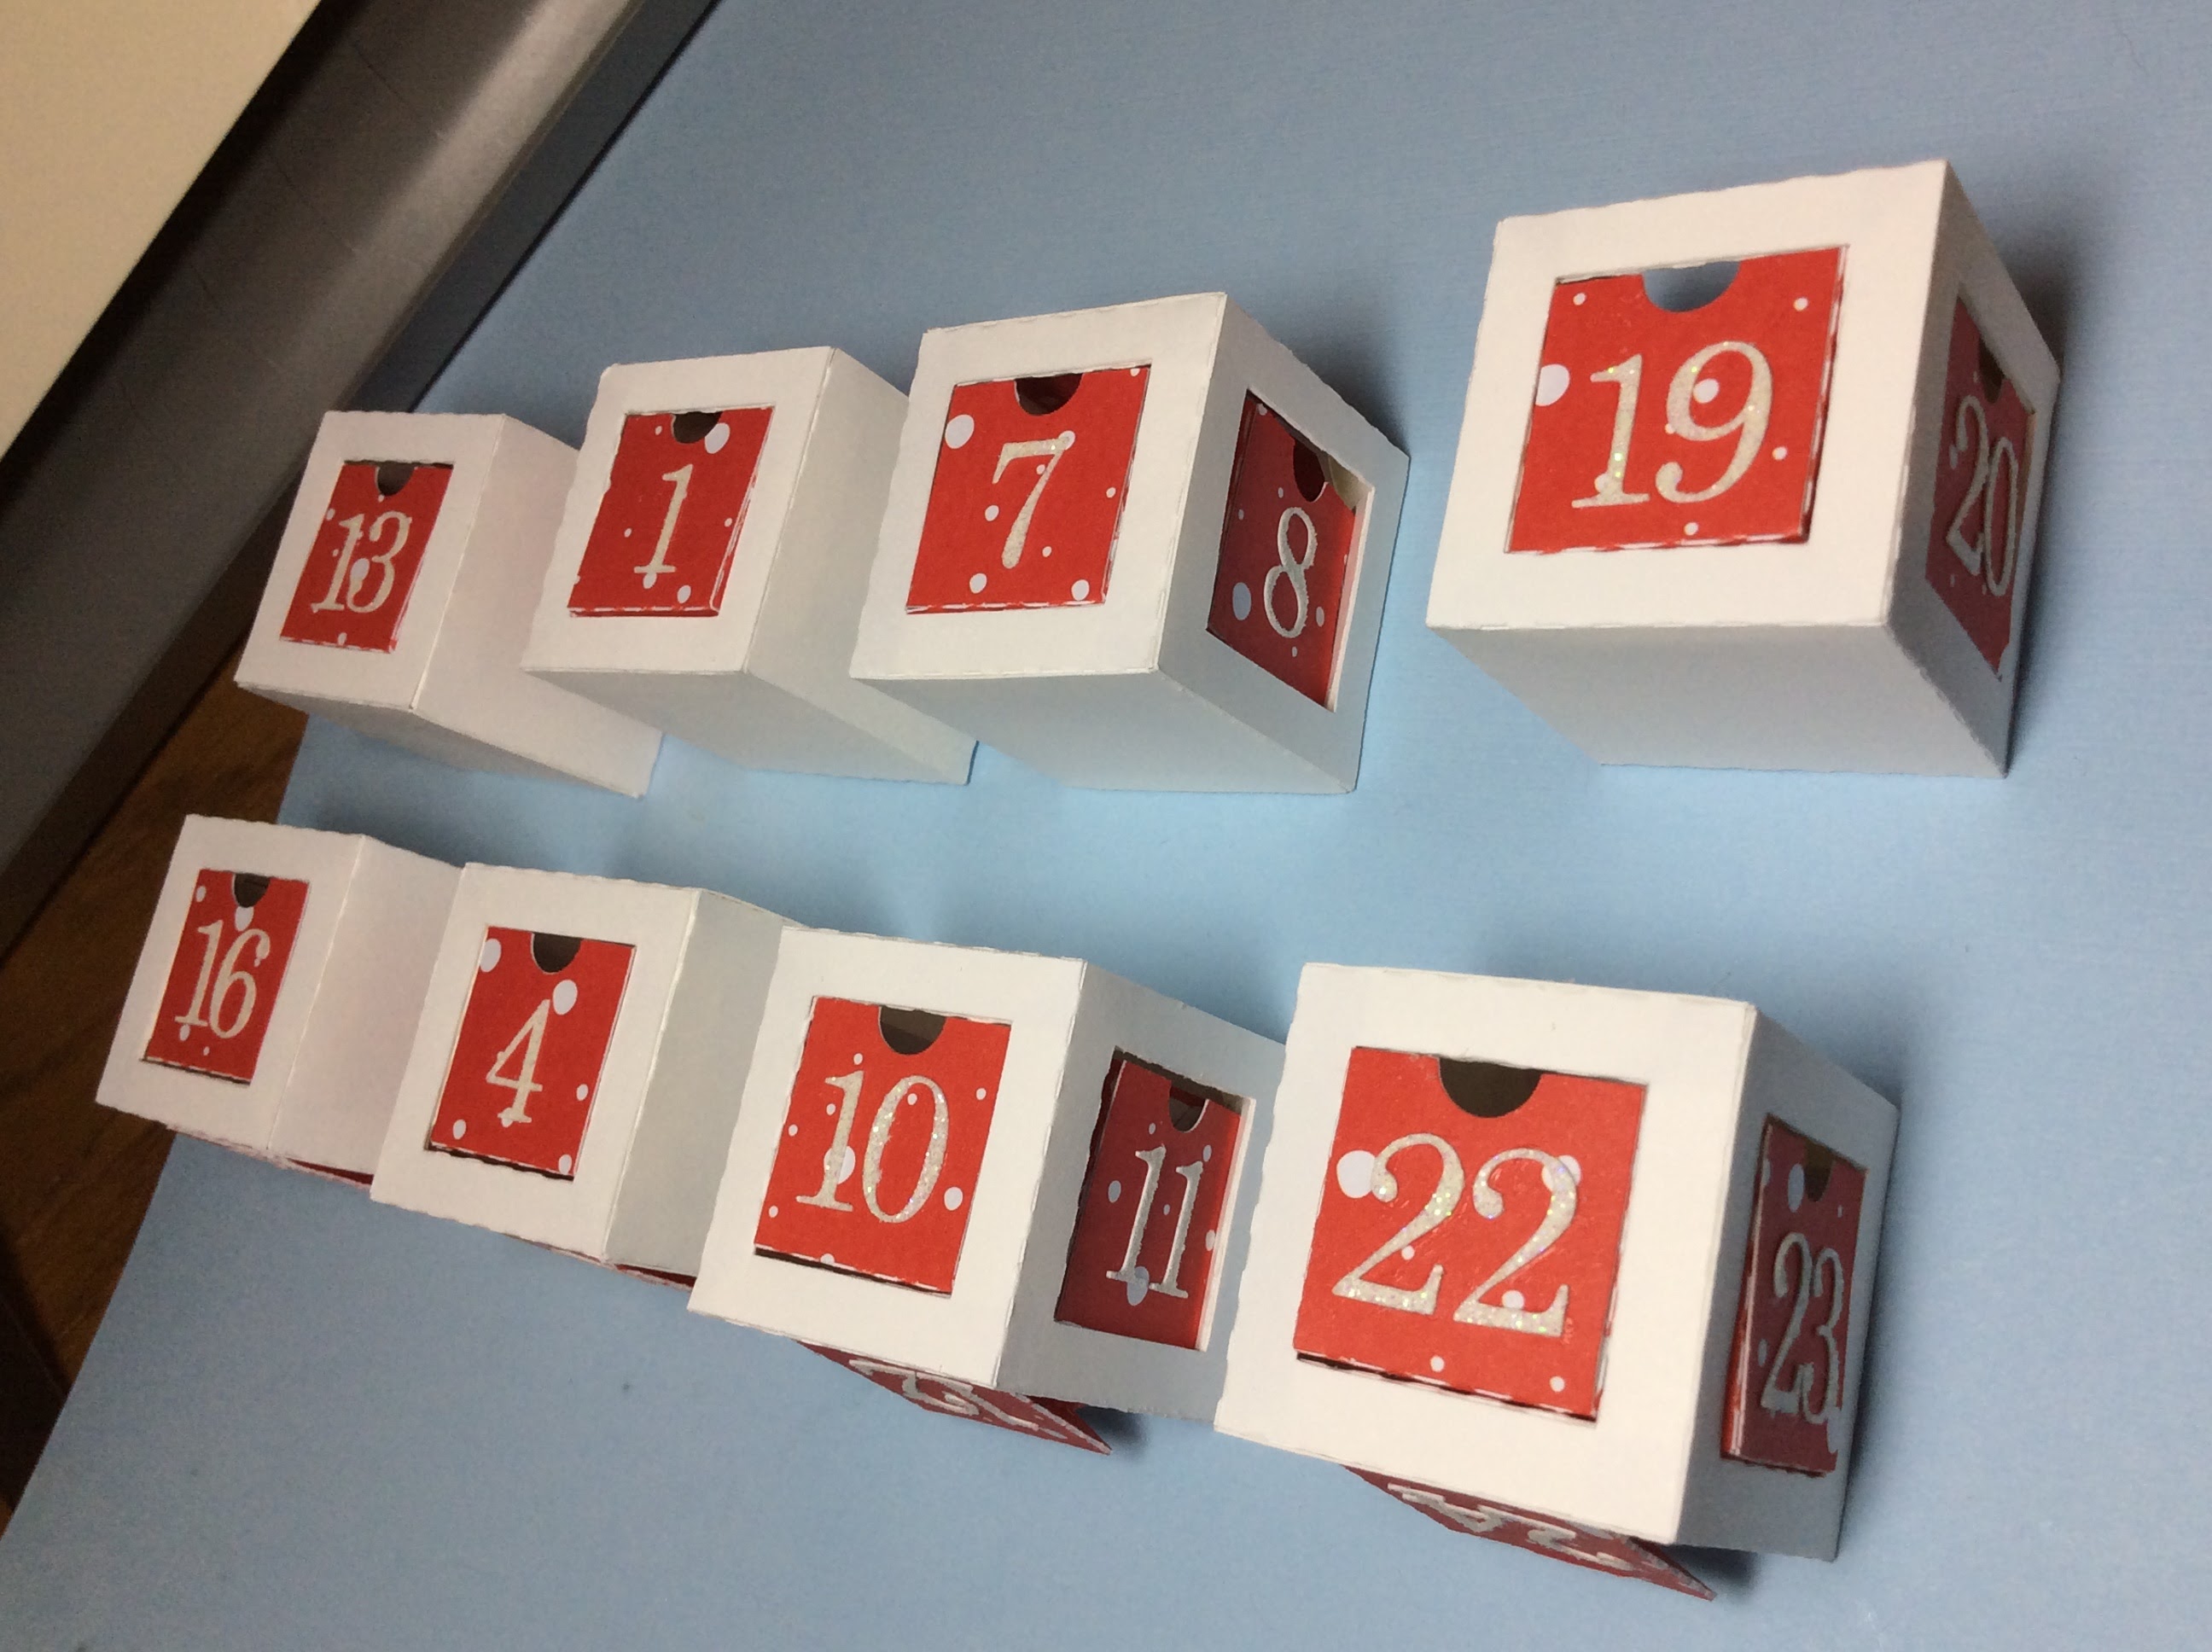
This Advent Box is a fun present to give to a child or an adult. I love the appearance of the stacked boxes because it make the present extra special. Small treats can be a put into the twenty-four drawers such as a Hershey Kiss, Shopkins, stickers, or a quarter. The drawers vary in size from a 1/8 inch accordion style box, a 1/4 inch box and a 1 1/2 inch box. There are eight of each type of box in this cube. The smaller boxes can contain stickers or a coin. The larger box can contain two Hershey kisses. I have found that some Shopkin toys can fit into the drawers too.
After filling the cube, I realized that the weight of the coins and candies move the drawers around a lot when the box is flexed. If the present is given to an adult it will be ok. But if it given to a small child, they will want to contort the boxes and the coins might fall out. If giving it to a child, maybe use all of the drawers as clues to a scavenger hunt. I have included 8 clues with my design.
I taped and used Glue Dots to stabilize the drawers. I am posting this project because it is wonderful project but it is not perfect. I will continue to think about how I can make it perfect but in the mean time, I think it is too nice of a project to not publish it. Maybe my readers can come up with a better solution to the drawer problem...maybe tear away sheets in front of the drawers?
A tumble cube is eight cubes which are tape together to form a bigger cube. When the cubes are moved, they go in different directions.
Watch the video of the Birthday Tumble Cube in action to see the mesmerizing movements of the cubes. The concept is exactly the same for this Advent Cube.
Here is the PDF file. I used 65 lb. white card stock from Walmart for the cubes, American Crafts paper for the outside of the cube and glitter card stock for the numbers. I used Scotch Packaging Tape to tape the boxes together. I also used Scotch GiftWrap tape and Glue Dots to stabilize the drawers.
Crease all of the window tabs as shown above. The window tabs are triangular tabs. This triangular tab provides a sturdy beam so that the cube does not collapse easily.
Apply glue to the tabs of the three sides of the left and right arm. Also apply glue to the tab on the bottommost tab as viewedinthe photo above.window. Adhere to create seven triangular beams.
Apply glue to the window tab as shown above.
Bend the box into a right triangle and adhere the tabs to create the box structure.
Apply glue to the edge of the triangular beam as shown above. The glue will be applied in six locations.
Form the sides into a box. Apply glue to the upper triangle and adhere.
Completed Advent Cube.
Repeat for the other seven cubes.
Make the drawers and the 25th Scalloped Box (The photos of the 25th box is not shown but the construction is the same for the top and the bottom of the box)
Make the drawers by gluing and adhering the tabs for the first two styles of boxes.
Make the accordion box by valley and mountain folding the sides. Apply glue to the tabs and adhere to make this third box style. The upper edge is folded as this will become a tab to adhere to the inside of the box.
Glue on the numbers to the three types of boxes.
Plan where you will be placing the boxes. the four boxes in the center can not have an opening because this is the area where the boxes are taped together.
The above two photos is how I planned the boxes. There are many configurations so you can decide how you want to place the boxes. Each cube has just one of each style of box.
Glue and adhere the tabs of the accordion box.
Please note: I folded down the semicircle on the top of the accordion box here but in a later photo it is not folded down because I used a Glue Dot to close the drawer.
Attach the Eight Cubes Together
Tape the cubes together at the six locations indicated above. I used Scotch Packaging tape. The tape needs to be durable because it will be under a lot of stress when the cubes are moved around. Apply the tape precisely as the tape needs a good bond. (The tape on the far side was not cut to size as I wanted to show that tape is applied to this side.)
Please be aware: the tape needs to be the exact length of the box and can not overhang. The tape should not interfere with the movement of the drawers when they are opened and closed.
Flip the boxes over to the other side.
Tape the cubes together at the two locations indicated above. The box can now be flexed into different configurations.
Glue the Pretty Paper to the Boxes.
There are 24 windows and 24 square to complete the tumble cubes construction.
Make the Tumble Cub Box
Cut out the bottom of the box and crease the tabs as shown above.
Glue the bottom two tabs of the sides to the center square as shown above.
Glue the sides together to complete the bottom of the box.
Glue and adhere the tabs for the top of the box.
Completed box.
Optional: Make the Scavenger Hunt Clues (I have included 8)
Fold them into a little square.
I used Glue dots to adhere the accordion style box closed.
I cut the Glue Dots in half and adhere the half moons to the half mood tab.
I used Scotch GiftWrap at the bottom of the small box and adhered it to its portion on the cube. I had to do this because I placed two quarters in the box and flexing the box caused the quarters to move around.
Completed Advent Tumble Cube
The Tumble Cube Advent Box fits perfectly inside its box.
Put the scalloped box on top and add a bow to make a perfect present for a child or an adult.