Saturday, April 8, 2023

An Easter Scavenger Hunt For Kids


An Easter Scavenger Hunt For Kids

Here is a PDF of an indoor Easter Scavenger Hunt for kids. 

https://drive.google.com/file/d/1PUWvbZyNxs75auA6CMfgqXxPIcbhp64W/view?usp=sharing


Print out the PDF on your printer using the double sided feature. Cut out the twelve clues.  Place the clues in a plastic Easter egg...not necessary but a fun way to find the clues. The back side of the clue tells where to hide that particular clue. The last clue is where the special surprise will be found.


I made an outdoor one but it might not general enough for everyone.  Here is an example that you can use to make your own outdoor scavenger hunt.

Here is a PDF of an outdoor Easter Scavenger Hunt for kids. 

https://drive.google.com/file/d/1w2oZgAwwPI1n95rDF7MtTPeYgy45h11K/view?usp=sharing


Sunday, April 2, 2023

A STEM Project: Galileo's Parabolic Experiment - Part #2


Galileo's Parabolic Experiment - Part #2 


In my blog posting of Galileo's Parabolic Experiment - Part #1 https://papercraftetc.blogspot.com/2023/03/a-stem-project-galileos-parabolic.html, I demonstrated Galileo's theory of parabolic trajectory of projectiles. In this posting, I will demonstrate that launching a marble from different heights, changes the amount of kinetic energy as it leaves the ramp.  This changes the flight of the marble as shown by the different colored parabolas on the left of the center vertical black line. Higher levels of energy drive the marble further horizontally before it sinks. (The different colored curved lines on the right represent the different height ramps.)

My files contain all of the necessary components to demonstrate this experiment.  It can easily be cut by hand, Silhouette, Cricut or another die cutting machine.

I used TurtleStitich to create the ramp. The height of the ramp is the radius of a  quarter of a circle. I ran the program three times to create the 3.5, 2.5 and 1.5 inch ramps.

I made a 1 inch circle to simulate the loop in the apparatus in TurtleStitch. 

I made a frame to contain the components of the apparatus in TurtleStitch. 

To Calculate the Parabola of a free-falling marble

For constant velocity motion,  x = vt, where v is velocity and t is time

When an object falls, (g is the acceleration due to gravity), it goes a distance d in time t   according to the formula, d = - (1/2)gt2 , (negative because it is dropping).
                                                                             

x = vt                                        d = -1/2 gt2 

Substitute t = x/v                      d = -1/2 g(x/v)2  

                                                 d = -(g/2v2)x2  


g is a constant of 981 cm/sec2  


For height of 3.5 in.(8.9 cm.), v = 111.7 cm/sec, 

Using the formula,  d = -(g/2v2)x2  

                                d = -(.04)x2  


 Make the Apparatus

Here is the PDF.  I used 65 lb. cardstock, one sheet of acetate, Glue Dots and a marble.

Here is the .Studio file.

Here is the SVG.  The file extends beyond the scope of the viewing field.  Zoom out to see the entire file.

Make the ramps by curving the ramp base and bending the tabs at a right angle (not shown).  Apply glue to each tab and adhere the side of the ramp.  Repeat for the other side of the ramp. Apply Glue Dots to the back of each ramp.  Make the Glue Dots "unsticky" by touching each Glue Dot with your finger about 10 times.

Glue the loop into a circle and apply a glue dot by its seam. Make the Glue Dot "unsticky" by touching the Glue Dot with your finger about 10 times.


 Make the Frame

Use the directions from the shuffleboard frame blog posting, https://papercraftetc.blogspot.com/2023/02/a-stem-project-making-shuffleboard-game.html to make the frame.

Assemble the Frame To the Apparatus


Apply glue to the frame. 

Apply a few drops of glue to the template. Align the template to the backing.

Add the clear acetate sheet to the front of the template with Glue Dots and adhere to the frame.

Experiment Using a Marble 

Place the largest ramp (3.5 inch radius) on the red line on the right. Place the loop in the center of the red line. Release the marble at the top of the red line. The marble will roll down the ramp, follow the trajectory of the red parabolic line and fall through the loop.


Remove the 3.5 inch ramp and loop. Place the medium size ramp (2.5 inch radius) on the green line. Place the loop in the center of the green line. Release the marble at the top of the green line. The marble will roll down the ramp, follow the trajectory of the green parabolic line and fall through the loop.

Remove the 2.5 inch ramp and loop. Place the small size ramp (1.5 inch radius) on the blue line. Place the loop in the center of the blue line. Release the marble at the top of the blue line. The marble will roll down the ramp, follow the trajectory of the blue parabolic line and fall through the loop.

Sunday, March 26, 2023

Easter Bunnies That Rotate Around a Cherry Tree With a Gear

Easter Bunnies That Rotate Around a Cherry Tree With a Gear

The cherry blossoms have arrived. My trees are in peak bloom and I wanted to create a scene depicting Easter Bunnies running around my cherry tree looking for Easter eggs.  The father and mother bunnies found some Easter eggs and their two children are scurrying around the tree in search of more eggs. 

The Easter Bunny family is attached to a gear which rotates when the gear is moved.  The cherry tree is stationary and is attached to a octagonal box. The box can be filled with Easter candy for gift giving.

Here is the PDF.  I used 65 lb. cardstock.

Here is the .Studio file.

Here is the SVG.  The file extends beyond the scope of the viewing field.  Zoom out to see the entire file.

There are three sizes of pink flowers.  I recommend cutting the flowers in four passes because there are so many flowers to glue onto the cherry tree. The medium size flowers are glued onto the tree first and then the small and large flowers.  

Cut and repeat for the other three sides of the two trees. 
Slide the cherry tree pieces together to form a 3D cherry tree.

Glue the same size bunnies together. In the photo above the mother bunny is complete.  The girl bunny needs to be sandwiched together with the pink piece glued to the center.

Repeat for the father and boy bunny.

Insert the tabs of the bunny into the gear with the set of four small holes. 

Splay the tabs and glue them down for each of the bunnies.

Glue the four gear axles together.

Insert the tabs of the cherry tree into the gear axle with the four slits.

Splay the tabs and glue them down as shown above.

Apply glue to the axle and adhere the set of four axles.

There will be a slight overhang.  Make sure that the overhang is centered.

Glue on the flowers to the outer gear casing.

Glue the outer gear casing to the gear axle and casing template.

Glue the three gears together to create a sturdy gear that will rotate without warping.

Place the gear on top of the outer gear casing assembly.  Make sure that the gear will move freely on the green axle.

Place the outer gear casing with the flowers on top of the assembly. Apply glue to the cherry blossom base and adhere the cherry tree to the center of the assembly.

Glue the outer gear casing to the tabs of the outer gear casing with flowers.

Glue opposite sides together so that the casing is centered correctly. Repeat for the tabs.

The gear assembly is now complete and the gear should move freely.

Crease the bottom of the box as shown above.

Glue the tabs of the sides together and apply glue to the inner tabs of the box. Adhere the bottom of the box to the tabs.

Turn the box over and apply glue to the tabs.  Adhere the bottom of the box.  The box is two walled to make a sturdy box.

Repeat for the top of the box. Glue the sides together and apply glue to the interior tabs.  Adhere the top of the box.

Turn the top of the box over and apply glue to the tabs.  Adhere the top of the box.

Apply glue to the top of the box. Adhere the gear assembly to the top.

Make sure the gear assembly is centered correctly.

Completed Easter Bunnies and Cherry Blossom Tree

Tuesday, March 21, 2023

A STEM Project: Galileo's Parabolic Experiment - Part #1

Galileo's Parabolic Experiment

Slow Motion Video of the Marble Rolling Down the Ramp and Through the Loops


In the late 1590's, Galileo
 studied the physics of motion made popular by Aristotle at the University of Pisa.  He then went on to teach at the University of Padua where he contradicted Aristotle's theory of projectile motion.  He proved that motion exerts forces on the projectile in two directions, vertically and horizontally at the same time.  He proved these results physically by rolling a metal ball down an inclined plane and allowed it to roll off the end to complete its fall. He also proved it mathematically with equations and visually by seeing that these
 forces create a curve which has the same exact mathematical shape as a parabola. 

In this blog posting, I recreate Galileo's parabolic experiment using an assembly similar to the following apparatus. (My files contain all of the necessary components to make the apparatus in paper.  It can easily be cut by hand, Silhouette, Cricut or another die cutting machine.)

At the Galileo Museo in Italy there is an apparatus which can demonstrate Galileo's theory of parabolic trajectory of projectiles.


"The apparatus was probably first described by Willem Jacob 's Gravesande in Physices elementa mathematica, experimentis confirmata (3rd ed., Leiden, 1742). It demonstrates experimentally that gravitational acceleration causes a body launched horizontally to describes a parabolic trajectory.

A wooden base, fitted with leveling screws, holds a stand with a quarter-circle track and vertical panel on which a series of four brass rings are fixed at equal distances along a parabola. A ball falling down the track experiences a constant acceleration. When no longer supported by the track, the ball's horizontal projection is combined with the natural motion of uniformly accelerated fall; the ball's path thus becomes parabolic, as evidenced by the fact that it goes through the entire series of rings. The experiment confirms Galileo's discovery of the parabolic trajectory of bodies as the result of the combination of horizontal projection and free fall, defined by the Pisan scientist in c. 1609 and first published in the Giornata Quarta [Fourth Day] of the Discorsi and dimostrazioni matematiche intorno a due Nuove Scienze (Leiden, 1638). Provenance: Lorraine collections"

I copied the photo of the apparatus to Silhouette and traced the trajectory (red and blue curves) that the projectile would take.  I confirmed that the two curves were as follows:

The red curve represents Galileo's parabola: Physics tells us the functional form of the parabolic ball flight is y=ax^2. By measuring points on the picture (done in centimeters) and curve fitting we find a=-.041. We also know from physics that a=-g/(2v^2) where v is the velocity vector in the x direction. We find the velocity coming off Galileo’s ramp, after converting units from centimeters, was 3.5 feet/sec.

 The blue line represents the curve that is formed when a circle is divided into fourths.

I created a template of the apparatus with both the red and blue curves and I put red lines where the loops would be. Using this template, I determined my radius of the ramp would be 3.5 inches.  

I used TurtleStitich to create the ramp. The height of the ramp is the radius.

I made a 1 inch circle to simulate the loop in the apparatus in TurtleStitch. 

I made a frame to contain the components of the apparatus in TurtleStitch. 

 Make the Apparatus

Here is the PDF.  I used 65 lb. cardstock, Glue Dots and a marble.


Here is the .Studio file.

Here is the SVG.  The file extends beyond the scope of the viewing field.  Zoom out to see the entire file.
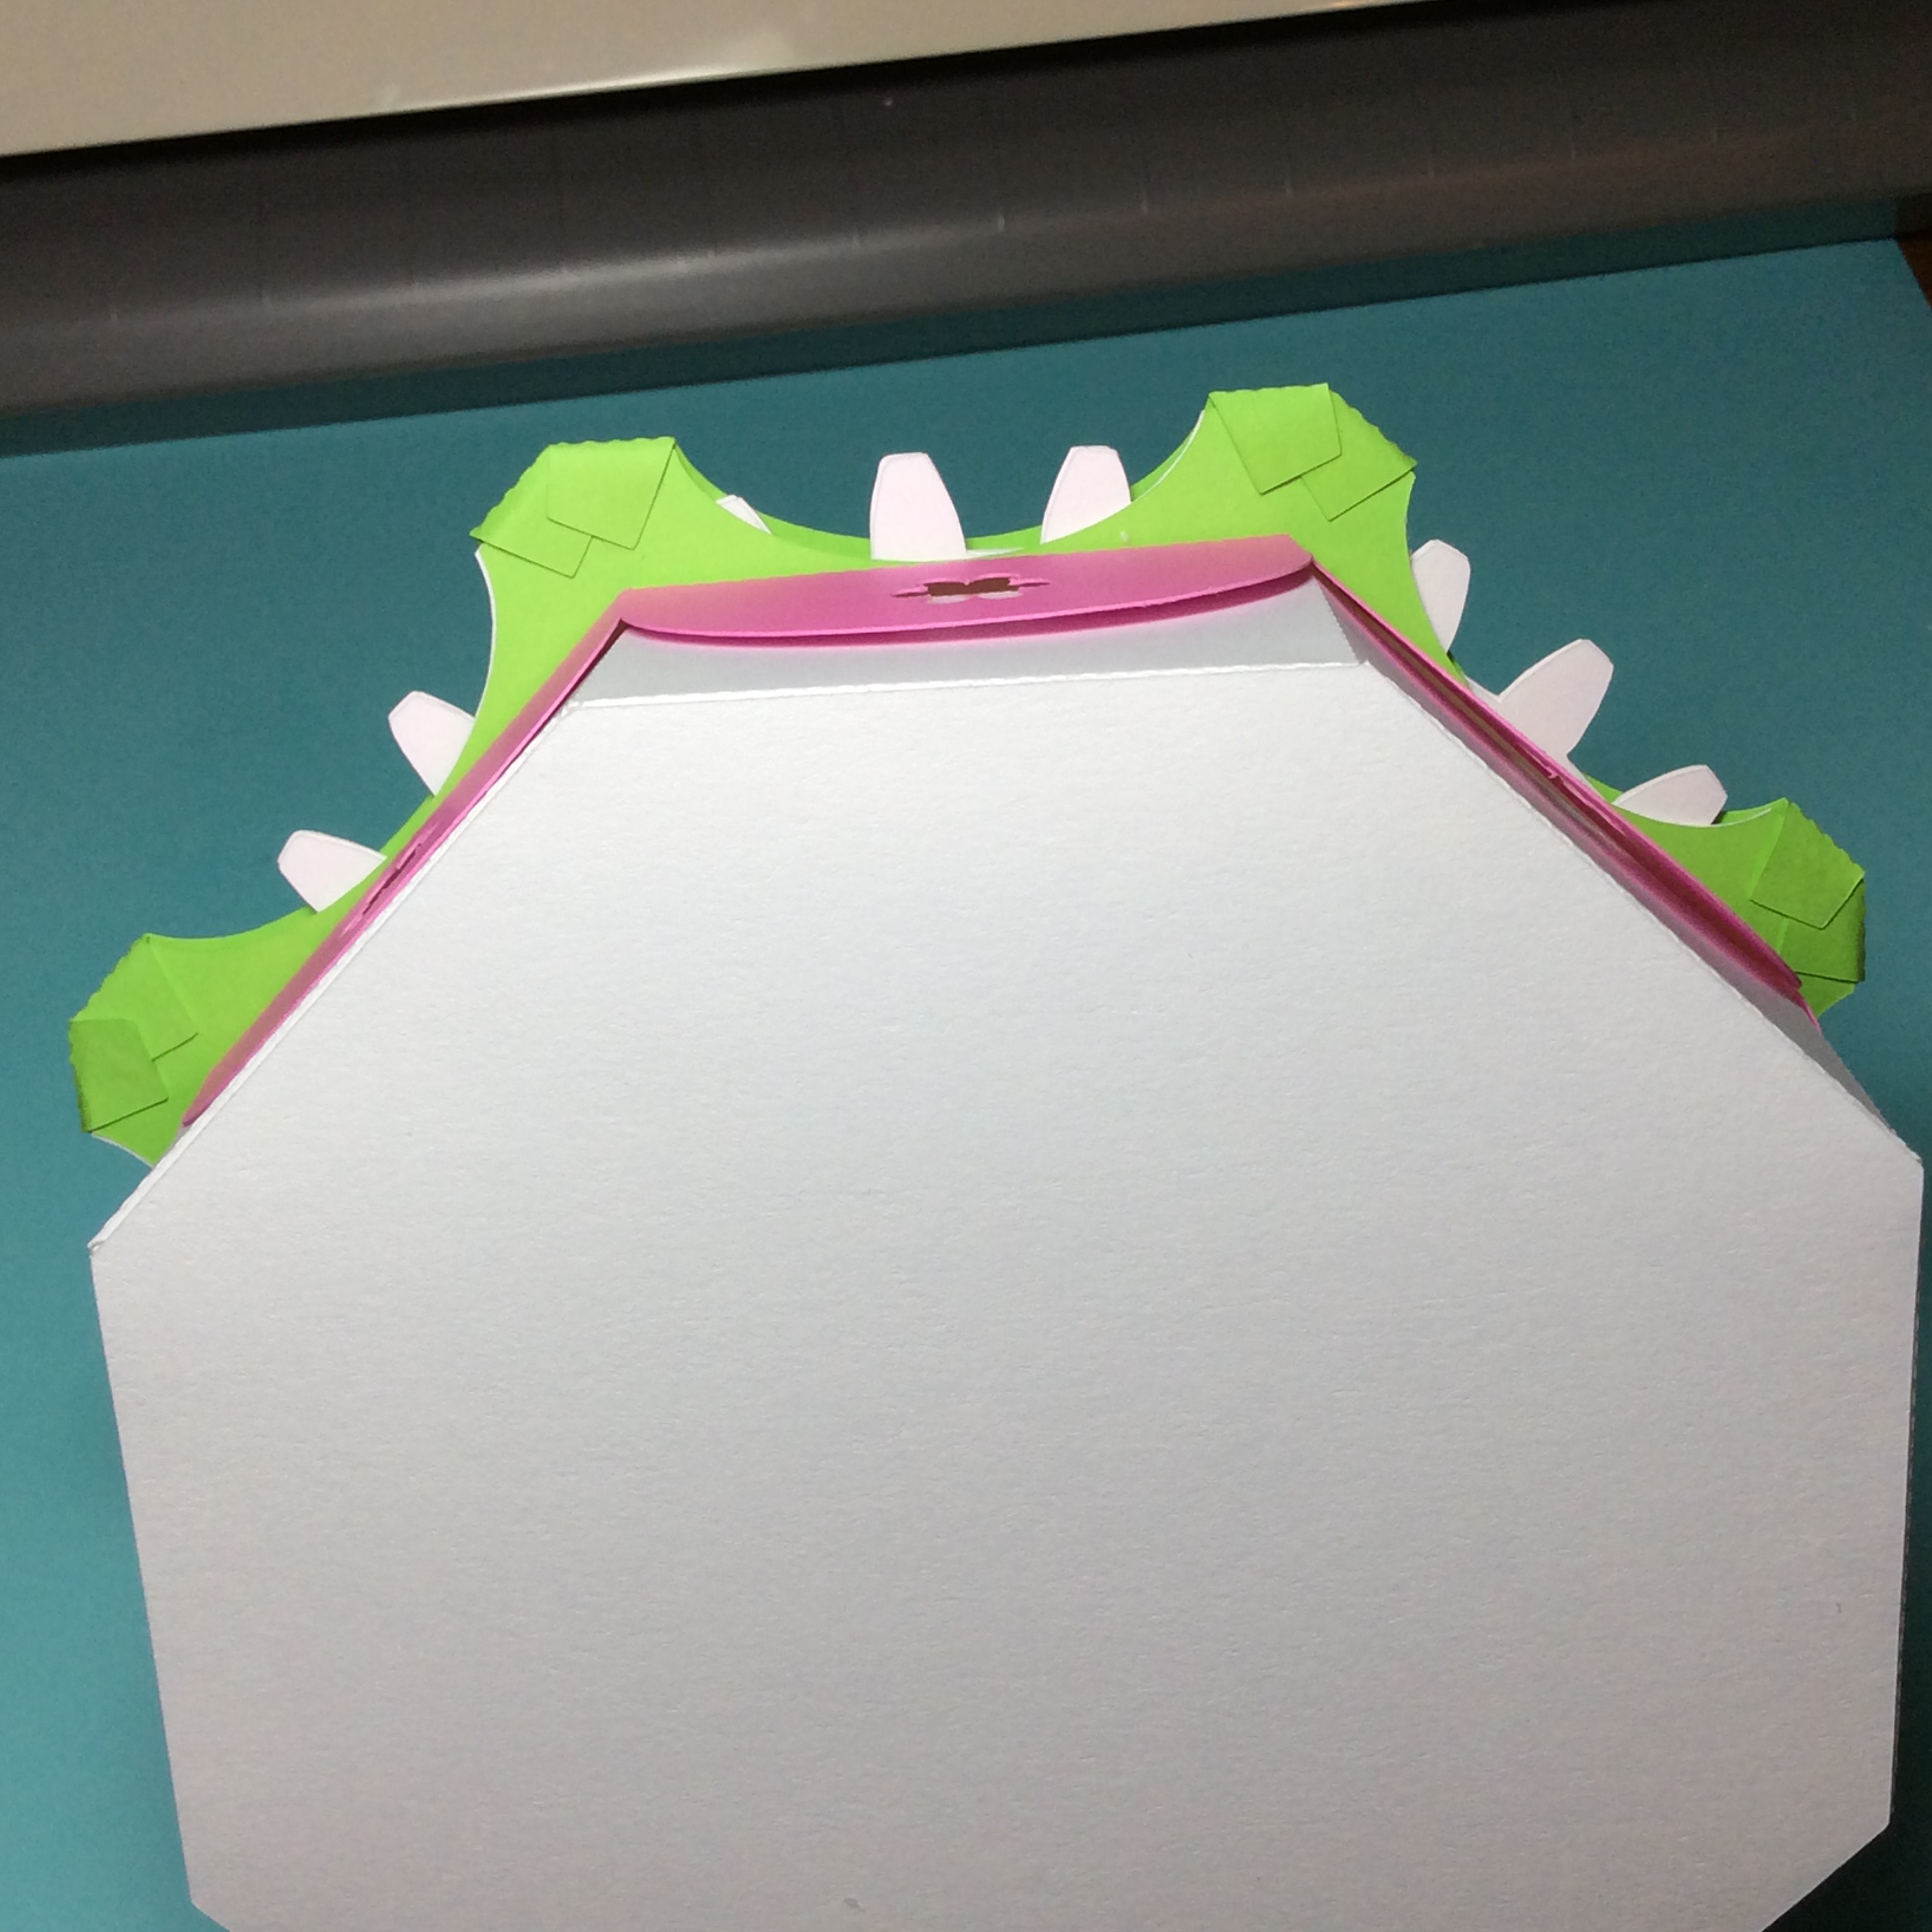

Make the ramp by curving the ramp base and bending the tabs at a right angle (not shown).  Apply glue to each tab and adhere the side of the ramp.  Repeat for the other side of the ramp. Glue the ramp to the template following the blue line.

Glue the four loop pieces into a circle.

Glue to the center of the red line which is perpendicular to the parabola.


Cut the outer black line with scissors.


 Make the Frame

Use the directions from the shuffleboard frame blog posting, https://papercraftetc.blogspot.com/2023/02/a-stem-project-making-shuffleboard-game.html to make the frame.

Assemble the Frame To the Apparatus


Apply glue to the frame.

Apply a few drops of glue to the template. Align the template on the backing and adhere the frame.

Experiment Using a Marble 

Place and release the marble at the top of the blue line. The marble will roll down the ramp.  The red parabolic line represents the path the marble will  take through the four loops.

For more information about Galileo's discovery of the Parabolic Trajectory, please read this Scientific American article, https://www.scientificamerican.com/article/galileos-discovery-of-the-parabolic/

Saturday, March 18, 2023

A STEM Project: Making a Variable Size Round Box And Flowers Using TurtleStitch

A Round Box And Flowers Coded In TurtleStitch


In this posting, I have programmed a round box whose size - diameter, height of top and height of bottom can be varied.  Here is the program in TurtleStitch. https://www.turtlestitch.org/run#cloud:Username=Elaine&ProjectName=Round%20Box

I have also programmed two different of flowers whose size and petals can be varied. https://www.turtlestitch.org/run#cloud:Username=Elaine&ProjectName=Flower%20Petals This program generates two types of flowers - one with a flat outer edge and another with a curved outer edge with varying number of petals. Each type of flower can also have their radius and center varied. The n-radius smoothes out the curve of the arc of the round petal.

For those of you who do not want to program, I have included a file for a 3 1/2 inch round box with two different types of flowers.

Here is the PDF.  I used 65 lb. cardstock.

Here is the .Studio file.

Here is the SVG.  The file extends beyond the scope of the viewing field.  Zoom out to see the entire file.

Make the Box

Please note:  the top and bottom of the box are two walled.  This produces a sturdy box.


Glue the strip together to form a loop. Fold the tabs at a right angle to the center of the circle. Repeat for the second strip.  The height of the top of the box is smaller than the bottom of the box.

Apply glue to the inside tabs and adhere the larger circle to form the top of the box. Repeat for the bottom of the box.

Apply glue to the larger circle and adhere it to the top of the box. Repeat for the bottom of the box.

Curl the petals of the flowers as desired.

Glue and adhere to the top of the box.