Saturday, September 8, 2018

Miniature House #8 - Right V Front House


I updated my V front house and skewed the V to the right of the house.  I added different windows and a chimney that is at the top of the roof line.

I used card stock.

Here is the PDF.
https://drive.google.com/file/d/1C_2rWhwYEdOlfDPBZUC_Up_eTUvUhAQx/view?usp=sharing

Here is the .Studio file.
https://drive.google.com/file/d/1nKzBjBqWhLzb0ondeVcD5OYDFfGCyVMK/view?usp=sharing

Friday, September 7, 2018

Miniature House #7 - Origami Roof with a Porch


This house is the same as the previous house but with an added porch.  I recommend  making the porch and attach it to the house first.  Insert the columns into the base and then construct the house around the base. Glue the roof on last.  I used glue dots in the corners of the house because I am impatient and can't wait for the glue to dry.

Here is the PDF.
https://drive.google.com/file/d/1EQCltuCMp8LKIXbZMc_ptJNWhz_ol8jT/view?usp=sharing

Here is the .Studio file.
https://drive.google.com/file/d/1dvAMMPqeyGIjURfNHDLp7A51NndTxcXR/view?usp=sharing

I used card stock to make this house.

Thursday, September 6, 2018

Miniature House #6 - An Origami Roof

 I love this house.  It was difficult to design because of all of the roof angles.  I enjoyed every minute of its creation.  The roof design reminds me of origami with its mountain and valley folds.  I made it easy to reproduce because I combined the triangles (less gluing).  There is just one triangle that needs to be glued to the main roof piece to make the roof. There is no chimney because I didn't want it to visually interfere with the folds of the roof.


I used card stock.

Here is the PDF.
https://drive.google.com/file/d/1qR3IyRxC_113IEdg-O3-U62I9DhOPmdL/view?usp=sharing

Here is the .Studio file.
https://drive.google.com/file/d/1-brciSVdte2yl8LvfqIftMctoytQNmud/view?usp=sharing


Wednesday, September 5, 2018

Miniature House #5 - A Cape Cod with Extended V Front


This miniature house is probably my favorite so far.  I like the extended V front.  I changed the window size to make them a little bigger.   No glue is necessary for the windows or door.  They are bent into the house with the tabs facing inward.  The same is true for the door.  Fold the perforations and bend the sides inward.

I recommend bending all of the tabs before inserting into their respective slot as it makes it easier to glue.  I discovered that gluing the chimney to the house with a glue dot makes the task easier. 

I used card stock.  I just bought some from Michaels.

Here is the PDF.

Here is the .Studio file.


Tuesday, September 4, 2018

Miniature House #4 - A Cape Cod with a Columned Porch


This model was a little difficult to construct.  The bottom edge of the roof line of the porch and the main roof are even and there isn't a tab to connect them. There is a tab to connect the roof to the house but that really doesn't  help (see picture below for placement). Apply a little glue to the edge of the porch roof and hold it there until the porch roof is dry and attached.  The columns are angled at the top.  Be aware of the direction that they are placed. The columns should be angled opposite of one another. There is a tab on the columns to be glued to the base. I recommend glueing the column to the base first and then to the roof.

I used card stock.

Here is the PDF.
https://drive.google.com/file/d/1D5ap4_LKRnMXZtbFu2nnXWoXYwCsg-Nx/view?usp=sharing

Here is the .Studio file.
https://drive.google.com/file/d/1dPpbCEgChDTQR-JHNn09EX_7gfUt2zBQ/view?usp=sharing


Monday, September 3, 2018

Miniature House #3 - Cape Cod with Dormers

This miniature house is exactly the same as the Cape Cod.  The added feature is two dormers to the front of the house and a different design on the front door.  I added a scrap of white paper to the inside of the dormer to reflect light since the roof was red.

I used card stock.

Here is the PDF.
https://drive.google.com/file/d/1YwECA7GV7tfLoGHtfiVQ_RE6BAy3Ug0U/view?usp=sharing

Here is the .Studio file.
https://drive.google.com/file/d/1U5dRWtpIKfQ8ULUOVHtIxWm-w57zE_6S/view?usp=sharing

Sunday, September 2, 2018

Miniature House Pattern #2 - A Cape Cod


My second house in the series of miniature houses is a Cape Cod style house.  The chimney is a free standing chimney.  The windows and doors do not have to be glued.  There are tabs which are inserted into the window opening.  The door has perforations that are folded around the opening on the top and bottom of the door.

Here is the PDF.  I used card stock to make the house.
https://drive.google.com/file/d/1veLbvvKHqHlEY6gz9o61g7TsBbx1lcvq/view?usp=sharing

Here is the .Studio file.
https://drive.google.com/file/d/1-WTGz7Xp139Nmrp_KGumIJMdolnY-_pa/view?usp=sharing


Saturday, September 1, 2018

Miniature House Pattern #1 - A Simple Rectangular House


I am going to make a series of miniature houses.  Here is the first one.  I used card stock to make it.  I might add glitter later to make a Christmas village or add more embellishments.  For now, I am going to make the basic house.

This design is also a box. The tab can be glued down if you do not want the box feature.


Here is the PDF. https://drive.google.com/file/d/1HZdCytIL_iHSTtmZ8F0EBvN74s5TWDQe/view?usp=sharing

Here is the .Studio file.
https://drive.google.com/file/d/1Qio4vfcjFukQkb7IhG8HEsK2QkLDh5AM/view?usp=sharing

Wednesday, August 1, 2018

A Paper Baby Carriage For a Baby Shower

This baby carriage has wheels that work because there is an axle built into the design. I made fifteen of these baby carriages for a baby shower.  They are a labor of love because they take about an hour a piece to make. I hope the recipient loves them as they are on their way to France for a baby girl shower.

I used cardstock for the model, two brass plated fasteners(brads) and glue on pearls for the embellishments.

Here is the PDF.
https://drive.google.com/file/d/1degpMCIEdT614pV1qoC-TpRMJp_OInO6/view?usp=sharing

Here is the .Studio file
https://drive.google.com/file/d/1bIRugimv5KzPiPcF6B9_i76ZspU0gnmj/view?usp=sharing


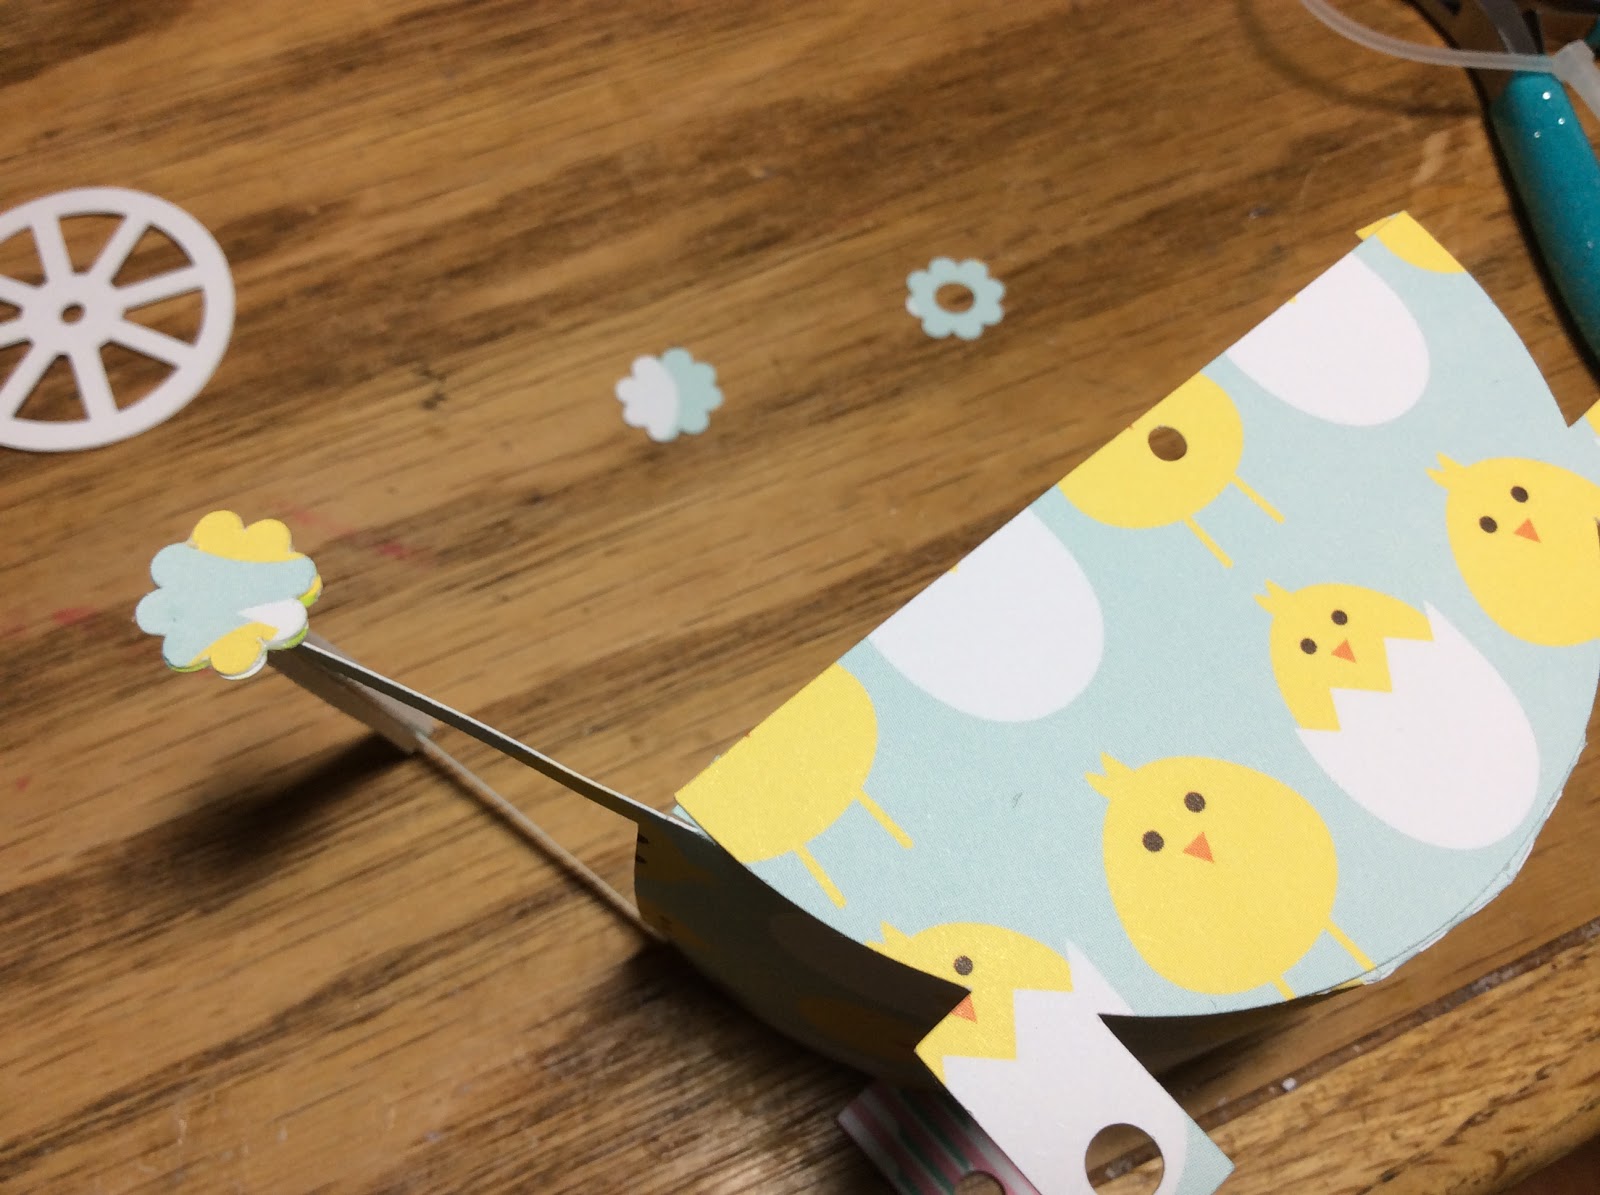
There are a lot of pieces.  Separate them on a table. There are eight wheels.  Align and glue two together to make four sturdy wheels.


Bend each canopy side inward.  I cut the ends of a brass plated fastener to about a half inch length.


Align the circles together and insert the fastener. Do not close the fastener yet. Repeat for the other side.

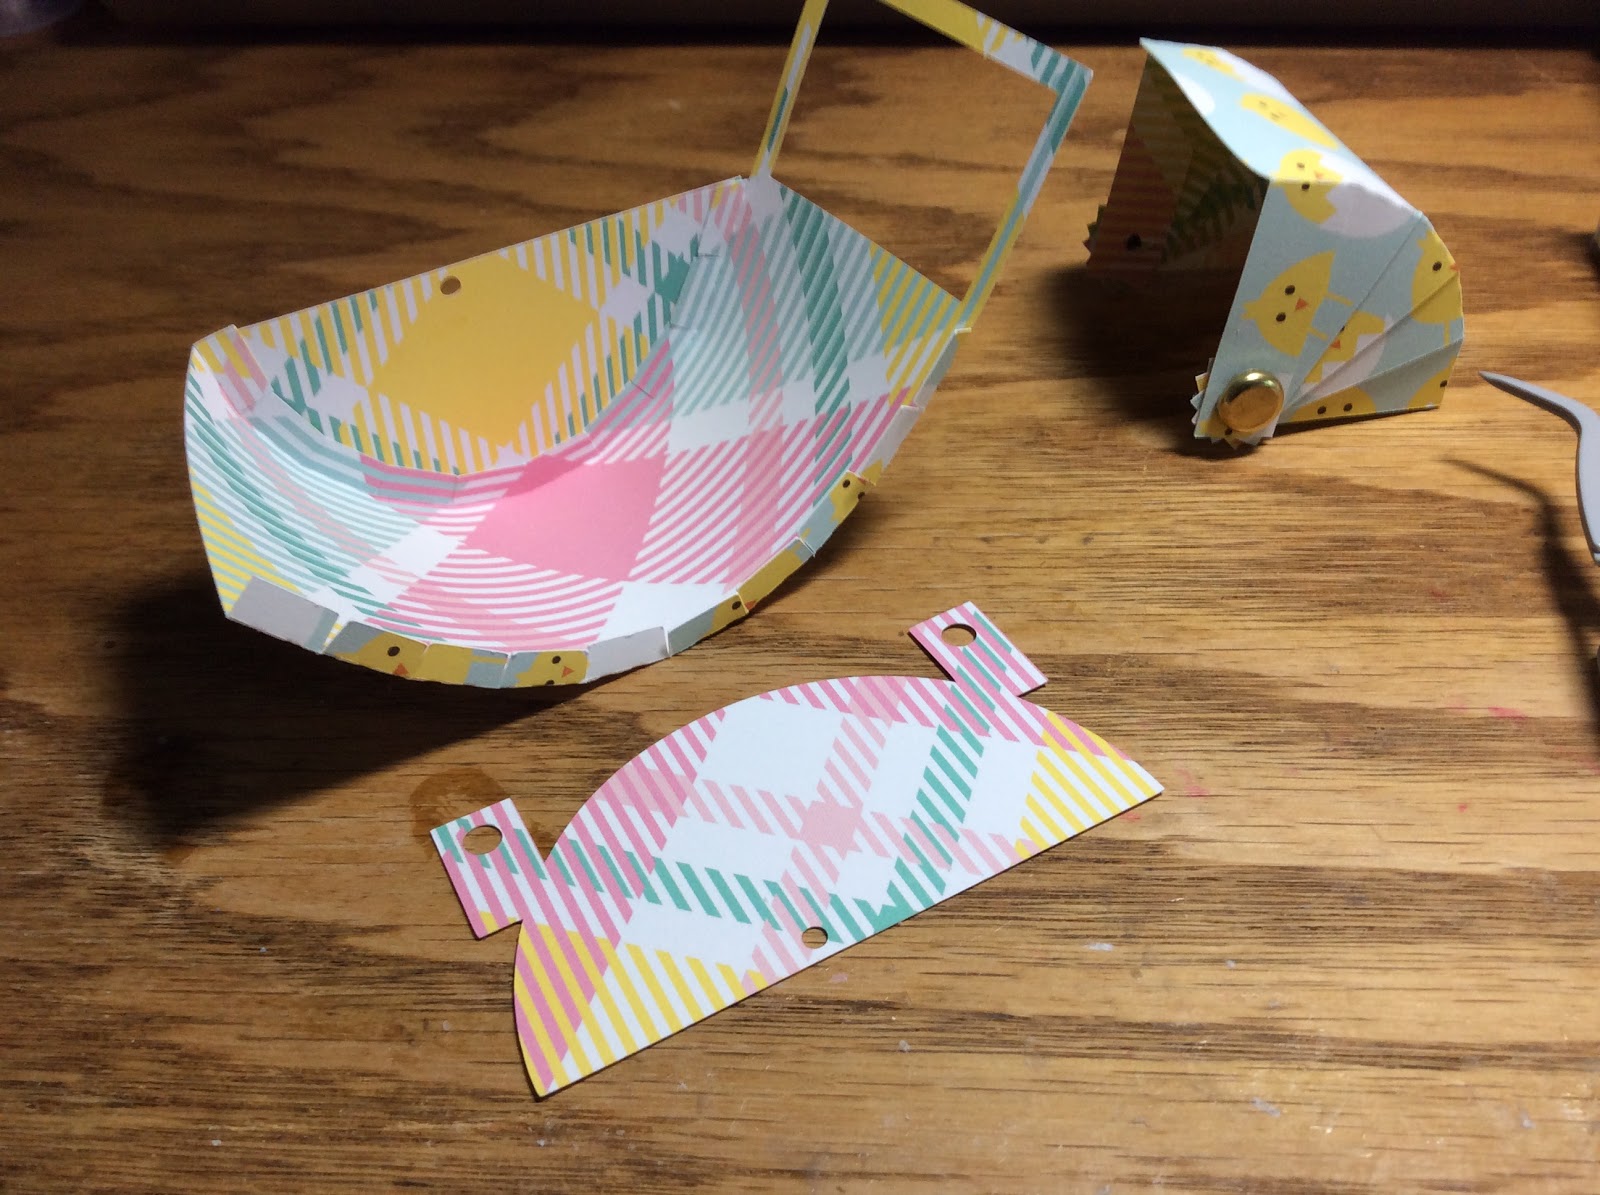
Bend the tabs of the carriage upward. 

Gently, bend the carriage into a U shape.  

Apply glue to the tabs on one side. The hole on the side is closer to the back of the carriage.  Make sure it is correct before you glue the side.  I like to use tweezers to hold one end and then I align the other top end.  The U shape is easy to adjust once the two top ends are aligned.
Repeat for the other side. 

Arrange the axle and handle pieces.  The handle piece has the shortest tabs. The white piece on the left is the handle.

 Fold the ends down and then curve the piece to make a tube.

 Glue the handle to one side of the main handle. 

 Roll into a tube and glue the other side.

 Rolled handle.

Slide on the flower with the largest hole in the middle onto the tabs.  Glue down the four tabs.

Glue on a flower to complete the handle on one side.

Repeat for the other side.

 Attach the canopy by inserting the fastener in the hole on the side of the carriage.

Repeat for the other side and close the fastener on both sides.

Glue a flower over the fasteners to hide them from view.

Roll the wide axle around a wooden skewer and glue into a tube. Repeat for the other axle.

 Insert the wide axle into the holes at the bottom of the carriage on each side. 

Repeat for the other axle.

Bend the tabs down and glue all the tabs down.

 Roll the narrow axle into a tube. Repeat for the second axle. It helps if you can find a small toothpick or wire to wrap it around and glue it.

Attach the axle to one of the wheels and glue the tabs down. 

Repeat this for the other axle.

Insert the small axle into the big axle piece. 

Attach a wheel to each small axle. Glue the tabs down on each wheel.

Glue the flower with the small hole to each of the axles.

Glue a flower on the brass fastener by the canopy.

Add pearl embellishments.

I curled the handle a little by twirling the handle downward.


Saturday, May 26, 2018

Graduation Hat Box

Graduation Hat Box

I am so proud of my husband. He graduated this week from Johns Hopkins University with a Masters Degree in Applied Economics. I made him this box to celebrate his lifelong ambition of getting an advanced degree in Economics.

I used cardstock and chipboard to construct this box.

Here is the PDF.

https://drive.google.com/file/d/1KGICvtkWWphyJmWA3Rz3AkeXmwFG3azY/view?usp=sharing

Here is the .Studio file

https://drive.google.com/file/d/1hIo63Dc2unR9Ca_OR2j_6pLm2qrcI12O/view?usp=sharing


 There are two size ovals.  Make sure that you keep them together.  The smaller ovals are for the bottom and the larger ovals are for the top of the box.

 The narrow piece (rim) forms the top of the box. Make it into a circle and glue. Repeat for the other wider piece.

 Bend down the tabs as shown above.

 Apply glue to all of the tabs.

Put the seam on the side of the box and add the corresponding oval which is - large oval & small rim - for the top of the box.  Place one of the larger ovals inside the box and the other on the outside.  
 Repeat for the bottom of the box which is -  small oval & large rim.
 Make the top of the hat by sandwiching chipboard between two pieces of black squares.
 Glue the top of the box to the center of the square.
 Glue six circles together to make the button on the top of the hat.
 Make the tassel. Take the strips of paper and fold in half.  Tie them together with the short strip of paper.
 Thread the charm through the short strip of paper and glue at the back point.
 Cut the tassel to make it even.

 Put glue in the center of the hat and add the tassel. Put glue on the button and put on top of the tassel.
Completed Hat Box.