Sunday, January 29, 2023

A STEM Project: Comparing the Cumulative Enclosed Volume of Two Cubes

Eight 1 inch green cubes, shown in the top row, are placed inside the 2 inch cube. The cumulative enclosed volume is calculated.

Eight multicolored colored cubes, shown in the second row, are nested inside of one another starting at the smallest cube and the cumulative enclosed volume is calculated.


In this blog posting, I compare the cumulative enclosed volume of two 2 inch cubes.  The cubes were made using SNAP!  SNAP! is a block based programming language which creates files in SVG format to be opened in the Silhouette software for cutting. For my Silhouette paper cutting friends, no coding is necessary as I have provided the .Studio files for making these boxes.

For those of you who would like to see my code or modify it, here is my code in SNAP! The program is dynamic because it allows the user to modify the size of the box - length and width, the height of the box top, the tab width and the percentage the box bottom is decreased in reference to the top of the box.


To make the green cubes, eight 1 inch cubes and one 2 inch cubes are cut, constructed and placed inside of the 2 inch cube. The one inch cubes are really 0.9 inches to allow for paper allowance but for simplicity sake, use the value of 1 inch for calculations.

To make the multicolored cubes, eight cubes are cut, constructed and nested inside of one another starting at the 0.25 inches cube to the 2 inch cube. Each box increases in size by 0.25 inches.

Here is the PDF. I used 65 lb. cardstock. 

Here is the .Studio file. 

Here is the SVG. Zoom out as the file extends outside the viewable area.


 Comparing the Cumulative Enclosed Volume of Two Cubes

Here are two 2 inch cubes.  

Can you calculate the volume of each of these cubes?

Volume is defined as the space that a three dimensional object occupies expressed in cubic units. 

The formula for volume is: 
Volume = Side x Side x Side

 The answer is 2 x 2 x 2 = 8 cubic inches

What happens to the volume of the cube if I put something inside these cubes. The volume of the cube is reduced when something is placed inside it. The volume is the amount of space it takes up. If you place an object inside of a cube, it will occupy some of the space within the cube, thus reducing the volume.

Enclosed volume refers to the amount of space that is completely surrounded by a solid object. It is the volume of the interior of an object and is the space that is available to be filled with a substance or an object. For example, putting a cube inside of the 2 inch cube and calculating the volume of each individual 1inch cube inside gives you the enclosed volume.

Cumulative enclosed volume refers to the total volume that is contained within a set of nested objects.  This can be done by adding up the volumes of each of the individual objects. The cumulative enclosed volume is a measure of the total amount of space occupied by a set of objects.

 Can I increase the cumulative enclosed volume if I place more cubes inside?  Yes.

If I told you that one cube has eight cubes in it and the other has seven cubes in it, could you tell me which cube has more cumulative enclosed volume? No because the sizes of the cube might be different.

If I let you peak inside can you tell which cube has more cumulative enclosed volume? Not really.

The green 2 inch cube has eight cubes which have a side length of 1 inch. What is the enclosed volume of the eight 1 inch cubes?

1in x 1in x 1in = 1 cubic inch
1 cubic inch x 8 cubes = 8 cubic inches of enclosed volume

When I add the volume of the two inch cube, which was 8 cubic inches (calculated previously) to the enclosed volume of the 8 cubes, I get the cumulative enclosed volume of 16 cubic inches.


Here are eight nested cubes which increase in size by 0.25 inches from 0.25 inches to 2 inches.  

What is the cumulative enclosed volume of all of these cubes? 

0.25 in x 0.25 in x 0.25 in = 0.015 cubic inch
0.5 in x 0.5 in x 0.5 in = 0.125 cubic inch
0.75 in x 0.75 in x 0.75 in = 0.42 cubic inch
1 in x 1 in x 1 in = 1 cubic inch
1.25 in x 1.25 in x 1.25 in = 1.95 cubic inch
1.5 in x 1.5 in x 1.5 in = 3.38 cubic inch
1.75 in x 1.75 in x 1.75 in = 5.36 cubic inch
2 in x 2 in x 2 in = 8 cubic inch

For a total of 20.25 cubic inches of cumulative enclosed volume.

Comparing the two sets of cubes, the green set of cubes has a cumulative enclosed volume of 16 cubic inches and the multicolored set of cubes has a cumulative enclosed volume of 20.25 cubic inches.

Saturday, January 21, 2023

A Valentine Mailbox Filled with Lots of Love

A Valentine Mailbox Filled with Lots of Love

This Valentine mailbox is filled with five pretty Valentine cards with corresponding envelopes and a heart box which can contain four Hershey kisses.  

Valentine Heart Box

The Valentine mailbox makes a wonderful present for someone who likes surprises as the dog and cat Valentines peak out of their envelopes.

They pop-up when they are removed from their envelope as there is a folded accordion pop-up attached to their body.

Here is the PDF. I used assorted 65 lb. cardstock - plain, foil and glitter from Michaels and a mini brad for the mailbox. Glue Dots for closing the mailbox and envelopes.

Here is the .Studio file.

Here is the SVG. The file extends past the visible viewing area.  Zoom out to see the entire file.

Make the Valentine Mailbox

Apply glue to the tab on the left of the photo.

Adhere the tab underneath the mailbox.

Apply glue to the interior of all of the tabs.  Insert the side piece and adhere all of the tabs. 

Apply glue to all of the tabs as shown above.

Fold the back of the mailbox onto the glued tabs.

Make the front flap of the mailbox by applying glue to each of the tabs.  

Bend and adhere the tabs to the face piece as shown above.

Apply glue to the tab of the mailbox and adhere the face piece to the interior of the mailbox. Set the mailbox aside.

Make the mailbox handle by creasing the tab shown in the center of the photo.

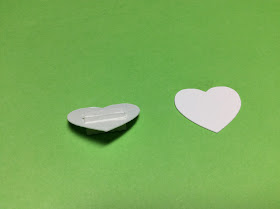
Insert the tab into the center of the heart with the slit and splay the tabs.  Apply glue to the two tabs and adhere to the heart.

The tab that is showing will be glued and adhered to the center of the mailbox face. Set aside.

Apply glue to the face piece and add another face to cover the tabs that are presently showing in the photo above. Before the glue dries, add the tab to the top center of the face piece. Add embellishments to the face piece.

Glue the two flags together.  Add embellishments to the flag. Insert a brad into the hole in the flag and the mailbox to hold the flag in place.

I added a small Glue Dot to the interior of the mailbox at the top center. (not shown)  This Glue Dot keeps the mailbox closed all the time because it is sticky.  With a little pressure, the mailbox can be opened. 


Make the Valentine Heart Box

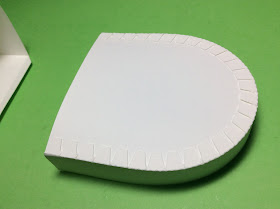
The heart box directions are the same as this blog posting. https://papercraftetc.blogspot.com/2020/01/a-heart-valentine-box.html The only difference is there is only one scalloped edge here not two. 

Make the Valentine Pet Pop-Ups

The Valentine pet pop-up with envelope directions are the same as this blog posting. https://papercraftetc.blogspot.com/2019/02/valentine-pop-ups-bear-cat-and-dog.html

Make the Valentine Cards

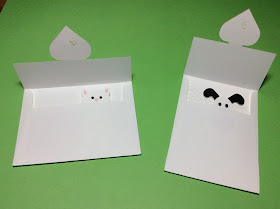
Embellish the cards and envelopes as desired with foil or glitter cardstock. The envelopes are folded at the creases and glued on their sides. The heart envelope shown at the top of the photo has two wings that slide into the slots in the envelope.  The wings make a pretty embellishment for this envelope. Glue Dots are used to close the envelopes.

Tuesday, January 17, 2023

A STEM Project: Skee Ball - Making an Inclined Plane - An Arcade Game

Skee Ball - An Arcade Game

An inclined plane game with a 45 degree wedge to change the trajectory of the ball.

Skee Ball is a fun, old-time, arcade game to play. The game was patented in 1908 by Joseph Simpson of Vineland, NJ. https://patents.google.com/patent/US905941A/en It is played by pitching a wooden ball up  an inclined plane. The object of the game is to roll the ball into one of several holes. The holes have  different values based on the difficulty of placing the ball in a particular hole. The trajectory of the ball's journey up the inclined plane is changed when the ball encounters a 45 degree wedge which is another type of inclined plane. The wedge causes the ball to propel upward over a void known as a gutter. The ball can then land in one of several holes encased by a circular lip based on how much transfer of energy was exerted from your body to the ball. Nine wooden balls are pitched during one game.  The scores are tallied based on the holes that the ball has landed in.  Paper game tickets were dispensed by the Skee Ball machine to the player.  The player could then redeem the tickets for prizes.

In my Skee Ball model, the design is essentially the same as the original. However, the holes are encased with a U shape instead of a circle around each hole to allow for an easier target. 
The U-shape makes the target bigger by funneling the ball into the hole.  

I used nine 1/2 inch gum balls from a miniature gum ball machine that I purchased at Five Below.

While designing my Skee Ball Arcade game, I enlisted the help of my husband. He calculated the angle of the wedge to be 45 degrees.  Here is his three page handwritten calculations.

Page 1

Page 2

Page 3

Here is the PDF. I used 65 lb. cardstock.

Here is the .Studio file

Here is the SVG.


Fold the edges as shown above. Apply glue to the tabs and adhere the two sides together.  This will form the 1/8 in. thick inclined plane.
Fold, glue and adhere the front edge.  The side tabs are to be glued in the photo above.  Repeat this procedure for the back edge.

Glue the back edge to the inclined plane. Set this piece aside.

Make the four legs by creasing the edges inward.  Apply glue to the tabs as shown above. Fold the tabs inward to the next crease.  Apply glue to the diagonal that is created. The diagonal creates a sturdy structure for the inclined plane to sit upon.

Glue the tabs of the longer legs to the back of the inclined plane that was set aside.  Glue the shorter legs to the front. See photo above for further reference.

Apply glue to the sides of the inclined plane and the back edge as shown above.

Repeat for the other side. 

Apply glue and adhere the front edge.

The result of gluing on the front edge. Notice that there is a little overlap of the side pieces.

Crease the floor of the inclined plane with gutter partition as shown above and apply glue to the valley folds. Insert the floor onto the inclined plane (not shown). I did not glue the floor but you can glue it.

Crease and apply glue to the gutter extension.

Attach the gutter extension to the gutter tab by encasing the short protruding tab of the gutter with the gutter extension. Bend the gutter extension so that it touches the side panel.

Apply a drop of glue to the location where the gutter extension and the side panel meet.

Crease the game board with wedge as shown above.

Apply glue to the tab as shown above.  

This will create a 45 degree triangular wedge when adhered. 

Apply glue to the top edge, as shown on the right and the two side tabs of the game board with gutter on the left where only one side tab is shown.

Adhere the game board with gutter to the three locations that were glued. All of the tabs are glued to the interior of the game.

Back view, after the game board with gutter is attached.

Fold the game board with the gutter down onto the inclined plane. Make sure that the gutter is open to the sides.

Lift up the wedge and apply glue as shown above. 

Adhere to the inclined plane.

Make the game board by bending the hole extenders into a U-shape.

Insert the hole extender tabs into the game board as shown above.

Back view of the game board after the tabs have been glued down.

I used four Glue Dots to adhere the game board to the game board with wedge.

Print the numbers on a printer for the hole values and cut them out with scissors.
Glue the numbers to the game board and then frame them as shown above.

I added decorative panels to all four sides of the Skee Ball game to give it some 'old school' elegance.

Back View

Front View 
 I placed a round circle in the center of the embellishment to give a point of reference so the player could  aim the ball when pitching. 

To Play the Game:

The game should be played at eye level.  The ball should be pitched about four inches from the inclined plane while the game is placed on a table or held in one hand at eye level.

Points are tallied after pitching nine balls and the person with the most points wins the game.